 Part 1: Building a POJO Annotation-Driven Service

Web services allow enterprises to expose business functionality irrespective of the platform or language of the originating application. The business functionality is exposed in such a way that it is abstracted to a message composed of standard XML constructs that can be recognized and used by other applications. Oracle ADF provides an access layer that can be used to access many types of business or data services, including web services.
The most common way of using web services in an application developed using Oracle ADF, is to create a data control for an external web service. A typical reason for doing this is to add functionality that is readily available as a web service, but which would be time consuming to develop within the application.
In this section you use the WSDL deployed to the integrated server and create a data control from it. Your application will not contain the original Java code as in the previous scenarios; it creates the data control from the deployed WSDL. Once you create the data control, any ADF client application can use it.
-
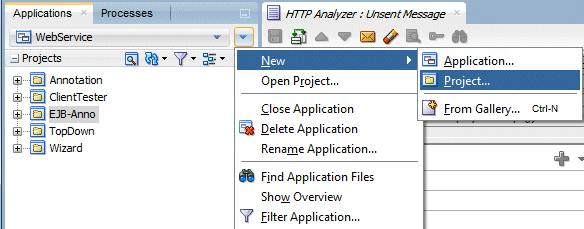
In the Applications window, click the down-arrow to the far right of the Application name and select New > Project from the menu.
-
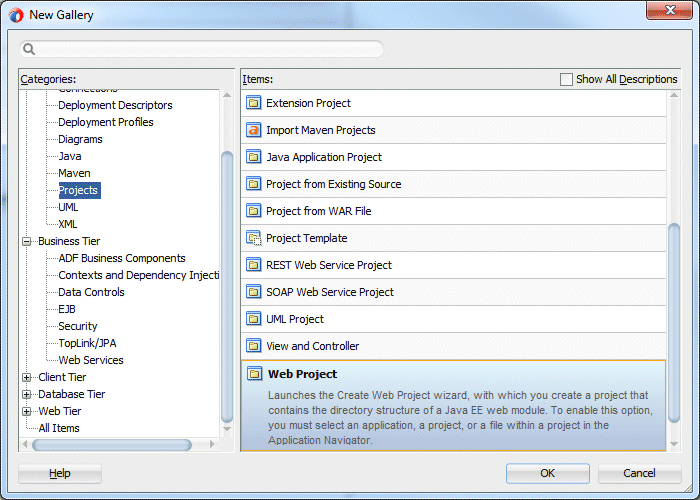
In the New Gallery, select Web Project and click OK.
-
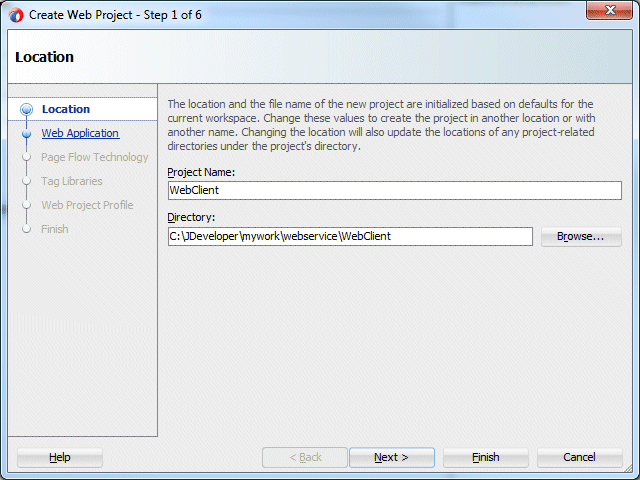
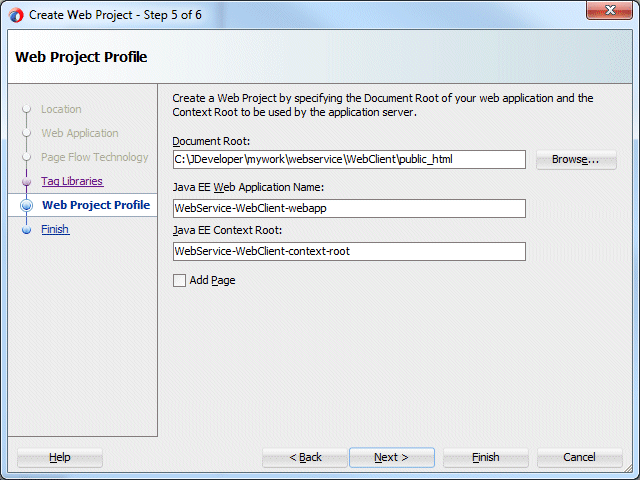
In the Create Web Project wizard, name the project WebClient. Click Next and Next again.
-
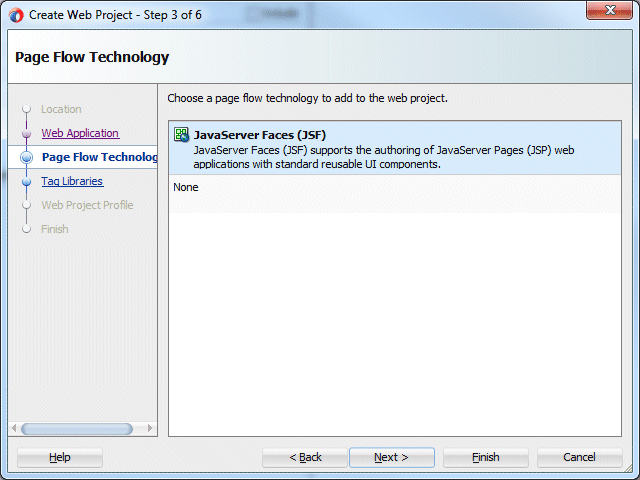
In the Page Flow Technology step of the wizard, select JavaServer Faces (JSF), and click Next.
-
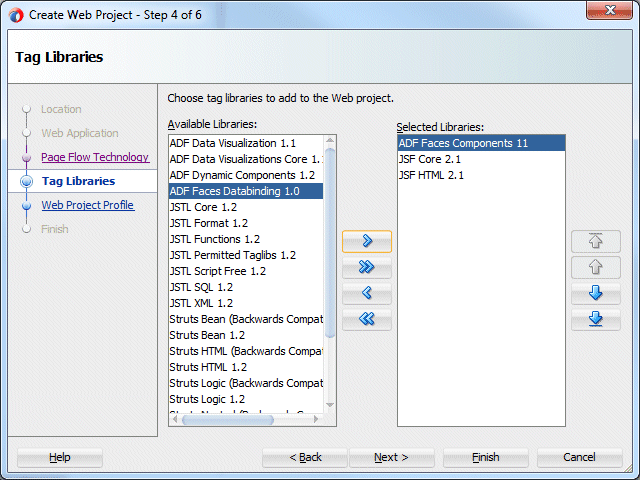
In the tag libraries, shuttle the ADF Faces Components 11 from Available Libraries to Selected Libraries. Notice that it automatically includes JSF Core 2.1 and JSF HTML 2.1.
-
Click Next.
-
Click Next and Finish.
-
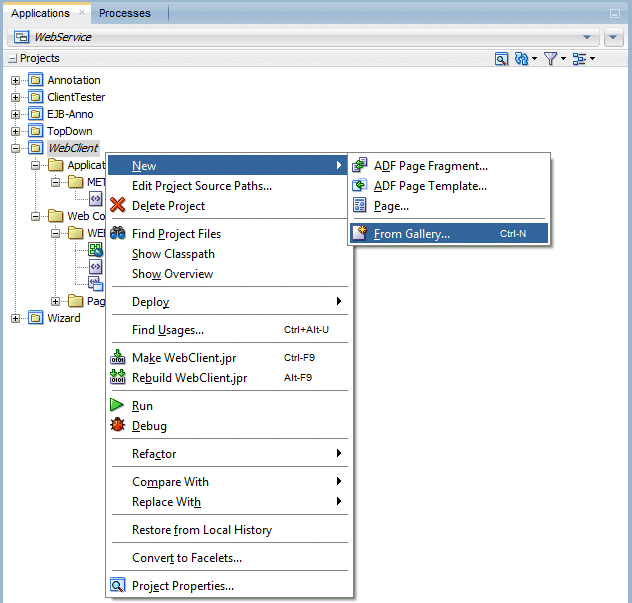
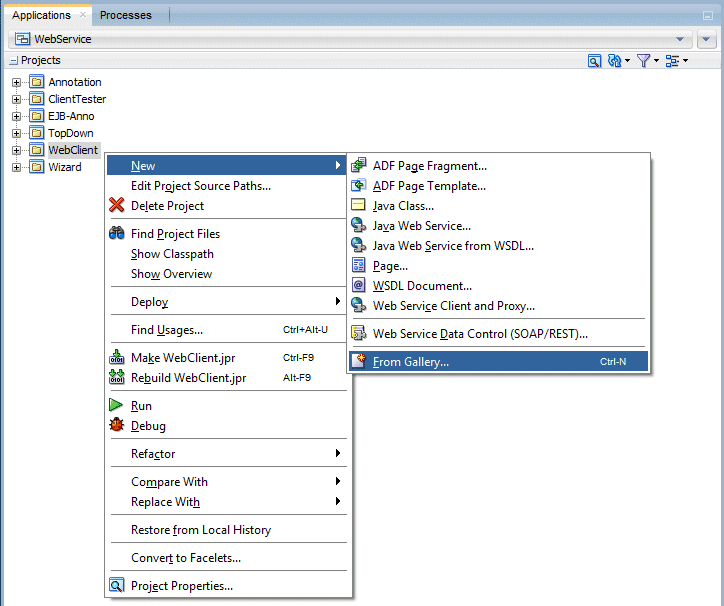
In the Applications window, right-click the WebClient node and select New > From Gallery from the context menu.
-
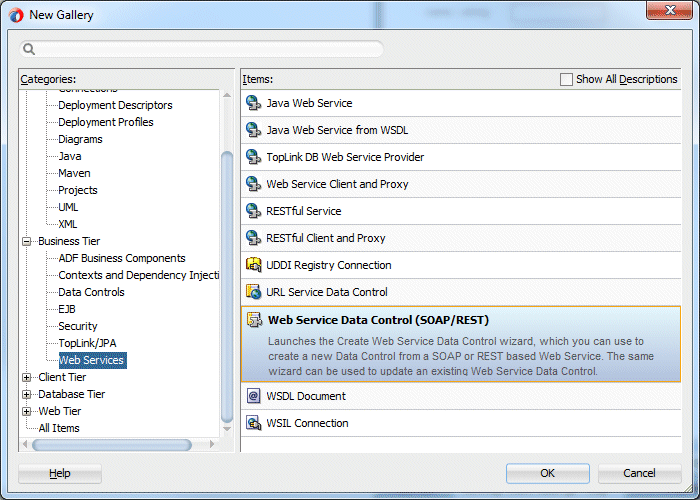
In the New Gallery Business Tier Category, select the Web Services node and choose the Web Service Data Control (SOAP/REST) in the Items list and click OK.
-
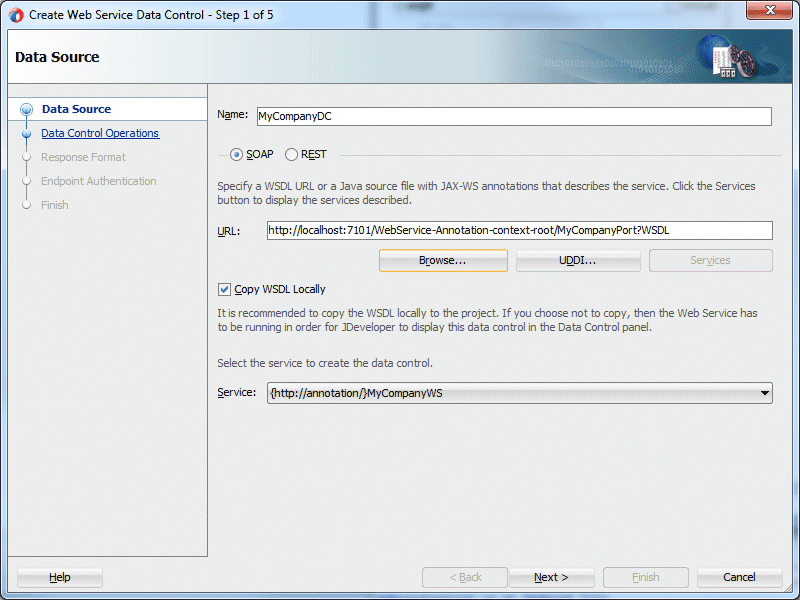
In the first step of the Create Web Service Data Control wizard, name the data control MyCompanyDC, and then paste the WSDL URL that you copied earlier:
http://localhost:7101/WebService-Annotation-context-root/MyCompanyPort?WSDL. -
Press [Tab], and the wizard will populate the Service field from the web service.
-
Click Next.
-
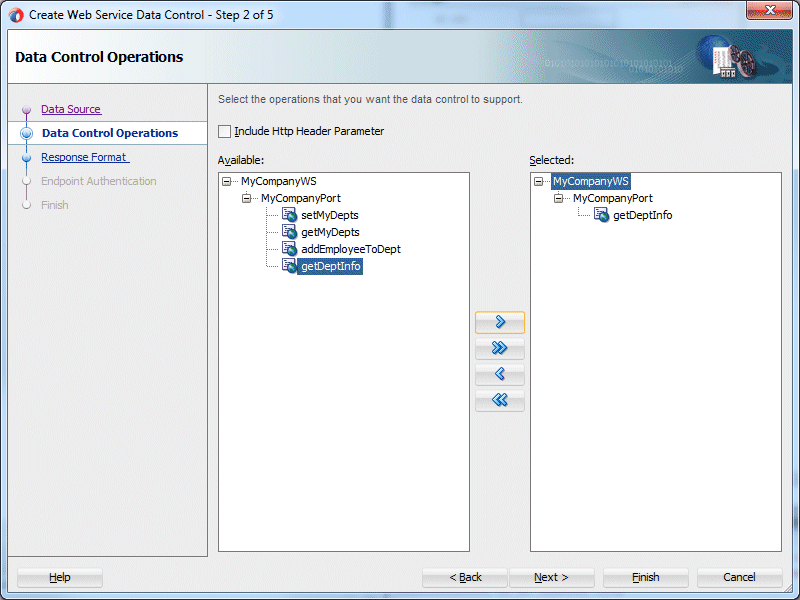
In the Data Control Operations page, shuttle the getDeptInfo method to the Selected side.
-
Click Next, then Finish.
The Applications window should look something like:

-
Click Save All
 to save your work.
 -
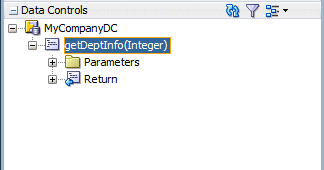
Expand the Data Controls accordion in the Applications window to expose the MyCompanyDC data control that has just been created. If it's not visable, then click the blue reload arrow to see the data control.

At this point you are ready to create the JSF page and use the data controls.
In this section you update the client class to invoke the web service proxy and return the result to the message window.
-
Invoke the New Gallery > From Gallery from the WebClient project.
-
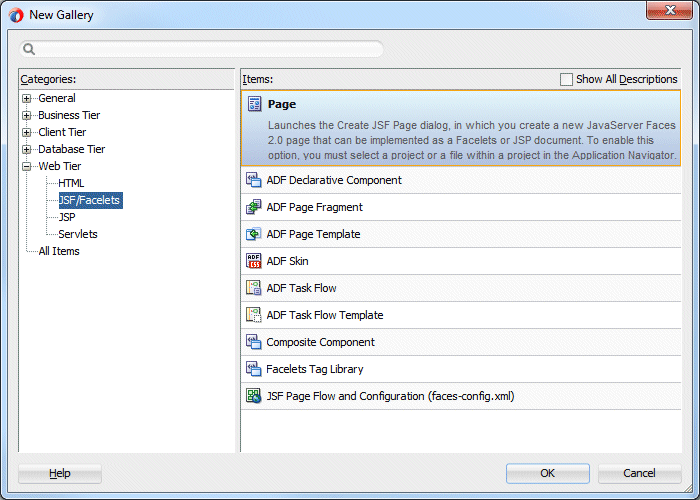
Expand the Web Tier node and select the JSF / Facelets sub node. In the Items column, select Page and click OK.
-
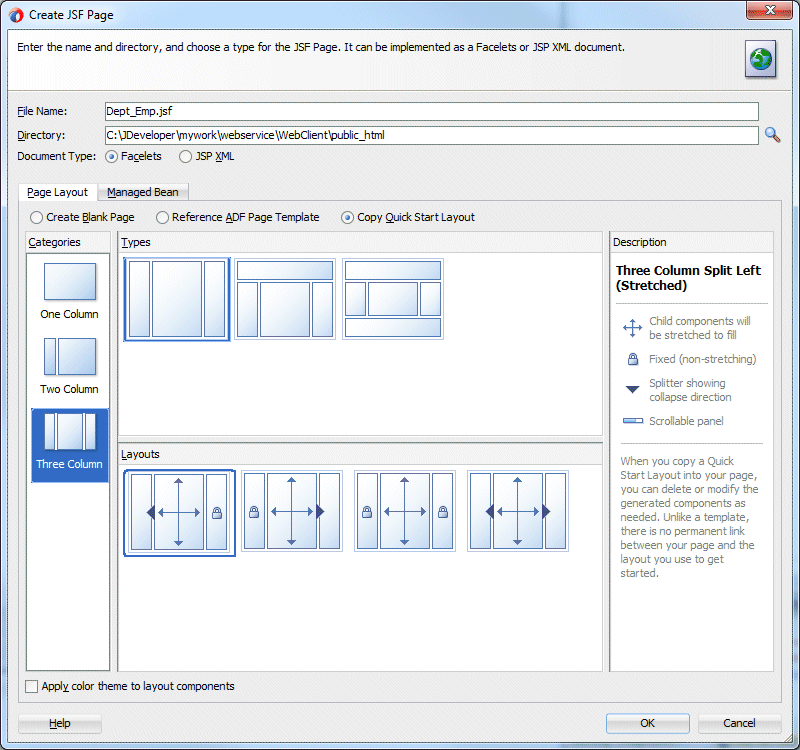
Name the page Dept_Emp.jsf and set the Document Type to Facelets. In the Page Layout tab, select Copy Quick Start Layout and in Categories select the Three Column Layout and click OK.
The page will open in the page editor
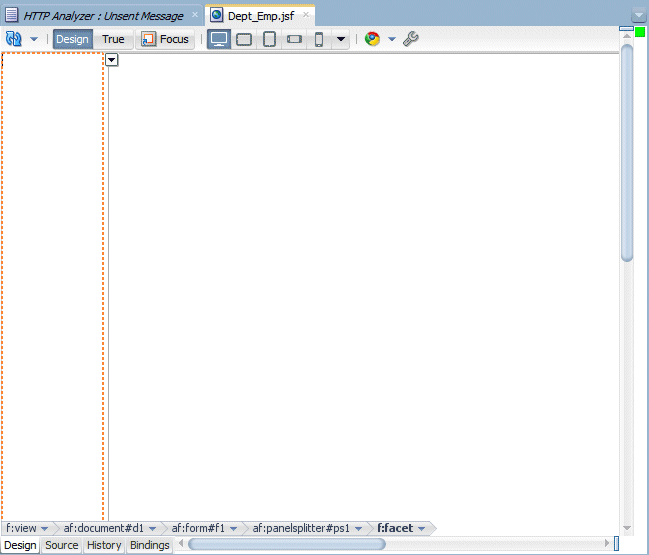
In the next few steps, you add the data controls for the method. The page will accept a parameter, execute the call to the web service, and return the results in a Master Detail layout. -
In the Data Control panel, expand the MyCompanyDC data control and select the getDeptInfo(Integer) method.
-
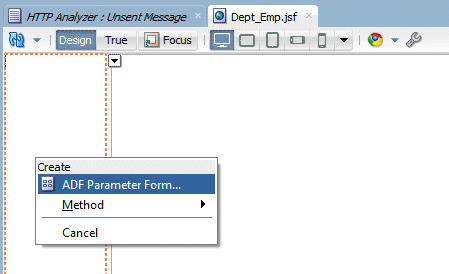
Drag the getDeptInfo(Integer) method onto the first facet of the page. When you drop it, a menu is displayed. Select ADF Parameter Form.
-
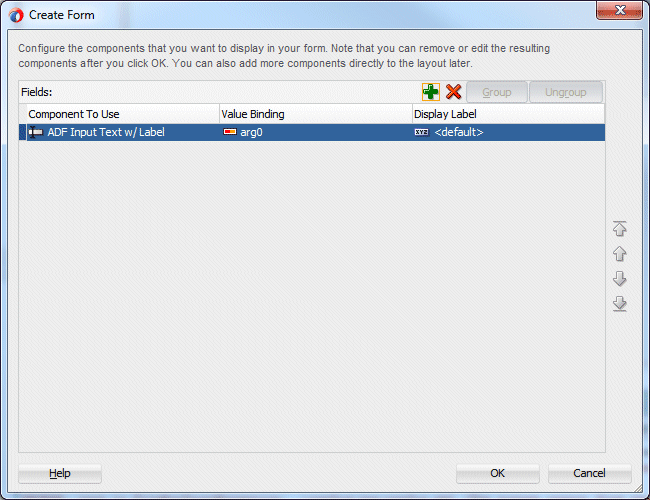
In the Create Form dialog, click OK to accept the default values.
-
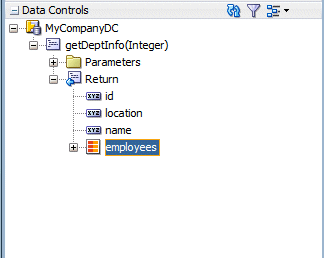
In the Data Controls panel, expand MyCompanyDC > getDeptInfo(Integer) > Return and select employees.
-
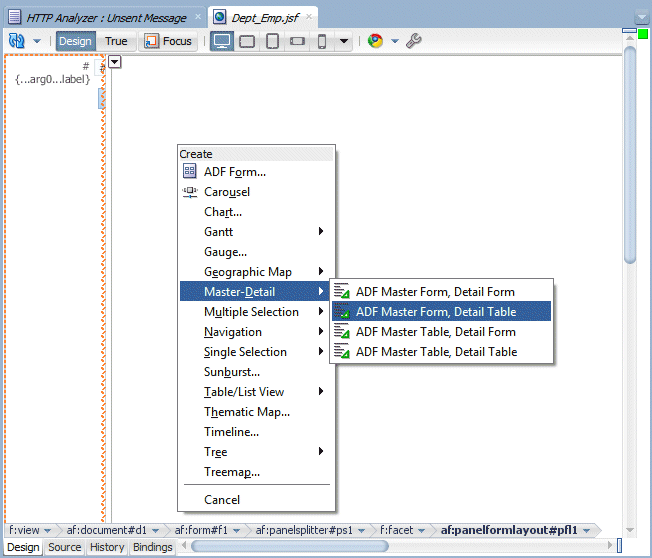
Drag employees onto the second facet (just to the right of the first facet). In the dynamic menu select Master-Detail > ADF Master Form, Detail Table.
-
Click Save All
to save your work. -
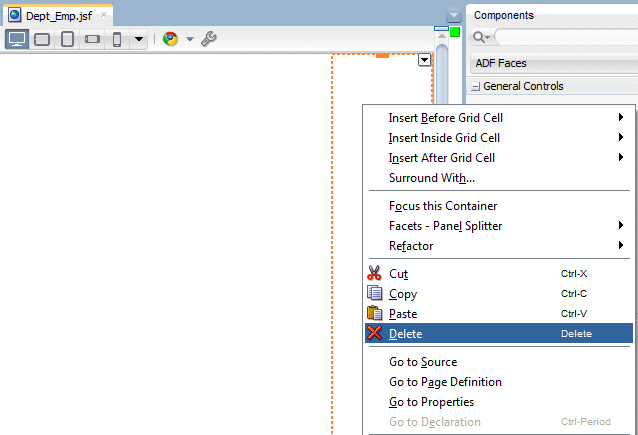
Right-click within the end facet and select Delete from the context menu.
-
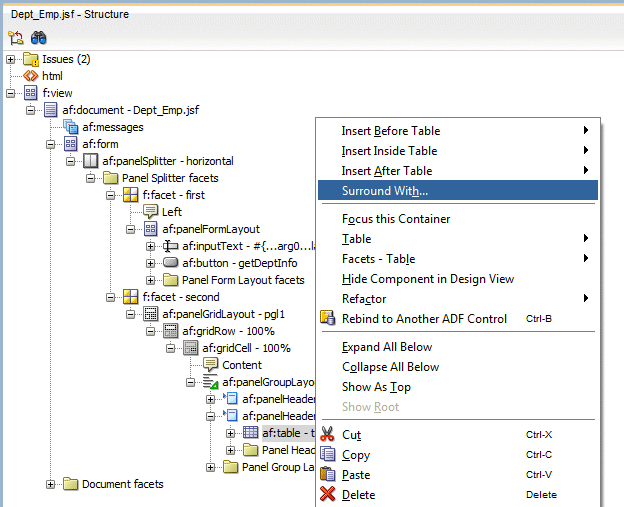
In the Structure window for the page, expand the second facet. Under the second facet, expand the af:panelGridLayout > af:gridRow > af:gridCell > af:panelGroupLayout > af:panelHeader - employees. Right-click the af:table - t1 component and select Surround With from the context menu.
-
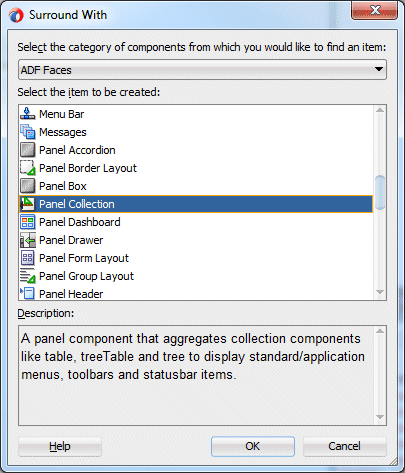
In the Surround With window select the Panel Collection and click OK.
-
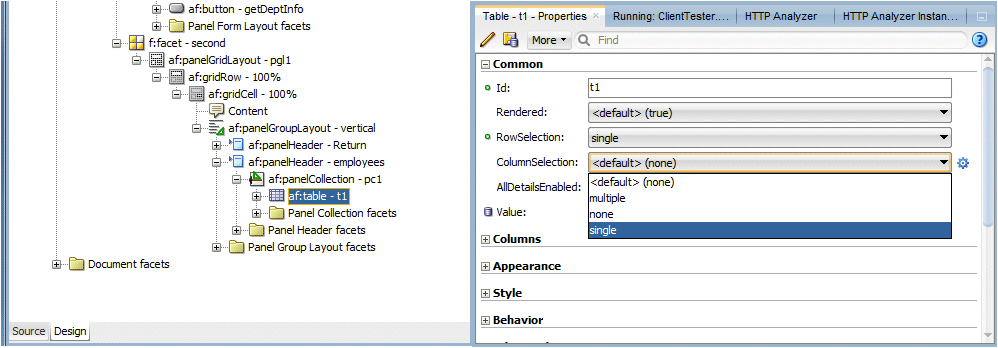
Expand the panelCollection and select the af:table - t1 component. In the Properties window, set the Column Selection property to single.
-
Save all your work.
-
Right-click within the page and select Run from the context menu.
-
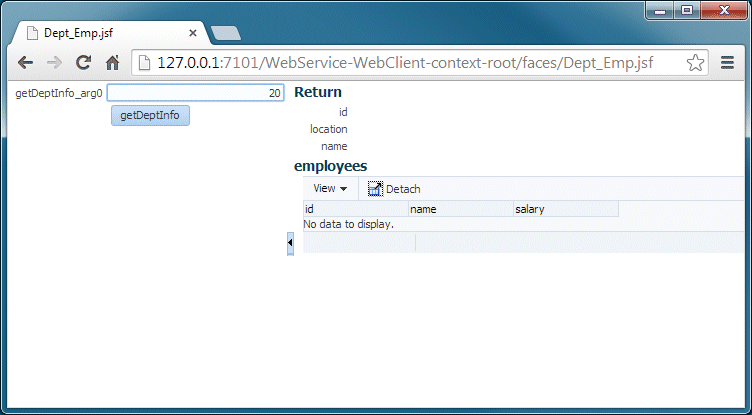
The page loads into your default browser.
 C
C -
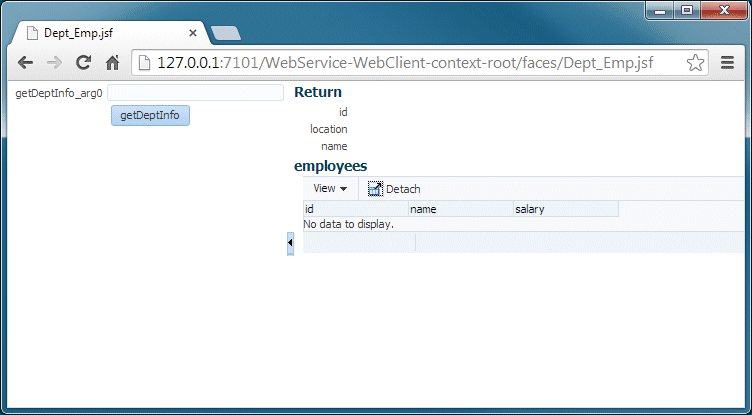
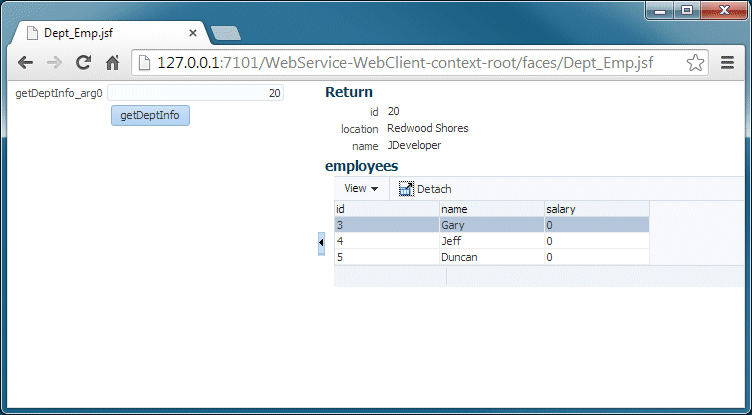
In the parameter field enter 30 as the department value and click the getDeptInfo button.
-
The department information and the related employees are retrieved and displayed
Summary:
- Create an annotated POJO Web Service
- Create a POJO and use JDeveloper to declaratively annotate the Web Service
- Build a Web Service using an existing WSDL document
- Build a annotated Web Service based an Enterprise Java Bean
- Create a proxy class for an existing Web Service so you can consume it for a Java program
- Create an ADF Data Control based on an existing Web Service
- Developing Fusion Web Applications with Oracle Application Development Framework
- Exposing Web Services Using the ADF Model Layer
- Developing Applications with Oracle JDeveloper