Part 1: Building a POJO Annotation-Driven Service

Any Java method can be published as a Web Service. JDeveloper provides wizards that take a Java class and its methods and creates a Web Service from that class.
Instead of manually adding the web service annotations to the Java class, you can use a JDeveloper wizard to manage that for you. The wizard adds the web service annotations and allows you to chose which methods you want to publish as web methods. This is an easy way to take an existing Java class and convert it to a web service.
In this section you create a new project and Java class, just as you did earlier. In this scenario, rather than manually adding annotations to create the web service, you use a wizard. The wizard creates all the necessary annotations to enable the class as a web service. Once the wizard steps are complete, you test the web service using the HTTP Analyzer with the integrated server, just as you did before.
-
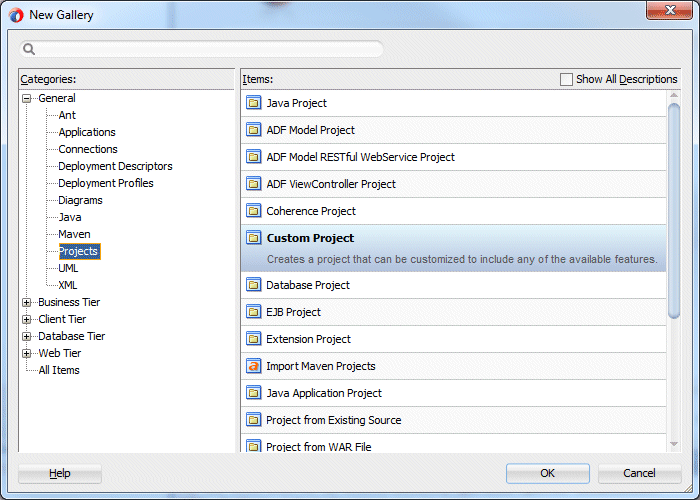
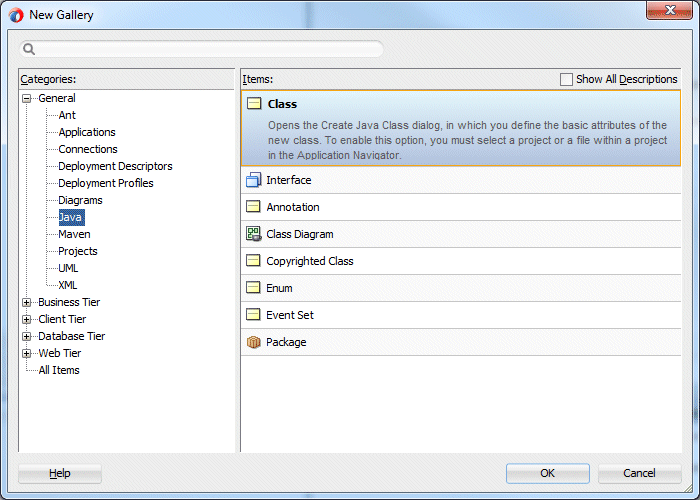
Create a new empty project. Right-click the Annotation project node and select New > From Gallery. In the New Gallery, select General > Projects in the Categories list and Custom Project in the Items list. Click OK.
-
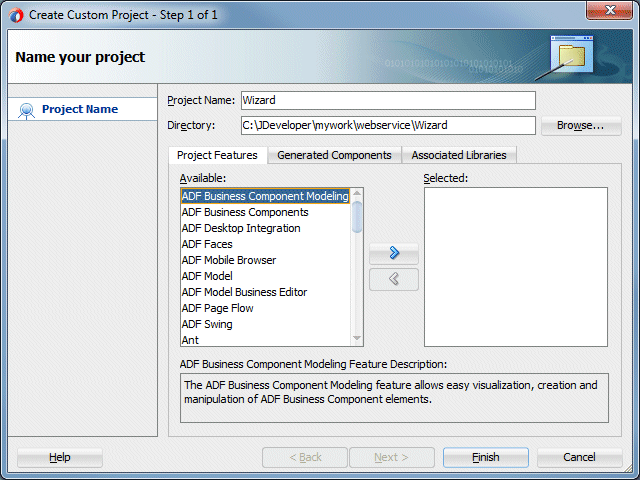
In the Create Project Dialog, name the project Wizard and click Finish.
-
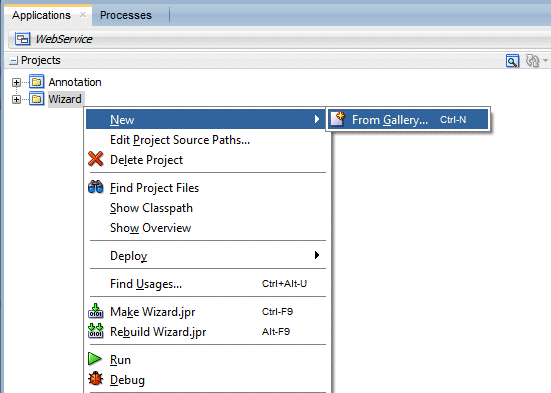
In the Applications window, right-click the new Wizard project and select New from the context menu.
-
In the New Gallery, select General > Java in the Categories list and Class from the Items list. Click OK to create a new Java class.
-
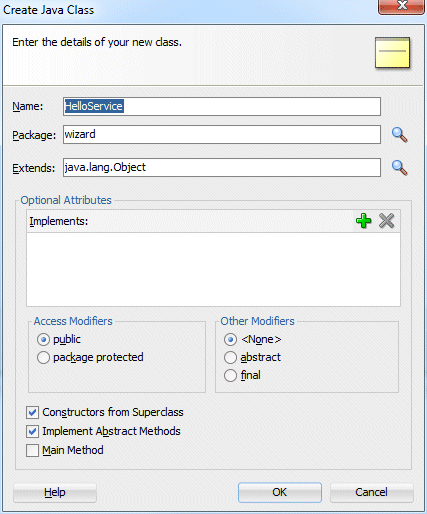
Name the class HelloService. By default the package name should be the project name. Ensure that the package name is set to wizard. Leave the rest of the values at their defaults and click OK to create the class and invoke the Code Editor.
-
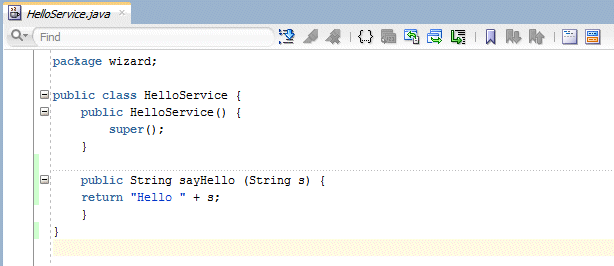
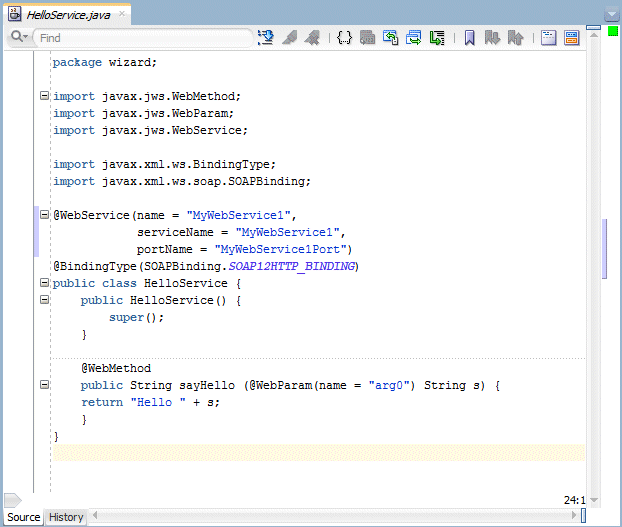
Add the following method to the class:
public String sayHello (String s) {
return "Hello " + s;
}
-
Click Save All
 to save your work.
At this point you just have a class with some very simple business logic to return the word Hello followed by the argument value.
-
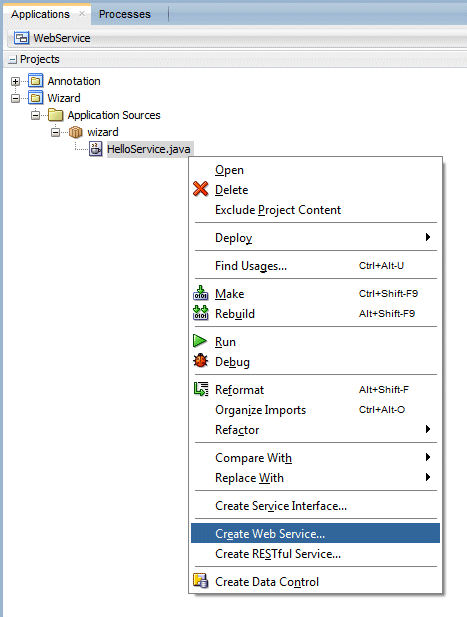
In the Applications window, right-click HelloService.java and select Create Web Service. This starts the wizard to create the class as a web service.
-
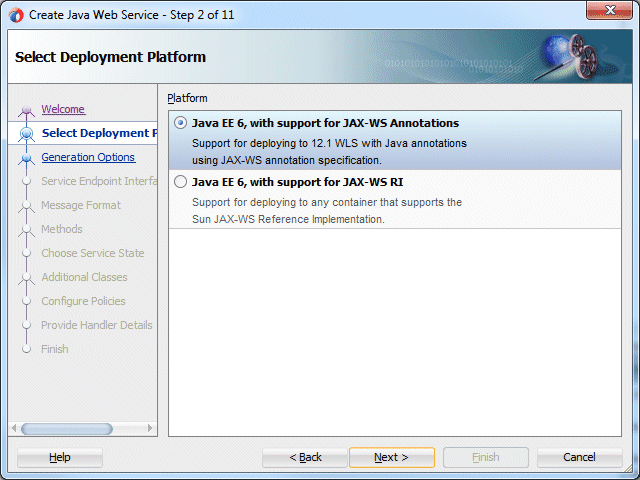
In the Select Deployment Platform step of the Create Java Web Service wizard, ensure that the Java EE 6, with support for JAX-WS Annotations is selected as the deployment platform and click Next.
-
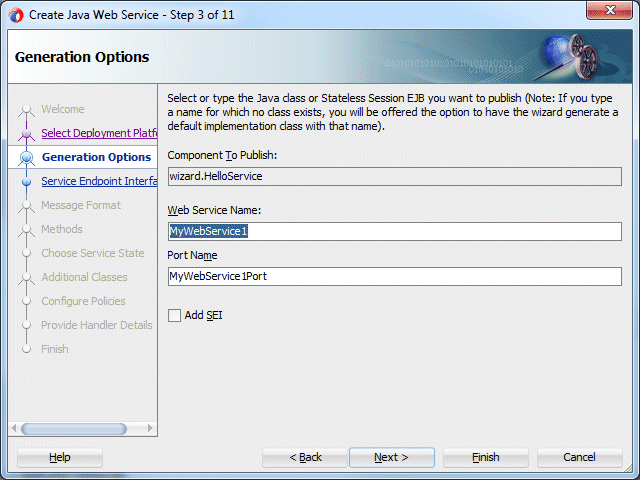
In the Generation Options step of the wizard, enter MyWebService1 as the Web Service Name, and ensure that the Port Name is set to MyWebService1Port. Click Next.
-
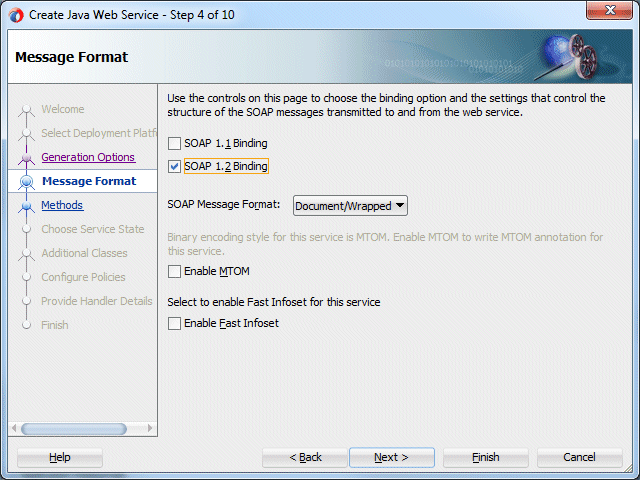
In the Message Format step of the wizard, select the SOAP 1.2 Binding option and Click Next.
-
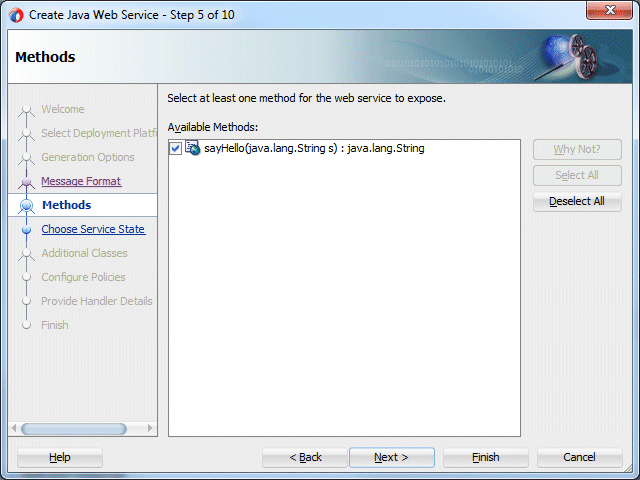
In the Methods step of the wizard, all the publishable methods are displayed so that you can select the ones you wish to publish. Because in this case there is only one, it is selected by default. The remaining pages are for including any additional classes the service may need, configuring policies for the service, and providing the handler details.
You will not change any of these values, so click Finish at any of these screens to create the web service.
-
The class definition is updated with the annotation needed to publish the web service. Make sure that the port name is set to MyWebService1Port, or change it to this value in the editor.
-
Click Save All
to save your work.
In this section you compile, deploy and test the web service. Just as before, you use the HTTP Analyzer for testing the web service. When you test web services using the analyzer, the service is compiled and deployed to the integrated server automatically. The analyzer is then invoked, enabling you to send values to and receive values from the web service.
-
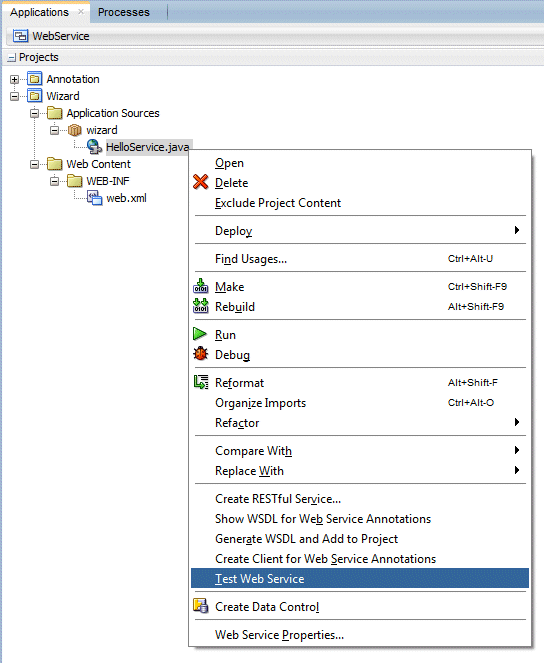
In the Applications window, right-click HelloService.java in the Wizard project and select Test Web Service from the context menu.
This option invokes the integrated server, deploys the service and then starts the analyzer. It may take a few seconds to start the Integrated server if it is being run for the first time.
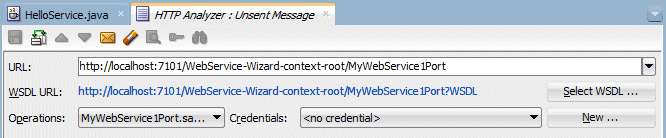
Just like earlier, the top portion of the HTTP Analyzer editor displays the URL for the web service, WSDL URL, and exposed Operations.
-
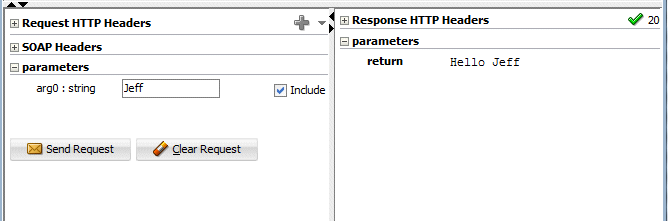
In the Request area, enter <your name> in the arg0 field and click Send Request.
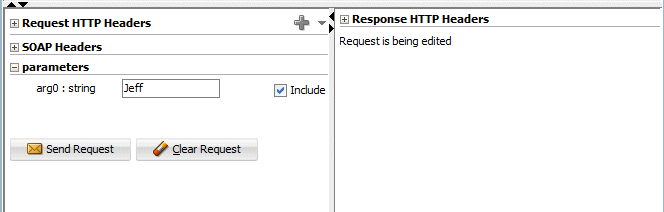
The analyzer sends the request to the service, and after a few seconds the return parameter is displayed.
You have now used a wizard in JDeveloper to annotate a Java class into a web service. This is an example of a bottom-to-top approach for creating a web service. You created a java class and then made it into a web service. Sometimes a web service exists that you want to use in some way. That is an example of a top-to-bottom approach. In the next section of this tutorial, you see how to consume an existing web service. -
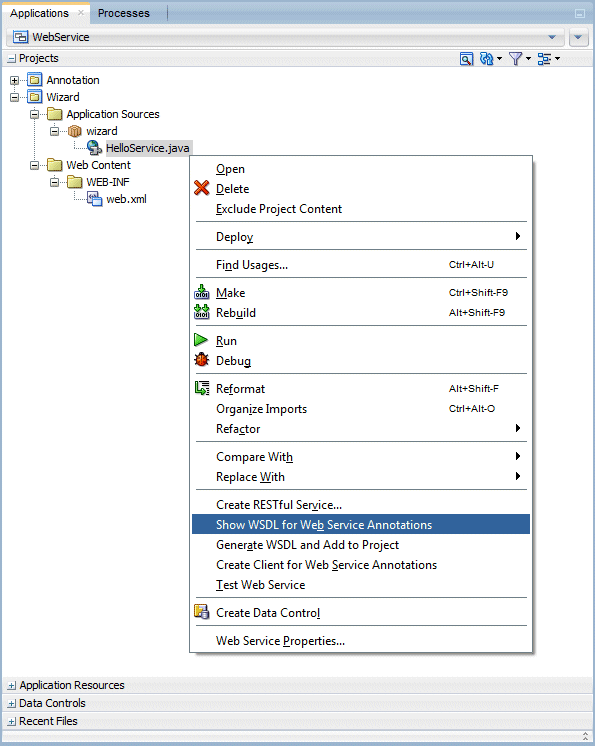
In preparation for the next task of creating a web service from a WSDL file, generate the WDSL to a file. Right-click the HelloService.java class in the Navigator and select Show WSDL for Web Service Annotations.
The generation of the WSDL file starts, and then MyWebService1.wsdl displays in the Design editor. You can expand and select the nodes to visualize the flows.

-
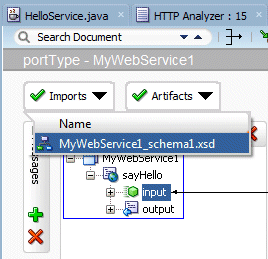
Click Imports to see what other artifacts the WSDL uses. In this case it uses MyWebService1_schema1.xsd.
-
Select MyWebService1_schema1.xsd from the drop down list.
-
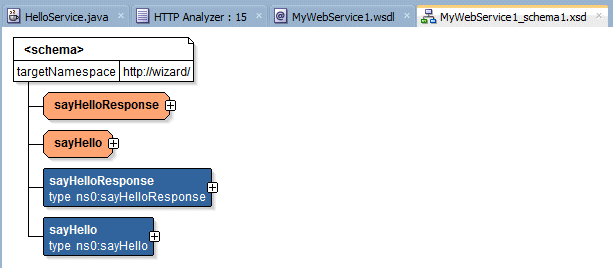
The schema document opens in a visual editor window that shows the relationships of the defined elements.
-
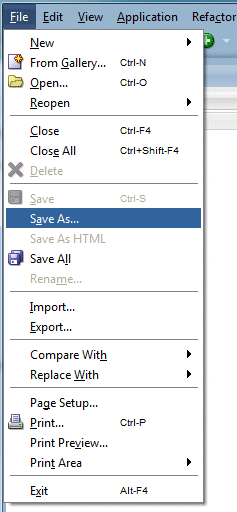
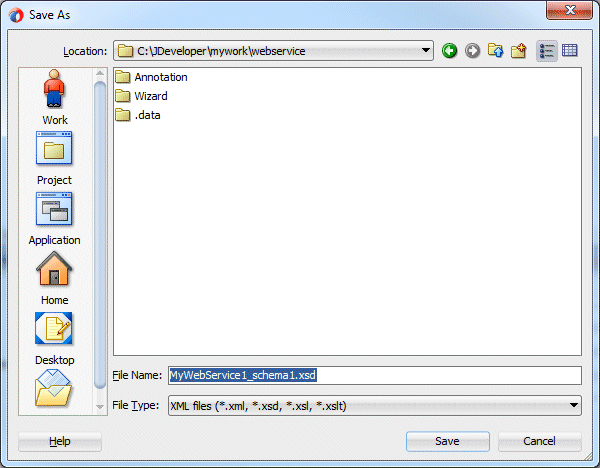
From the menu, select File > Save As...
and save the file in the root directory of your application (webservice).
-
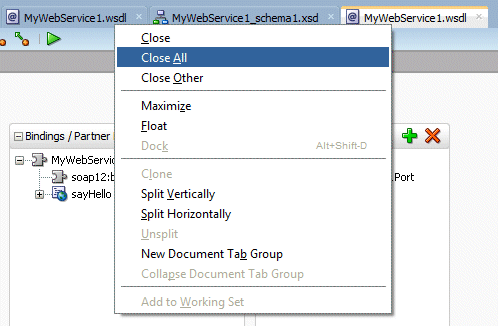
Select the MyWebService1.wsdl tab and save that file to the same directory you chose for the MyWebService1_schema1.xsd file.
-
Locate the directory where you saved the MyWebService1.wsdl file and open the file in WordPad or the text editor of your choice.
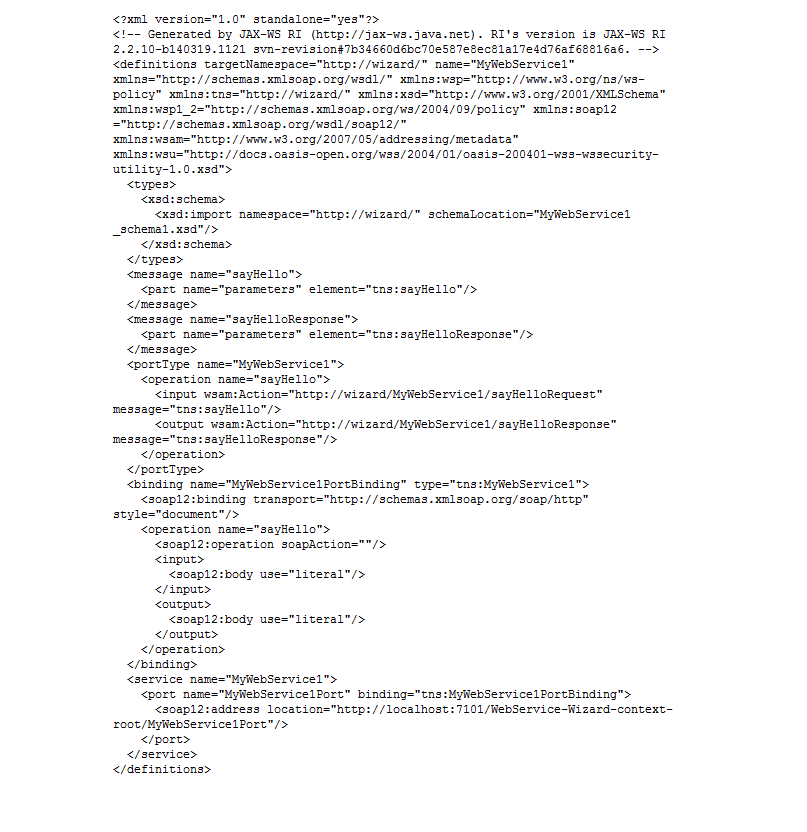
-
After you examine the file, close the text editor window.
-
Close all the tabs in the Editor and collapse the Wizard node in the Applications window.