Install Oracle Solaris Using Oracle System Assistant
Before You Begin
Ensure that the following requirements are met:
Perform the steps in Preparing to Install the Oracle Solaris Operating System.
If you want to configure the boot drive (that is, the storage drive onto which you are installing Oracle Solaris) for RAID, you must do so before you install Oracle Solaris. For instructions on how to configure RAID on your server, refer to Configure Storage Drives for OS Installation in Oracle Server X5-8 Installation Guide.
- Ensure
that the installation media is available to boot.
-
For an ISO image on a DVD, insert the DVD into the local or external DVD-ROM drive.
-
For an ISO image on the network, ensure that the Oracle Solaris ISO images are available and that the Oracle ILOM Remote System Console Plus application has mounted the ISO image.
For additional information about how to set up the installation media, see Selecting the Boot Media Option.
-
- To launch Oracle System Assistant directly from the Oracle ILOM web interface (recommended),
perform the following steps; otherwise proceed to Step 3.
-
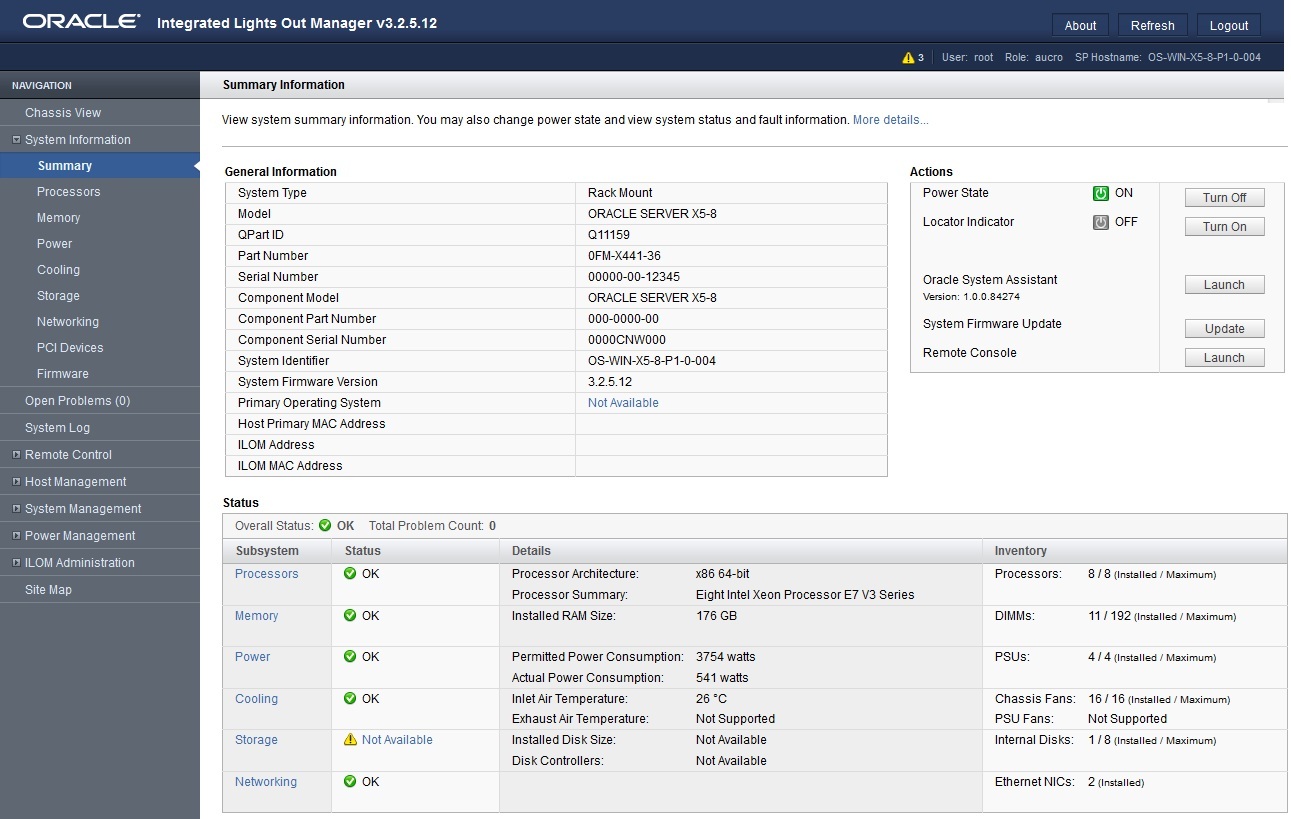
Log in to the Oracle ILOM web interface.
The Oracle ILOM Summary Information page appears.

-
In the Actions panel on the Oracle ILOM Summary Information page,
click the Oracle System Assistant Launch button.
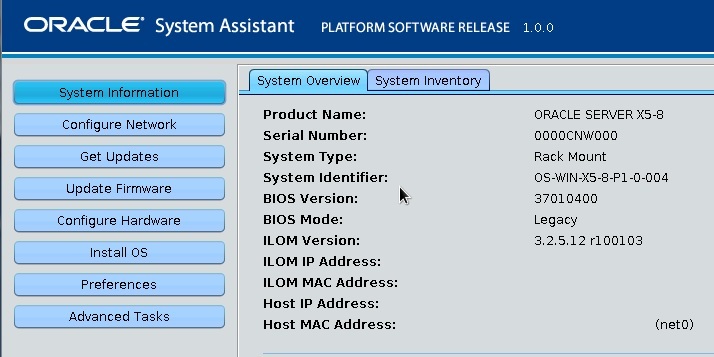
The Oracle System Assistant System Overview screen appears.

- Proceed to Step 4.
-
Log in to the Oracle ILOM web interface.
- To launch Oracle System Assistant using the remote console, perform the following
steps:
- From the Oracle ILOM Summary Information page, click the
Remote Console Launch button.
The Oracle ILOM Remote System Console Plus window appears.
- Reset or power on the server.
For example, do one of the following:
From the local server, press the Power button (approximately 1 second) on the front panel of the server to power off the server, then press the Power button again to power on the server.
From the Oracle ILOM web interface, click Host Management → Power Control, select Reset from the Select Action list box, then click Save.
From the Oracle ILOM CLI, type: reset /System
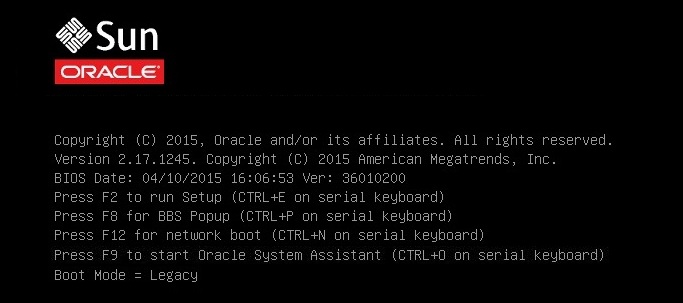
The server begins the boot process and the BIOS screen appears in the Oracle ILOM Remote System Console Plus application.

Note - The next event occurs very quickly; therefore, focused attention is needed for the following steps. Watch carefully for these messages as they appear on the screen for a brief time. You might want to enlarge the size of your screen to eliminate scroll bars. - Press the F9 key to start Oracle System Assistant.
The Oracle System Assistant System Overview screen appears.
- From the Oracle ILOM Summary Information page, click the
Remote Console Launch button.
- To update Oracle System Assistant to the latest software release version, click the Get
Updates button in Oracle System Assistant.
This action ensures that the server has the latest version of Oracle System Assistant installed before you begin the OS installation.
Note - Server web access is required to update Oracle System Assistant. - To update the server firmware,
click the Update Firmware button.
This action ensures that the server has the latest firmware and BIOS before you begin the OS installation.
- To install the Oracle Solaris OS, click the Install OS button.
The Install Operating System screen appears.
- Select Oracle Solaris from the Supported OS drop-down list.
- In the Current BIOS mode portion of the screen, select the BIOS mode (UEFI or Legacy BIOS) that you want to use for the OS installation.
- In the Select Your Install Media Location portion of the screen, select the location of the
installation media.
This is the location of the OS media. The options are DVD and Network.
Note - Oracle System Assistant does not support Preboot eXecution Environment (PXE) installs. - Click Installation Details.
The Installation Details dialog appears.
- In the Installation Details dialog, deselect any items that you do not want to install.
- At the bottom of the Install Operating System screen, click the Install OS button.
- Follow the prompts until the
installation is finished.
The server boots.