Configuring PDL Setup
Before you deploy PDL and start loading data from external sources, you must set up the following:
Data Update Rules Entry
CTM Transaction Setup
Transaction Security
Common Attribute Framework
Prospect Configuration
File Parser
This section discusses:
Setting up data update rules entry.
Setting up transaction.
Setting up CTM transaction security.
Entity Registry impacts.
Setting up Common Attribute Framework.
Setting up filtering for common attributes.
Prospect configuration and File Parser setup are discussed in the subsequent “Setting Up Prospect Configuration” and “Setting Up File Parser for PDL” sections.
Create a data update rule based on the incoming constituent data from your file layout. Determine if/how the constituent data should be updated if it already exists for the person in the core campus records.
Academic institutions require different rules for updating constituent data based on a transaction and the affiliation the institution has with the constituent. For example, you may define one rule based on the incoming data from TOEFL and a different rule based on the incoming data from PTE as the data you receive from each testing agency differs. Additionally, you may want to override the TOEFL rule if the constituent is already an applicant. The Data Update Rule Entry component allows this flexibility. The system uses these rules when it posts a transaction.
To be consistent with existing processes that update this data, the data update rules are as follows for the following entities:
|
Entity |
Rules |
|---|---|
|
Academic Interests |
If data exists on ADM_INTRST_HDR for an existing EMPLID and ACAD_CAREER and the max ADM_INTRST_HDR.EFFDT is not equal to %Date, a new row is inserted with EFFDT = %Date. Rows are inserted into ADM_INTERESTS for each academic interest populated on SCC_STG_ADMINT. PRIORITY is populated based on ADM_INTRST_HDR.USE_PRIORITY. If data exists on ADM_INTRST_HDR for an existing EMPLID and ACAD_CAREER and the max ADM_INTRST_HDR.EFFDT is equal to %Date, a row is not inserted into ADM_INTRST_HDR. Rows will be inserted into ADM_INTERESTS only where SCC_STG_ADMINT.EXT_SUBJECT_AREA does not exist on ADM_INTERESTS for the current effective date. If ADM_INTRST_HDR.USE_PRIORITY is Y, the max ADM_INTEREST.PRIORITY is determined and incremented to the next number when new rows are inserted. |
|
External Academic Data |
A new data number (EXT_DATA_NBR) is inserted to EXT_ACAD_DATA if the EXT_ORG_ID on the staging record SCC_STG_ACADHST exists on the core record ACAD_HISTORY. The max EXT_DATA_NBR existing on EXT_ACAD_DATA is determined and incremented to the next number on insert. All child records are populated with the same EXT_DATA_NBR that is inserted on EXT_ACAD_DATA if the field exists on the child record. Exception: For the record EXT_DEGREE, if data exists on EXT_DEGREE where DESCR, DEGREE_DT, DEGREE_STATUS and LS_DATA_SOURCE = data from staging record (SCC_STG_EXTDEGR), a new row is not inserted. |
|
General Materials |
A new record is always inserted. The max GENL_MATL_NBR is determined and new incremented to the next number when new rows are inserted. |
|
Test Score |
If SCC_STG_TEST.TEST_ID does not exist on STDNT_TEST for the EMPLID, a new row is inserted along with any child rows (STDNT_TEST_COMP). If the following elements on STDNT_TEST_COMP match the elements on the staging record SCC_STG_TESTCMP, update Score, Percentile and Date Loaded regardless of the previous score reported: EMPLID, TEST_ID, TEST_COMP, TEST_DT and DATA_SOURCE. If there is not an existing row on STDNT_TEST_COMP that matches on EMPLID, TEST_ID, TEST_COMP, TEST_DT, DATA_SOURCE, a new row is inserted. |
You must define a transaction for each PDL transaction you will be loading. Oracle will deliver transaction codes for each prospect or test score template Oracle delivers.
Image: Sample Transaction Setup for Prospect/Admissions Data Load (1 of 2)
This is an example of a delivered transaction code (1 of 2).
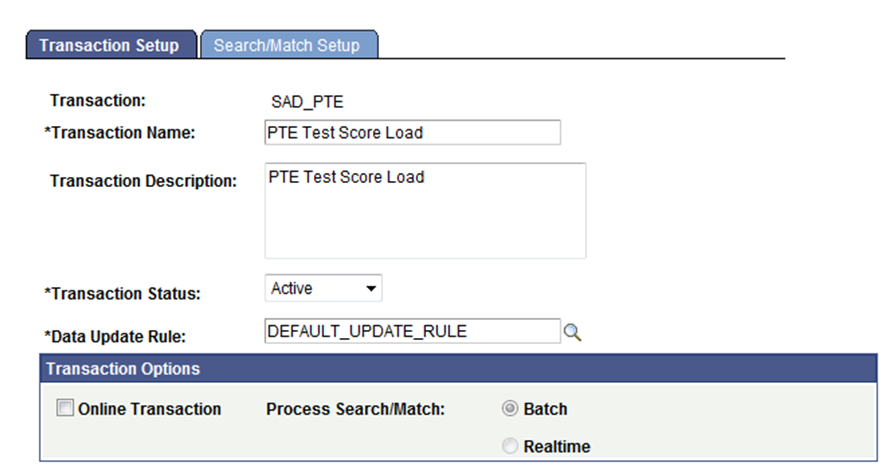
Image: Sample Transaction Setup for Prospect/Admissions Data Load (2 of 2)
This is an example of a delivered transaction code (2 of 2).

All PDL transactions should be set up with the Online Transaction check box cleared which sets the Process Search/Match option to Batch automatically.
The following table lists the delivered transaction handler values for Prospect/Admissions Data Load transactions. Use these values when defining a transaction handler for any new PDL transaction you may define.
|
Root Package ID |
Path |
Application Class ID |
|---|---|---|
|
SAD_PDL_PROCESS |
TRANSACTION |
DataLoadTransaction |
The staging record name for PDL Transaction Status and Date should be set to SAD_PDL_HDR_STG. This record stores the transaction status and transaction status date value for PDL transactions. You should always use this value when defining any new PDL transaction.
The following table lists the delivered transaction handler values for processing the constituent data that is loaded with your PDL transaction. Use these values when defining a constituent handler for any new PDL transaction you define.
|
Root Package ID |
Path |
Application Class ID |
|---|---|---|
|
SCC_SL_TRANSACTION |
INTFC |
DefaultConstituent |
All PDL transactions should be set to Partition by Transaction which creates one transaction record for each constituent record.
The following table lists the delivered transaction data launch view settings for PDL transactions. You should always use these values when defining the transaction data launch view settings for any new PDL transaction you may create.
|
Menu Name |
Menu Bar Name |
Menu Item Name |
Menu Page Name |
|---|---|---|---|
|
SAD_PDL_DATA_STAGE |
USE |
SAD_PDL_DATA_STG |
SAD_PDL_ACAD_INFO |
On the Search/Match Setup tab, define the search parameter, search result code and action to take for each search level that you want to use when processing your PDL transaction.
Access the CTM Transaction Security page ().
Image: CTM Transaction Security page
This example illustrates the fields and controls on the CTM Transaction Security page.
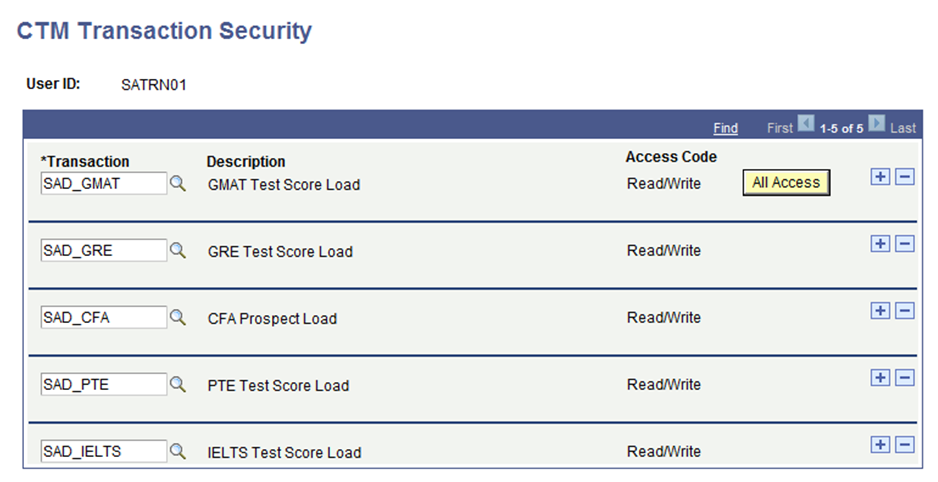
The CTM Transaction Security page controls access to the Prospect/Admissions Staging and Constituent Staging components under the Student Recruiting, Prospect/Admissions Data Mgmt menu.
For more information about the CTM Transaction Security page:
In order to enable the filtering of attributes defined within the Common Attribute Framework by test ID on the Additional Test Data section both on Prospect/Admissions Staging and Test Results components, a script has been delivered to create entities for each test ID you have defined within your system. In addition, the system automatically creates an entity for a new test ID that you add through the Test Tables component.
Note: The script will run automatically when you apply Bundle 30 via PeopleSoft Change Assistant.
This is an example of the entity registry record that the system creates for the PTE test:
Image: Entity Registry Example for PTE
This image illustrates an Entity Registry example for PTE.
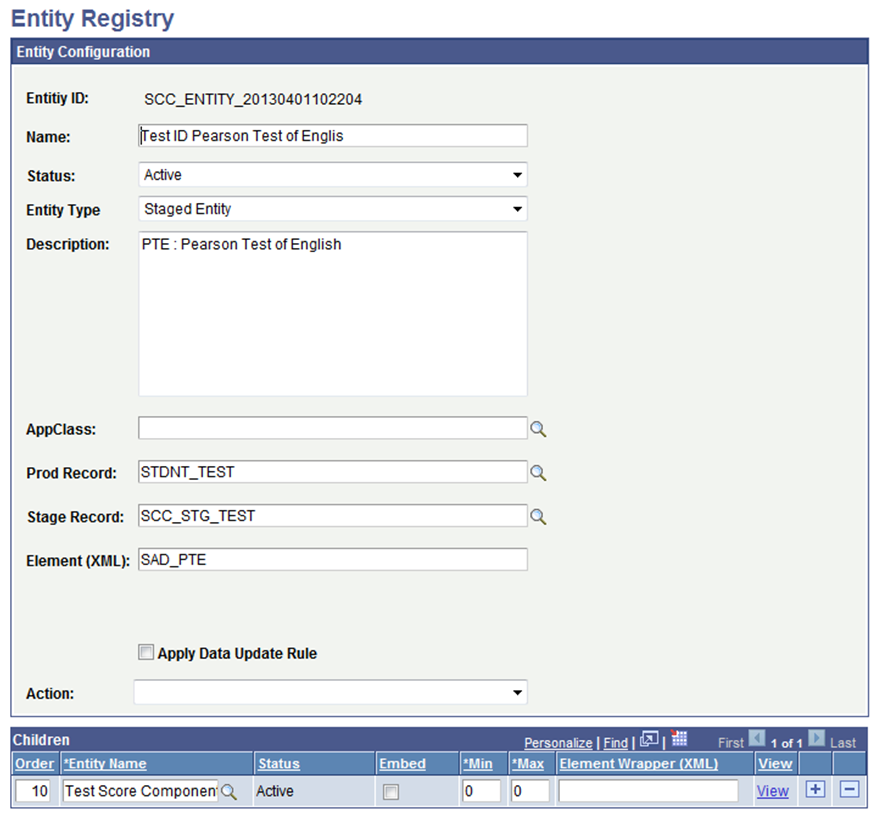
The system will assign a unique entity ID to each test ID that you set up. The Test Tables page will also display this entity ID. The name assigned for each Test ID Entity will use the following name convention <Test ID> <Description from Test Table>. The Description for each Test ID Entity will use the following naming convention <Value entered for Test ID>: <Description from Test Table>.
PDL is leveraging the Common Attribute Framework to enable you to store additional data loaded from external data sources for test scores and prospects. Examples have been delivered but you may choose to add additional attributes for the data you are loading.
For extending prospect career data, a record context has been delivered for ADM_PRSPCT_CAR and its corresponding staging record SAD_PRS_CAR_STG.
Image: Record Context for Prospect Career
This example illustrates the record context for prospect career.
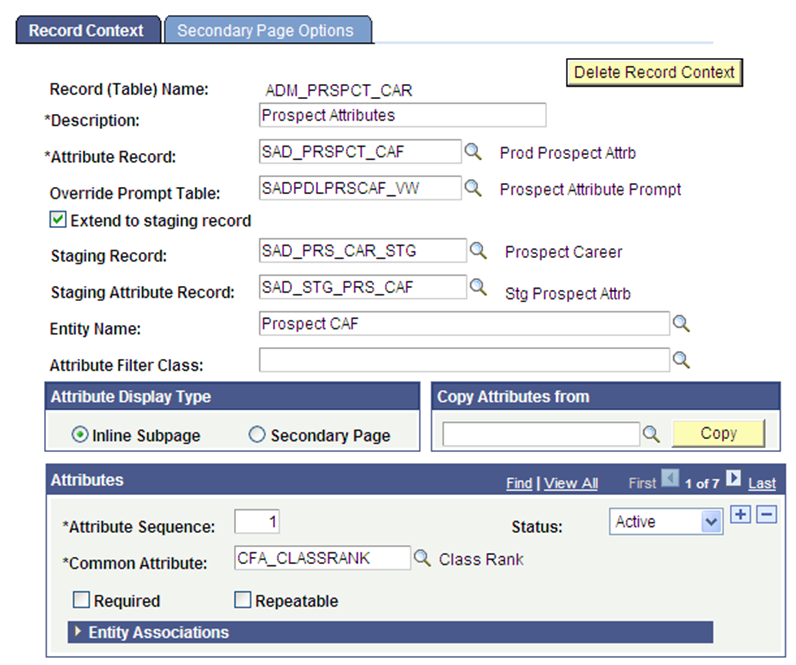
For additional data you want to store for your prospect, define a common attribute and add it to the ADM_PRSPCT_CAR record context.
To add common attributes to the ADM_PRSPCT_CAR record context:
Access the Record Context search page ().
Enter Record (Table) Name = ADM_PRSPCT_CAR.
Click Search.
In the Attributes section, add a row and populate the Common Attribute field for each common attribute. Add a new row for each common attribute.
Click Save.
Note: The “Delivered PDL Templates” section lists the common attributes delivered for each template. The CFA attributes have already been added to ADM_PRSPCT_CAR. Add the remaining attributes to ADM_PRSPCT_CAR for the templates you are planning to use.
To allow you to store additional test score data by test date, a record context has been delivered for SAD_TESTDT and its corresponding staging record SCC_STG_TESTDT.
Image: Record Context for Test Date
This example illustrates the record context for test date.
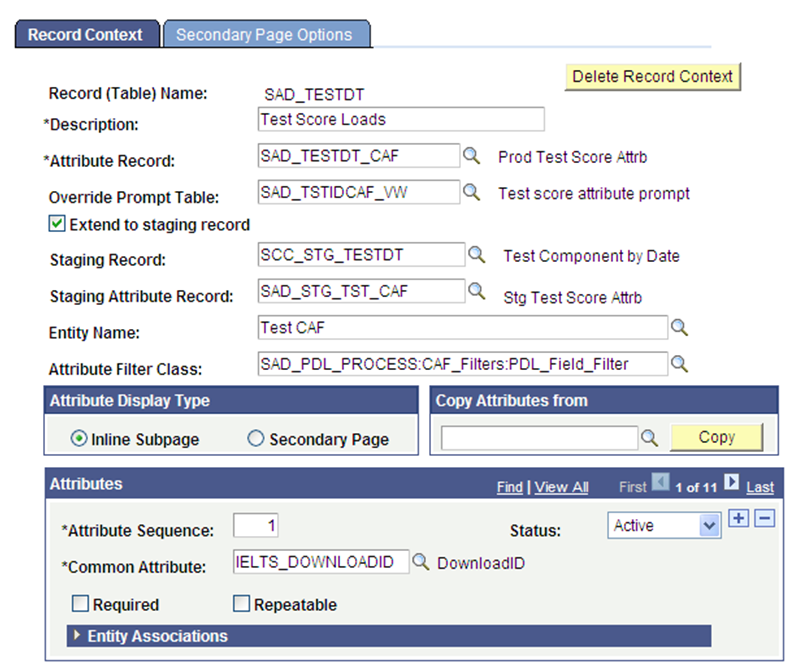
For additional data you want to store for your specific test, define a common attribute and add it to the SAD_TESTDT record context. To add common attributes to the SAD_TESTDT record context:
1. Access the Record Context search page ().
2. Enter Record (Table) Name = SAD_TESTDT.
3. Click Search.
4. In the Attributes section, add a row and populate the Common Attribute field for each common attribute. Add a new row for each common attribute.
5. Click Save.
Note: The “Delivered PDL Templates” section lists the common attributes delivered for each template. The IELTS and PTE attributes have already been added to SAD_TESTDT. Add the remaining attributes to SAD_TESTDT for the templates you are planning to use.
For each of the attributes you have added to the record context for SAD_TESTDT, you need to add the Test ID that corresponds to the attribute. Doing so will then filter those attributes in the field search results for that Test ID in the:
Test Results group box of the Prospect/Admissions Staging - Academic Information page.
Test Results pages.
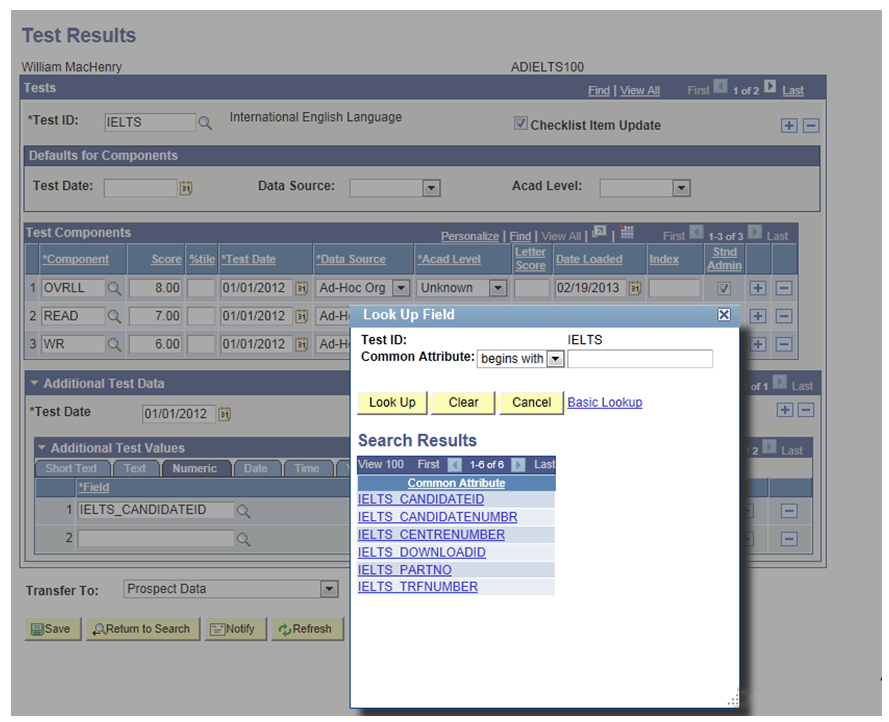
This is an example of the Test Results group box when the user clicks the lookup button for Field in Additional Test Values:
Image: Example of filtering based on Test ID in the Academic Information page
This image illustrates an example of filtering based on Test ID in the Academic Information page.
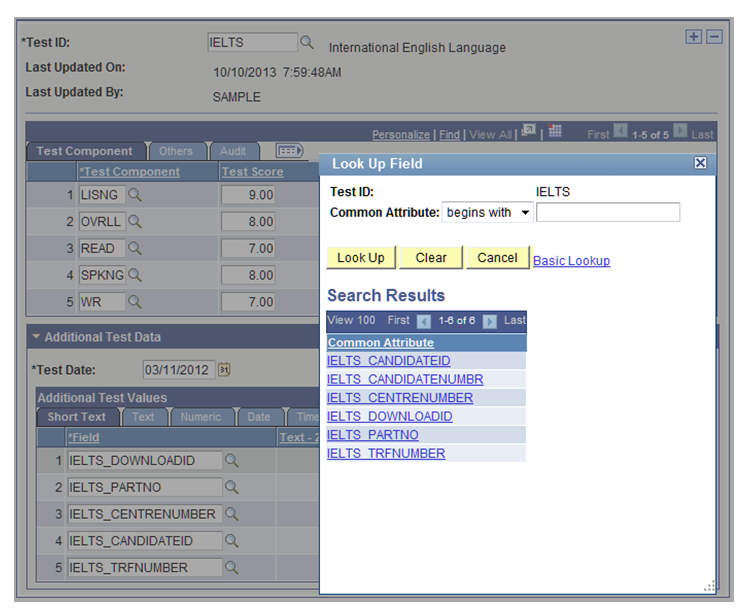
This is an example of the Test Results page when the user clicks the lookup button for Field in Additional Test Values:
Image: Example of filtering based on Test ID in the Test Results page
This image illustrates an example of filtering based on Test ID in the Test Results page.
For more information on Academic Information page:
See Reviewing and Editing Staged PDL Transactions
For more information on Test Results page:
See Tracking Supporting Information for Prospects and Applicants
You must perform the following steps in order to achieve this behavior of filtering based on Test ID:
Navigate to the Record Context search page ().
Enter SAD_TESTDT in the Record (Table) Name search field.
Click Search.
The Record Context page should look like this:
Image: Record Context page for SAD_TESTDT
This example illustrates the record context for SAD_TESTDT.
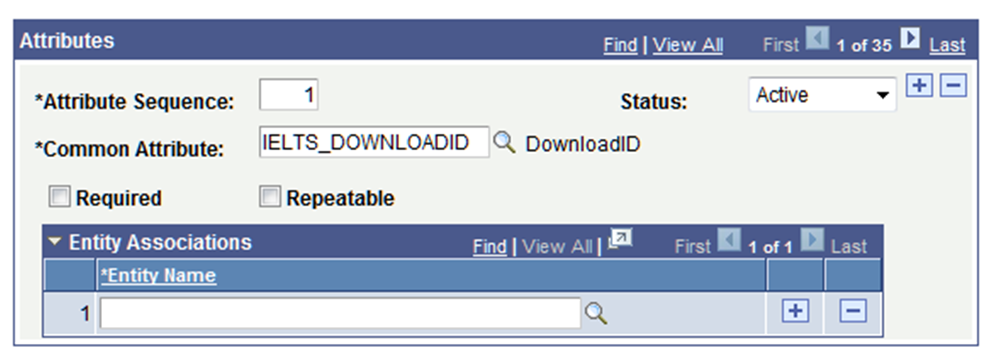
Expand the Entity Associations group box. The group box should look like this:
Image: Entity Associations group box
This example illustrates the Entity Associations group box.
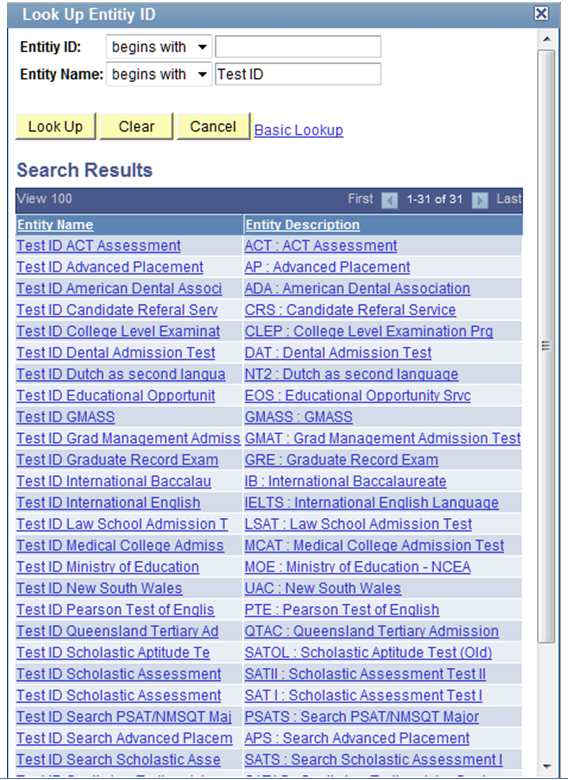
For each of the Attributes defined to the record SAD_TESTDT, add the Entity Name that corresponds to the value in the Common Attribute field. Entering Test ID in the Entity Name field and clicking the lookup icon displays the results as shown in the following graphic:
Image: Lookup results for the Entity Name field
This example illustrates the Lookup results for the Entity Name field.
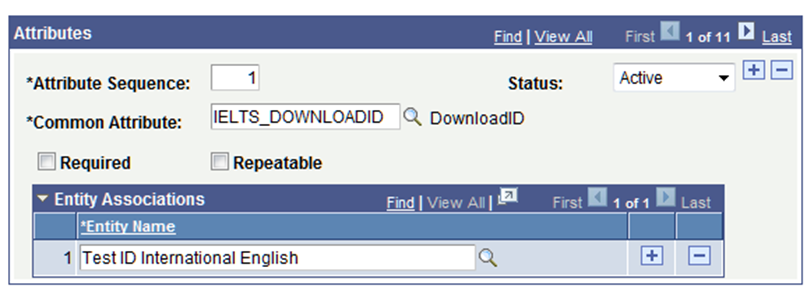
For all those attributes prefaced with IELTS, add the Entity Name Test ID International English:
Image: Entity Name for IELTS
This example illustrates the Entity Name for IELTS.
Repeat the above step for the remaining attributes.
Note: Remember to use the correct Entity Name that corresponds to those common attributes.
Save your changes. When you save the changes, the system displays this message:
Please run Entity Property Sync process to update corresponding Entity Registry definitions. (14097, 56)
The record context data has changed. To keep corresponding Entity Registry definitions in sync please run the Entity Property Sync process (Home > Setup SACR > System Administration > Entity > Entity Property Sync)
In order for these changes to take full effect, you must complete the next steps and run both the Entity Registry Sync and Cache Wipe processes.
Navigate to the Entity Property Sync component ().
Image: Entity Property Sync component (1 of 2)
This example illustrates the Entity Property Sync component (1 of 2).
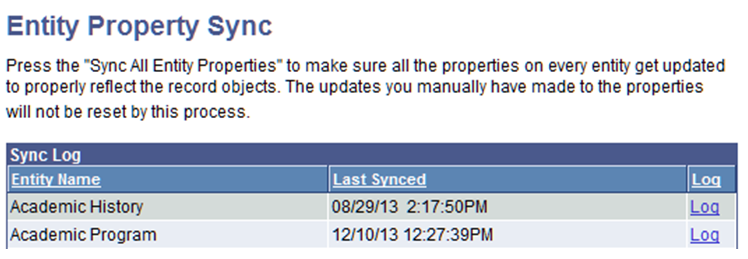
Image: Entity Property Sync component (2 of 2)
This example illustrates the Entity Property Sync component (2 of 2).
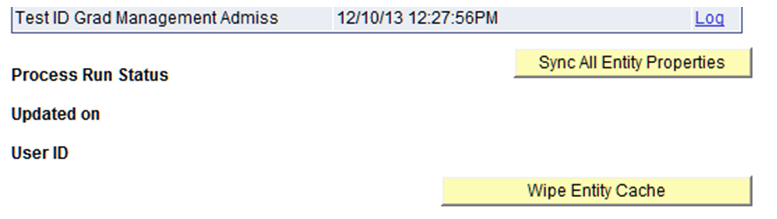
Click the Sync All Entity Properties button.
Clicking this button will initiate an Application Engine process that should take 5 - 10 minutes to complete. Clicking the Refresh button will update the status of the Application Engine process (that is, Queued, Processing, Success).
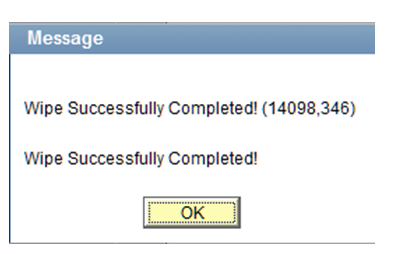
Once the process has completed successfully, click the Wipe Entity Cache button. This should take between 3 - 5 minutes to complete. Upon completion, you should see the following message:
Image: Confirmation message for Wipe Entity Cache process
This example illustrates the confirmation message for Wipe Entity Cache process.
When the Wipe Entity Cache process has completed, you have successfully completed updating the common attributes for test scores.
Note: If common attributes are changed, added or deleted, run the Entity Property Sync process () to keep the corresponding Entity Registry definitions in sync.