Preparing for PBI Data Exchange
Before you start importing and exporting SMS data, you must set up Campus Solutions as follows:
Enable the PBI functionality for all institutions or for a specific institution.
Set up a PBI configuration record.
Set up CAS statuses.
Define the UKVI Sponsor License Number for partner institutions.
Enter the PBI data for academic programs.
Enter the PBI data for academic plans.
Set up PBI communications.
Configuring common attributes for PBI.
Defining field values at the configuration level
You can define default values for fields in the Upload extract on the PBI Configuration page if you do not want to specify field values separately at the program and plan levels or at the individual CAS record level.
Defining field values at the academic program and plan levels
For a particular academic program or plan, the value that your institution wants to include in the Upload or Update extract for one or more fields may be the same for all the applicants or students for that academic program or plan. Use the Academic Program and Academic Plan PBI Data pages to define field values at program and plan level respectively, rather than using the CAS Maintenance component to enter field values for each individual applicant or student.
If the same value applies to all academic plans associated with an academic program the value can be defined at academic program level only. The defined values are used to default the values for the corresponding fields when a new CAS Details record is created.
Defining field values at the CAS record level
You can choose to enter or update field values at the applicant or student level using the CAS Maintenance component.
Note
For most fields the extract process will first look at the CAS Details record to derive a field value. In most cases if a default value has been defined at Academic Plan, Academic Program or Configuration level then the field will be automatically populated in the CAS Details record when it is created. For some fields if a value has not been defined at that CAS Details level, then the process will look at the Academic Plan level. If a value has not been defined at the Academic Plan level, then it looks at the Academic Program level. If a value has not been defined at Academic Program level, finally it derives the field value from the Configuration level.
Refer to the PBI Field Derivation documentation for information about derivation of the individual fields.
|
Page Name |
Definition Name |
Navigation |
Usage |
|---|---|---|---|
|
SA Features |
SCC_INSTALL_SA2 |
|
Enable the PBI pages and links in Campus Solutions. |
|
Academic Institution 6 |
SSR_INST_FEATURES |
|
Enable the PBI pages and links in Campus Solutions for a specific institution. |
|
PBI Configuration |
SAD_PB_CONFIG |
|
Create a PBI configuration record. Enter the sponsor license numbers of your institution and campuses. Also, specify field and course date defaults, and applicant and student communication details. |
|
Statuses |
SAD_PB_CONFIG1 |
|
Define the various processing statuses for CAS records. |
|
Regional |
SAD_UC_SCHOOL_SBP |
|
Define the UKVI Sponsor License Number for an external organization being reported to UKVI as a Partner Institution. |
|
Academic Program PBI Data |
SAD_PB_PROG |
|
Specify field values at program level. |
|
Academic Plan PBI Data |
SAD_PB_PLAN |
|
Specify field values at plan level. |
Access the SA Features page ().
Image: SA Features page
This example illustrates the fields and controls on the SA Features page . You can find definitions for the fields and controls later on this page.
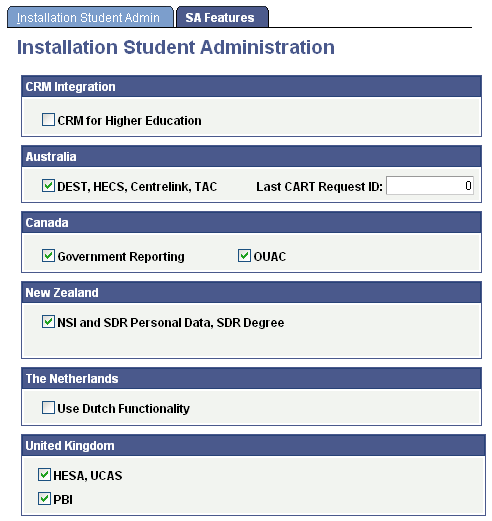
Select the PBI check box to enable PBI pages, fields, and links fields in Campus Solutions.
Access the Academic Institution 6 page ().
Image: Academic Institution 6 page
This example illustrates the fields and controls on the Academic Institution 6 page. You can find definitions for the fields and controls later on this page.
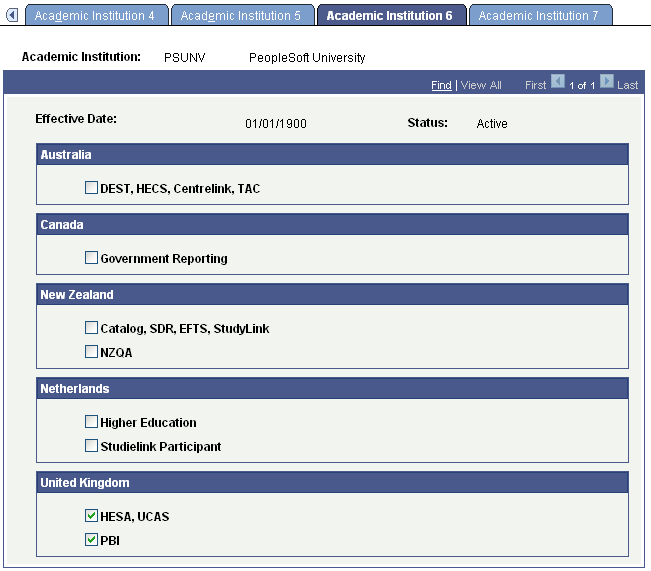
Select the PBI check box to enable PBI pages, fields, and links in Campus Solutions for a specific institution.
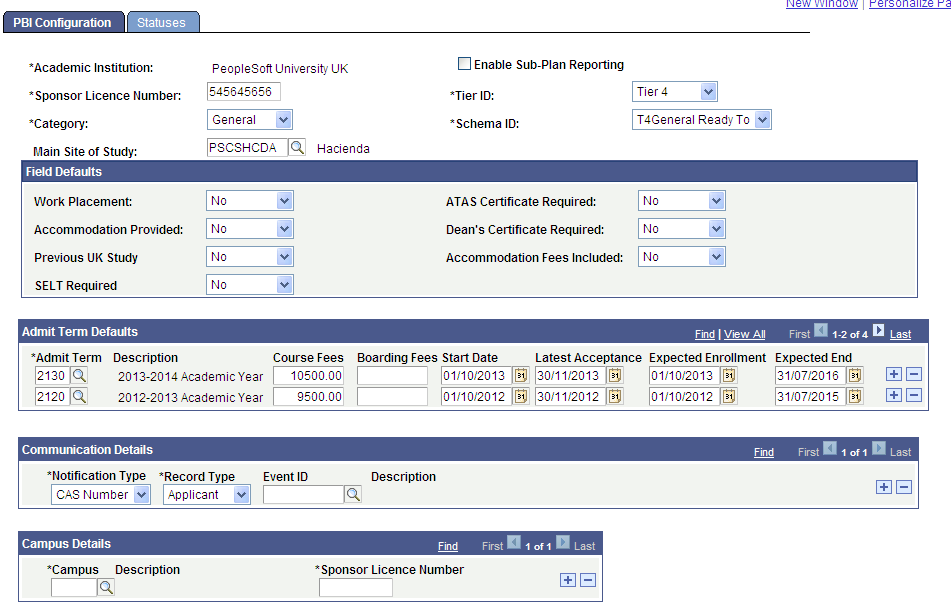
Access the PBI Configuration page ().
Image: PBI Configuration page
This example illustrates the fields and controls on the PBI Configuration page . You can find definitions for the fields and controls later on this page.
|
Field or Control |
Definition |
|---|---|
| Enable Sub-Plan Reporting |
Select the check box for Sub-Plans to be considered in the derivation of Course Title in the Upload extract. |
| Sponsor License Number |
Enter your institution's license number. The value is used to derive the corresponding field in the Upload extract. |
Use the Tier ID, Category and Schema ID fields to specify the values that are used to derive the corresponding fields in the Upload extract.
|
Field or Control |
Definition |
|---|---|
| Main Site of Study |
Enter the Location if the same Main Site details are reported in the Upload extract for all CAS records for your institution. The value is displayed as the default Main Site on the CAS Details page. The value is used in the derivation of the Main Site address fields in the Upload extract if no Reported Site is defined in the individual CAS Details record. |
Field Defaults
Use this region to specify default field values for new CAS records. The system uses a Field Defaults value as a default value in a new CAS Details record only if the value is not defined at the program or plan level.
Admit Term Defaults
For each term, define the values that are used to populate the fees and course date fields in new CAS records if no values are defined at plan or program level. The Latest Acceptance Date should be on or after the Course Start Date.
Communication Details
Campus Community's Communication Generation process uses the event IDs, you set up on this region, to notify the CAS number or fee update details to the applicant or student.
|
Field or Control |
Definition |
|---|---|
| Notification Type |
Indicate whether you want to notify CAS Number or Fee Update. |
| Record Type |
Indicate whether you want to notify the applicant or student. |
| Event ID |
Select the event ID that you want the system to assign the applicant or student. You can select only event IDs defined for the CASN administrative function in Campus Community. The CASN function captures Academic Career, Career Number and CAS Number as variable data. Refer to "Setting Up PBI Communications" in this section for information about the event ID setups. |
The system assigns an event ID for CAS Number notification type to a person when the Import CAS Details process loads the CAS number from the inbound XML file for the first time.
For more information about how the process assigns event IDs for CAS Number notification, see Importing CAS Details
The system assigns an event ID for Fee Update notification type when the Create Extract process creates the update extract data.
You can create one or more communication records using the Communication Generation process to notify the CAS number or fee update details to the applicant or student.
Campus Details
Use this region to specify Sponsor Licence Numbers for individual Campuses if your institution has a different licence number for a particular campus. The value is used to derive the corresponding field in the Upload extract based on the Campus value of the applicant or student in place of the value defined for your institution. If no value is defined the value defined for the institution is used.
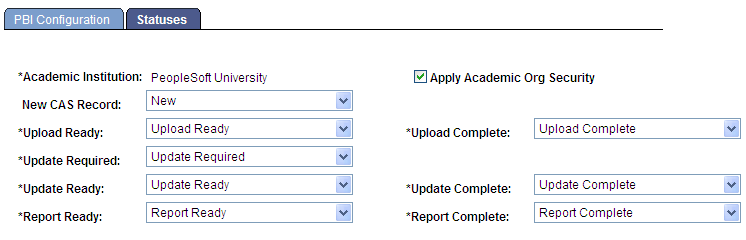
Access the Statuses page ().
Image: Statuses page
This example illustrates the fields and controls on the Statuses page. You can find definitions for the fields and controls later on this page.
|
Field or Control |
Definition |
|---|---|
| Apply Academic Org Security (apply academic organization security) |
Select to have the Create Extract process choose only that CAS record for which the user ID has access to at least one academic organization. Clear this check box if you want the process to choose a CAS record regardless of whether the user ID has access to the related academic organization. Refer to the following "Applying Academic Organization Security to the Create Extract Process" topic for more information about this setup. |
| New CAS Record |
Choose an Upload status value that the system assigns to new CAS records. If you do not choose a value, the system assigns a blank Upload status. |
| Upload Ready |
Choose an Upload status value. The Create Extract Data process uses this value to select CAS records for inclusion in the Upload extract. |
| Upload Complete |
Choose an Upload status value. The Create Extract Data process uses this value to create a new effective dated record to indicate that a CAS record has been included in the Upload extract. |
| Update Required |
Choose an Update status value that the system assigns to CAS records where the CAS number has been imported and a subsequent change is made to one of the fees paid fields. |
| Update Ready |
Choose an Update status value. The Create Extract Data process uses this value to select records for inclusion in the Update extract. |
| Update Complete |
Choose an Update status value. The Create Extract Data process uses this value to create a new effective dated record to indicate that a CAS record has been included in the Update extract. |
| Report Ready |
Choose a Report status value. The user uses this value to indicate that a record is ready to be included in the Report extract. The Create Extract Data process uses this value to select records for inclusion in the Report extract. |
| Report Complete |
Choose a Report status value. The Create Extract Data process uses this value to create a new effective dated record to indicate that a CAS record has been included in the Report extract. |
Statuses are delivered as translate values for Upload (SAD_PB_UPLOAD), Update (SAD_PB_UPDATE) and Report (SAD_PB_REPORT). You can amend or add to the translate values as required.
If additional verification steps are required before a CAS record is ready for inclusion in the Upload extract, additional interim statuses can be defined and used to manage individual CAS records. Additional statuses can be defined and used to prevent CAS records from being included in the Upload extract if required.
If a verification step is required between one of the fees paid values being updated and the record being included in the Update extract, different status values can be defined for Update Required and Update Ready. If no verification step is required the same status value for Update Ready can be used for both fields.
Note: To allow records to be retrieved using the single Processing Status search field in the CAS Maintenance component it is recommended that distinct status values are defined for Upload, Update and Extract.
The following is a scenario on how the statuses work where there are verification steps before a CAS record is included in an extract:
Use PeopleTools to create additional status values required. For example: new Upload Statuses of Upload Exclude and Upload Pending and a new Update Status of Update Pending.
Use the Statuses page to define the required values.
Use the CAS Maintenance component to create CAS records. The Upload Status is automatically set to New when you create the records.
Use the CAS Record Update process or CAS Details page to set the Upload Status to Upload Exclude for records that should be excluded from the Upload extract. For example, for a second CAS record for an applicant where the previous CAS record has already been sent and a CAS number requested.
Use the CAS Record Update process or CAS Details page to set the Upload Status to Upload Pending for records where all the details have been entered and the record needs to be verified before it is included in an Upload extract.
Use the CAS Record Update process or CAS Details page to change the Upload Status from Upload Pending to Upload Ready for records that have been verified and are ready to be included in an Upload extract.
Run the Create Extract Data process with the Create Upload option selected. The process picks up only those records that have an Upload Status of Upload Ready.
After including the record data in the extract, the Create Extract Data process sets the Upload Status to Upload Complete and saves the Upload File ID to each CAS record included.
After importing the CAS number, when you update the fees paid details on the CAS Details page, the system automatically sets the Update Status to Update Required.
Use the CAS Record Update process or CAS Details page to set the Update Status to Update Pending for records where the fees paid changes need to be verified before the record is included in an Update extract.
Use the CAS Record Update process or CAS Details page to change the Update Status from Update Pending to Update Ready for records that have been verified and are ready to be included in an Update extract.
Run the Create Extract Data process with the Create Update option selected. The process picks up records that have an Update Status of Update Ready.
After including the record data in the extract, the Create Extract Data process sets the update status to Update Complete.
Use the CAS Record Update process or CAS Details page to set the Report Status to Report Ready for the CAS records where the CAS number has been used and the applicant or student has not enrolled at your institution.
Run the Create Extract Data process with the Create Report option selected. The process picks up only those records that have a Report Status of Report Ready.
After including the record data in the extract, the Create Extract Data process sets the status to Report Complete.
Applying Academic Organization Security to the Create Extract Process
These are the high-level steps to set up academic organization security for the Create Extract process:
Select the Apply Academic Org Security on the Statuses page.
Use the Academic Org Security page to grant or restrict access to academic organizations (Set Up SACR, Security, Secure Student Administration, User ID, Academic Org Security, Academic Org Security). Only those academic organizations defined using the Tree Manager are available for selection on the Academic Org Security page.
Use the Taxonomy/Campus page to link academic programs to academic organizations (Set Up SACR, Foundation Tables, Academic Structure, Academic Program Table, Taxonomy/Campus).
If you are not linking programs, link plans as described in the next step.
Use the Owner page to link academic plans to academic organizations (Set Up SACR, Foundation Tables, Academic Structure, Academic Plan Table, Owner).
If you are not linking plans, link programs as described in the previous step.
The Create Extract process performs the following steps if you select the Applying Academic Organization Security check box on the Statuses page:
Step 1: Select the program and plan for the CAS record
For a CAS record with type = applicant:
Select the academic program from the latest effective dated Campus Solutions admission application record (the CAS Details page displays this record).
Select the reported plan from the CAS Details record or if the reported plan does not exist, then select the plan that starts with the lowest alphabet from the latest effective dated Campus Solutions admission application record. For example, suppose if the reported plan does not exist and there are two plans: Biology and Zoology. Then, select Biology.
For a CAS record with type = student:
Select the academic program from the latest effective dated Campus Solutions student program record (the CAS Details page displays this record).
Select the reported plan from the CAS Details record or if the reported plan does not exist, then select the plan that starts with the lowest alphabet from the latest effective dated Campus Solutions student program record.
Step 2: Use the Taxonomy/Campus and Owner pages to find out the academic organizations that are linked with the selected academic program and academic plan.
Step 3: Use the Academic Org Security page to find out whether the user ID that you are using to run the Create Extract process has access to the academic organizations.
Step 4: If the user ID has access to the academic organization, include the CAS record in the extract.
Access the Academic Program PBI Data page ().
Image: Academic Program PBI Data page
This example illustrates the fields and controls on the Academic Program PBI Data page. You can find definitions for the fields and controls later on this page.
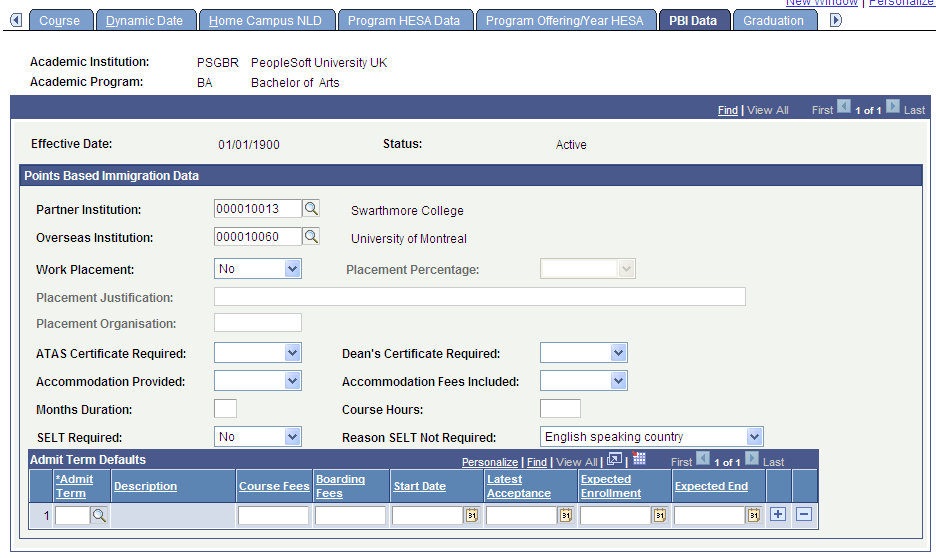
This page appears only if you have selected the PBI check box on the Academic Institution 6 or SA Features page. The values defined are used to populate the corresponding fields in new CAS records if no value is defined for the field at plan level. Values are also used during field derivation.
The Placement Percentage, Placement Justification, and Placement Organisation fields become available for entry if you select Yes in the Work Placement field. The Reason SELT Not Required field becomes available for entry if you select No in the SELT Required field.
Refer to the PBI Field Derivation documentation for information about derivation of the individual fields.
Access the Academic Plan PBI Data page ().
Image: Academic Plan PBI Data page
This example illustrates the fields and controls on the Academic Plan PBI Data page.
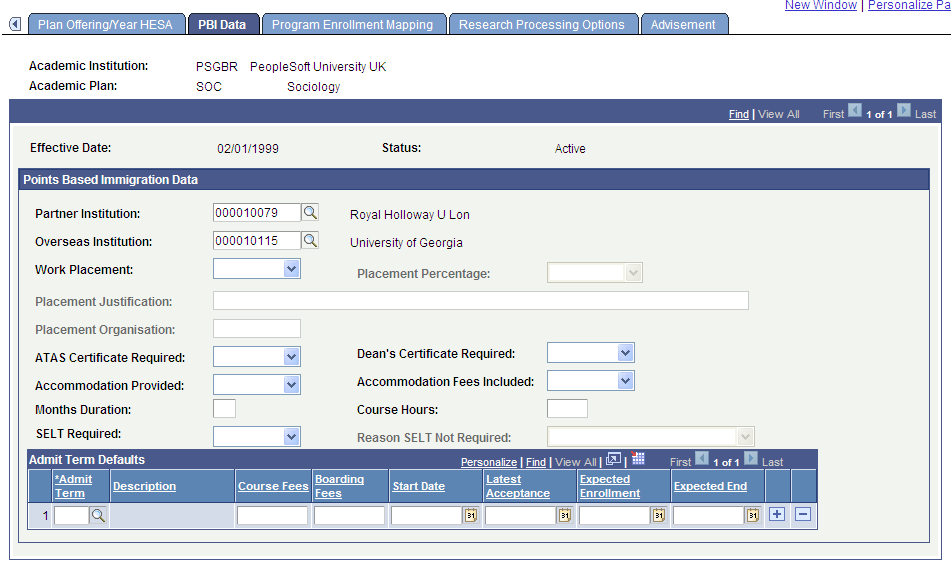
This page appears only if you have selected the PBI check box on the Academic Institution 6 or SA Features page. The values defined are used to populate the corresponding fields in new CAS records. Values are also used during field derivation.
Refer to the PBI Field Derivation documentation for information about derivation of the individual fields.
You will need to set up Campus Community communications to notify applicants and students about their assigned CAS numbers or fee update details. This section discusses the steps required to define the Event ID values that are used in the PBI Configuration page, the Import CAS Details process (for CAS Number notification), the Create Extract - update process (for Fee Update notification), the 3C Engine process and the Communications Generation process to create communications to notify applicants and students. You should also refer to the PeopleSoft Campus Community 9.0 documentation for setting up communications.
This section provides communications setup examples for sending CAS number notifications to applicants and students. Similar setups are required for Fee Update notification. The Fee Update notification should contain the relevant update data: First Year Course Fees, Course Fees Paid, Accommodation Fees Paid, and Boarding Fees Paid.
The PeopleSoft system provides a CASN administrative function that captures the variable data required to identify the CAS record that has been updated. The variable data can be used to generate communications, checklists or comments associated with an Event ID. No further setup is required for this function.
The following is the variable data that is automatically populated from the incoming CAS record:
Academic Career
Student Career Number
CAS Number
Image: Administrative Function Table page for CASN
This example shows the CASN administrative function.
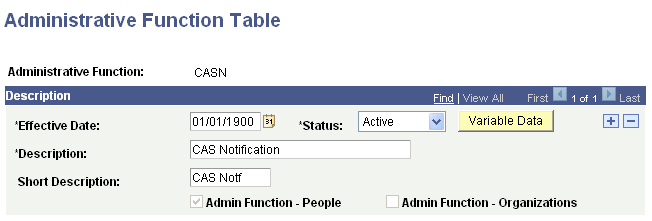
To access the Administrative Function table, select .
Creating Queries
Access the Query Manager page ().
The PeopleSoft system delivers example queries, one for CAS Number notifications to applicants (QA_SAD_PB_CASA) and one for CAS Number notifications to continuing students (QA_SAD_PB_CASB).
Create your own queries to select all the data you require for your communications. Refer to "Defining Communication Data Sources" in this section for information about data sources.
Each query requires the following:
The core record must be included in the query associated with the administrative function. For the CASN function, the CAS Details record (SAD_PB_CAS) must be included.
A prompt must be created for the applicant/student ID. The Unique Prompt Name must be changed to Person_ID.
Prompts must also be created for the variable data fields relating to the administrative function, ACAD_CAREER, STDNT_CAR_NBR and SAD_PB_CAS_NUMBER.
Image: Fields page for the QA_SAD_PB_CASA query
This example shows the selected fields for the QA_SAD_PB_CASA query.

Image: Query page for the QA_SAD_PB_CASA query
This example shows the selected records for the QA_SAD_PB_CASA query.
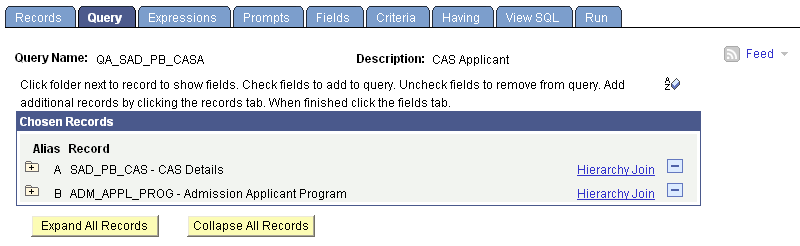
Image: Fields page for the QA_SAD_PB_CASB query
This example shows the selected fields for the QA_SAD_PB_CASB query.
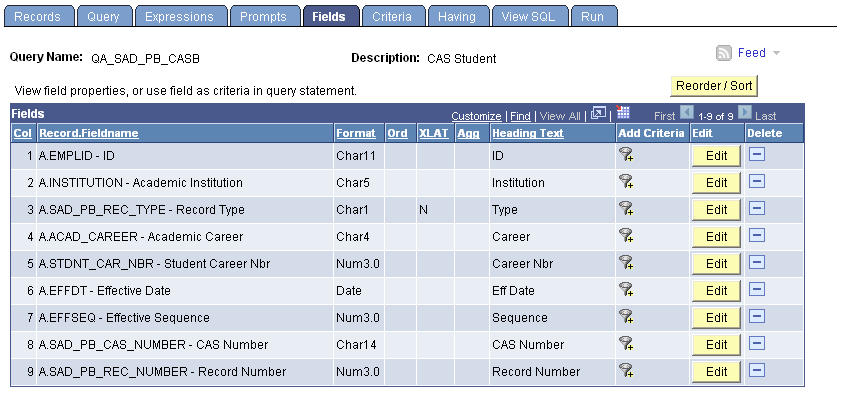
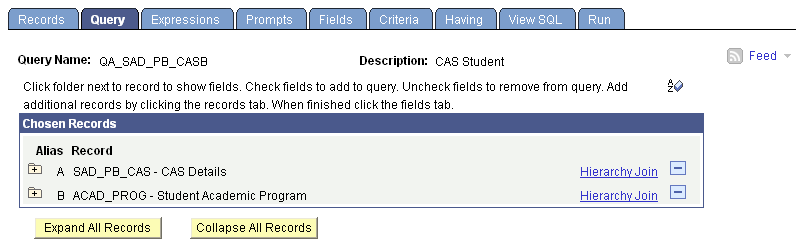
Image: Query page for the QA_SAD_PB_CASB query
This example shows the selected records for the QA_SAD_PB_CASB query.
Defining Communication Data Sources
Access the Communication Data Source page ().
Define Communication Data Sources for each query.
Image: Communication Data Source page for CASA
This example shows the CASA data source map ID.
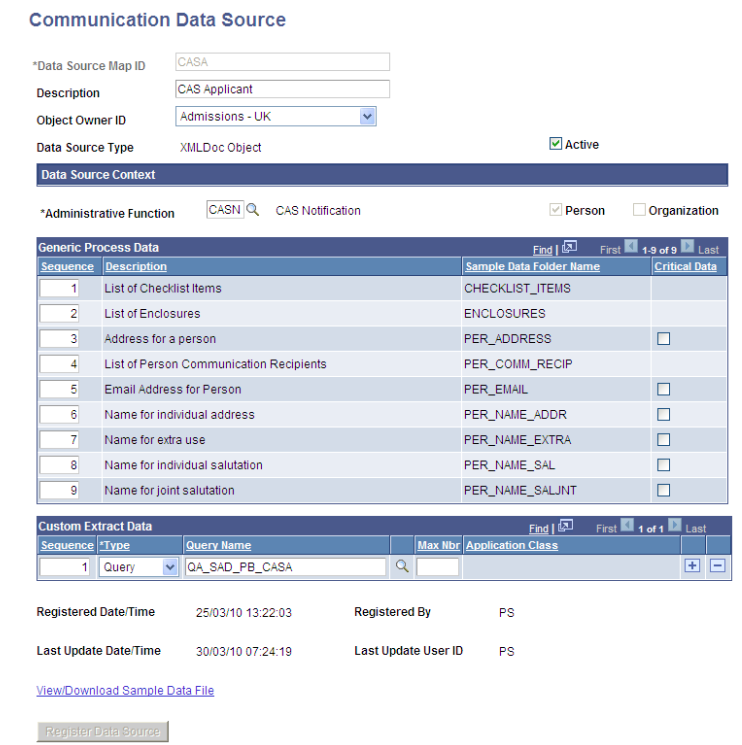
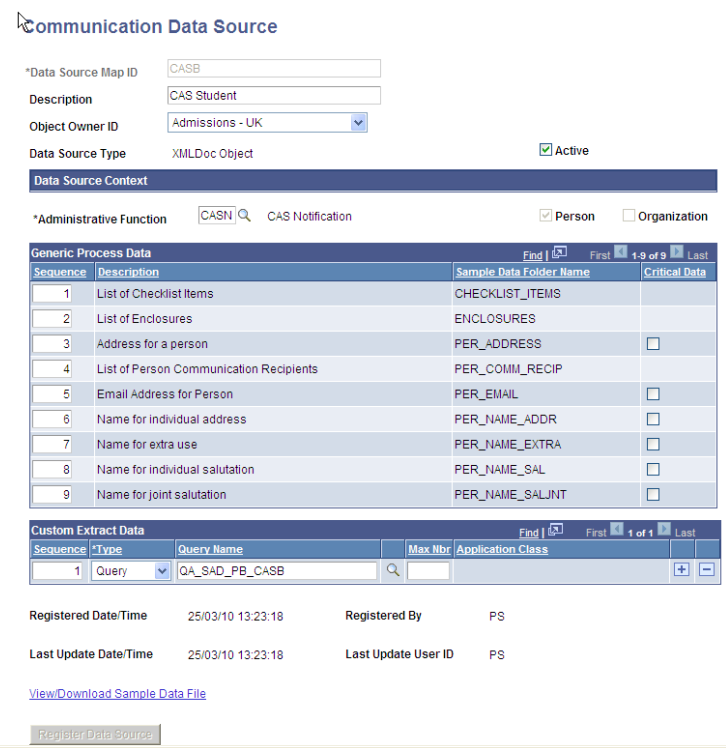
Image: Communication Data Source page for CASB
This example shows the CASB data source map ID.
Defining Report Definitions
Access the Definition page ().
Example templates are delivered that can be used in Report Definitions for CAS Number notifications to applicants (CASA_1) and CAS Number notifications to students (CASB_1). The templates have been created from the XML file downloaded from each Data Source using Oracle BI Publisher.
Create your own template files. There are several possible methods including installing BI Publisher for Word which creates a new menu option in Word. A template can then be created from the XML document downloaded from the Data Source page.
Image: Definition page for CASA
This example shows the Definition page for CASA.

Image: Template page for CASA
This example shows the Template page for CASA.
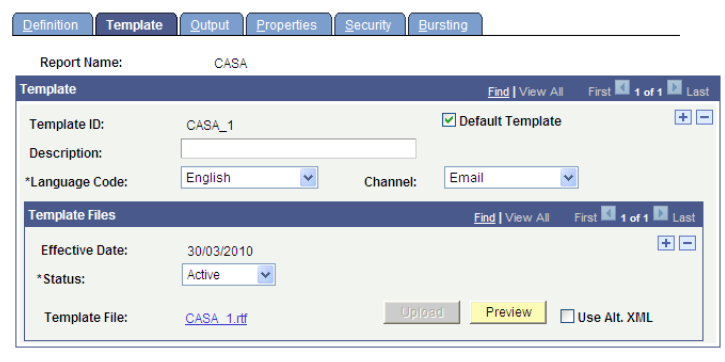
Image: Definition page for CASB
This example shows the Definition page for CASB.
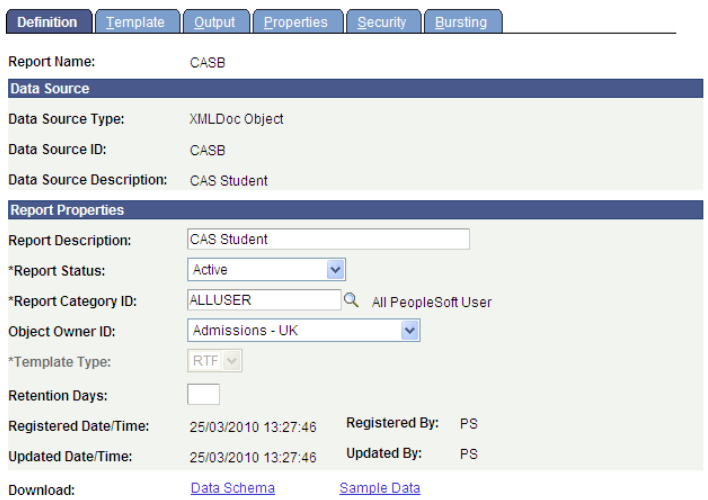
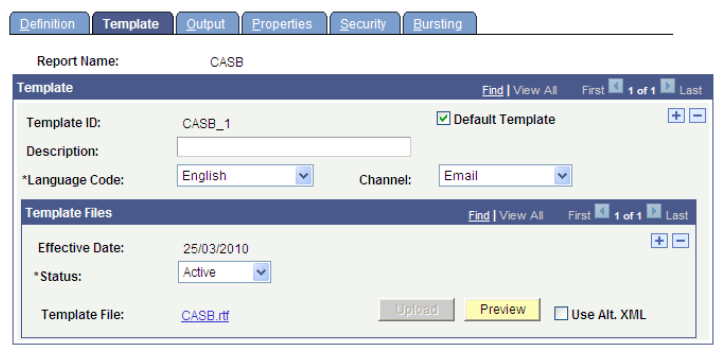
Image: Template page for CASB
This example shows the Template page for CASB.
Defining Standard Letters
Access the Standard Letters page ().
Create standard letters for applicants and students. Select Report Name to add the details.
Image: Standard Letters page for CSA
This example shows the Standard Letters page for CSA.
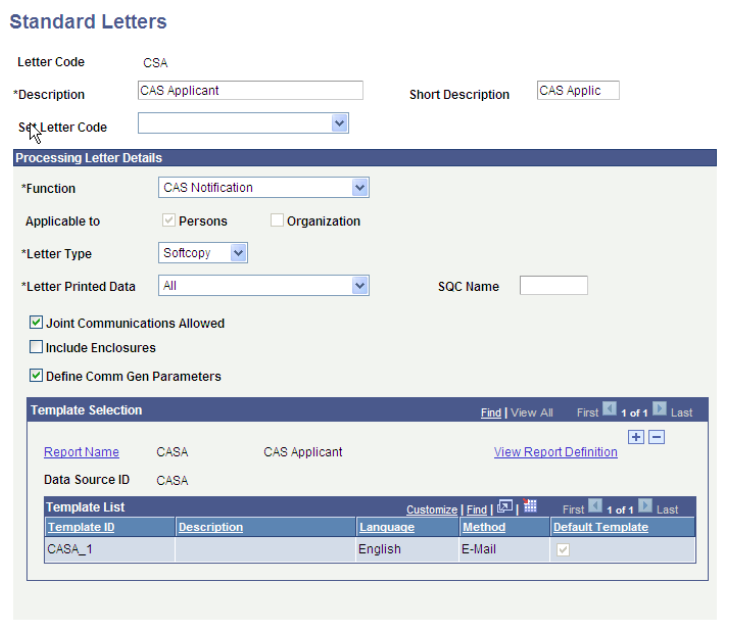
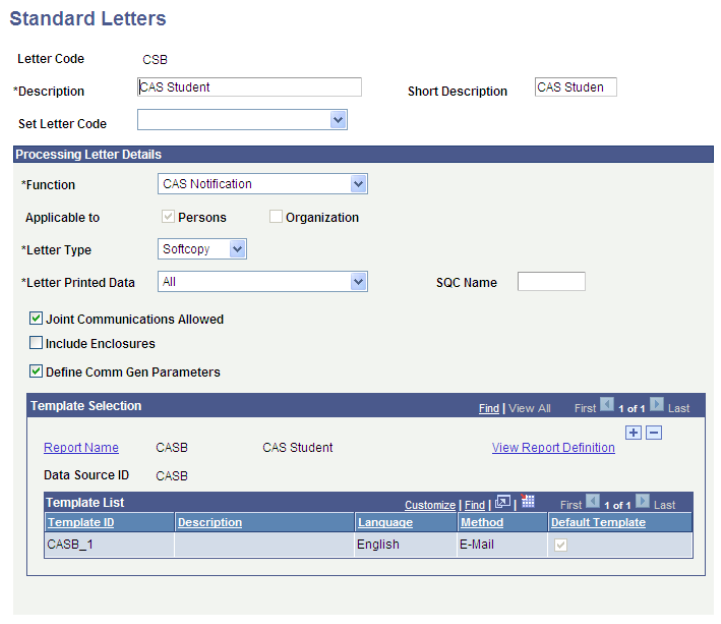
Image: Standard Letters page for CSB
This example shows the Standard Letters page for CSB.
Defining Communication Contexts
Access the Communications Context page ().
Create communication contexts for applicants and students.
Image: Communications Context page for CASA
This example shows Communications Context page for CASA.
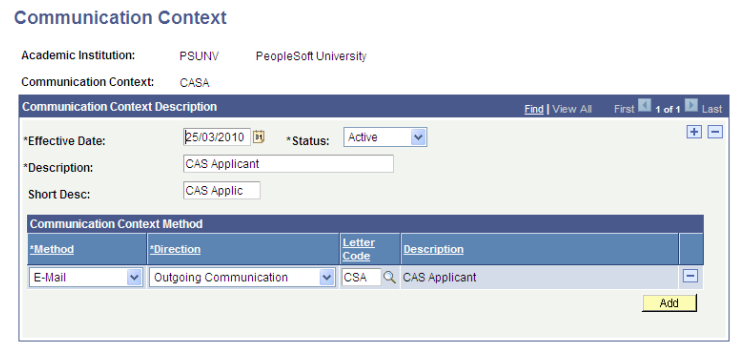
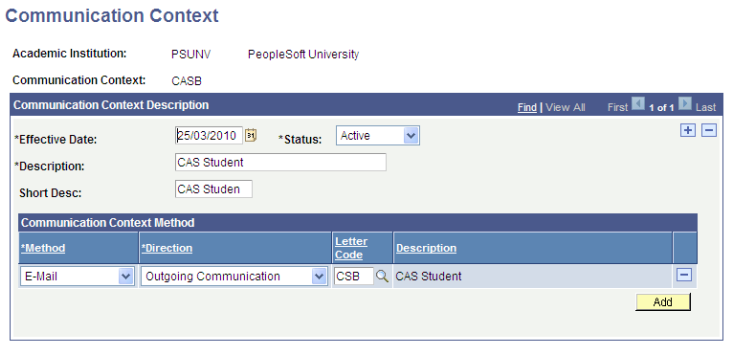
Image: Communications Context page for CASB
This example shows Communications Context page for CASB.
Defining Communication Categories
Access the Communications Category page ().
Create communication categories for applicants and students using the CASN administrative function and the communication contexts created in the previous step.
Image: Communications Categories page for CASA
This example shows the Communications Categories page for CASA.
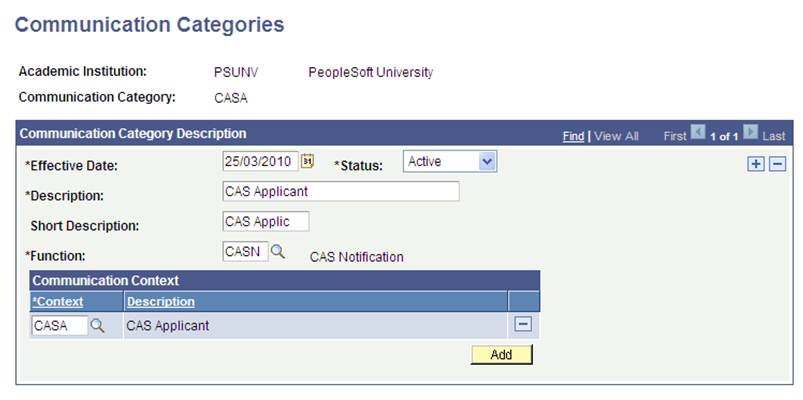
Image: Communications Categories page for CASB
This example shows the Communications Categories page for CASB.

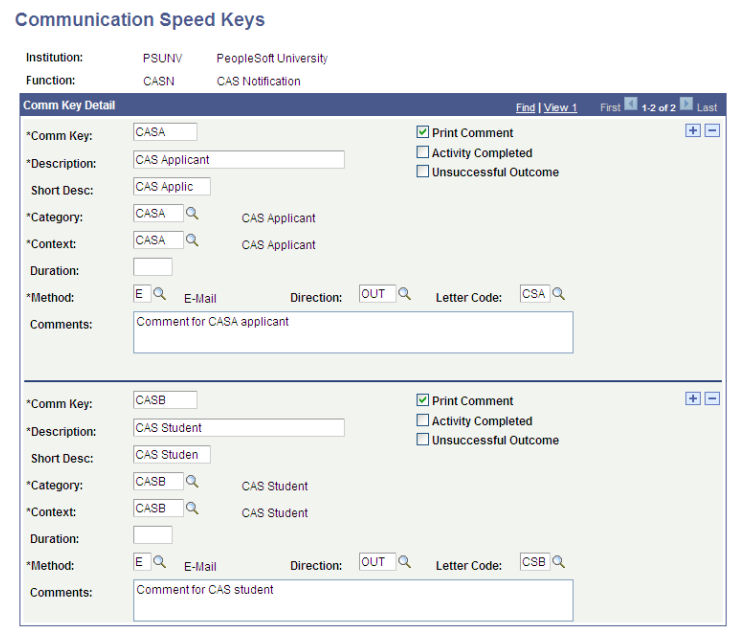
Defining Communication Speed Keys
Access the Speed Key Table page ().
Create speed keys for applicants and students using the CASN administrative function and the communication contexts and categories created in the previous steps.
Image: Communications Speed Keys page for CASA and CASB
This example shows the Communications Speed Keys page for CASA and CASB.
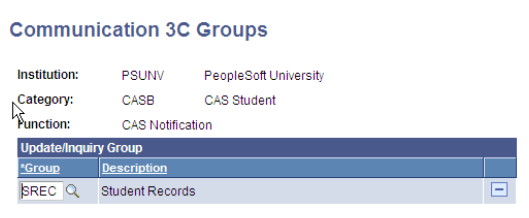
Defining Communication 3C Groups
Access the Communication 3C Groups page ().
Define the new categories for the appropriate Communication 3C Groups for the user depending on your institution's group setup (Set Up SACR, User Defaults, User 3C Group Summary).
Image: Communication 3C Groups page for CASA
This example shows the Communication 3C Groups page for CASA.
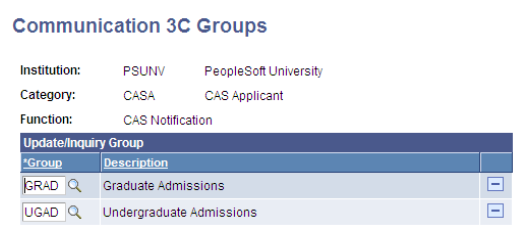
Image: Communication 3C Groups page for CASB
This example shows the Communication 3C Groups page for CASB.
Creating Event Definitions
Access the Event Definition page ().
Define events using the CASN administrative function and communication keys defined in previous steps. Additional communications, comments or checklists can be added to the events if required.
Image: Event Definition page for CASA
This example shows the Event Definition page for CASA.
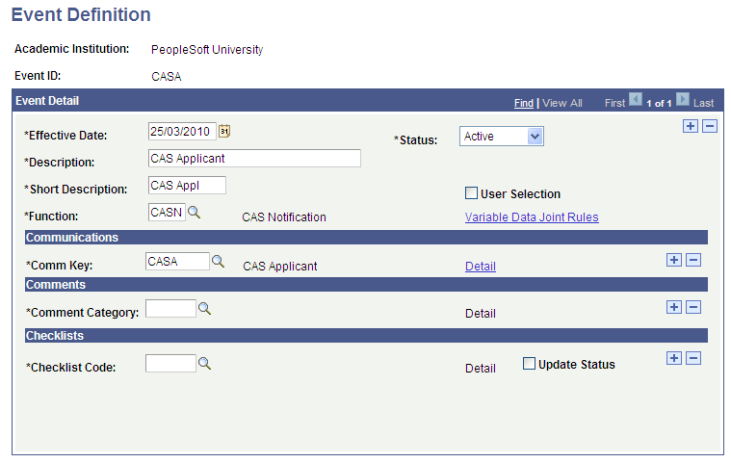
Image: Event Definition page for CASB
This example shows the Event Definition page for CASB.

Defining Event 3C Groups
Access the Event 3C Groups page ().
Define the new event IDs for the appropriate Communication 3C Groups for the user depending on your institutions group setup (Set Up SACR, User Defaults, User 3C Group Summary).
Image: Event 3C Groups page for CASA
This example shows the Event 3C Groups page for CASA.
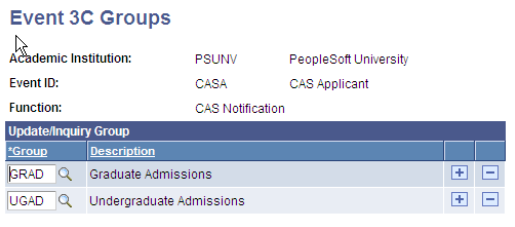
Image: Event 3C Groups page for CASB
This example shows the Event 3C Groups page for CASB.

Common Attribute Framework is enabled for the CAS Details page (SAD_PB_CAS) with a delivered record context. You can use this framework to add an additional fields link and secondary page to the CAS Details page. For more information on the CAS Details page, see the next section:
Creating and Maintaining CAS Details
For information on using Common Attribute Framework, refer to the Campus Community — Common Attribute Framework documentation.
See Understanding Common Attribute Framework
Image: Record Context page (Delivered Record Context for SAD_PB_CAS)
This example shows the delivered record context for SAD_PB_CAS.
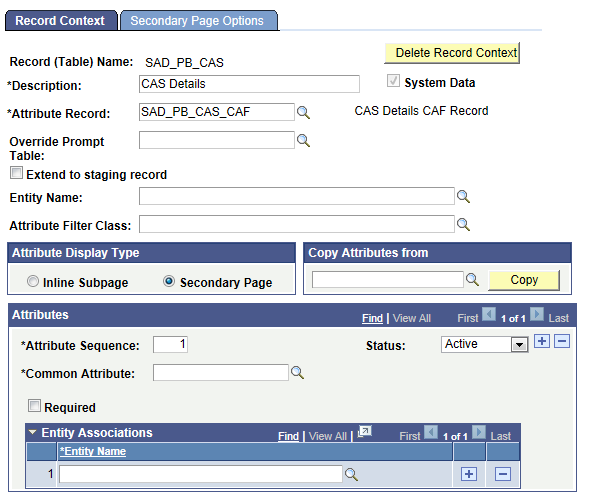
Image: Secondary Page Options page (Delivered Record Context for SAD_PB_CAS)
This example shows the delivered record context for SAD_PB_CAS.

When you add a minimum of one attribute to this record context, the Additional Details link will appear on the CAS Details page. Click that link to capture additional data. If no attribute is added to this record context, the CAS Details page will not display the link.