Applying FERPA Control
When students exercise rights under FERPA, they identify information that they do not want your institution to release about themselves. You must apply FERPA control to identify this information and prohibit the release of restricted information across your institution. Students have the option of permitting your institution to release any of the restricted information to specific internal publications.
You can use the FERPA page or the FERPA Quick Entry page to apply FERPA control from the administrative side or, if your institution has purchased PeopleSoft Campus Self Service, you can make students responsible for applying their own FERPA control over the internet from the FERPA self-service page.
This section discusses how to:
Apply or release FERPA restrictions.
Use the FERPA Quick Entry page.
Release FERPA data to publications.
Note: If your institution has licensed and implemented PeopleSoft Campus Self Service, students can use the FERPA self-service page to apply their own FERPA restrictions and to identify which restricted information your institution can include in specific internal publications.
See Using Self-Service Addresses, Names, Phones, and Demographic Data.
|
Page Name |
Definition Name |
Navigation |
Usage |
|---|---|---|---|
|
FERPA |
FERPA |
|
Apply or release FERPA restrictions to selected data for an individual. |
|
FERPA Quick Entry |
FERPA_ADMIN_QENTRY |
|
Apply or release FERPA restrictions to selected data for an individual. |
|
Release To Publication |
INST_PUB_CATG_SEC |
Click the link that appears on the FERPA Quick Entry page when an item is selected on the FERPA Quick Entry page. |
Specify or review publications to which restricted data may be released. |
Access the FERPA page () or the FERPA Quick Entry page ().
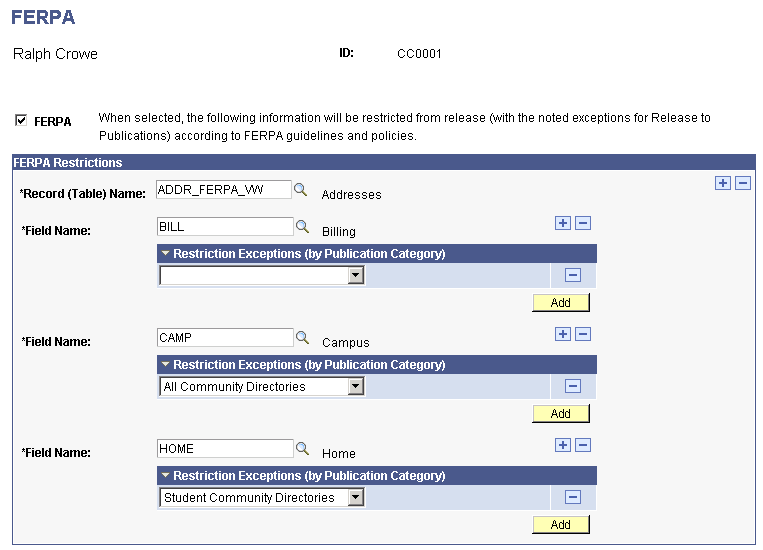
Image: FERPA page
This example illustrates the fields and controls on the FERPA page. You can find definitions for the fields and controls later on this page.
|
Field or Control |
Definition |
|---|---|
| FERPA |
Select this check box to indicate that the student has, in accordance with FERPA, instructed your institution not to release the information about them, and to display the FERPA Restrictions area at the bottom of the page, where you can select the record and field to restrict. |
FERPA Restrictions
|
Field or Control |
Definition |
|---|---|
| Record (Table) Name |
Enter the name of the FERPA_VW record, from the FERPA Control Page, that contains the type of information the student is restricting. |
| Field Name |
Enter the name of the controlled field on the FERPA_VW record that contains the specific information the student is restricting. The values displayed in the prompt are controlled by the FERPA Control setup page. |
| Restriction Exceptions (by Publication Category) |
Select each of the publications, from the Publications Categories page, to which the student gives you permission to release the otherwise restricted information. All Community Directories: Indicates that the student gives permission to release the otherwise restricted information for inclusion in all of your institution's internal community directories. Student Community Directory: Indicates that the student gives permission to release the otherwise restricted information for inclusion in your institution's internal student directory only. |
Note: Publication categories are used in PeopleSoft Campus Self Service. You can add new categories and add publications to the delivered categories, but do not delete the delivered categories.
Access the FERPA Quick Entry page ().
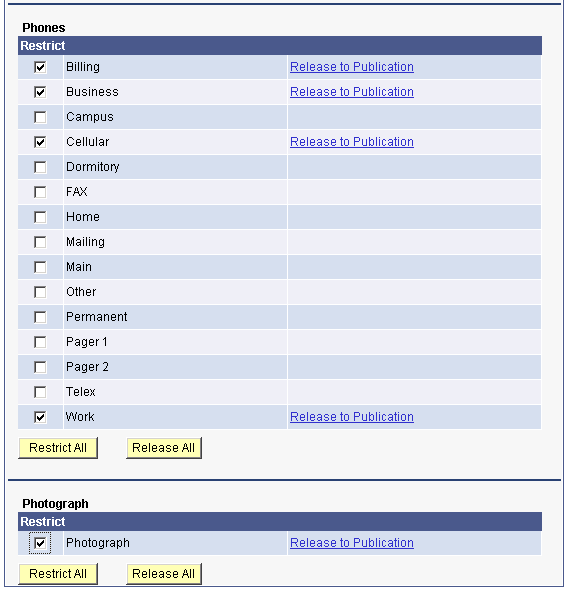
Image: FERPA Quick Entry page (1 of 4)
This example illustrates the fields and controls on the FERPA Quick Entry page (1 of 4). You can find definitions for the fields and controls later on this page.
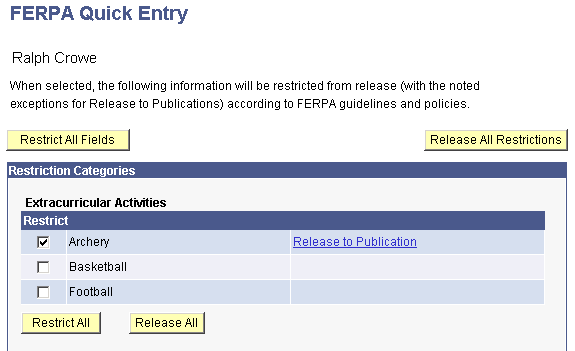
Image: FERPA Quick Entry page (2 of 4)
This example illustrates the fields and controls on the FERPA Quick Entry page (2 of 4). You can find definitions for the fields and controls later on this page.
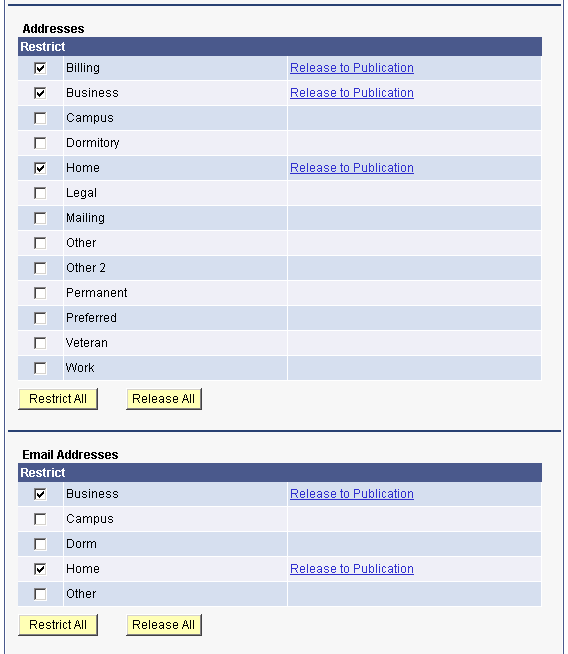
Image: FERPA Quick Entry page (3 of 4)
This example illustrates the fields and controls on the FERPA Quick Entry page (3 of 4). You can find definitions for the fields and controls later on this page.
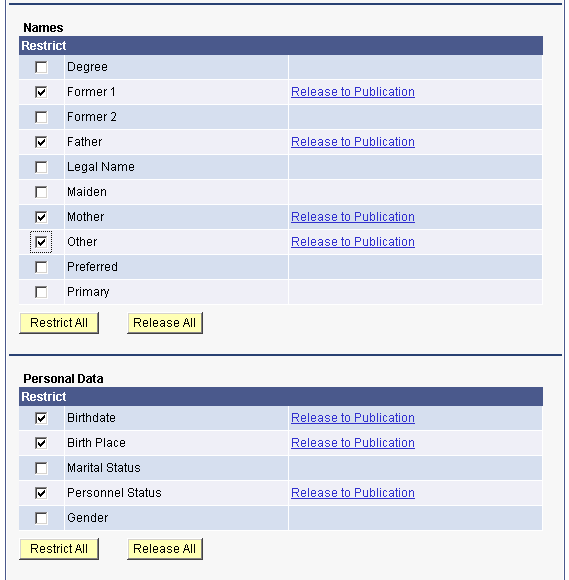
Image: FERPA Quick Entry page (4 of 4)
This example illustrates the fields and controls on the FERPA Quick Entry page (4 of 4). You can find definitions for the fields and controls later on this page.
|
Field or Control |
Definition |
|---|---|
| Restrict All Fields |
Click this check box to select the Restrict option for all fields in all categories on the entire page. |
| Release All Restrictions |
Click this button to clear the Restrict option for all fields in all categories on the entire page. |
Restriction Categories
The fields that appear for each category are based on the controlled fields identified for each FERPA_VW record on the FERPA Control page.
Note: Extracurricular Activities field names do not appear because the PeopleSoft system does not deliver sample control fields on the ACTVTS_FERPA_VW record. To set control fields for activities, use the FERPA Control page.
See Making Data Available for FERPA Privacy Control.
|
Field or Control |
Definition |
|---|---|
| Restrict |
Select this check box to indicate that the student prohibits the institution from releasing this information. |
| Release To Publication |
Select this link to access the Release To Publication page, where you can enter or review publications to which the restricted data may be released. |
| Restrict All |
Click this button to select the Restrict option for all fields in the category. |
| Release All |
Click this button to clear the Restrict option for all fields in this category. |
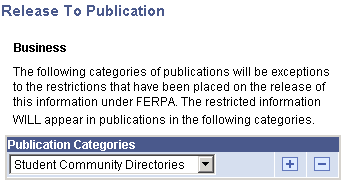
Access the Release To Publication page (click the link that appears on the FERPA Quick Entry page when an item is selected on the FERPA Quick Entry page).
Image: Release To Publication page
This example illustrates the fields and controls on the Release To Publication page. You can find definitions for the fields and controls later on this page.
|
Field or Control |
Definition |
|---|---|
| Publication Categories |
Select each publication, from the Publication Categories page, to which the student gives you permission to release this specific, otherwise restricted information. All Community Directories: Indicates that the student gives permission to release the otherwise restricted information for inclusion in all of your institution's internal community directories. Student Community Directories: Indicates that the student gives permission to release the otherwise restricted information for inclusion your institution's internal student directory only. |
Note: Publication categories are used in PeopleSoft Campus Self Service. You can add categories, and add publications to the delivered categories, but you should not delete the delivered categories.