Configuring the CRM 360-Degree View
This section provides an overview of the 360-degree constituent view and its security, lists prerequisites, and discusses how to:
Configure Campus Community data filters.
Configure Financial Aid data filters.
Configure Contributor Relations data filters.
Review configuration scenarios.
The CRM 360-Degree View component displays summary information that enables generalists and specialists to solve the higher education issues reported by constituents. In addition, the functionality enables a holistic, actionable view of the constituent that combines CRM and CS data in real time and is configurable depending on the role (marketer, recruiter, advisor, and so on) of the user who is accessing the component. CS provides this summary information through Integration Broker services. These services call the core CS system and respond to CRM with an aggregation of data that populates the following Higher Education sections of the 360 Degree View:
Biodemographic Information
3C's - Interactions
Recruiting
Admissions
Transfer credits
Academics
Finances
Financial aid
Transcript requests
Contributor Relations
Affiliations
See PeopleSoft CRM for Higher Education, "Working with the 360-Degree View."
The system uses an aggregation web service (SCC_CONSTITUENT - SCC_CONSTITUENT_READ360SUMMARY) to populate the 360-degree view. When CRM sends a request for constituent information, CS generates 12 local requests to gather data for each section of the 360-degree view and feeds that data to the aggregation service, which then sends a single populated message back to CRM based on the user's security access in both CS and CRM. This process follows a synchronous model; the message and response is processed in real time, using request handlers that are configured on the Request Handlers page.
When the system runs PERSON_BASIC_SYNC, it creates a record in CRM for every constituent with an EMPLID in CS. The CRM consumer role is needed to access certain CRM constituent information for an ID. For constituents who did not complete the standard student life cycle, a consumer role may not have been created. For example, a donor who never attended as a student will have an ID created in CRM during the sync, but no role will be assigned. To assign the consumer role to an individual in CRM, see PeopleSoft CRM Business Object Management, "Defining Person Business Objects," Viewing and Updating Primary Person Information. Once you have added the consumer role to an ID, the ID appears in search results for components like the Constituent 360 Degree View.
In the 360-degree constituent view pages, the CRM system honors CS security settings. For example, if a user chooses to view Financial Aid information but he does not have underlying access to the CS functional area, the data will not appear. For users to view all areas of the Higher Education Information portions of the 360-Degree View, they must have security access to the pages and components that feed the section. The following table describes how the information that is passed to CRM can be controlled:
|
Section Name |
Section Display Secured by |
|---|---|
|
Constituent Summary |
Academic Institution Security |
|
Checklists/Communications/Comments |
3C Group Security |
|
Recruiting |
CRM system security |
|
Admissions |
Application Center Security |
|
Transfer Credits |
No row-level security view applied |
|
Academics |
Academic Institution Security, Institution/Campus Security, Institution/Career Security, Academic Program Security, Plan settings |
|
Transcript Requests |
Academic Institution Security, Transcript Type Security |
|
Student Financials |
Business Unit security |
|
Financial Aid |
Academic Institution Security, Security Views |
|
Contributor Relations |
Academic Institution Security, CR Business Unit Security |
|
Affiliations |
Academic Institution Security |
In addition, Security View settings for each request handler defined on the Request Handlers page affect a user's view.
Understanding Request Handlers
CS system request handlers have a significant impact on the security of many components in the 360-Degree View, because they enable the setting of particular security views. There is one overall, externally available request handler for the "aggregation service" (SCC_CONSTITUENT), and then each of the components has its own internal request handler. This service interacts with CRM and serves as the front end to all the others, which gather the information for CRM internally in CS. Request handlers are defined on the Request Handlers page The CRM for Higher Education Developer's Guide contains more complete details about security.
Setup is required in both the CS and CRM systems to enable the CRM 360-degree view. PeopleSoft CRM for Higher Education documents CRM setup requirements. Within the CS system, you must enable CRM integration on the SA Features page and set up data filtering parameters using the Configure Integrations component.
|
Page Name |
Definition Name |
Navigation |
Usage |
|---|---|---|---|
|
Configure Integrations - Campus Community |
SCC_WSC_COMMUN |
|
Define or limit the Campus Community data to be picked from CS for displaying in the CRM 360–degree view. |
|
Configure Integrations - Financial Aid |
SCC_WSC_FINANC |
|
Define or limit the Financial Aid data to be picked from CS for displaying in the CRM 360–degree view. |
|
Configure Integrations - Contributor Relations |
SCC_WSC_FINANC |
|
Define or limit the Contributor Relations data to be picked from CS for displaying in the CRM 360–degree view. |
Access the Campus Community page ().
Image: Campus Community page
This example illustrates the fields and controls on the Campus Community page. You can find definitions for the fields and controls later on this page.
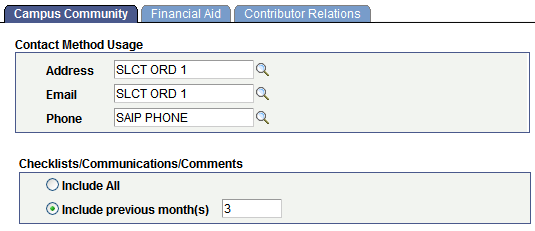
The fields on this page enable you to define the data that should be included in the EIPs that populate the Summary portion of the CRM 360-degree view.
Contact Method Usage
The Address, Email, and Phone fields define the order in which the system searches for and uses the associated data. Address and phone usage settings are defined on the Address Usage and Phone Usage pages in PeopleSoft Campus Community.
Checklists/Communications/Comments
A large volume of data pertaining to 3Cs may be available. Use these options to limit the data that should be sent to populate the CRM 360-degree view. You can either Include All data or data for the past few months. By entering a value for Include previous month(s), such as 3, you limit the 3C data to the past 3 months. Three months is the recommended 3C period to avoid potential data relevance and performance issues; however, your institution should adjust this period according to its business processes.
Access the Financial Aid page ().
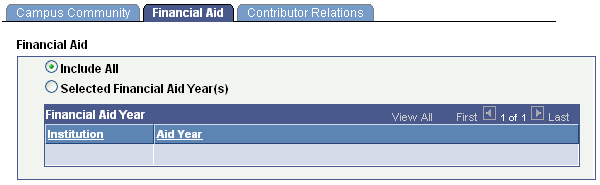
Image: Financial Aid page
This example illustrates the fields and controls on the Financial Aid page. You can find definitions for the fields and controls later on this page.
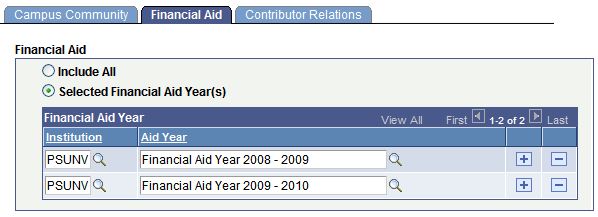
The fields on this page enable you to define the data that should be included in the EIPs that populate the Financial Aid portion of the CRM 360-degree view. That page displays one aid year at a time in the grid, and lists the current aid year first.
Select the option to Include All financial aid year data for a person in the message sent to CRM 360-degree view, or only data from Selected Financial Aid Year(s).
Access the Contributor Relations page ().
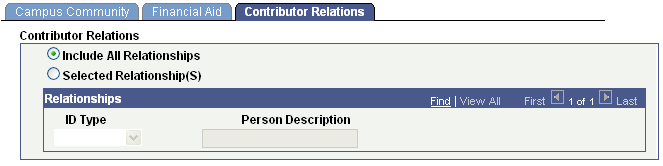
Image: Contributor Relations page
This example illustrates the fields and controls on the Contributor Relations page. You can find definitions for the fields and controls later on this page.
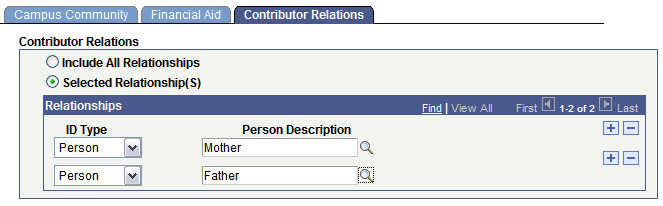
The fields on this page enable you to define Person/Org Relationship data that should be included in the EIPs that populate the Contributor Relations portion of the CRM 360-degree view. That part of the 360-degree view displays all summarized giving information for the relationship.
It is possible that a constituent may have relationships with other persons and organizations, and the default value on this page is to Include All Relationships. However, your institution may not want to include every relationship in the CRM 360-degree view. So, select a relationship option to define what relationships are applicable to be sent to CRM. If you choose Selected Relationship(s), then you must select the ID Type and Person Description for each selected relationship. Only those relationships selected here will be applicable for sending across to CRM 360-degree view. Selecting pertinent relationships only, such as parents or spouse, is recommended.
This section provides examples and sample step-by-step procedures for enabling and configuring:
360-degree view.
EIPs.
Test score post.
Configuring the 360-Degree View
To set up services filter data:
Select
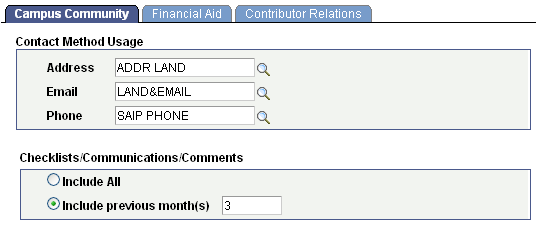
In the Contact Method Usage group box , Address field, select ADDR LAND.
In the Email field, select LAND&EMAIL.
In the Phone field, select SAIP PHONE.
In the Checklists/Communications/Comments check box, select the Include Previous Months option and enter 3 in the adjacent box.
Image: Example of Campus Community configuration
This example illustrates the fields and controls on the Example of Campus Community configuration. You can find definitions for the fields and controls later on this page.
Click the Financial Aid tab.
In the Financial Aid group box, select the Include All option.
Image: Example of Financial Aid configuration
This example illustrates the fields and controls on the Example of Financial Aid configuration. You can find definitions for the fields and controls later on this page.
Click the Contributor Relations tab.
In the Contributor Relations group box, select the Include All option.
Image: Example of Contributor Relations configuration
This example illustrates the fields and controls on the Example of Contributor Relations configuration. You can find definitions for the fields and controls later on this page.
Click the Save button.
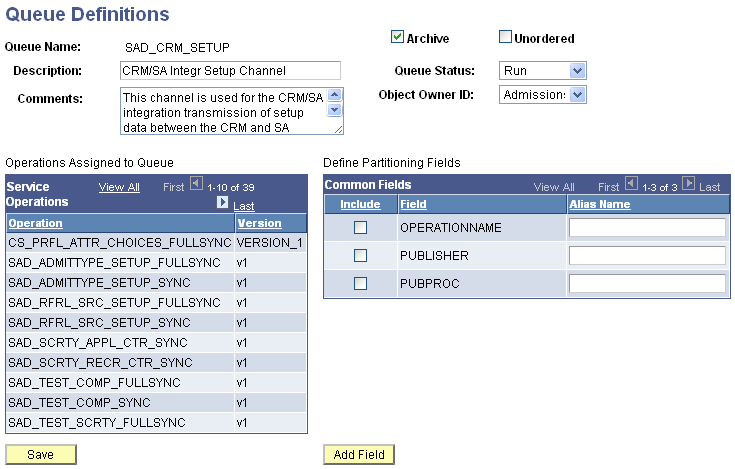
Configuring EIPs
To set up queues:
Select
Change the Queue Status to Run for the following queues, if they are not already set: SAD_CRM_SETUP, SAD_CRM_DATA, PERSON_DATA.
Image: Example of setup on Queue Definitions page
This example illustrates the fields and controls on the Example of setup on Queue Definitions page. You can find definitions for the fields and controls later on this page.
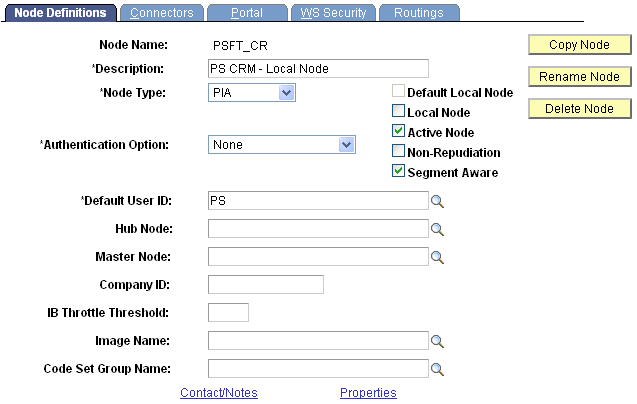
Configuring Test Score Posting
To manually set a node as segment aware and configure a node to handle segmented messages:
Select
Select the CRM node (PSFT_CR) with which to work and click the Search button.
The Node Definitions page appears.
Select the Segment Aware check box.
Click the Save button.
Image: Example of setup on Node Definitions page
This example illustrates the fields and controls on the Example of setup on Node Definitions page. You can find definitions for the fields and controls later on this page.
For further details, refer to the CRM for Higher Education Developer's Guide on My Oracle Support.