Creating a Proxy and Delegating Access
Delegated access occurs when a person gives another person access to his data. The person who delegates access is known as the delegator. The other person, to whom access is delegated, is known as the proxy. When a proxy is given access, the proxy can then view data or perform some actions on behalf of the delegator.
This section discusses how a delegator gives a proxy access to data or transactions.
|
Page Name |
Definition Name |
Navigation |
Usage |
|---|---|---|---|
|
Share My Information - Summary |
SS_CC_DA_HDR |
|
A delegator uses this page to:
In the Student Center and User Preferences pages, the Share My Information button or link appears only if the delegator has access to the Share My Information component and has access to at least one delegation transaction defined in the Delegation Transaction Setup page. |
|
Share My Information - Terms and Conditions |
SS_CC_DA_DELEG_AGR |
On the Share My Information - Summary page, click the Delegate Access to a New Contact button. |
Delegator accepts the academic institution’s terms and conditions. Every time a delegator creates a proxy, the delegator must first accept the terms and conditions outlined by the academic institution. |
|
Share My Information - Details |
SS_CC_DA_DTL |
|
The delegator uses this page to:
|
Access the Share My Information - Summary page ().
Image: Share My Information - Summary Page
This example illustrates the fields and controls on the Share My Information - Summary Page. You can find definitions for the fields and controls later on this page.
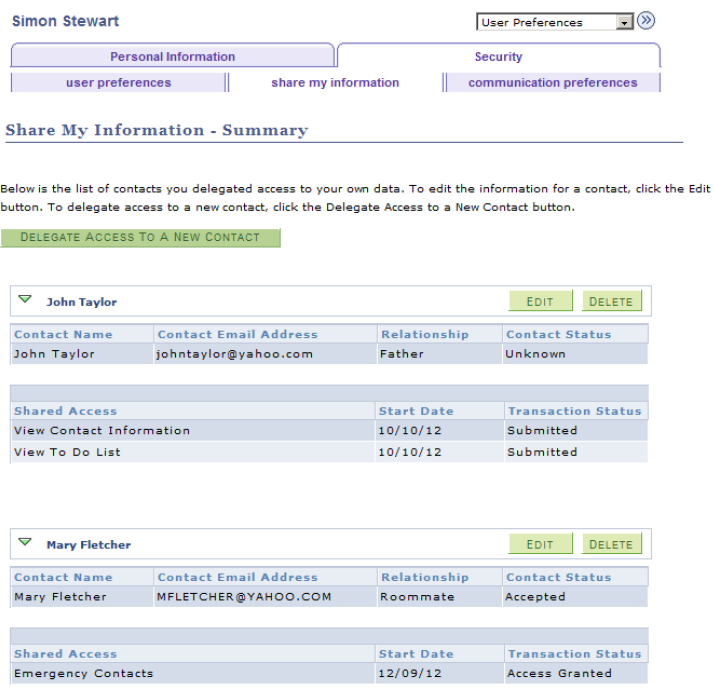
To create a new proxy, click the Delegate Access to a New Contact button.
To edit the proxy details (for example, to revoke access, or to change the email address of the proxy), click the corresponding Edit button. The Share My Information - Details page appears.
To delete the proxy, click the corresponding Delete button. This revokes all transactions delegated to the proxy and the proxy no longer appears on the Share My Information - Summary page. However, the information remains in the records for history purposes.
Access the Share My Information - Terms and Conditions page (click the Delegate Access to a New Contact button on the Share My Information - Summary page).
Image: Share My Information - Terms and Conditions Page
This example illustrates the fields and controls on the Share My Information - Terms and Conditions Page. You can find definitions for the fields and controls later on this page.
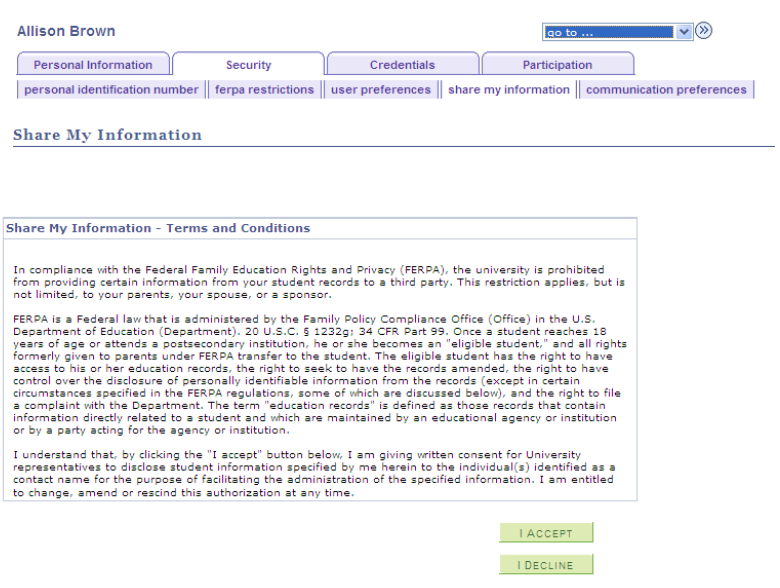
To modify the terms and conditions, edit the 14025, 60 message catalog.
Access the Share My Information - Details page (click the I Accept button on the Share My Information –Terms and Conditions page.)
Image: Share My Information - Details Page
This example illustrates the fields and controls on the Share My Information - Details Page. You can find definitions for the fields and controls later on this page.
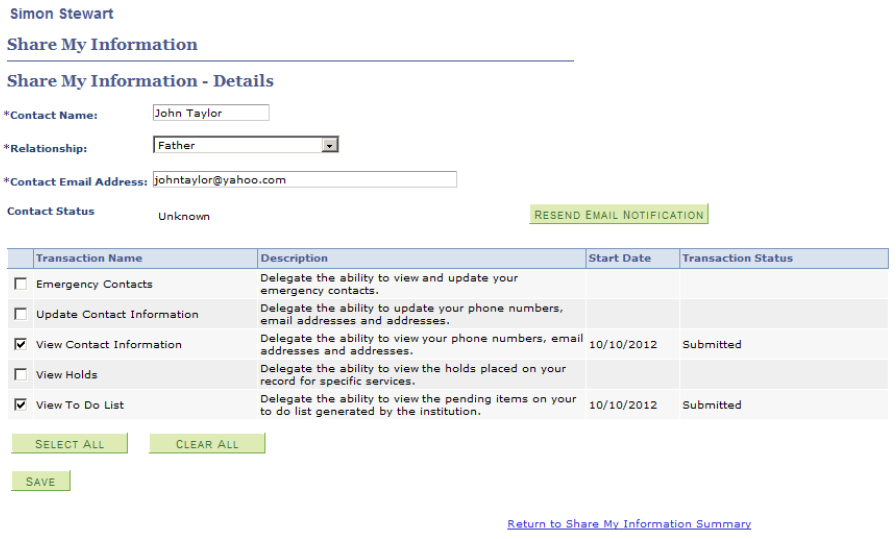
Use this page to provide the proxy’s name, the proxy’s relationship with the delegator, and the proxy’s email address. It is important that the delegator ensures that the email address is correct. The system uses the email address to send an email notification to the proxy. The email notification contains information on how to sign into Campus Solutions, which transactions the proxy has been granted access to, and how to be identified as the right person that has been granted access to the delegator’s data.
The list of transactions show only transactions that the delegator is allowed to delegate. When the delegator selects a transaction name, the system automatically enters the current date as the start date in the transaction grid. The delegator cannot edit this date. To end or revoke a transaction, the delegator must deselect the transactions from the list.