11 Work with EDD Transactions
This chapter contains these topics:
Using the EDD Workbench (P00EWB) you can view transactions (Email, FTP, SFTP, and Direct Print) to determine the status and select a transaction to view additional information about the transaction. As EDD files can become large, you can also use the workbench to purge transactions and free up space on your system.
11.1 Viewing Transactions
JD Edwards recommends that you occasionally review your EDD transactions to verify that they transmit successfully or to view other information about the transaction. To view only transactions with your user ID, set the processing option. You can also enter values in the fields in the header portion of the screen to narrow your selection.
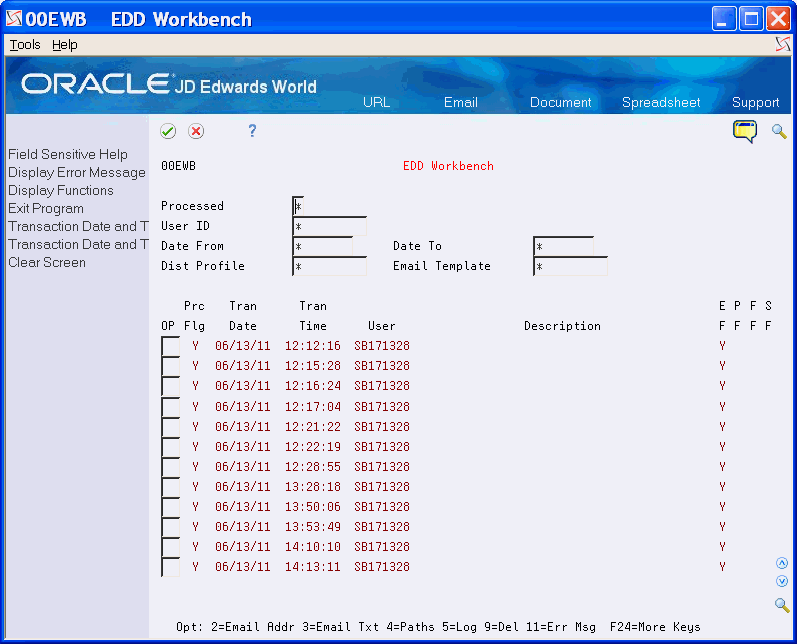
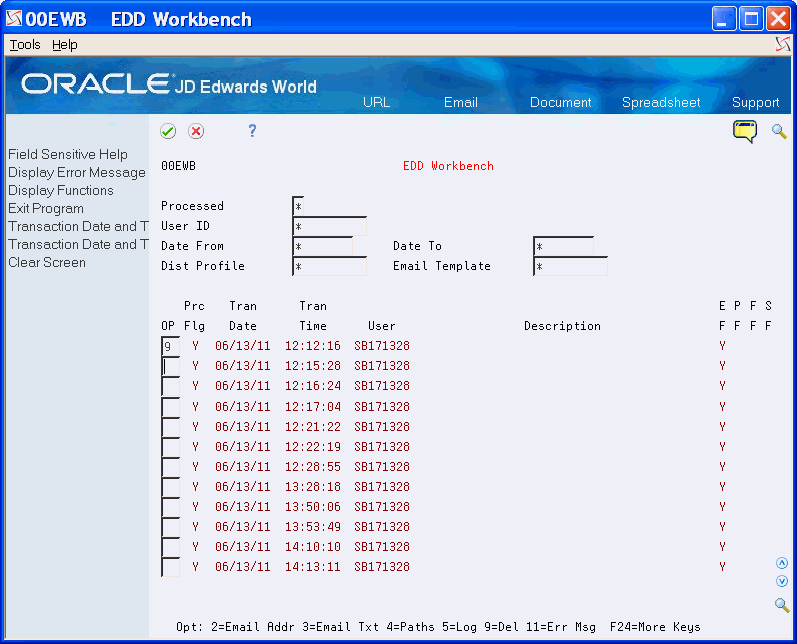
Use these options to access programs and screens to view the data for a transaction:
| Option | Description |
|---|---|
| 1 | Generic Text Window to add a memo |
| 2 | EDD History Detail (P00EWB1) to view email addresses |
| 3 | EDD History Text (P00EWB2) to view the location of email text that the system stores in the EDD Transaction Master table (F00E06). |
| 4 | EDD Transaction Paths (P00EWB3) to view the location of body text for an email and the log file path that the system stores in the EDD Transaction Detail table (F00E061) |
| 5 | Log file from the EDD Transaction Text table (F00E062) to determine if an error exists for the transaction. |
| 8 | Audit Information Window |
| 11 | Data Dictionary Glossary error messages. |
| 15 | Display a text editor with the log file. |
From Electronic Document Delivery Menu (G00E), choose EDD Workbench
-
On EDD Workbench, to narrow your search, complete any of the following optional fields and click Enter:
-
Processed
-
User ID
-
Date From
-
Date To
-
Distribution Profile
-
Email Template
-
-
Complete the Option field.
| Field | Description |
|---|---|
| Processed | Flag to indicate status of EDD transaction. This flag will be updated in the EDD transaction file with the process status. Valid values are:
' ' - Unprocessed, the transaction has not been processed, or process not enabled for transaction. 'Y' - Processed successfully. 'E' - Error in processing. 'U' - Processing began, but was interrupted. |
| User ID | The person who originally entered the transaction. |
| Date From | The beginning date for which the transaction or code is applicable. |
| Date To | The ending date for which the transaction or code is applicable. |
| Distribution Profile | This is the name of the Distribution Profile. In EDD, a Distribution Profile is used to store format and distribution options for an Email. |
| Email Template | This is the Email template name. An Email template contains the Email subject line and/or the body text of an Email. The body text may be contained directly on the Email template, or may be contained in an HTML file which the template refers to. |
| EF (Email Processed) | Flag to indicate the status of an Email process. This flag will be updated in the EDD transaction file with the process status. Valid values are:
' ' - Unprocessed, the transaction has not been processed, or this process not enabled for transaction. 'Y' - Processed successfully. 'E' - Error in processing. 'U' - Processing began, but was interrupted. |
| PF (Print Processed) | Flag to indicate the status of a Print process. This flag will be updated in the EDD transaction file with the process status. Valid values are:
' ' - Unprocessed, the transaction has not been processed, or this process not enabled for transaction. 'Y' - Processed successfully. 'E' - Error in processing. 'U' - Processing began, but was interrupted. |
| FF (FTP Processed) | Flag to indicate the status of an FTP process. This flag will be updated in the EDD transaction file with the process status. Valid values are:
' ' - Unprocessed, the transaction has not been processed, or this process not enabled for transaction. 'Y' - Processed successfully. 'E' - Error in processing. 'U' - Processing began, but was interrupted. |
| SF (SFTP Processed) | Flag to indicate the status of an SFTP process. This flag will be updated in the EDD transaction file with the process status. Valid values are:
' ' - Unprocessed, the transaction has not been processed, or this process not enabled for transaction. 'Y' - Processed successfully. 'E' - Error in processing. 'U' - Processing began, but was interrupted. |
11.2 Purging Transactions
Occasionally, you might want to purge obsolete transactions or free up space on your system. When you purge transactions, the system removes the data from the following tables:
-
EDD Transaction Master (F00E06)
-
EDD Transaction Detail (F00E061)
-
EDD Transaction Text (F00E062)
-
EDD Transaction Paths (F00E063)
-
EDD Transaction Variables (F00E064)
-
EDD Email Client Server File (F00E06X)
Purging transactions includes the following tasks:
-
To purge transactions manually
-
To purge transactions by batch
To purge transactions manually
From Electronic Document Delivery Menu (G00E), choose EDD Workbench
-
On EDD Workbench, locate transactions:
-
Enter 9 in the Option field next to the transactions you want to purge and click Enter.
The system displays a window with a warning for each transaction you want to purge.
-
Press F6 to confirm the purge.
To purge transactions by batch
From Electronic Document Delivery Menu (G00E), choose EDD History Purge
You can purge a large number of transactions at once using a DREAM Writer, the EDD History Purge Report program (P00EPURGE).
Use the data selection to choose the records that you want to delete.
JD Edwards recommends that you run this program in proof mode first and review the results on the report. The report includes the number of records, user ID, transaction type and other information for each record that you want to delete. Adjust the data selection until you are satisfied with the results on the report. After you are satisfied with the results, run the program in final mode. The final report includes the number of records the program removes from each of the files.
Additionally, you can use the Import/Export function to export this report to an export file on the Integrated File System. See Section 4.3, "Exporting Data by Batch" for more information.