| Oracle® Retail Xstore Point of Service Manager's Guide Release 19.0 F25016-03 |
|

 Previous |
 Next |
| Oracle® Retail Xstore Point of Service Manager's Guide Release 19.0 F25016-03 |
|
Previous |
Next |
Customer Maintenance includes activities related to entering a new customer into the customer database, updating customer information, and viewing or printing customer information. Customer Maintenance is typically initiated when an employee performs a register transaction and discovers that the customer's name is not in the database and must be entered for the first time. Customer maintenance is also required when customer information is found to be incorrect and must be changed, or when it is incomplete and additional data must be entered.
The Customer Maintenance screens are essentially the same whether accessed through the Back Office or through the register. Refer to the Oracle Retail Xstore Point-of-Service User Guide for detailed instructions on modifying customer records.
|
Note: The Customer Maintenance activities that may be accessed are controlled by each user's security level. An associate must have the proper security privileges to perform any customer maintenance. |
|
Note: Because each Oracle Retail Xstore Point-of-Service menu is configurable, the button functions and the menu options on your system may appear in a different order or have different text than the examples shown in this guide. |
Associates with the correct security privileges may access Customer Maintenance from the Back Office Main Menu.
In addition to all the customer maintenance functions available from the register, the Back Office Customer Maintenance Menu also offers a Customer List Report. Refer to the Oracle Retail Xstore Point-of-Service Reports Guide for more information.
Select the Back Office menu button from the Register Login screen.
|
Note: Access to the back office functions is controlled by security levels. You must have the correct security privileges to access the Back Office. |
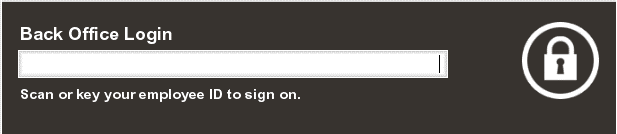
When prompted, scan or enter your employee ID and press Enter.
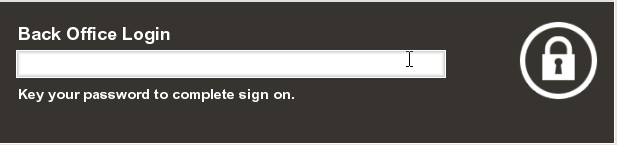
Enter your password and press Enter.
|
Note: If your system is set up to use a Biometric Fingerprint device, an Employee ID Login prompt displays. Use the device to scan your fingerprint rather than entering your user ID and password. Scanned and keyed entry is also supported at this prompt. |
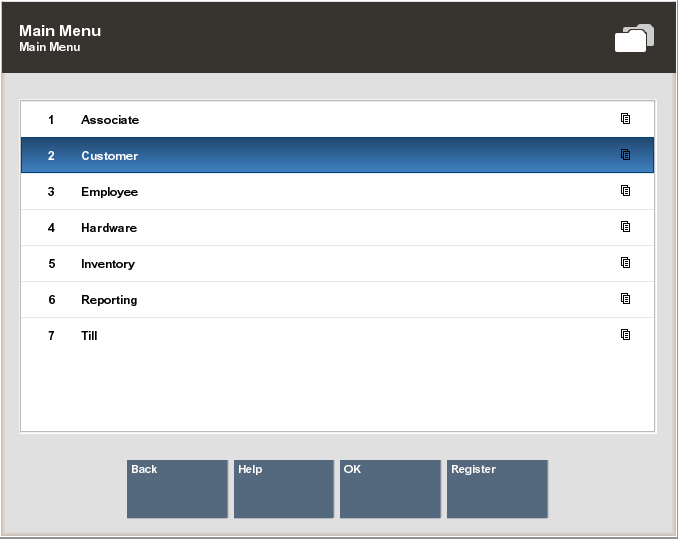
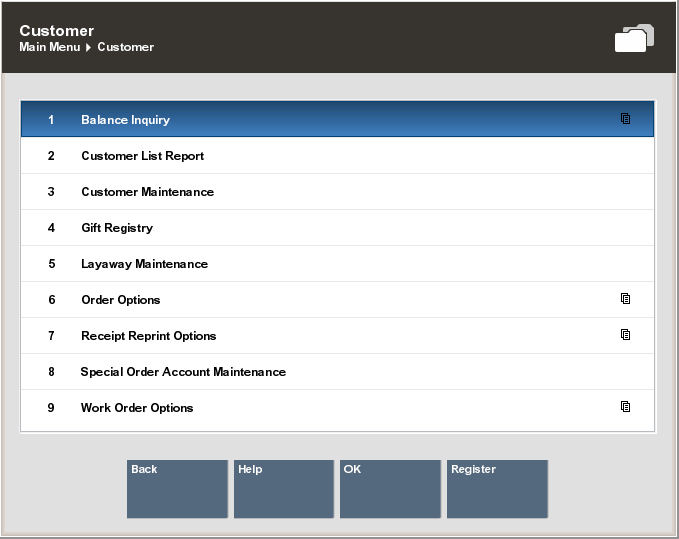
From the Back Office Main Menu, select the Customer option and press Enter.
Several sub-menu options appear:
Balance Inquiry - Select this option to track the activities that are related to various customer-related transactions. Refer to Balance Inquiry for more information.
Customer List Report - Select this option to run the Customer List Report.
Refer to the Oracle Retail Xstore Point-of-Service Reports Guide for more information about this report.
Customer Maintenance - Select this option to maintain customer data as explained in this chapter.
Gift Registry - Select this option to maintain gift registry accounts. Refer to Gift Registry for more information.
Layaway Maintenance - Select this option to maintain customer layaway accounts. Refer to Layaway Maintenance for more information.
Order Options - Select this option to maintain Oracle Retail Order Broker Cloud Service (formerly Locate) order accounts. Refer to Order Broker Maintenance for more information.
Receipt Reprint Options
Special Order Account Maintenance - Select this option to maintain special order accounts. Refer to Special Order Maintenance.
Work Order Options - Select this option to maintain customer work order accounts. Refer to Work Order Maintenance for more information.
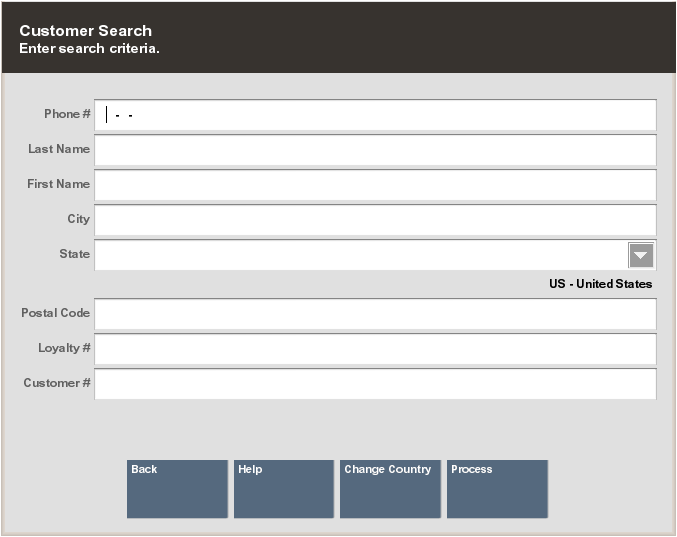
From the Customer menu, select Customer Maintenance.
Enter your search criteria and then select Process.
Tip: Enter as much information as possible in the Customer Search form to limit the number of customer records that are returned. You may enter partial names in the Last and First name fields.
The maximum number of returned records is configurable. If your search results exceed that number, you may see a message indicating there are too many results.
If the name you want is not listed, select the Back option to return to the Customer Lookup form. Enter the customer's full name or make additional entries in the other searchable fields. Select Process to search again.
When applicable, the Change Country menu option provides the ability to search for customers from countries other than the country where the store is located. For example, if you change the country to Canada, the State form field will list Canadian provinces, and if Mexico is selected as the country, then the State form field will list Mexican states.
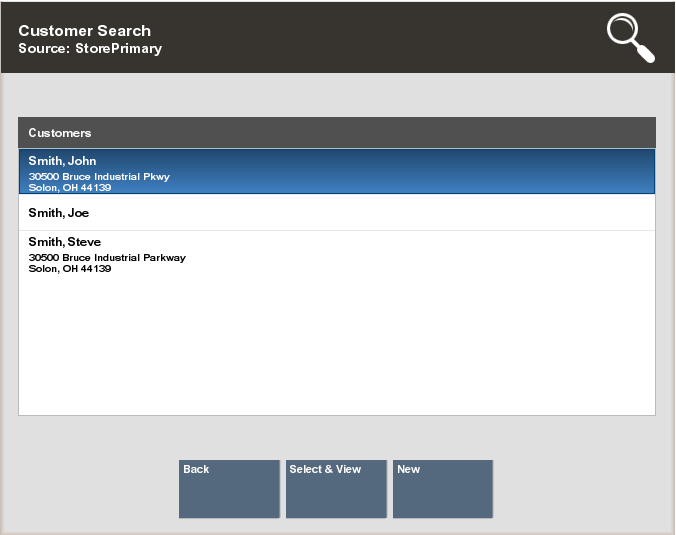
If more than one customer record matches your search criteria, the system displays a list of customers.
|
Note: The Source field underneath the header Customer Search indicates the data source from which this information was retrieved.
Depending upon your system's configuration, the system may automatically display the Customer Maintenance screen when only one name matches the search criteria, rather than showing a list with only one customer name. |
Choose one of these options:
Back – Returns to the Customer Lookup form where you can begin a new search.
Select & View – Opens the selected customer record for viewing, editing, or printing.
New – Opens the Customer Maintenance screens with blank fields for adding information
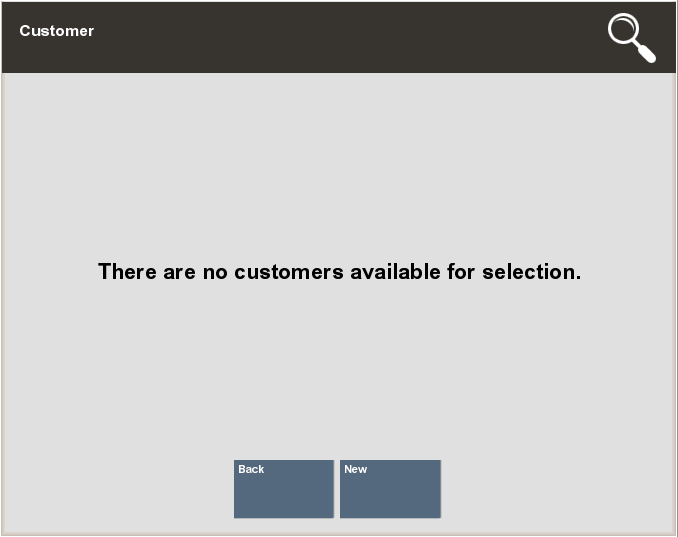
If you search for a customer name and it is not found in the customer database, you can create a new record for the customer. The system displays a message as shown in the Figure 2-8 below if there is no current record.
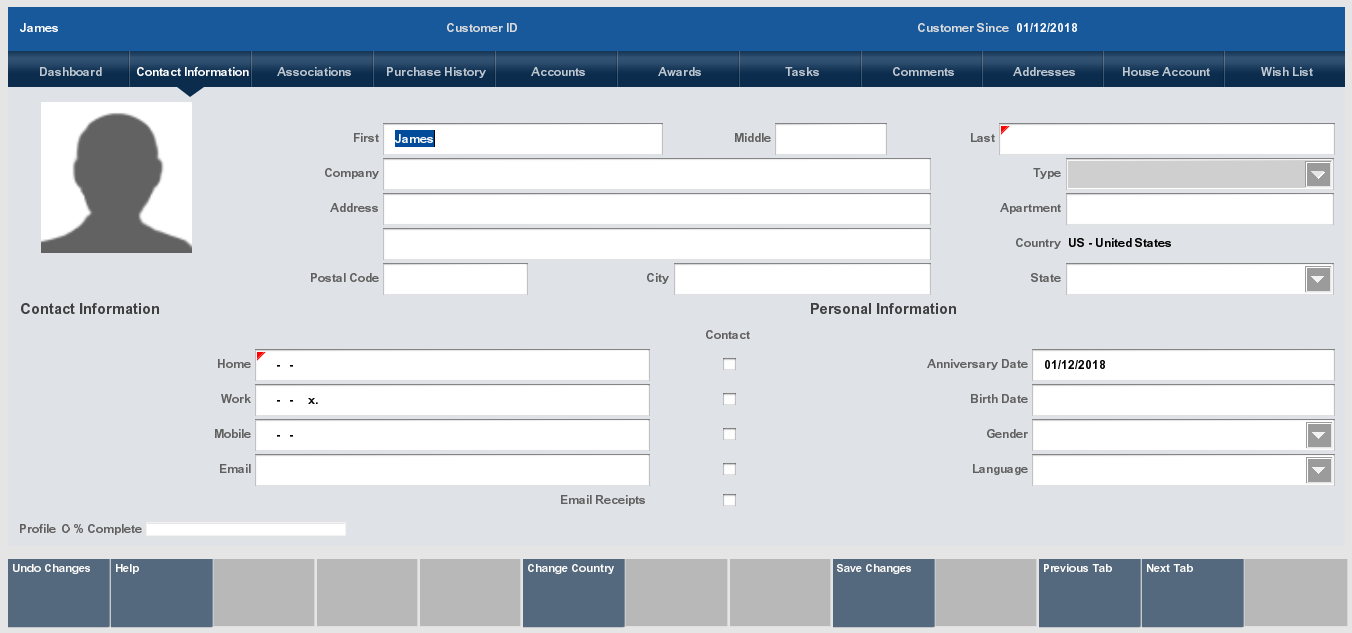
Select New to display the Customer Maintenance Screen in edit mode. The form consists of tabs, each containing a different type of information about the customer.
|
Note: The information you entered in the Customer Search form automatically populates the appropriate fields on the customer maintenance screen. |
Enter customer contact information. Your system may be configured to capture and display the following information on the Contact Information tab. Any of the fields may be designated as a required entry (per your store policy).
Any field that required an entry is marked with a red triangle  in the upper left corner of the field.
Any field that has a selectable list of options displays a down arrow  on the right side of the field.
|
Tip: When you enter a valid postal code for the customer, the system automatically enters the city and state information. |
Table 2-1 Contact Information Fields
| Field Name | Description |
|---|---|
|
First name, middle initial, last name |
The system automatically creates an initial cap for the first letter you type here if you don't press the Shift key when entering the customer's name. |
|
Company |
If you enter a company name here, the Organization Type field becomes active. |
|
Type |
Associated with Company entries; for example, Club, Company, School, and so on. This field is only active after a Company name is entered |
|
Address |
Two address lines are provided. This is the customer's primary address. |
|
Apartment # |
Optional field. |
|
Postal Code |
The system automatically supplies the city and state if it recognizes the Zip/Postal code that you enter. |
|
City |
Automatically populated if the system recognizes the Zip/Postal code that you entered first. |
|
State/Province |
If you begin typing, the system auto-fills the field with states/provinces defined for your store. |
|
Country |
Defaults to the country in which the store is located, but can be changed using the Change Country option. |
|
Phone Numbers |
As you enter data in these fields, the associated contact permission check marks become active. Check mark whether or not it is okay to contact the customer by selecting the corresponding yes box. |
|
Email address |
Format this email address correctly so it can be used to contact the customer. If the customer would like to receive receipt copies via email, this must be a valid email address and the Email flag (Email?) must be set to "Yes". |
|
Anniversary Date |
This information can be used to display a message such as "Happy Anniversary" before or after the anniversary. |
|
Birth Date |
This information can be used to display a message such as "Happy Birthday John" before or after the customer's birthday. |
|
Gender |
The gender will determine the avatar picture in the contact information tab. |
|
Language |
The language code for the customer's preferred language. |
|
Email Receipts |
"Yes" indicates the customer would like to have email receipts automatically selected when purchasing items. |
Select the Associations tab to make additional entries for personal information such as tax exemptions. See Associations Tab.
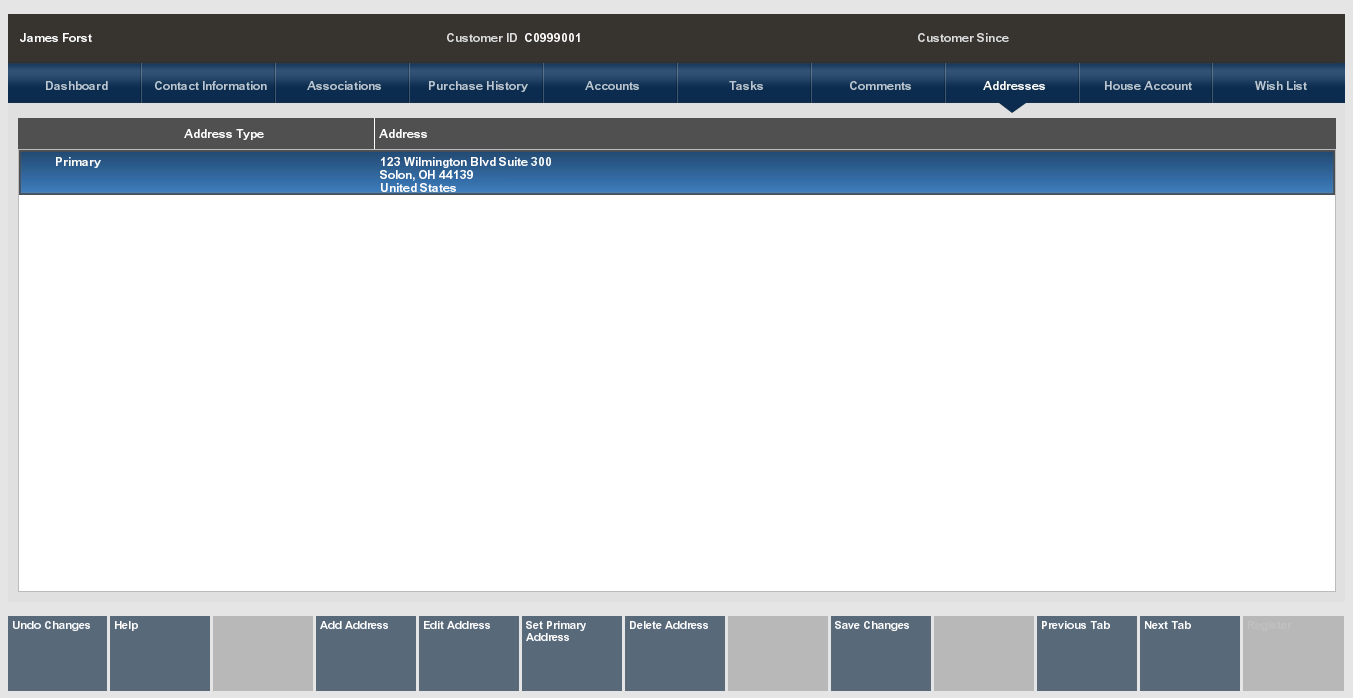
Select the Addresses tab to add and manage multiple addresses for the customer. See Addresses Tab.
|
Note: The non-editable tabs are Dashboard, Purchase History, Customer Account, and Wish List. Depending on your store policy, you may be able to create and maintain House Accounts. See the Oracle Retail Xstore Point-of-Service User Guide Customer Maintenance chapter to create and modify House Accounts.The Customer Account tab contains options to Print Balance Receipt and Print Account History, see the Oracle Retail Xstore Point-of-Service User Guide Customer Maintenance chapter. |
To create a comment for the new customer, see Adding a Comment to a Customer Record.
After completing all of the data entry for the new customer, select the Save Changes option to store the new customer record in the database.
Select Cancel to return to the Customer Search list.
Select the Associations tab to select a membership if applicable.
Table 2-2 Association Tab Fields
| Field Name | Description |
|---|---|
|
Group Membership |
Select a membership if applicable. Your store may have badges such as silver A customer may be associated with one or more groups. If groups are not defined, no customer groups are listed in this section. |
|
Customer Attributes NON-EDITABLE |
Attribute categories are defined by the home office and provide additional information about the customer. |
|
Customer Segments NON-EDITABLE |
Segments are groupings that share common criteria. This information is provided by Oracle Retail Customer Engagement Cloud Services (formerly MICROS Retail Relate CRM). Identifying a customer with a segment may be helpful in customer analysis and in sales promotions. |
|
Tax Exempt Information |
If a customer has a tax exemption, that information is displayed in this section. A customer may have one or more exemptions, and they may be updated as required. To add tax exempt information see the Oracle Retail Xstore Point-of-Service User Guide. |
Select the Addresses tab to add and manage multiple addresses for the customer. The Contact Information address will automatically be set as the primary. To change this see the Oracle Retail Xstore Point-of-Service User Guide Customer Maintenance chapter.
To add a comment to your new customer:
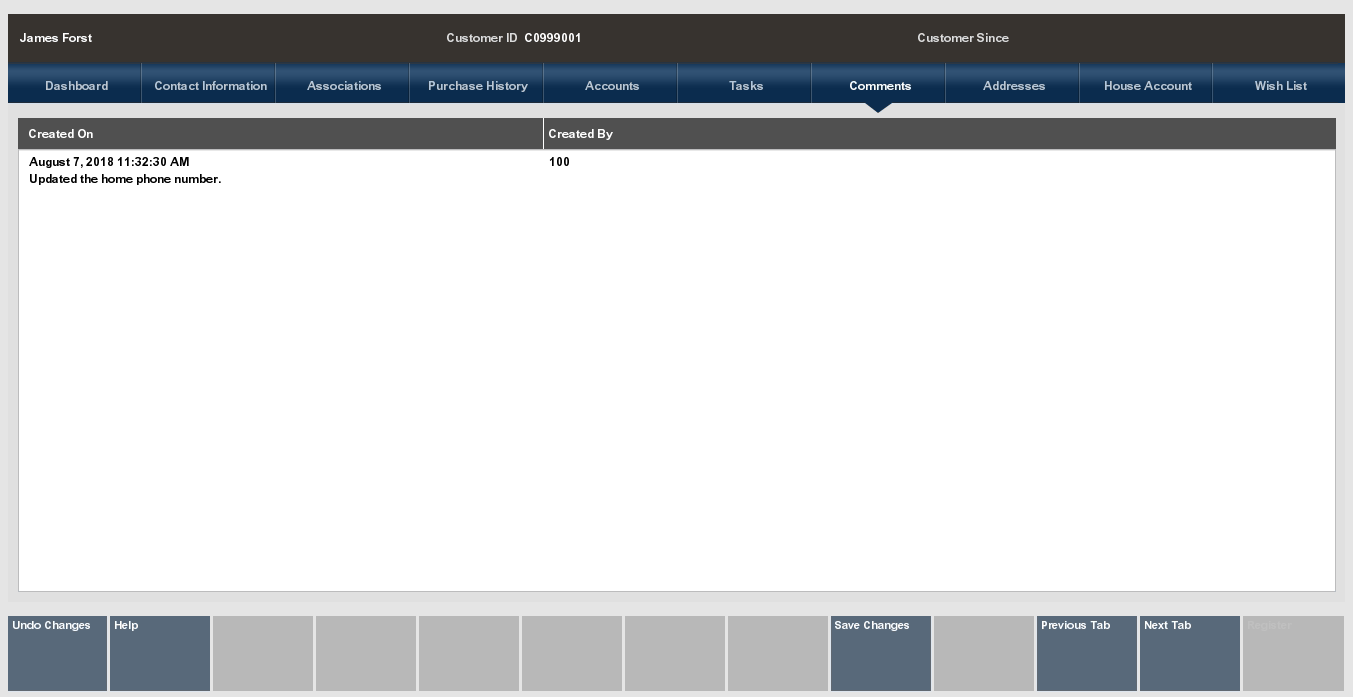
Select the Comments tab to view or add comments for this customer.
Select the Add Comment menu button.
|
Note: If the Add Comment button is not available, you may be entering a new customer. Save Changes first and then add the comment. |
Type a comment.
Select OK. The comment displays on the Comments tab.
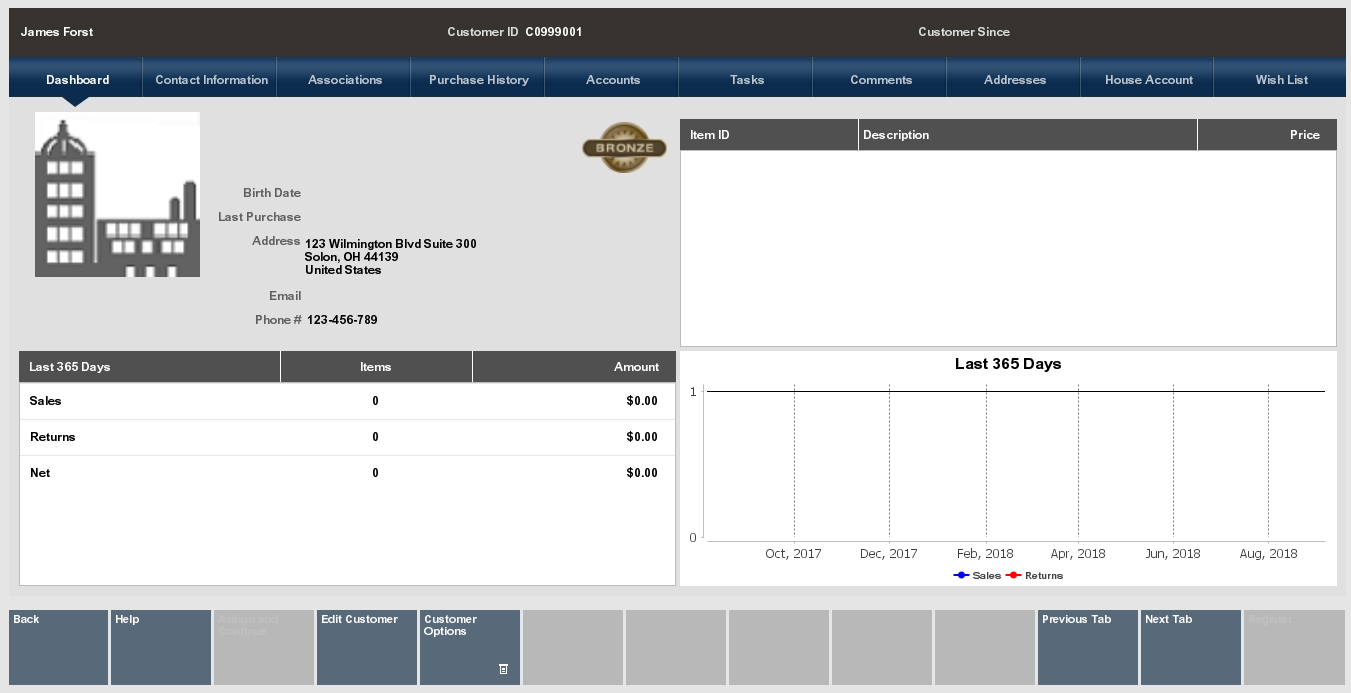
A customer record always opens in a read-only mode and cannot be edited unless you change to the editing mode. If you only need to see information or confirm that it is correct, just navigate between the tabs on the customer record.
At the Customer Search form, select a customer name and select the Select & View option (see Accessing Customer Maintenance and Accounts).
|
Note: The system may display the customer record automatically if only one record matches the search criteria you entered at the Customer Search form. The source for the customer record is also noted near the top of the results list. |
The customer record opens in a read-only mode.
|
Note: The photo area is always present. When a customer's image is not present, an avatar takes its place. |
Choose one of these options:
Back – Returns to the Customer Search form.
Edit Customer - Allows you to change information in the customer record.
Customer Options – Displays a list of customer options. Options include:
Add a new customer record to the customer database
Print the customer record
Enroll the customer in the loyalty program
Maintain the customer's tax exemption information
Create a House Account for the customer
|
Note: Refer to the Oracle Retail Xstore Point-of-Service User Guide, Customer Maintenance chapter - Additional Customer Options for customer options instructions. |
Navigate between the tabbed sections on the customer record by selecting the Previous Tab and Next Tab menu options. This section provides an overview of the information available on each tab.
Dashboard Tab: This tab shows the customer's loyalty information, and purchase information over the last 365 days.
Contact Information Tab: This tab shows the customer name, address, phone and email information, contact preferences, and profile completeness progress bar. Your store may be configured to display anniversary, birthday, and loyalty expiration messages.
Associations: Displays information about the customer group, customer attributes, segment, tax exempt record.
Purchase History Tab: Displays sales history information about the customer.
Customer Account Tab: Displays information about the customer's accounts, including loyalty, and other transaction-related accounts
Tasks Tab: Displays customer related tasks and appointments (see also Reviewing Task Management Information). You can add and edit tasks from this tab but updates to the status must be made from the My Tasks screen. See the Xstore Point-Of-Service User Guide for instructions on how to update status.
Comments Tab: Displays comments that have been entered about the customer.
Addresses Tab: Displays the customer's primary address and any other addresses on file.
House Account Tab: Displays information about the House Account associated with this customer. This tab is only active if the customer has a house account.
Wish List Tab: If your system is set up to use Oracle Retail Customer Engagement Cloud Services, this tab displays the customer's wish list items. Otherwise, this tab is not active.
|
Note: Refer to the Oracle Retail Xstore Point-of-Service User Guide, Customer Maintenance chapter for information about each tab section and how to modify a customer. The instructions are the same. |
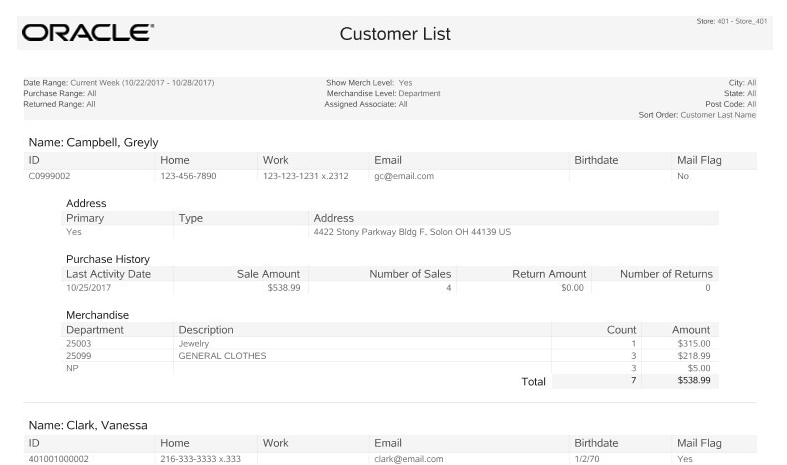
The Customer List Report is available from the Back Office Menu. It is accessed from the Customer menu as well as from the Reports Menu. The report can be viewed on the screen or printed.
The Customer List Report shows customers who fall within specified data ranges (for example, spends over $500.00 per year) or who follow a particular pattern of shopping (for example, most purchases are from the children's department).
The selection criteria allow you to include customers in the report based upon customer location, type of merchandise purchased, amount of merchandise purchased or returned, and certain demographic information.
The Customer List Report can be produced at either a summary level or a detail level.
|
Note: Refer to the Oracle Retail Xstore Point-of-Service Reports Guide for more detailed information about this report. |
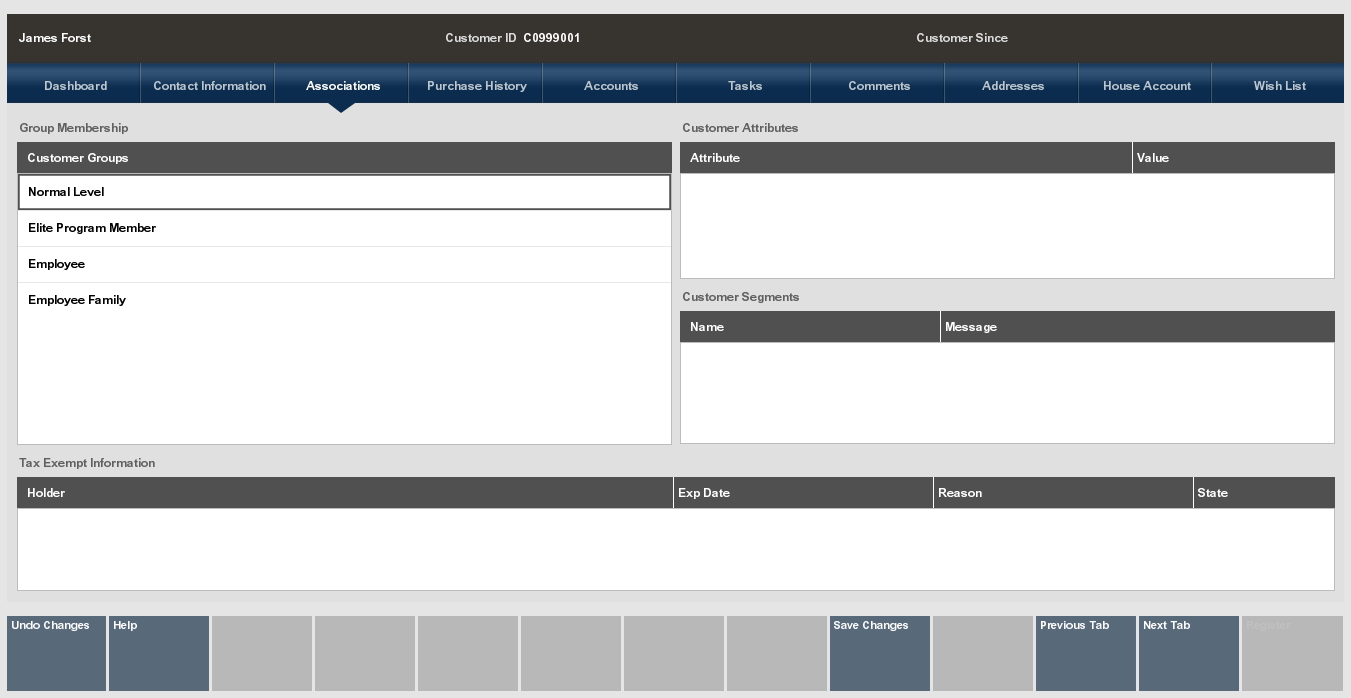
 assigned to various group memberships. The badge appears on the header of the Customer Maintenance Screen as well as the Customer Loyalty Banner on various sales screens.