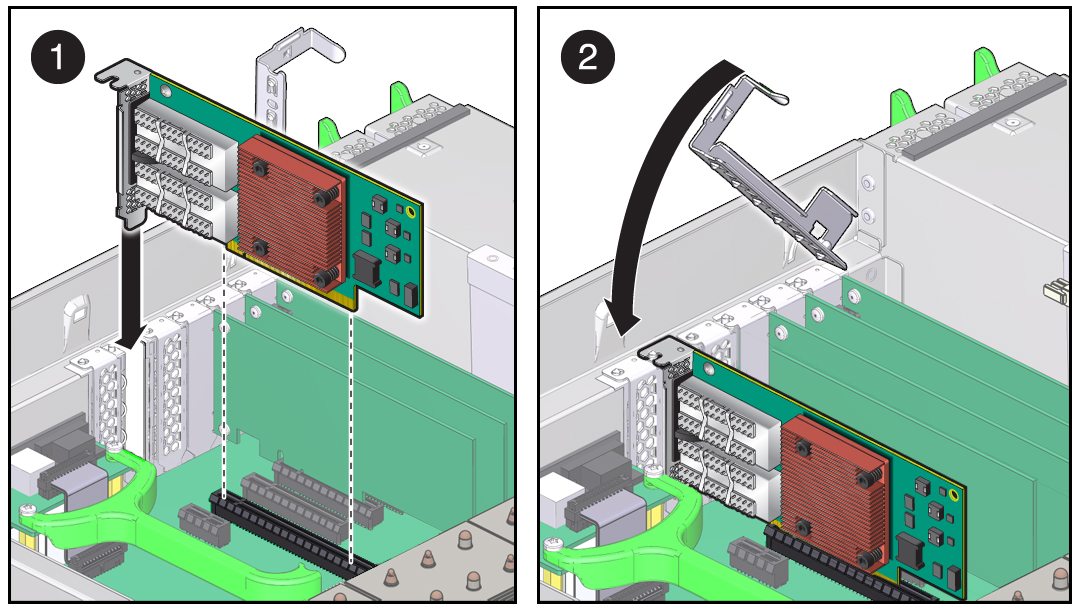
Install the Adapter
Refer to the server's installation guide or service manual for detailed instructions for this.
 | Caution - Electronic components on printed circuit boards are extremely sensitive to static electricity. Ordinary amounts of static electricity generated by your clothing or work environment can damage electronic equipment. When installing the adapter in a system, use antistatic grounding straps and antistatic mats to help prevent damage due to electrostatic discharge. |
- Attach an antistatic wrist strap to your wrist and to the server.
- If applicable, power off the server, using the standard shutdown procedures described in the
server's service manual.
Product documentation for Oracle servers is available at http://docs.oracle.com.
- If applicable, remove the cover from the server to access the adapter slots and connectors.
- Select an available PCIe x16
slot.
Remove the blank filler panel for that slot. If you are replacing an existing adapter in that slot, remove the adapter.
- Install the adapter into the
slot, pushing the adapter's edge connector into the connector on
the server.

- Ensure that the front panel on the adapter mounts flush with the server panel opening.
- If applicable, install the screw in the front panel to secure the adapter into the server.
- If applicable, replace the cover on the chassis.
- Attach the 4x end of each IB
cable to an adapter port connector.
See Standard MT Cables.
- Ensure that the connectors are properly engaged.
- If not already connected, connect
the other end of the IB I/O cables to the appropriate ports on the IB
switches.
The adapter ports can be connected to different ports on the same IB switch or to ports on different IB switches.
- If applicable, power on the server and allow the server to reboot.
This step completes the hardware installation.
- Verify the installation.
See Verify the Adapter Installation (Oracle Solaris) or Verify the Adapter Installation (Oracle Linux).