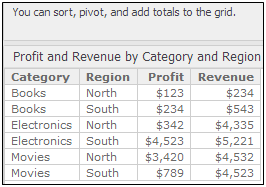
Once you have created a dashboard, you can add text to the dashboard. Text can serve as a label for your data or provide background information, a description, or instructions for the dashboard. You can reposition, resize, and format the text. In the example below, the text at the top of the dashboard provides tips for using the grid. The text has been formatted to display in a smaller font.
You can type the text to display, as in the example above, or you can drag and drop a dataset object into the text field. When you use a dataset object, the text automatically changes depending on what is displayed in the dashboard (also known as dynamic text). You can combine both text and dataset objects in the same text field.
For example, you can use a combination of text and a dataset object as a title. Your dashboard, which is filtered on the Region attribute, contains a visualization that displays metric values for your regions. Add a text field, type “Revenue and Profit Data for ” (note the extra space) in the text field, and then drag and drop the Region attribute into it. When you select the Northeast region in the Filter panel, the text field displays “Revenue and Profit Data for Northeast”, and the visualization displays metric values for the Northeast region only. If you select another region in the Filter panel, both the text field and the visualization automatically change.
For steps to add text, see Adding and formatting text.
You can use a text field to create a list of all the elements for an attribute. An attribute element is a value of an attribute. For example, North is an element of the Region attribute.
To do this, create a derived metric with the definition ConcatAgg(Attribute@form), replacingAttributewith the name of the attribute. (An attribute form is additional descriptive information about an attribute. For example, the attribute Customer has the forms First Name, Last Name, Address, Email Address, and so on.) Drag the derived metric into the text field. The attribute elements are displayed as a comma-separated list, such as North, South, East, West. For steps to create a derived metric, see Creating a metric based on existing objects: Derived metrics.
You can display dashboard information, such as the dashboard name and description, or the current date and time in a text field. The available codes are described in the following table. Be sure to include the braces ({ }) when you type the code in the text field.
Description |
Code |
Sample Display |
|---|---|---|
Date & Time Current date and time, of the client computer |
{&DATETIME} |
11/15/2003 7:10:55 PM |
Current user The full name, not the login, of the user who views the dashboard |
{&USER} |
Jane User |
Dashboard name |
{&DOCUMENT} |
Regional Sales Summary |
Dashboard description |
{&DESCRIPTION} |
Revenue and profit by region |
Project name |
{&PROJECT} |
Tutorial |
Dashboard execution time |
{&EXECUTIONTIME} |
11/15/2003 7:11:15 PM |
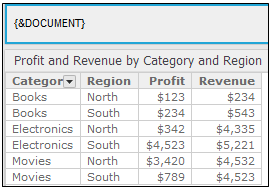
For example, you add the {&DOCUMENT} code to a text field in a dashboard named Regional and Category Data, as shown below:
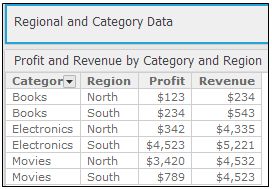
The dashboard name is displayed, as shown below:
Follow the steps below to add and format, edit, delete, or move and resize a text field in a dashboard.
You must have Edit Dashboard and Run Dashboard privileges.
To add text:
From the dashboard's toolbar,
click the Insert icon  , then
click Text. A text field is
added to the dashboard and displayed.
, then
click Text. A text field is
added to the dashboard and displayed.
Add the text to display, as described below. You can combine both text and dataset objects in the same text field.
To add text, in the field, type the text to display, and then press ENTER.
To add a dataset object, drag and drop the object from the Datasets panel into the text field.
To display dashboard information, type the code into the text field. For a list of the available codes, and an example, see Displaying dashboard information using a text field.
To format the text:
If the text contains numeric data, you can format the numbers, as described below:
Hover the cursor over the text field, then click the arrow icon displayed to the right, and select Number Format.
From the drop-down list, select the type of number formatting to use to display numeric values.
Select the appropriate format options, such as the separator symbol, currency symbol, and number of decimal places.
Click OK to save the number formatting.
You can select formatting options
for the text, such as font color, background color, or whether to
bold or italicize text, using the Properties panel. For detailed information
on each of the text formatting options, see Dashboard
Editor: Text: Properties. Note:
If the Properties panel is not displayed, from the View
menu, select Properties Panel.
If the Properties panel is hidden behind another panel, click the
Properties icon  to display the Properties
panel.
to display the Properties
panel.
To edit, move, resize, or delete a text field:
To edit a text field, click the text to edit, then type the new text to display.
To move a text field, click and drag the text field, so that a blue indicator line is displayed in the location to move the text field to. The text field is moved and displayed in its new location.
To resize a text field, hover the cursor over the edge of the text field to size. Click and drag the edge to change the size of the text field.
To delete a text field, hover the cursor over the text to delete and click the arrow icon, then select Delete. The text is deleted from the dashboard.
_____________________________
Copyright © 2019, Oracle and/or its affiliates. All rights reserved.
Legal Notices