| Oracle® Retail Invoice Matching User Guide Release 14.1 E57810-02 |
|

 Previous |
 Next |
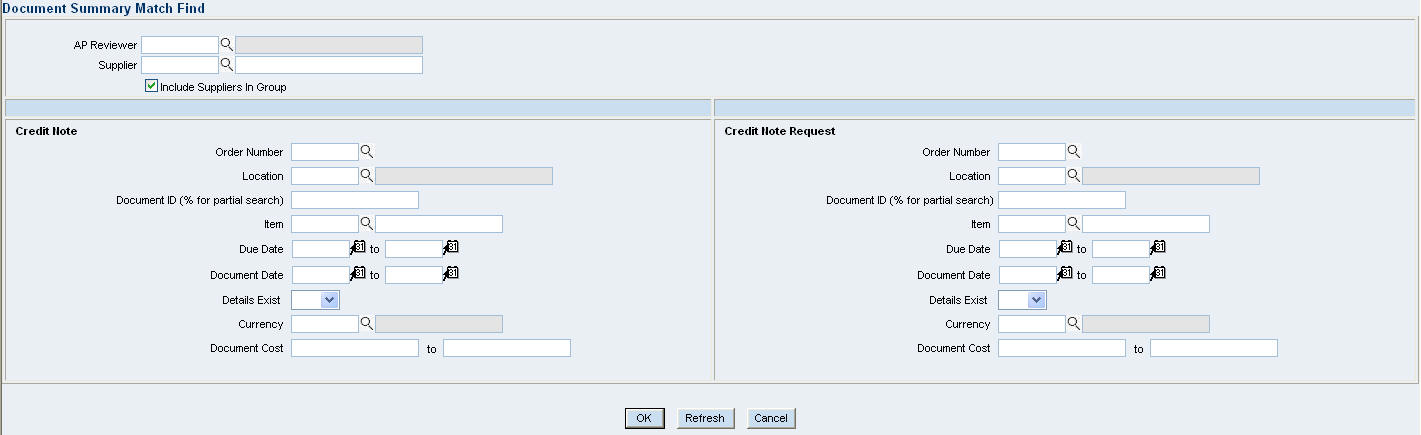
The summary matching windows allow you to match credit notes and credit note requests. By limiting the credit note request and credit note criteria on the Summary Match Find window, you can view credit note requests and credit notes with similarities.
Navigate: In the Credit Note Matching tab, click Summary Match. The Document Summary Match Find window opens.
In the AP Reviewer field, enter the User ID, or click on the search button to select a reviewer.
In the Supplier field, enter the Supplier ID, or click on the search button to select a supplier.
Select the check box if you want to include the suppliers in the group.
Search for and retrieve credit notes and credit note requests for detail matching.
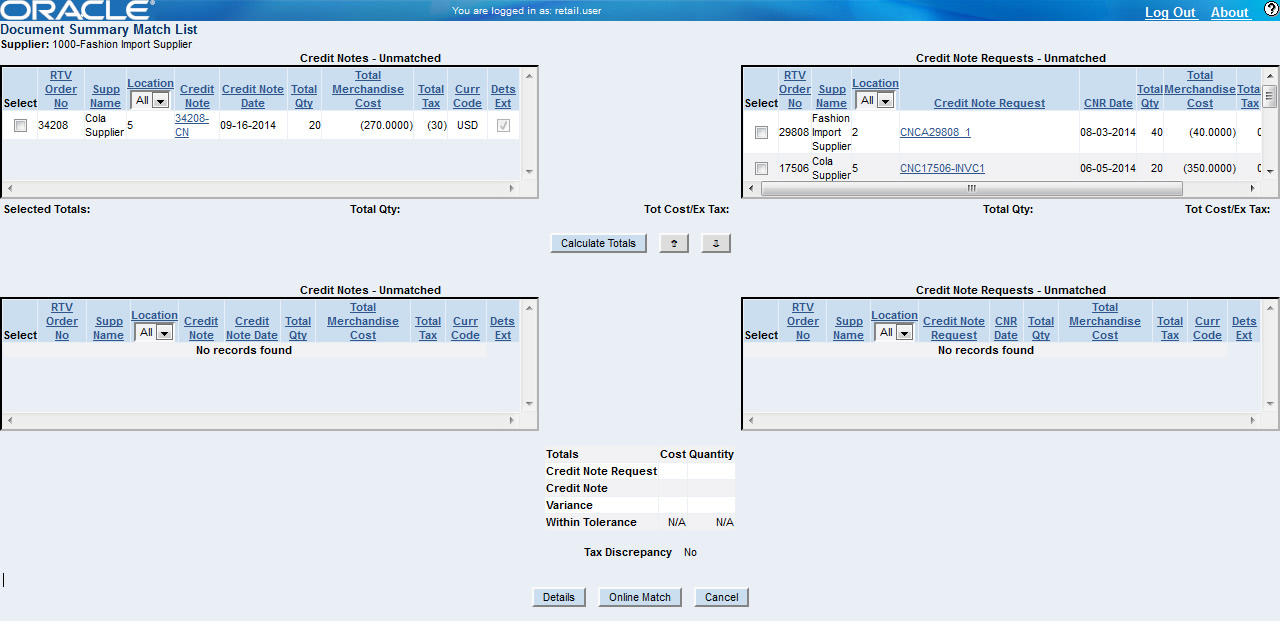
Click OK. The Document Summary Match List window opens.
Click Details. The Document Detail Match List window opens.
Click the In Balance Items tab.
Click OK to close the window.
Navigate: In the Credit Note Matching tab, click Summary Match. The Document Summary Match Find window opens.
Enter criteria as desired to make the search more restrictive. You must enter at least one search criterion.
Click OK. The Summary Match - Supplier List window displays the credit note requests and credit notes for each supplier that match the search criteria.
In the Supplier Name field, click a supplier name. The Document Summary Match List window opens.
Click Cancel to close the window without saving any changes.
In the summary matching windows, you can match invoices and receipts that have not been matched previously through the auto-match process. By limiting the invoice and receipt criteria on the Summary Match Find window, you can view similar invoices and receipts.
After you find the invoices and receipts you want to match, you can match auto-groups or manual groups. Auto-groups are created when you when you enter the Summary Match window. An auto-group is created by ReIM and consists of potential matches between receipts and invoices. If you modify an auto-group in any way, it becomes a manual group.
Manual groups are created when you select an invoice and a receipt in the unmatched area. Your selection is held in the Group - Manual area until you verify that the variances fall within tolerance.
This section includes the following summary invoice matching instructions:
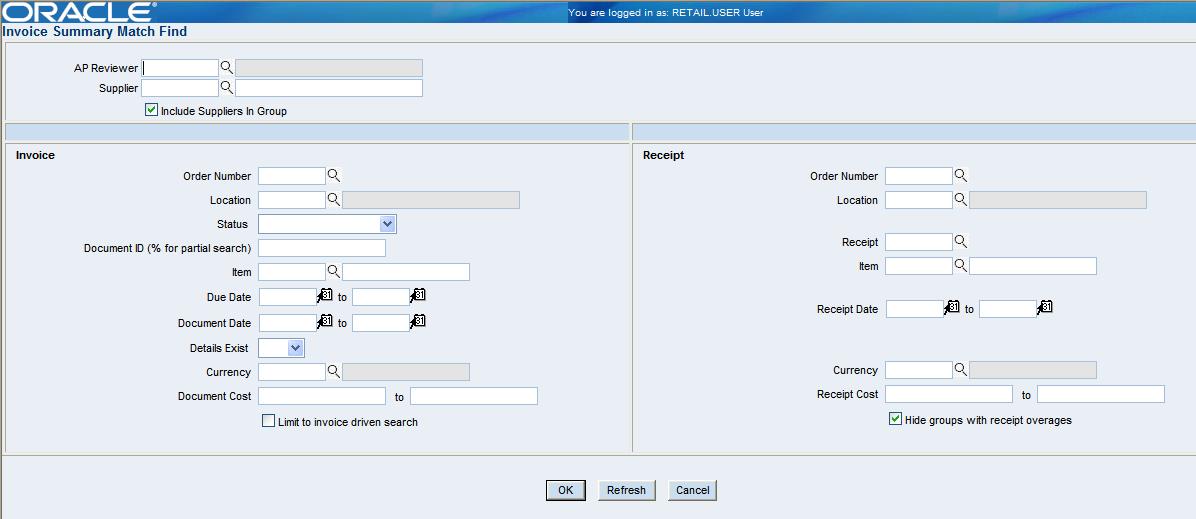
Navigate: In the Invoice Matching tab, click Summary Match. The Invoice Summary Match Find window opens.
In the AP Reviewer field, enter the User ID, or click on the search button to select a reviewer.
In the Supplier field, enter the Supplier ID, or click on the search button to select a supplier.
In the Supplier Site field, enter the supplier site ID, or click on the search button to select a supplier site.
Select the check box if you want to include the suppliers in the group.
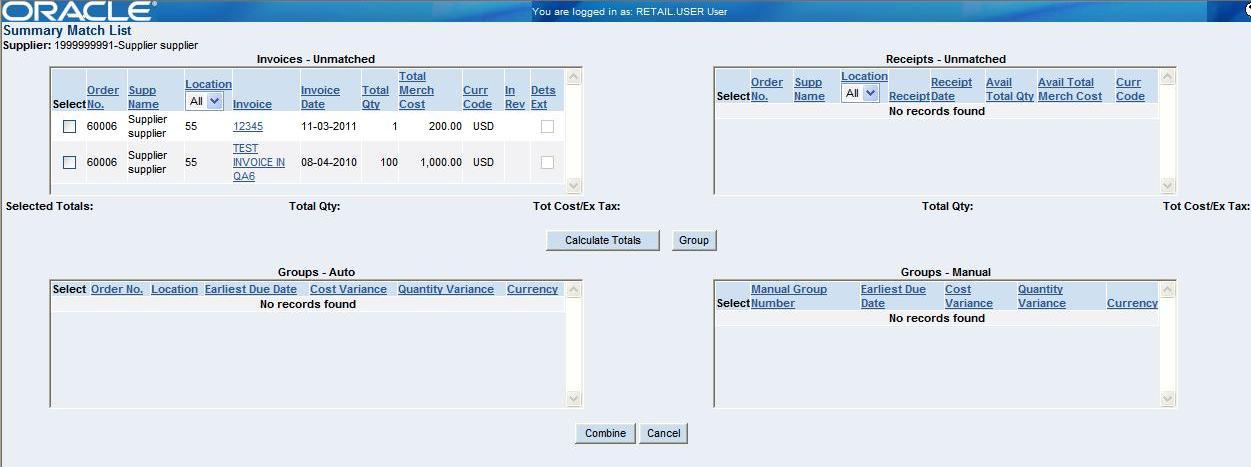
Search for and retrieve a supplier whose invoices you want to match. The Summary Match List window opens.
To begin matching, in the Groups area:
In the Groups - Auto area, click the Order No. The Summary Match - Auto Match area appears.
In the Groups - Manual area, click the Manual Group Number. The Summary Match - Manual Match area appears.
Groups must fall within tolerance before you can match them. You can try to eliminate the tolerance by:
Adding invoices or receipts to the matching area. In the unmatched area, select the check box to the left of the invoice or the receipt you want to add. Click the down arrow button.
Removing invoices or receipts from the matching area. In the Summary Match area, select the check box to the left of the invoice or the receipt you want to remove. Click the up arrow button.
Click Online Match. If a match is created, the Summary Match List window displays the auto-groups and manual groups.
|
Note: If you fail to create a summary match, you can begin detail matching. Click Details to open the Detail Matching window. |
When you are finished making summary matches, click Cancel to close the windows and return to the main menu.
Navigate: In the Invoice Matching tab, click Summary Match. The Invoice Summary Match Find window opens.
Search for and retrieve a supplier whose invoices you want to match. The Summary Match - Supplier List window opens.
To create a manual group:
In the Invoices - Unmatched area, select the check box to the left of the invoice you want to match.
In the Receipts - Unmatched area, select the check box to the left of the receipt you want to match.
Click Group. The match appears in the Manual Match - Group area.
To combine multiple groups:
Select the check boxes to the left of groups you want to combine.
|
Note: You can combine auto-groups with auto-groups, auto-groups with manual groups, or manual groups with manual groups. |
Click Combine. Your new group appears in the Manual Match - Group area.
Click OK to continue creating manual groups.
Navigate: In the Invoice Matching tab, click Summary Match. The Invoice Summary Match Find window opens.
Enter criteria to make the search more restrictive. You must enter at least one search criterion.
Click OK. The Summary Match - Supplier List window displays the invoices and receipts for each supplier that match the search criteria.
In the Supplier Name field, click a supplier name. The Summary Match List window opens.
If the records for that supplier are in use, the View Locks button appears.
Click View Locks. The View Locks window opens.
|
Note: To switch between the locked invoices and locked receipts views, click the tabs. |
Click Cancel to close the window.
Click Cancel to close the window without saving any changes.
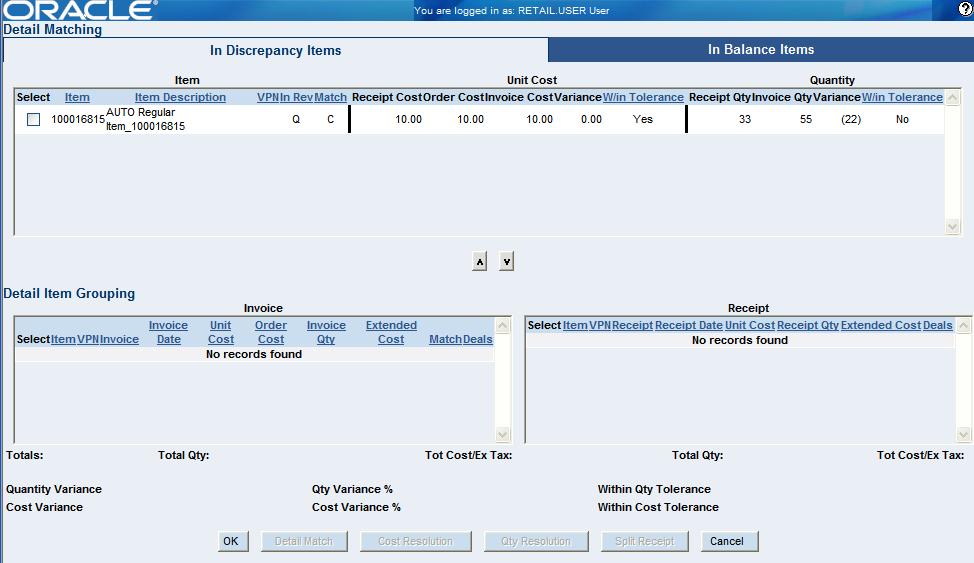
Detail matching provides the last level of matching possible. The Detail Matching window contains two tabs to help you match invoices and receipts at the line item level.
In Discrepancy Items tab: Use this tab to match line items on invoices and receipts. Discrepancies can be sent for cost resolution or quantity resolution, or you can split a receipt quantity.
In Balance Items tab: Use this tab to view line items on an invoice and receipts that match within tolerance.
This section includes the following detail invoice matching instructions:
Navigate: In the Invoice Matching tab, click Summary Match. The Invoice Summary Match Find window opens.
Search for and retrieve invoices and receipts for detail matching.
Click on the In Balance Items tab.
Click OK to close the window.
Navigate: In the Invoice Matching tab, click Summary Match. The Invoice Summary Match Find window opens.
Search for and retrieve invoices and receipts for detail matching. The Summary Match List window opens.
Group invoices and receipts as necessary.
In the selected totals area:
In the Groups - Auto area, click the Order No. The Summary Match - Auto Match area opens.
In the Groups - Manual area, click the Manual Group Number. The Summary Match - Manual Match area opens.
Click Details. The Detail Matching window opens.
To match items on invoices to items on receipts:
On the In Discrepancy Items tab, select the check box to the left of the item you want to match.
Click the down arrow button. The document is added to the Detail Item Grouping area.
Remove line items as necessary:
In the Detail Item Grouping area select the check box to the line item you want to remove.
Click the up arrow button. The line item is removed from the Detail Item Grouping area.
If the invoice and receipt match within tolerance:
Click Cost Resolution to resolve cost discrepancies. The Cost Selection window opens.
Click Qty Resolution to resolve quantity discrepancies. The Quantity Selection window opens.
Click Detail Match. The items are posted for payment.
After you have matched all the items on an invoice, click OK to post the invoice for payment.
Navigate: In the Invoice Matching tab, click Summary Match. The Invoice Summary Match Find window opens.
Search for and retrieve invoices and receipts for detail matching.
Group invoices and receipts as necessary.
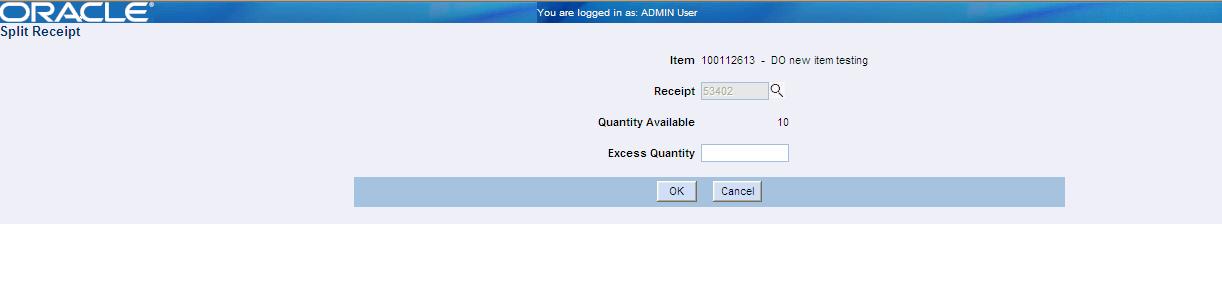
In the Detail Item Grouping area, select the check box to the left of the receipt you want to split.
Click Split Receipt. The Split Receipt window opens.
In the Excess Quantity field, enter the amount you want to remove from the receipt.
Click OK. The Detail Matching window opens.
|
Note: The quantity you removed from the receipt appears on the In Discrepancy Item tab on the Detail Matching window. |