| Oracle® Retail Invoice Matching User Guide Release 14.1 E57810-02 |
|

 Previous |
 Next |
A cost discrepancy is the difference between the cost on a receipt and the cost on a merchandise invoice. When there is a cost discrepancy in the system, in either the retailer's or supplier's favor, a reviewer must do a cost review.
When a cost discrepancy is identified, you must review and reconcile the discrepancy. Discrepancies are routed to reviewer groups. The cost discrepancy is based on a comparison between the invoice and the receipt. If a receipt is not available, the invoice is compared to the purchase order. Depending on your user permissions, you may or may not be able to access this window or all discrepancies.
Cost discrepancies are created during the auto-match process when the invoice cost does not match the purchase order cost. Cost discrepancies are also created when a debit memo is disputed.
Navigate: In the Invoice Matching tab, click Cost Review List. The Cost Review List window opens.
In the No. of Line Exceptions column, click the line exception. The Cost Review Detail window opens.
In the Item column, click the item number of the line you want to resolve. The Cost Selection window opens.
In the Correct Unit Cost area, select the correct cost of the item: order or invoice.
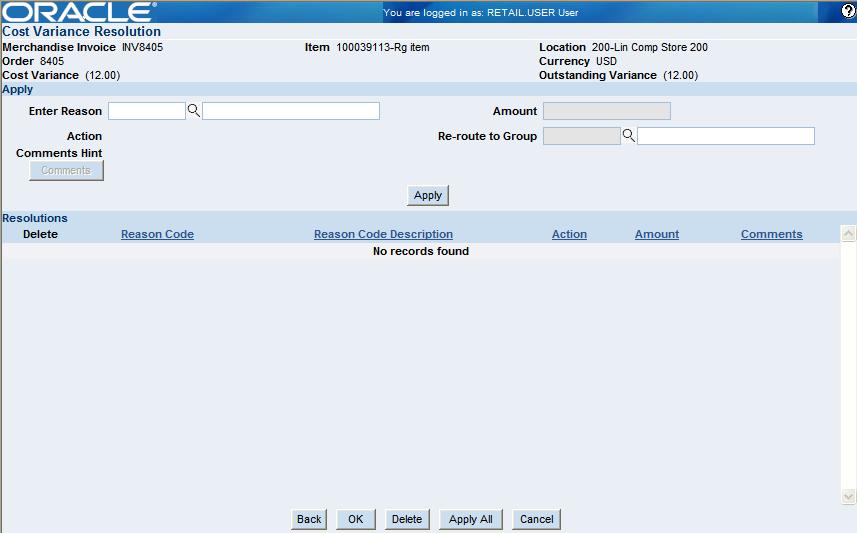
Click Next. The Cost Variance Resolution window opens.
In the Apply area:
In the Enter Reason ID field, enter the reason ID, or click the LOV button to select a reason.
|
Note: You cannot apply a reason code of Debit Memo Cost or Credit Memo Cost to a child invoice that results from a split invoice. The invoice must be routed to Accounts Payable for resolution. |
In the Amount field, enter the monetary amount of the discrepancy.
Add comments as necessary.
If necessary, in the Re-route to Group field, enter the ID of the review group to which you want to send this, or click the LOV button to select a group.
Click Apply. The information is added to the Resolution area.
To delete a resolution you have added:
On the list of cost discrepancy resolutions, select the check box next to the resolution you want to delete.
Click Delete.
You are prompted to confirm the deletion. Click OK.
Click OK to save your changes and close the window.
When a quantity discrepancy is identified, you must review and reconcile the discrepancy. Discrepancies are routed to reviewer groups. The quantity discrepancy is based on a comparison between the invoice and the receipt. If a receipt is not available, the invoice is compared to the purchase order. Depending on your user permissions, you may or may not be able to access this window or all discrepancies.
Quantity discrepancies are created during the auto-match process when the invoice quantity does not match the purchase order quantity. Quantity discrepancies are also created when a debit memo is disputed.
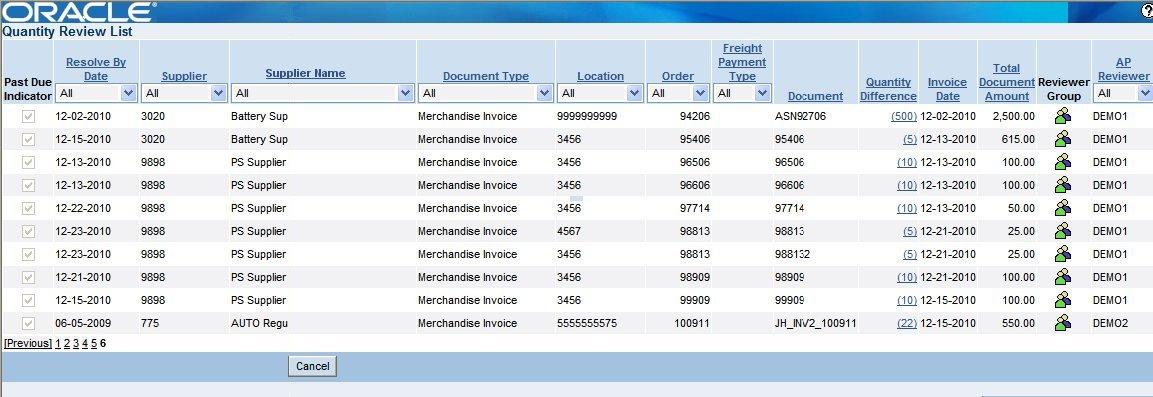
Navigate: In the Invoice Matching tab, click Quantity Review List. The Quantity Review List window opens.
In the Quantity Difference column, click the amount. The Quantity Review Detail window opens.
In the Item column, click the item number of the line you want to resolve. The Quantity Selection window opens.
In the Correct Quantity area, select the quantity of the item. If you select Other, enter the quantity in the field to the right.
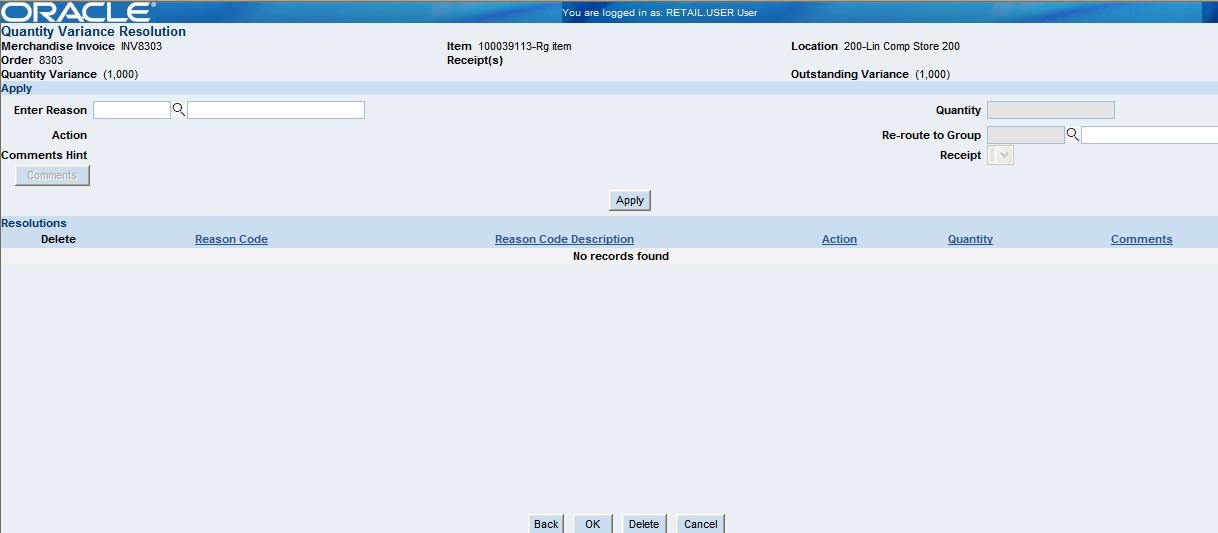
Click Next. The Quantity Variance Resolution window opens.
In the Apply area:
In the Enter Reason field, enter the reason ID, or click the LOV button to select a reason.
|
Note: You cannot apply a reason code of Debit Memo Quantity or Credit Memo Quantity to a child invoice that results from a split invoice. The invoice must be routed to Transportation for resolution. |
In the Quantity field, enter the number of units in dispute.
Add comments as necessary.
If necessary, in the Re-route to Group field, enter the ID of the group to which you want to send this, or click the LOV button to select a group.
In the Receipt field, identify the receipt associated with the discrepancy.
Click Apply. The information is added to the Resolution area.
To delete a resolution you have added:
On the list of quantity discrepancy resolutions, select the check box next to the resolution you want the delete.
Click Delete.
You are prompted to confirm the deletion. Click OK.
Click OK to save your changes and close the window.
A tax discrepancy occurs when the tax stored in RMS for an item is different than the tax on a merchandise invoice. When there is a tax discrepancy in either the retailer's or supplier's favor, a reviewer must do a tax review. Tax discrepancies can also exist for header-only invoices.
When a tax discrepancy is identified, you must review and reconcile the discrepancy. Discrepancies are routed to reviewer groups. The tax discrepancy is based on a comparison between the tax on the invoice and the tax stored in RMS on the item. Depending on your user permissions, you may or may not be able to access these windows or all discrepancies. Header-only tax discrepancies are resolved on the Invoice Maintenance Header and Detail windows.
Tax discrepancies for header-level-only invoices are created during the auto-match process when the invoice tax does not match the purchase order tax.
Tax discrepancies for invoices with details are created when the invoice details are added to the invoice and when the entered tax information for an item does not match the system-maintained tax information for the item.
This section includes the following tax discrepancy resolution instructions:
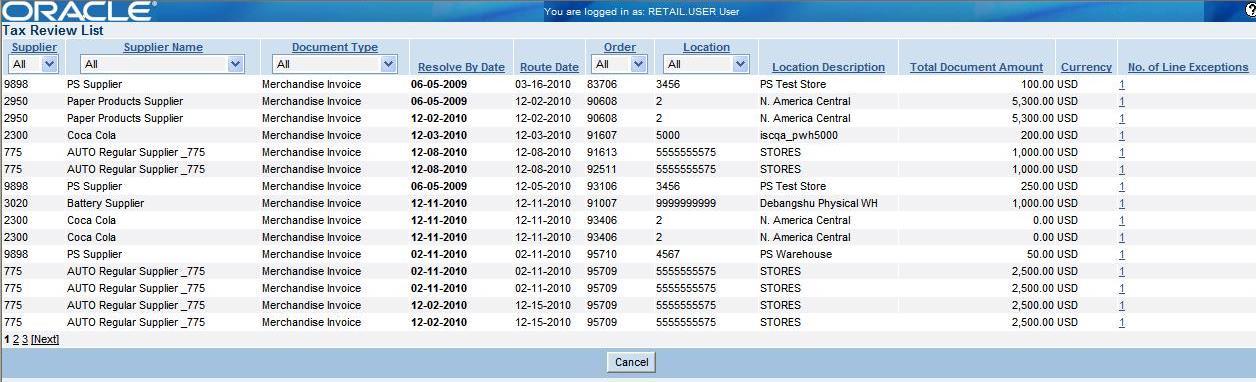
Navigate: In the Invoice Matching tab, click Tax Review List. The Tax Review List window opens.
In the No. of Line Exceptions column, click a numbered line exception. The Tax Discrepancy Detail window opens.
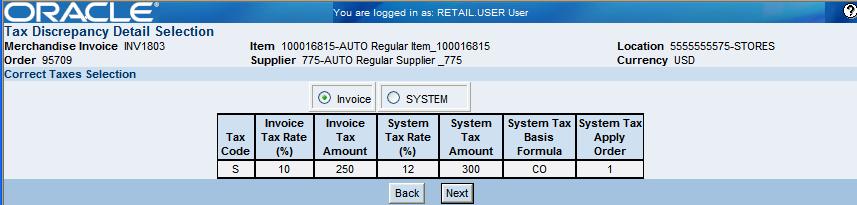
In the Item column, click the item number of the line you want to resolve. The Tax Discrepancy Detail Selection window opens.
In the Correct Tax area, select the correct tax for the item: System Tax or Invoice Tax.
Click Next. The Tax Discrepancy Detail Resolution window opens.
In the Apply area:
In the Enter Reason ID field, enter the reason ID, or click the LOV button to select a reason.
Add comments as necessary.
Click OK to save your changes and close the window.
Navigate: In the Invoice Matching tab, click Tax Review List. The Tax Review List window opens.
In the No. of Line Exceptions column, click a 0 line exception. The Invoice Maintenance Header window opens.
Add or Update the tax breakdown:
Click the Total Tax Cost hyperlink. The Tax Breakdown window opens.
In the Ex Tax Basis field, enter the amount on the invoice that is subject to tax.
Click Calculate Total. The amount of tax appears in the Total field.
Click Details. The Invoice Maintenance Detail window opens.
Add details as necessary. (See "Add Details to a Merchandise Invoice" for more information.)
Click OK to save the changes and close the Invoice Maintenance Detail window.
Click OK to save the changes and close the Invoice Header Maintenance window. You return to the Tax Review List window.
In addition to creating merchandise and non-merchandise invoices, you can create different types of memos, notes, and requests. You can create the following types of documents:
Credit memo - cost
Credit memo - quantity
Credit note
Credit note request - cost
Credit note request - quantity
Credit note request - Tax
Debit memo - cost
Debit memo - quantity
Debit memo - Tax
This section includes the following credit memo and request instructions:
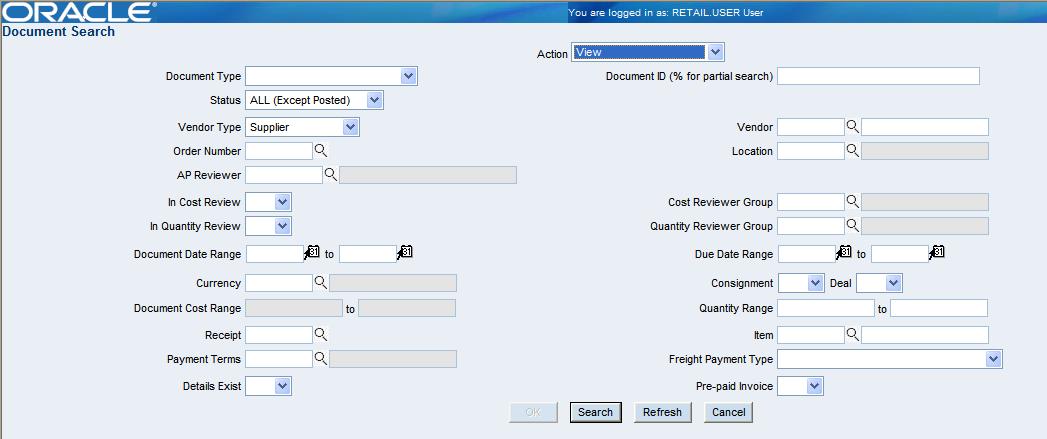
Navigate: In the Document Maintenance tab, click Document Search. The Document Search window opens.
In the Action field, select New.
In the Document Type field, select the document type.
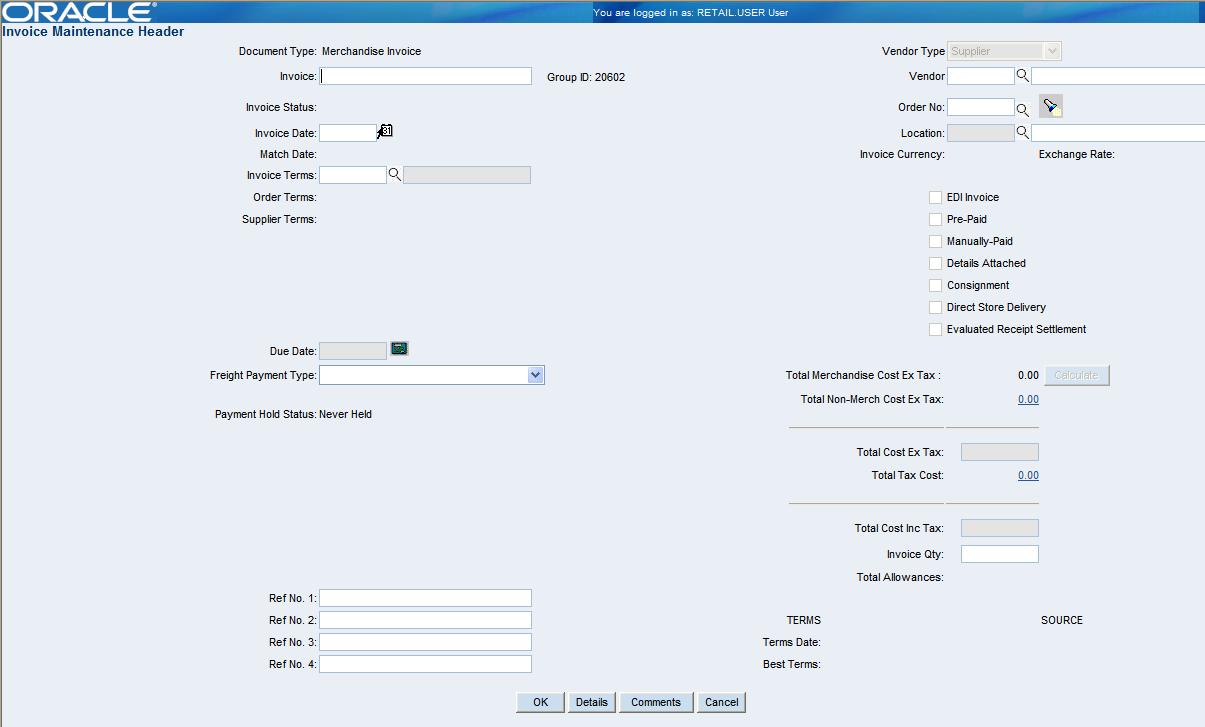
Click OK. The Document Maintenance Header window opens.
In the Document ID field, enter the number of the document.
In the Supplier field, enter the supplier ID, or click the LOV button to select a supplier.
In the Order No. field, enter the order ID associated with the document, or click the LOV button to select a document number.
|
Note: You can search for a purchase order by receipt, receipt date, and location information. |
In the Location field, enter the location ID, or click the LOV button to select a location.
Add non-merchandise costs as necessary.
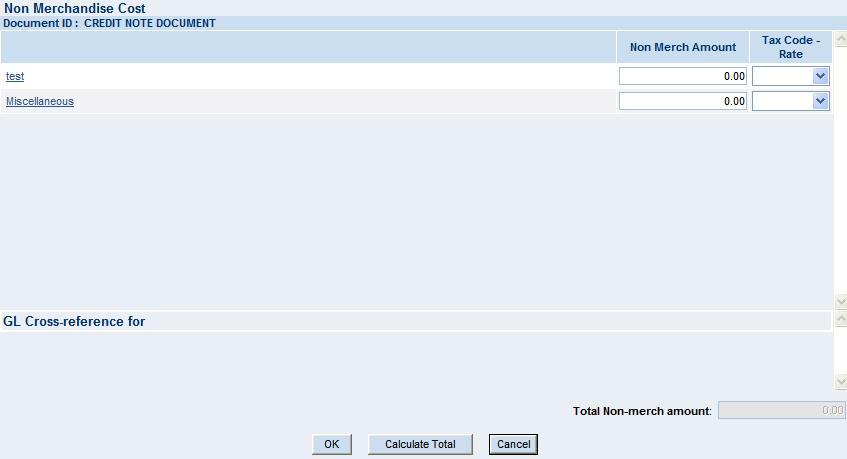
In the Total Non-Merch Cost field, click the amount. The Non-Merchandise Cost window opens.
In the non-merchandise fields, enter the non-merchandise charges.
Click Calculate Total. The sum of the costs appears in the Total field.
Click OK to save your changes and close the window.
Add comments as necessary.
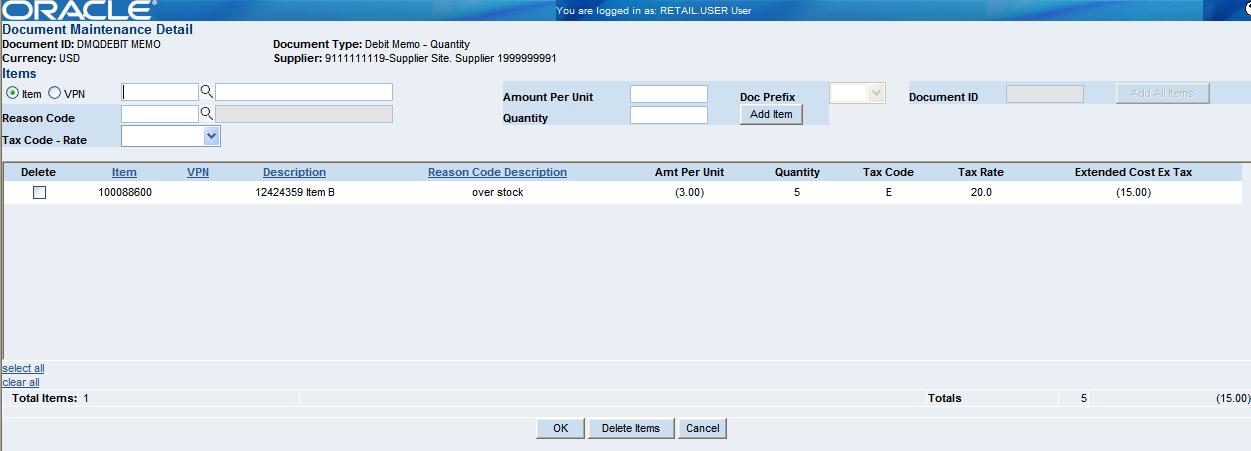
Click Details. The Document Maintenance Detail window opens.
In the Item field, enter the item ID, or click the LOV button to select an item.
In the Amount per Unit field, enter the unit cost of the item.
In the Reason Code field, enter the reason that the item is in dispute.
In the Quantity field, enter the number of units in dispute.
In the Tax Code - Rate field, select the tax information.
Click Add Item.
Click OK to save your changes and close the window.
Navigate: In the Document Maintenance tab, click Document Search. The Document Search window opens.
Search for and retrieve a debit memo in View mode. The Document Maintenance Header window opens.
Click Details. The Document Maintenance Detail window opens.
Adjust the details so that the quantities and amounts in question remain.
Click OK. The Document Maintenance Header window opens.
Click Reverse. A credit memo is created in disputed status.
Navigate: In the Document Maintenance tab, click Document Search. The Document Search window opens.
In the Action field, select Void Credit Note Requests.
In the Document Type field, select the appropriate document type.
Click Search. The Document Find window displays the documents that match the search criteria.
To display the item information, click a document number. The Document Maintenance Header window opens.
Click Void.
Click OK to close the window.