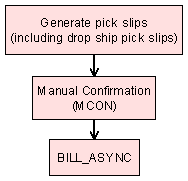
Manually Confirming Shipments (MCON)
Purpose: Use the Confirm Shipments menu option to confirm the shipment of items on pick slips or drop ship pick slips by pick control number or by billing batch number. You might use manual confirmation for international shipments if your PC manifest system does not support them.
Overview: Confirmation is the process of identifying packages or items as shipped and recording essential information for reporting and tracking purposes. There are two methods available to confirm shipments: the manual confirmation function that is used for manual billing and drop ship items, and the PC manifest system.
This topic describes manual confirmation. Manual confirmation provides the opportunity to confirm shipments interactively or by batch. Interactive confirmation is driven by the pick control number, whereas batch confirmation is driven by the billing batch number (with or without exceptions).
See PC Manifesting Interface for information on confirming shipments through an interface with the manifesting station.
Confirming drop ship pick slips: You can also use this menu option to confirm drop ship pick slips, once your drop ship vendor has informed you that the orders have been shipped. You can confirm drop ship pick slips either by billing batch number or by pick control number.
When you process drop ship pick slips using the Selecting Vendors for Drop Ship Processing (MDSP) menu option, the system produces a pick slip/invoice which lists the billing batch number. If you want to confirm by pick control number, you must display picks through standard order inquiry (Select Options/Display picks), and note the pick control number for each order.
Confirming pick slips containing a stored value card item: When you confirm a pick slip containing a stored value card item, the system verifies that the stored value card is assigned a number. If the stored value card is not assigned a number, the system does not allow you to confirm the pick slip or change the status of the pick to carryover and displays an error message: All stored value card numbers must be entered before accepting. You must assign a number to the stored value card before you can confirm the associated pick slip. See Assigning Numbers to Physical Stored Value Cards.
Serial numbers: You cannot confirm pick slips containing serial numbered items by billing batch number. You must confirm these items by pick control number so that you can enter the serial numbers being shipped.
In this topic:
• Interactive Confirmation Screen
• Confirm by Pick Control Number Screen
• Confirm Pick Control Details Screen
• Confirm by Pick Batch Number Screen
• Work with Batch Exceptions Screen (Confirming by Billing Batch Number with Exceptions)
• Accepting and Rejecting Batches (with Exceptions)
• Batch Confirmation Pop-up Window
• Confirming by Billing Batch Number (without Exceptions)
• Drop Ship Batch Confirmation Report
Interactive Confirmation Screen
Purpose: Use this screen to specify the shipping warehouse, current billing date, and whether you are going to confirm shipments by the pick control number or by the billing batch number.
How to display this screen: Enter MCON in the Fast path field at the top of any menu or select Confirm Shipment from a menu.
Field |
Description |
Shipping warehouse |
A code that represents the warehouse from which you are shipping the merchandise. Warehouse codes are defined in and validated against the Warehouse table; see Creating and Maintaining Warehouses (WWHS). Numeric, 3 positions; required. |
Current billing date |
The date that you want to confirm this billing run. The current date defaults, but you can override it. Numeric, 6 positions (MMDDYY format); required. |
Bill by batch # |
Indicates whether you want to bill by batch or pick control number. Valid values are: • Selected = Bill by the batch number assigned by the system when you generated pick slips or drop ship pick slips. • Unselected (default) = Bill by the pick control number assigned by the system when you generated pick slips or drop ship pick slips. |
Completing this screen: If you selected the Bill by batch number field, you advance to the Confirm by Pick Batch Number Screen. If you left the Bill by batch number field blank, you advance to the Confirm by Pick Control Number Screen.
Confirm by Pick Control Number Screen
Purpose: The system assigns a pick control number to each pick slip. Use this screen to confirm a shipment by the pick control number.
How to display this screen: Complete the Interactive Confirmation Screen without selecting the Bill by batch number field.
Field |
Description |
Warehouse |
A code that represents the shipping warehouse. Warehouse codes are defined in and validated against the Warehouse table. Numeric, 3 positions; display-only. |
Billing date |
The date reflects when the order is shipped. The value defaults from the previous screen. Numeric, 6 positions (MMDDYY format); display-only. |
Enter the pick control number that you are confirming. Note: You cannot confirm a pick control number that is in a pre-printed status (G Generated No Authorization or H Generated Has Authorization); see Creating Pre-Generated Picks. Numeric, 7 positions; required. |
|
The following fields are displayed when you enter a valid pick control number in an eligible status. |
|
Pick status |
The description of the pick slip’s status. Possible statuses are: are: • Open • Submitted to async • Billing pending • Confirmed • Declined authorization • Async processing error • Manifest submission • CarryOver • Packed • Reprinted • Suspended • Void • Waiting for authorization • Authorized Display-only. |
Order # |
The order number you wish to confirm. Numeric, 8 positions; display-only, assigned by the system. |
Ship-to number (Unlabeled field) |
A hyphen (-) separates this field from the Order # field. Indicates the number of shipping addresses on the order. Numeric, 3 positions; display-only. |
Ship to |
The name and address of the customer to receive the order. Alphanumeric, 41 positions (name), 32 positions (address), 10 positions (apartment), 40 positions (city/st/postal/cntry); display-only. |
A code that represents the shipper. Ship via codes are defined in and validated against the Ship Via table; see Working with Ship Via Codes (WVIA). The system writes an S (shipment) order transaction history message (Order History in order maintenance and inquiry) if the ship via is changed. Numeric, 2 positions; required. |
|
The freight charges associated with shipping this order. The system writes an S (shipment) order transaction history message (Order History in order maintenance and inquiry) if the meter charge is changed. If you enter multiple tracking numbers, the meter charges are associated with the first tracking number entered. Numeric, 8 positions; optional. |
|
The shipment tracking number, if any, to save in the Manifest Upload Audit table. The number is then eligible to include in the: • Outbound Email XML Message (CWEmailOut) or shipment confirmation email • Detailed Order Inquiry Response XML Message (CWORDEROUT) • E-Commerce Order Status Response Message (CWStatusResponse) Also, this number is displayed on the: • Display Package Information Screen • Third Streamlined Order Inquiry Screen (Order Summary) Note: The two screens above can provide a link to the shipper’s web site to review tracking history. • Select Orders For Return Authorization Screen • Display Order History Screen Multiple tracking numbers? Optionally, you can select Add’l Tracking #s to open the Enter Additional Tracking Numbers window. You can enter up to 10 tracking numbers at this window, plus the tracking number at the Confirm by Pick Control Number Screen, for a maximum of 11 numbers, regardless of the number of pick control labels that were originally generated. Note: Once you confirm shipment as described below, you cannot enter any additional tracking numbers for the pick slip. Alphanumeric, 30 positions; optional. |
|
Screen Option |
Procedure |
Change the date |
Select Change Date to activate the date field. Enter the new date (MMDDYY format). |
Carry over |
Select Carry over to change the status of the pick slip to carryover. |
Enter additional tracking numbers |
Select Add’l Tracking #s to open the Enter Additional Tracking Numbers window. You can enter up to 10 tracking numbers at this window, plus the tracking number at the Confirm by Pick Control Number Screen, for a maximum of 11 numbers, regardless of the number of pick control labels that were originally generated. Note: This option is available only after you have entered a valid pick control number. |
Work with details |
Select Work with Details to advance to the Confirm Pick Control Details Screen. This option is available only after entering a pick control number. |
Instructions: To confirm shipment by pick control number.
1. Enter the pick control number is the one you want to confirm in the Control # (Pick control number) field. The additional fields, described above, are displayed in the bottom portion of the screen.
2. Optionally, change the Ship via.
3. Optionally, enter Meter charges.
4. Optionally, enter a Tracking #. You can also select Add’l Tracking #s to open the Enter Additional Tracking Numbers window, where you can enter up to 10 tracking numbers, for a maximum of 11 numbers, regardless of the number of pick control labels that were originally generated.
5. Select OK to confirm the pick control number. A confirmation window opens if you normally use PC manifesting. Select Accept to accept the confirmation; otherwise, select Reject.
6. When you confirm the shipment, the screen displays a message: Pick submitted to async job!
Note: When you confirm the shipment, all labels associated with the pick control number are confirmed. You cannot confirm any additional shipments for the pick control number.
For more information: See Updates During Background Processing.
Purpose: Use this screen to enter and validate the serial number of each unit of an item you are confirming. Assigning serial numbers allows you to track activity, such as receipts or shipments, for individual units of an item. You can enter serial numbers for each unit of an item you are confirming if the Serial number flag for the item is selected. See Assigning Items to Warehouses for an overview of how serial numbers are tracked through the system.
How to display this screen: This screen displays automatically when you complete the Confirm by Pick Control Number Screen if the pick slip includes a serial numbered item.
Note: You cannot confirm pick slips containing serial numbered items by billing batch number. You must confirm these items by pick control number so that you can enter the serial numbers being shipped.
Field |
Description |
Serial #s |
The serial number(s) of each unit of the item or SKU you are confirming. This screen provides a field for entry of a serial number for each unit. Alphanumeric, 20 positions; required. |
Instructions:
1. Enter the serial number for each unit of an item you are confirming in each field provided.
2. The system validates that each serial number is on hand, in the correct warehouse and eligible to ship. If you have the proper authority, you can create a new serial number; see below. If the serial number is not available for shipment, an error message indicates: Serial # 7C1 has been returned to the vendor.
3. To confirm: Select Accept at the Confirm by Pick Control Number Screen.
4. To cancel: Leave the Serial number field(s) blank, select Accept to advance to the Confirm by Pick Control Number Screen, then select Return. A pop-up window, indicating that you have not entered enough serial numbers for confirmation, opens before you advance to the Confirm by Pick Control # screen.
Secured feature: The Create Serial Number During Shipment/Return (A66) secured feature controls whether you can create a new serial number at this screen.
Confirm Pick Control Details Screen
Purpose: This screen allows you to display pick control details at the line level.
How to display this screen: Select Work with details at the Confirm by Pick Control Number Screen.
Field |
Description |
Control # (Pick control number) |
The control number assigned to a pick slip. Numeric, 7 positions; display-only. |
Pick status (Unlabeled field to the left of the Control number field) |
The description of the pick slip's status. Status options: • Open • Submitted to async • Billing pending • Confirmed • Declined authorization • Async processing error • Manifest submission • CarryOver • Packed • Reprinted • Suspended • Void • Waiting for authorization • Authorized Display-only. |
Order # |
A unique number to identify an order. Numeric, 8 positions; display-only, assigned by the system. |
Ship-to number (Unlabeled field to the right of the order number) |
The number of the shipping address on the order. Numeric, 3 positions; display-only. |
Ship to |
The name of the customer to receive the order. Alphanumeric, 41 positions (name); display-only. |
Line # |
The line number on the pick slip. Numeric, 3 positions; display-only. |
Item |
A code that represents a unit of inventory. Item codes are defined in and validated against the Item table. Alphanumeric, 12 positions; display-only. |
SKU |
The unique characteristics of an item, such as its color and size. Alphanumeric, three 4-position fields; display-only. |
Printed |
The quantity of the item printed on the pick slip. Numeric, 5 positions; display-only. |
Packed |
The quantity of the item packed and shipping. Not currently implemented. Numeric, 5 positions; display-only. |
Sts (Status) |
The status of the item. Valid values are: • C = Cancel • H = Hold • Blank = Open Alphanumeric, 1 position; display-only. |
Screen Option |
Procedure |
Enter and validate serial numbers for each unit confirmed |
Select Serial #s for an item to advance to the Enter Serial Numbers Screen. |
Confirm by Pick Batch Number Screen
Purpose: Use this screen to confirm an entire batch of picks in a single entry. The system assigns the billing batch number when you generate pick slips.
How to display this screen: Select the Bill by batch number field on the Interactive Confirmation Screen.
Field |
Description |
Billing batch # |
The billing batch number containing the pick slips you are confirming. Numeric, 7 positions; required. |
Indicates if there are pick slips in the batch that are not shipping at this time. Valid values are: • Selected = Exclude exceptions from the billing run. You advance to the Work with Batch Exceptions screen. • Unselected = There are no exceptions in the billing run. You advance to the Batch Confirmation pop-up window. |
|
Ship via |
The shipper assigned to this batch of pick slips. Ship via codes are defined in and validated against the Ship Via table. The system writes an S (shipment) order transaction history message (Order History in order maintenance and inquiry) if you enter a ship via in this field. Numeric, 2 positions; required. |
Meter charge |
The total freight charges associated with shipping all pick slips in this batch. The system writes an S (shipment) order transaction history message (Order History in order maintenance and inquiry) if you enter a meter charge in this field. The system uses the following calculation to determine the meter charge for each unit in the batch: meter charge / total units in batch = meter charge per unit The system uses the following calculation to determine the meter charge for each pick slip in the batch: unit meter charge x number of units on pick = meter charge for each pick slip Example: batch 203 includes 25 pick slips the total meter charge for the batch is 150.00 the total units in the batch is 50 units per pick slip is 2 150.00 (meter charge) / 50 (total units in batch) = 3.00 (meter charge per unit) 3.00 (unit meter charge) x 2 (units per pick slip) = 6.00 (meter charge for each pick slip) |
|
Example: batch 204 includes 25 pick slips the total meter charge for the batch is 150.00 the total units in the batch is 50 units for pick slips 1-24 is 1 units for pick slip 25 is 26 150.00 (meter charge) / 50 (total units in batch) = 3.00 (meter charge per unit) 3.00 (unit meter charge) x 1 (number of units on pick slip) = 3.00 (meter charge for pick slips 1-24) 3.00 (unit meter charge) x 26 (number of units on pick slip) = 78.00 (meter charge for pick slip 25) |
|
You can review summary information for a batch of pick slips such as per unit meter charge and total picks confirmed on the Batch Confirmed Report. Numeric, 8 positions; optional. |
Completing this screen: If you selected the Exceptions field, you advance to the Work with Batch Exceptions Screen (Confirming by Billing Batch Number with Exceptions).If you unselected the Exceptions field, you advance to the Batch Confirmation pop-up window. See Confirming by Billing Batch Number (without Exceptions).
Work with Batch Exceptions Screen (Confirming by Billing Batch Number with Exceptions)
Purpose: Exceptions are pick control numbers in the batch that did not ship or that you wish to exclude from the batch (for example, the pick slip includes a different ship via than the rest of the pick slips in the batch). Use this screen to exclude these control numbers from the billing run.
How to display this screen: Select the Exceptions field on the Confirm by Pick Batch Number Screen.
Field |
Description |
Billing batch # |
A number to identify a batch of pick slips. Numeric, 7 positions; display-only, assigned by the system. |
Billing date |
The billing date for this batch of picks. Numeric, 6 positions (MMDDYY format); display-only. |
Cntrl # (Pick control number) |
The control number assigned to a pick slip. Type a control number to display pick slips in that batch in numeric sequence beginning with your entry. Numeric, 7 positions; required. |
Ship to |
The name of the customer to receive the order. Alphanumeric, 41 positions; display-only. |
Pick status |
The description of the pick slip's status. Valid values are: • Open • Submitted to async • Billing pending • Confirmed • Declined authorization • Async processing error • Manifest submission • CarryOver • Packed • Reprinted • Suspended • Void • Waiting for authorization • Authorized Display-only. |
Whs (Warehouse) |
A code to identify the warehouse confirming the shipment. Warehouse codes are defined in and validated against the Warehouse table; see Creating and Maintaining Warehouses (WWHS). Numeric, 3 positions; display-only. |
Screen Option |
Procedure |
Void the pick |
Select Void Pick for a pick slip to advance to the Reprint/Void Pick Slips Screen (Reprinting/Voiding by Pick Control Number). |
Confirm the pick |
Select Confirm for a pick slip to confirm the pick slip. Note: If the pick is a carryover or was submitted to the PC manifest, its status changes to Open when you select this option. |
Carry over |
Select Carryover for a pick slip to change the status of the pick to Carryover. |
Work with details |
Select Work with Details for a pick slip to advance to the Confirm Pick Control Details Screen. |
Accept the batch |
Select Accept to accept the batch. See Accepting and Rejecting Batches (with Exceptions). |
Reject the batch |
Select Reject to reject the batch. The system displays the Confirm Reject Request pop-up window. See Accepting and Rejecting Batches (with Exceptions). |
Accepting and Rejecting Batches (with Exceptions)
Purpose: To complete confirming by billing batch number (with exceptions), you must accept or reject the batch.
To accept a batch: You can accept a batch by selecting Accept at the Work with Batch Exceptions Screen (Confirming by Billing Batch Number with Exceptions). The system displays the Batch Confirmation pop-up window.
Batch Confirmation Pop-up Window
This window indicates that you are about to submit the batch for confirmation. Select OK to accept the batch confirmation and exit the screen; otherwise, select Exit to cancel the batch confirmation and return to the previous screen.
Confirming the batch causes the system to submit the batch job (BCH_CONFRM) for processing, and create the Batch Confirmed Report. Any pick slip that you marked for void or carry over is excluded from the billing run.
To reject a batch: You can reject a batch by selecting Reject at the Work with Batch Exceptions Screen (Confirming by Billing Batch Number with Exceptions). The Confirm Delete pop-up window displays.
Select OK to confirm the delete or select Exit to cancel and return to the previous screen.
Important: If you confirm the rejection, any changes that you indicated on the Work with Batch Exceptions Screen (Confirming by Billing Batch Number with Exceptions) are not executed by the system. Pick slips remain in the status they were in when you entered the Work with Batch Exceptions screen.
Confirming by Billing Batch Number (without Exceptions)
Purpose: Use this window to confirm a batch of pick control numbers for billing without exceptions.
How to display this window: Unselect the Exceptions field at the Confirm by Pick Batch Number Screen.
To confirm the batch: Select OK to confirm at the confirmation window to confirm the batch; otherwise, select Exit to cancel the confirmation and return to the Confirm by Pick Batch Number screen.
Confirming the batch causes the system to return to the previous screen and to submit the batch job (BCH_CONFRM) for processing, and to create the Batch Confirmed Report.
| PC Manifesting Interface | Contents | SCVs | Search | Glossary | Reports | Solutions | XML | Index | Batch Confirmed Report |

MCON OROMS 5.0 2018 OTN