17Notifications
Notifications
This chapter describes how to administer and review notifications for your application. It includes the following topics:
About Notifications
Notifications provides a way for administrators and other users to send important information directly to the screens of users. Typically, this information is time-critical, such as a due date, or it is updated frequently, such as the status of a call queue.
Messages appear in notification panes that users access by clicking Notification (the exclamation mark icon) on the application toolbar. They have severity levels (indicated by color) and activation and expiration dates.
You create notifications in the Message Broadcasts view of the Administration - Communications screen. Notifications can be created automatically from Siebel Business Process Designer or remotely from a third-party application through Siebel EAI.
Notification Message Order
Messages in the notification pane appear in a set order. Unread messages appear first in the pane and are sorted by message date with later messages appearing before earlier messages. Read messages appear after the unread messages and are also sorted by message date with later messages appearing before earlier messages.
Notification messages are retrieved from the Message table through the Siebel Application Server and they are sent to the notification pane of the targeted Web client sessions.
Disabling Notification Messages
When the administrator sets a component parameter that allows users to enable or disable notification messages, users can disable the Notification button and notification panes. The administrator can change this component parameter to override this user setting for notification messages.
Notification Caching Versus Directly Polling the Siebel Database
The Siebel application obtains the display messages by using the following methods:
The default behavior is read the messages from the Siebel database each time the notification pane is refreshed. This method can adversely affect performance if the panes are set to refresh frequently.
Notification caching stores messages in each Siebel Application Object Manager. The messages are then sent through the Service Request Broker (SRBroker).
About Web Notifications
Your application supports Web notifications for incoming calls and chats. The Web notifications feature is based on the standard Web Notifications API. Siebel integrates the Web Notifications API (http://www.w3.org/TR/notifications/) with Siebel CTI and Siebel Chat so that when any of the following happens, an alert or pop-up window appears notifying agents about incoming calls and chats so that customer calls or chats will not be missed:
Agents navigate away from the main application browser window.
The application browser window is minimized or hidden behind another application window.
Clicking inside the Web notification pop-up window brings the application browser window to the front. There is a Bring Siebel to Front user preference which you can set to one of the following options to control when to display Web notifications for incoming calls and chats:
On All Incoming Work Items
On Matching Events
Off
For more information about the Bring to Front user preference, see Siebel CTI Administration Guide and Doc ID 216960.1 on My Oracle Support.
Scenario for Administering Notifications
This topic gives one example of how notification administration might be used. You might use notification administration differently, depending on your business model.
The contact center administrator wants to inform customer-care representatives of the current total number of outbound calls relative to their day’s goal. In addition, the administrator wants the inform customer-care representatives of the current customer service levels and whether customers are waiting for service.
After working with the telecommunications and application teams to define the appropriate real-time contact center statistics for his customer-care representatives and contact center, the contact center administrator creates notifications, using statistics from a variety of sources and third party solutions. The real-time data feed into the notifications tables is accomplished through Siebel EAI after the appropriate statistics and their sources are identified. The customer-care representatives then receive their individual and group statistics on their notification pane in real time.
In addition to providing his customer-care representatives with this real-time status information, the contact center administrator also wants to send informative messages to individuals and teams in real time. Throughout the shifts and work day, he sends these messages to individuals and teams using the Message Broadcasts view within the Siebel application. The contact center administrator can send a message to an individual employee, a set of employees with the same responsibility, a division of employees, or to all employees.
The customer-care representatives service customers using multiple communication channels with the Siebel application. The customer-care representative receives contact center statistics calculated for an individual, a group, or in summary on the notification pane within the Siebel application. This real-time information updates the customer-care representatives about whether they and the call center are meeting their service objectives.
Process of Administering Notifications
To administer notifications, perform the following tasks:
Enabling and Disabling Notifications
By default, notifications are enabled. As an administrator, you can enable or disable notifications. You can set notifications to operate in any of the following modes:
Always enabled
Always disabled
User enabled (default)
This task is a step in Process of Administering Notifications.
To enable or disable notifications for an application
Navigate to the Administration - Server Configuration screen, then the Enterprises view.
From the Enterprise Servers list, select the enterprise server that runs the application with the notification settings you want to modify.
Navigate to the Component Definitions view, and select a component with a Component Type value of Application Object Manager.
In the Component Parameters list, select the Application Message Bar Flag parameter, and type the appropriate value in the Value field.
For details on how to configure the server component, Siebel Application Object Manager, or parameters, see Siebel System Administration Guide.
The parameter values are described in the following table.
Parameter Value
Comments
TRUE
Specify this value if you want to always enable notifications. Note the following about a value of TRUE:
Users cannot disable notifications.
For Siebel Web client deployments, the Siebel Application Server relays messages to users. For Mobile Web client users, messages are synchronized.
You can use the Application Message Bar Update parameter to specify the refresh rate for the notification pane. Modify the Value field of the Application Message Bar Update parameter. The default value is 120 seconds.
If the update interval is less than the SessionTimeout set in the CFG file of the application, then sessions never time out.
FALSE
Specify this value if you want to always disable notifications. Note the following about a value of FALSE:
The Notification button and notification panes do not appear on the screens of users
For Siebel Web client deployments, the Siebel Application Server does not relay messages to users. For Mobile Web client users, messages are not synchronized.
User Enabled
Specify this value if you want users to enable or disable notifications in their user preferences. Note the following about a value of User Enabled:
The update interval is a user preference
If a Web client user disables notifications, then the Siebel Application Server does not relay messages to the user. If a Mobile Web client user disables notifications, then messages are not synchronized.
If the update interval is less than the SessionTimeout set in the CFG file of the application, then sessions never time out.
Enabling or Disabling Notifications in Mobileand Developer Web Clients
You can enable or disable notifications in Siebel Mobile and Developer Web clients. This task is an optional step in Process of Administering Notifications.
To enable or disable notifications on Mobile and Developer Web clients
Open the CFG file for your Siebel application using a text editor.
Locate and go to the ShowMessageBar parameter in the CFG file.
For example: ShowMessageBar=True.
Set the parameter value to TRUE, FALSE, or User Enabled as required.
For a description of each parameter value, see Step 4 on page 124.
If you set the ShowMessageBar parameter to TRUE, then specify the refresh rate for the notification pane by adding the following line to the CFG file:
MessageBarUpdateInterval=seconds
Where seconds is the interval in seconds between refreshes to the notification pane. The default value is 120 seconds.
Save and close the CFG file.
Creating a Notification
When you create a notification, all connected users you specify receive the message immediately on the date and time you specify for message activation. Mobile users, such as field representatives, receive the activated messages when they synchronize.
This task is a step in Process of Administering Notifications.
To create a notification
Navigate to the Administration - Communications screen, then the Message Broadcasts view.
In the Message Broadcasts list, create a new record, and complete the necessary fields.
Some fields are described in the following table.
Parameter Value
Comments
Severity
Select the severity level to indicate the importance and appearance of the message. Each severity level is associated with a color. The severity level that you select determines the color of the text in the message.
If you select a severity of Urgent with Alert, then the user sees a blinking Notification button, and clicks the blinking button to view the message.
Abstract
Type a brief description of the message. When users click the Notification button to access messages, this text appears in the notification pane.
Message
Type the text you want to include in the message. This field accepts up to 2,000 characters. This text appears in the notification pane.
Recipient Position
Select the positions associated with the users to whom to send the message.
You can use this field in combination with the Recipient Division field.
An employee name appears in the Recipients dialog box if the employee has a defined position and is marked active for that position. If multiple employees occupy the same position, then the message is sent to all of them, although you see only the active employee on the list.
Employees with multiple positions see messages sent to any of their positions, regardless of the position associated with their login ID.
Recipient Division
Select the divisions associated with the users to whom to send the message.
You can use this field in combination with the Recipient Position field.
All
Select this check box to send the message to all users.
Activation Date/Time
Select the date and time at which you want to start sending the message. If the Activation field is blank, then the message is sent immediately.
However, notifications are controlled by the application message interval and login.
The date and time are taken from the Siebel Server (not from the computer where the client browser runs). Make sure that the date and time are set correctly on the server.
Expiration Date/Time
Select the date and time at which you want to stop sending the message. If the Expiration field is blank, then the message is sent continually.
The date and time are taken from the Siebel Server (not from the computer where the client browser runs). Make sure that the date and time are set correctly on the server.
Broadcast
Select this check box to display the message in the notification pane. Clear the check box to hide (not display) the message in the notification pane.
Briefing Bulletin
Select this check box to distribute the message as a bulletin on the My Briefing page. For more information, see Siebel Briefings Administration Guide.
Allow Dismiss
Select this check box to allow users to dismiss (or delete) the message in the notification pane. When you select this check box, Dismiss appears next to the message in the notification pane, and users click Dismiss to dismiss the message.
Recipient Users
Select the users to whom to send the message.
If the values that you select in the Recipient Position field and the Recipient Division field are not associated with all of the users to whom you want to send the message, then select the remaining users in this field.
Updating a Notification
Sometimes after a message is sent to users, you might want to change the message text. In this scenario, you want users who have already read or dismissed (deleted) the message to see your changed version of the message. Complete the procedure in this topic to convert a message that users have already read or dismissed to a message that users have not read or dismissed. Users can then access the message again to see the changed version of the message.
This task is a step in Process of Administering Notifications.
To update a notification
Log in to your application as administrator.
Navigate to the Administration - Communications screen, then the Message Broadcasts view
In the Message Broadcasts list, select the message you want to update.
Complete the appropriate changes to the message.
Click Set as Unread.
After you update an existing or create a new notification message, the updated or new message is sent directly to application screens and the counter beside the Notification button on the menu toolbar increases to indicate that a new message has arrived. If the new message waiting to be read has an Urgent with Alert severity, then the Notification button also blinks on the menu toolbar.
Administrators can modify the code internally for notification messages on either the client or server-side using the following APIs:
AddNotification. Creates a notification and returns the Row_Id of the notification.
DeleteNotification. Deletes a notification using the Row_Id.
UpdateNotification. Updates a notification using the Row_Id.
ReadNotification. Returns the notification details using the Row_Id.
For more information about these APIs, see Configuring Siebel Open UI.
About Automatically Updating Notification Text
As an administrator, you can customize notifications to automatically update message text that changes frequently. For example, a call center’s queue statistics frequently change. Every few minutes, an administrator has to update the statistics to make sure agents have the most accurate information. This manual approach is very time consuming and inefficient when dealing with frequently changing data.
You can use Siebel EAI to automatically update notification text. Your CTI middleware or ACD switch can provide the data for the Siebel application to distribute.
The Broadcast Message business component manages the messages. The following table lists and describes the fields of this business component. These field names are necessary for developing the integration object.
This task is a step in Process of Administering Notifications.
Table Field Names for the Broadcast Message Business Component
Field |
Description |
|---|---|
Abstract |
A short summary for identifying the purpose of a message, such as Calls In Queue. |
Activation Date/Time |
The beginning of the notification. |
All |
The designation to send the message to all employees with positions defined. |
Body |
The text of the message. |
Division |
The designation to set recipients using division. |
Division Id |
The internal identification value for Division. |
Expiration Date/Time |
The end of the notification. |
Position |
The designation to set recipients using position. |
Position Id |
The internal identification value for Position. |
Recipient |
The designation to set recipients using employee. |
Recipient Id |
The internal identification value for Recipient. |
Type |
The severity of the message as defined in the type BRDCST_MSG_TYPE in the List of Values. |
Via Broadcasting |
The designation to send the message using notifications. |
Via Interactive |
The designation to send the message using Siebel eBriefings. |
Sample Notifications Script
The notification script can be created through a button, an Excel macro, or another VB application. Because it is a script and not an application, it does not need the VB Set command. All the commands are standard to VB coding.
This script is designed to update a message without an expiration date, not to create a new message every time. For more information about how to get or create a Siebel Application Object, see Configuring Siebel Business Applications.
'Get "Broadcast Message" BusComp
   Set BusObj = SiebelApplication.GetBusObject("Broadcast Message", errCode)
   Set BusComp = BusObj.GetBusComp("Broadcast Message", errCode)
'Find "Calls Waiting" message
   BusComp.SetSearchSpec "Abstract", "Calls In Queue", errCode
   BusComp.ExecuteQuery 0, errCode
   If BusComp.FirstRecord(errCode) <> True Then
'We need to create a new message
   BusComp.NewRecord 0, errCode
   BusComp.SetFieldValue "Abstract", "Calls In Queue", errCode
‘Prepare message using middleware API info.
   End If
   Set Msg = "[N]Calls Waiting: [U]10"
'Update the record
   BusComp.SetFieldValue "Body", Msg, errCode
   BusComp.SetFieldValue "All", "Y", errCode
Write the record
  BusComp.WriteRecord errCode
In addition to writing a script, you can use Siebel Business Process Designer to create or update a message. For more information, see Siebel Business Process Framework: Workflow Guide.
Configuring Notifications Caching
The following task describes how to configure your Siebel application to take advantage of notifications caching. For information about activating the Check New Broadcast Message workflow policy, see Siebel Business Process Framework: Workflow Guide.
This task is a step in Process of Administering Notifications.
To configure notifications caching
Navigate to the Administration - Server Configuration screen, then the Enterprises view.
From the Enterprise Servers list, select the enterprise server that runs the Siebel application with notifications settings you want to modify.
Navigate to the Component Definitions view, and select a component with a Component Type value of Application Object Manager.
In the Component Parameters list, select the Application Enable Message Broadcast Cache parameter, and type TRUE in the Value field.
For details on how to configure the server component or Siebel Application Object Manager parameters, see Siebel System Administration Guide.
Note: The default value for the Application Message Broadcast Cache Size parameter is 100. You probably do not have to increase this value. The minimum cache size is the ratio [refresh rate for the notification pane] / [message update interval]. For example, if the refresh rate is every 120 seconds, and the message update interval is every 10 seconds, then set the cache size parameter to at least 12.Enable notifications caching for Developer Web clients (if any), and add or edit the EnableMsgbroadcastCache parameter in the [Siebel] section in your Siebel application’s CFG file as follows:
EnableMsgbroadcastCache = TRUE
Reviewing Notifications
Managers use notifications to communicate information to their direct reports and to others in the organization. If your application administrator provides you with the proper authority, then you can customize the behavior of notifications in your user preferences. For more information, see Notifications Setup.
You access notifications by clicking the Notification button on the application toolbar.
To review notification messages in the application
Click Notification (the exclamation mark icon) on the application toolbar.
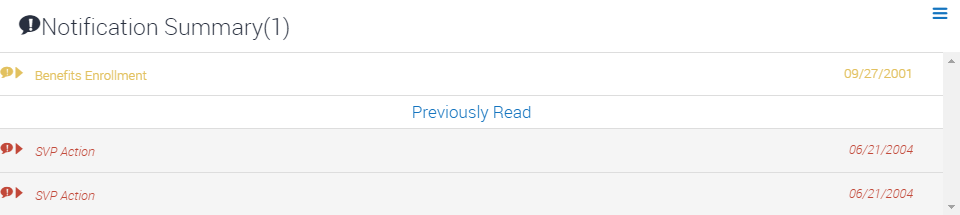
The notification pane opens where:
The messages that you have not read appear at the start of the list.
The messages that you have already read appear in the Previously Read section.
The message severity or level of importance attached to a message is illustrated by the color of the message, as described in Notification Levels of Importance.
All notification messages are read-only. The following image shows an example of a notification pane.
Click a message to open and review the details of the message.
Click any attachment that is part of a message to open and view the attachment.
Click any hyperlink that is part of a message to navigate to the associated view.
-
Click the message again to close it after you have read it.
The message moves to the Previously Read section in the notification pane.
The counter beside the Notification button on the application toolbar decreases accordingly.
Tap Delete (the X icon) to delete a message after you read it.
After you delete a message, the message disappears from the notification pane.
Click Mark as Read to clear all unread messages and mark them as read.
Notification Button and Pane
Note the following about the Notification button and pane, and accessing notifications:
The counter beside the Notification button (the exclamation mark icon) on the application toolbar indicates the number of messages that are waiting for you to read.
Read messages are not included in the message number that appears beside the Notification button.
If there is more than one message waiting to be read, then the Notification button appears in the color associated with the most important (highest priority) unread message.
When there are zero messages, then the Notification button displays zero.
If the Notification button is blinking, then you have at least one unread message with a severity of Urgent with Alert.
The Notification button stops blinking after the message is read.
The Notification button does not blink if there are messages waiting to be read with only a Normal, High, or Urgent severity.
When you click Notification on the application toolbar, the notification pane opens showing a summary of each message.
Unread messages appear first and are sorted by message date.
Read messages appear next in italic text, and they are also sorted by message date.
When you expand a notification by selecting it, the details appear for that message.
Notification Levels of Importance
The level of importance or severity attached to a notification or to specific text in a notification message is indicated by the default color associated with the notification message. The following table describes the different levels of importance or severity that exist for notifications and the default color associated with each level in the preconfigured application.
The Notification button appears in different colors depending on the level of importance or severity attached to unread messages, and always in the color associated with the most important (highest priority) unread message. For example, if 3 unread messages exist, and if one message has a Normal level of importance, one message has a High level of importance, and one message has an Urgent level of importance, then the Notification button appears in the color associated with the Urgent message. If no unread messages exist, then the Notification button appears in the color associated with a Normal message.
Your application administrator can configure the color to associate with the different notification levels of importance by changing the style sheet for the application.
Table Notification Levels of Importance
Notification Level of Importance or Severity |
Default Message Color |
|---|---|
Normal |
Gray |
High |
Yellow |
Urgent |
Red |
Urgent with Alert |
Red |
For each notification level of importance, it is recommended that you also configure the following user preferences on the Message Broadcasting form when setting up notifications so that users will be able to determine the importance of each notification message from its prefix:
Prefix of Normal Priority Message
Prefix of High Priority Message
Prefix of Urgent Priority Message
For more information about configuring these user preferences for notifications, see Notifications Setup.