Using the PeopleSoft Fluid User Interface to Review and Update Personal Information
This topic discusses how employees use the PeopleSoft Fluid User Interface to view and update their personal information. The fluid pages discussed in this topic have classic equivalents that are discussed in the topic Reviewing and Updating Personal Information.
The personal data fluid pages appear in a framework that includes the following:
An overall page title of “Personal Details”.
The common employee self-service header.
The header includes the employee’s name, job title, photo (if available), Update Photo link (if enabled on the Installation Table), and a related actions icon. The related actions icon provides access to additional self-service transactions.
A panel on the left with tabs for accessing specific pages.
For general information about Fluid pages in PeopleSoft HCM, see Understanding PeopleSoft Fluid User Interface Home Pages
|
Page Name |
Definition Name |
Usage |
|---|---|---|
|
HC_HR_EE_ADDR_FL_GBL (this is the cref for the tile) |
Tap this tile to access a group of fluid pages that are used to view and maintain your personal information. |
|
|
HR_EE_ADDR_FL |
View your home address and mailing address. |
|
|
ADDRESS_DFT_SCF |
Update address information and view or add attachments that may support the update. |
|
|
HR_EE_CONTACTS_FL |
Review your phone numbers, email addresses, and instant messaging IDs. |
|
|
HR_CNCT_PHONE_SCF |
Add, update, or delete a phone number. |
|
|
HR_EMAIL_ADDRS_SCF |
Add, update, or delete an email address. |
|
|
HR_IM_CHAT_SCF |
Add, update, or delete an instant messaging ID. |
|
|
W3EB_SEL_EVNT_FLU (if eBenefits is active) HR_EE_MARITAL_FL (if eBenefits is not active) |
Enter a marital status change. |
|
|
HR_EE_NAME_FL |
View your current name and any pending name change requests |
|
|
NAME_DFT_SCF |
Enter name change information and view or add attachments that may support the update. |
|
|
HR_ETHNIC_GRP_FL |
View your ethnic group data. |
|
|
HR_ETHNIC_GRP2_SCF |
Enter ethnicity information when the system is configured to collect the information using the two-question format. |
|
|
HR_ETHNIC_GRP_SCF |
Add, update, or delete an ethnic group from your personal data. |
|
|
HR_EMERG_CNTCT_FL |
View a list of your emergency contacts. |
|
|
HR_EMERG_CNTCT_SCF |
Add, update, or delete an emergency contact. |
|
|
HR_EMERG_ADDR_SCF |
Add, update, or delete an address for an emergency contact. |
|
|
HR_EMERG_PHONE_SCF |
Add, update, or delete a phone number for an emergency contact. |
|
|
HR_ADDTL_INFO_FL |
Review miscellaneous personal information. |
|
|
HR_DISABILITY_FL |
Complete and file Form CC-205 disability data electronically. |
|
|
HR_VET_STATUS_FL |
Enter and update self-identification veteran information. |
|
|
HR_I9_EE_FL |
Access the I-9 instructions PDF, access the Form I-9 page (HR_I9_EE) where you enter personal employee eligibility information, and review the date on which you submitted your Form I-9, |
|
|
Employment Eligibility Verification Page, Section 1 |
HR_I9_EE |
Complete the employer sections (2 and 3) of the Form I-9. See Employment Eligibility Verification Page, Section 1 (HR_I9_EE) and Employment Eligibility Verification Page, Section 2 and Section 3 (HR_I9_ADMIN_SEC2) in your Human Resources Administer Workforce product documentation. |
|
USCIS Form I-9 - Submit Confirmation Page |
EO_SUBMIT_CONFIRM |
View a confirmation that you have successfully submitted the Form I-9. See (USA) Managing I-9 Information in your Human Resources Administer Workforce product documentation. |
|
HRCD_USER_PICS_SCF |
Upload or select an employee photo to display in self-service and throughout the system. |
Use the Personal Details tile to access a group of fluid pages that are used to view and maintain your personal information.
Navigation
Select Fluid Home under the main menu. On the page that appears, select Employee Self Service. The Personal Details tile is available on the Employee Self Service landing page.
As an employee, you can add the tile, through personalization, to a system-delivered homepage or a homepage that you create.
Image: Personal Details tile
This example illustrates the Personal Details tile.
Depending upon the system setup and personal preferences, the picture may display a default photo.
Tap the Personal Details tile to access these employee self-service transactions easily without using traditional menu navigations:
Addresses
Contact details
Marital status
Name
Ethnic groups
Emergency contacts
Additional information
Disability
Veteran status
Form I-9
Select photo
Use the Addresses (Summary) page (HR_EE_ADDR_FL) to view your home address and mailing address.
Navigation
Tap the Personal Details tile on a PeopleSoft Fluid User Interface home page.
If you are already on a Personal Details fluid page, tap the Addresses tab.
Image: Addresses (summary) page
This example illustrates the Addresses (summary) page.
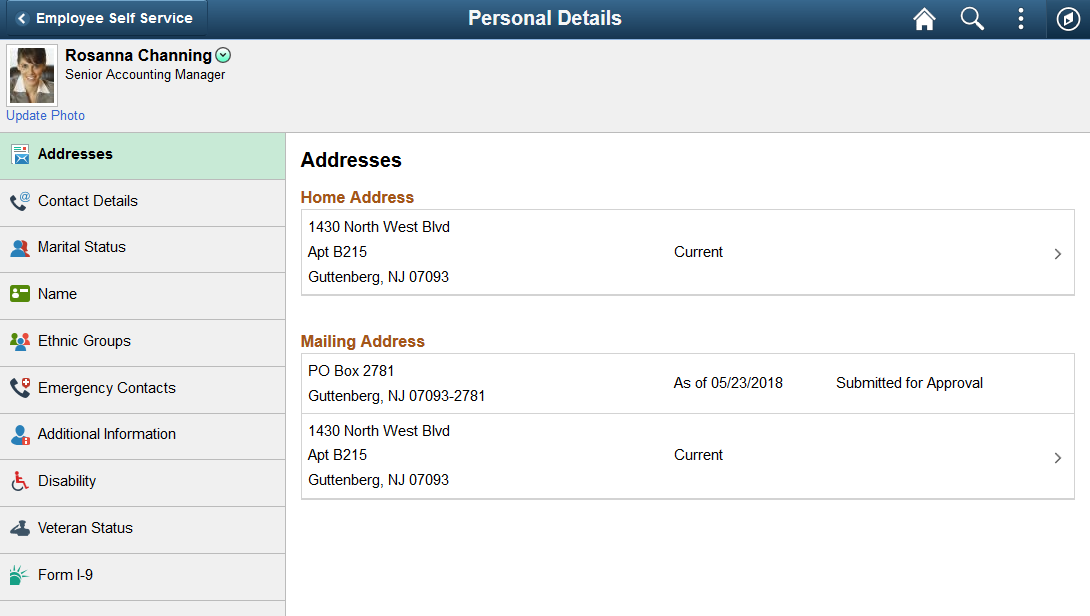
Tap an address to view details on the Address (Detail) Page and make changes.
When using approvals (AWE) and the user submits a change request for this transaction, the row will show the current row and the proposed change request row. The change request row will show the as of date and the status that it has been sent for approval. You cannot access the address details for pending requests. If the request is approved, the new address will become the current row on the as of date, at which point the earlier address will no longer appear on the page.
For information on where to approve a request, see Using Fluid Approvals to Approve Self Service Transaction Requests.
Use the Address (detail) page (ADDRESS_DFT_SCF) to update address information and view or add attachments that may support the update.
Navigation
Tap an address on the Addresses (summary) page to update an existing address.
Tap the Add Address button or icon to add a new address. This option is available for an address type (home or mailing address) only if no address currently exists.
Image: Address (detail) page
This example illustrates the Address (detail) page.
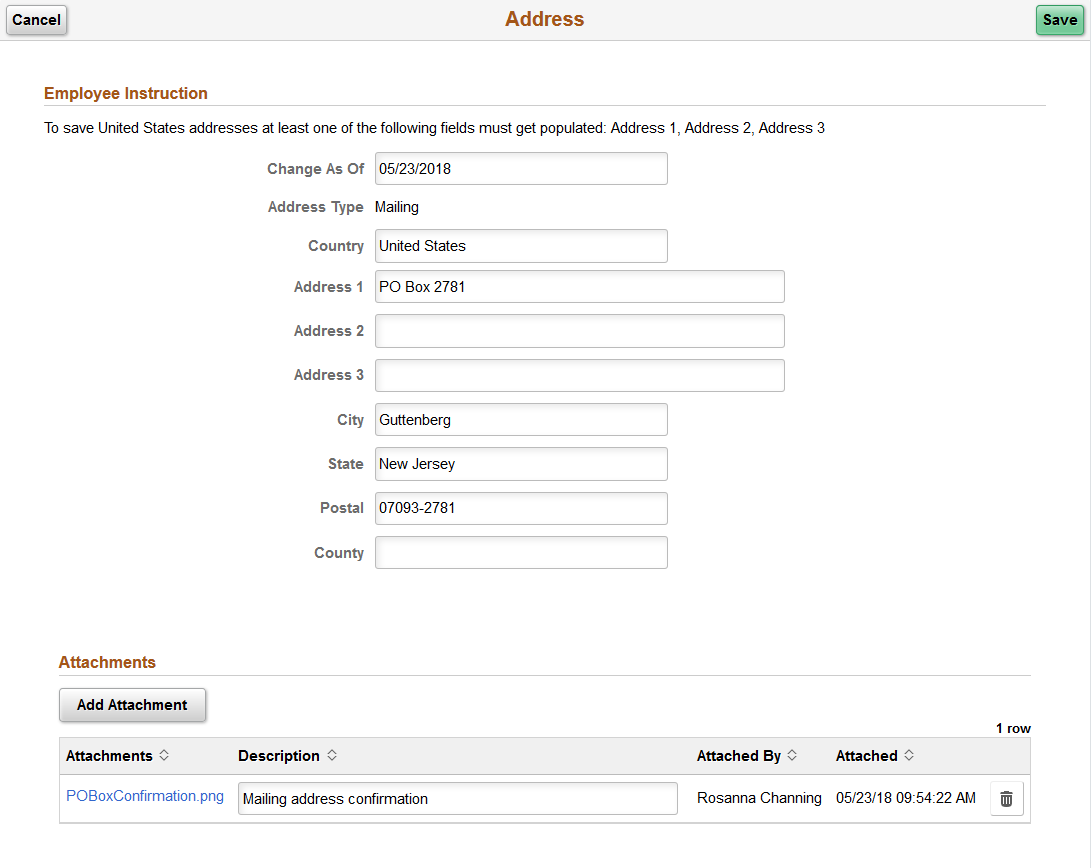
The address format varies depending on the value in the Country field.
When approvals workflow has been set up for this transaction and you click Save, the top of the page will display a confirmation that the transaction request has been sent for approval.
Attachments
Use this section to manage attachments by uploading, deleting, or updating attachments using fluid. Attachments are not accessible from the classic pages. Attachments are saved in the PS_HR_ESS_ADDR_ATT table. When a user submits an address change for approval, all attachments on this page will be sent with the request. To send an address change request without an attachment, remove the items from this section.
|
Field or Control |
Definition |
|---|---|
| Add Attachment |
Click this button to access the File Attachment page and upload files. |
| Attachments and Description |
Select the link to download and view the attachment. Enter a description, or the field will use the attachment file name as the description upon saving the page, which you can overwrite. |
 (Delete) button (Delete) button |
Click this button to remove an attachment from your personal details address page. |
Managers use fluid Approvals to view attachments for an Address Change transaction request using the Attachments Page.
The following videos provide an overview and demonstration of the Fluid Attachment framework:
Use the Contact Details page (HR_EE_CONTACTS_FL) to review your phone numbers, email addresses, and instant messaging IDs.
Navigation
Tap the Personal Details tile on a PeopleSoft Fluid User Interface home page, then tap the Contact Details tab on the Personal Details page.
Image: Contact Details page
This example illustrates the Contact Details page.
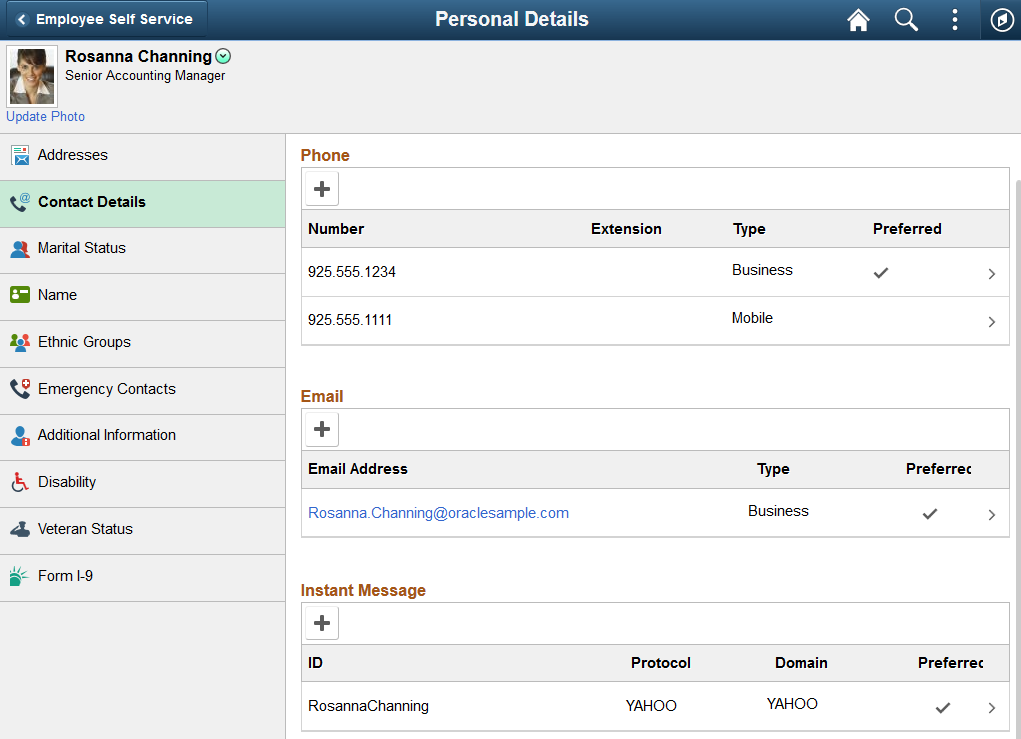
Use the Phone Number page (HR_CNCT_PHONE_SCF) to add, update, or delete a phone number
Navigation
Tap a phone number on the Contact Details page to update or delete an existing phone number.
Tap the Add Phone Number button or icon to create a new phone number.
Image: Phone Number page
This example illustrates the Phone Number page.
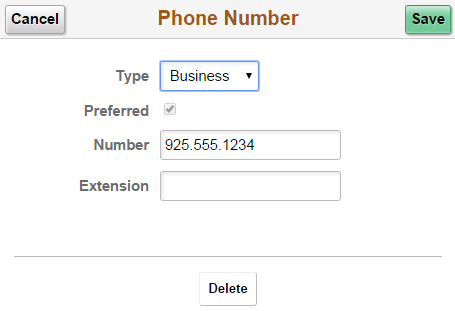
Only one phone number can be preferred, so selecting the Preferred check box removes the preferred status from any other phone number.
Tap the Delete button to remove the phone number. If you delete a preferred phone number, the system displays a confirmation message. If the delete is confirmed, the system automatically marks the first remaining phone number as preferred.
Use the Email Address page (HR_EMAIL_ADDRS_SCF) to add, update, or delete an email address.
Navigation
Tap an email address on the Contact Details page to update or delete an existing email address.
Tap the Add Email Address button or icon to create a new email address.
Image: Email Address page
This example illustrates the Email Address page.
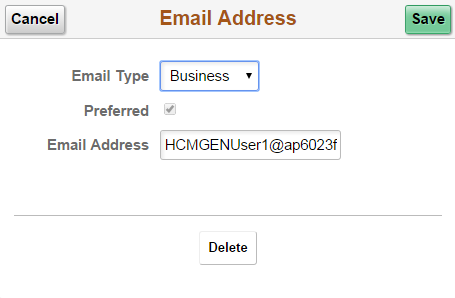
Only one email address can be preferred, so selecting the Preferred check box removes the preferred status from any other email address.
Tap the Delete button to remove the email address. If you delete a preferred email address, the system automatically marks the first remaining email address as preferred.
Use the Instant Message page (HR_IM_CHAT_SCF) to add, update, or delete an instant messaging ID.
Navigation
Tap an instant message ID on the Contact Details page to update or delete an existing instant message ID.
Tap the Add Instant Message button or icon to create a new instant message ID.
Image: Instant Message page
This example illustrates the Instant Message page.
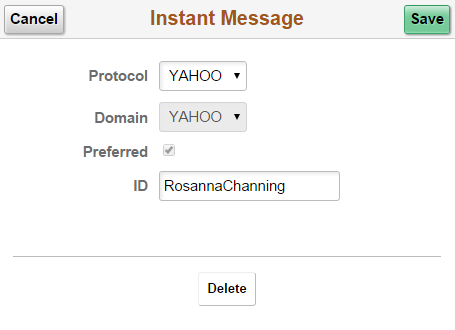
Only one instant message ID can be preferred, so selecting the Preferred check box removes the preferred status from any other instant message ID.
Tap the Delete button to remove the phone number. If you delete a preferred instant message ID, the system displays a confirmation message. If the delete is confirmed, the system automatically marks the first remaining instant message ID as preferred.
Use the Marital Status page (W3EB_SEL_EVNT_FLU) to initiate a marital status change life event.
Navigation
Tap the Personal Details tile on a PeopleSoft Fluid User Interface home page, then tap the Marital Status tab on the Personal Details page.
Image: Marital Status page with eBenefits
This example illustrates the Marital Status page as it appears when PeopleSoft eBenefits is selected on the Installation Table - Products Page.
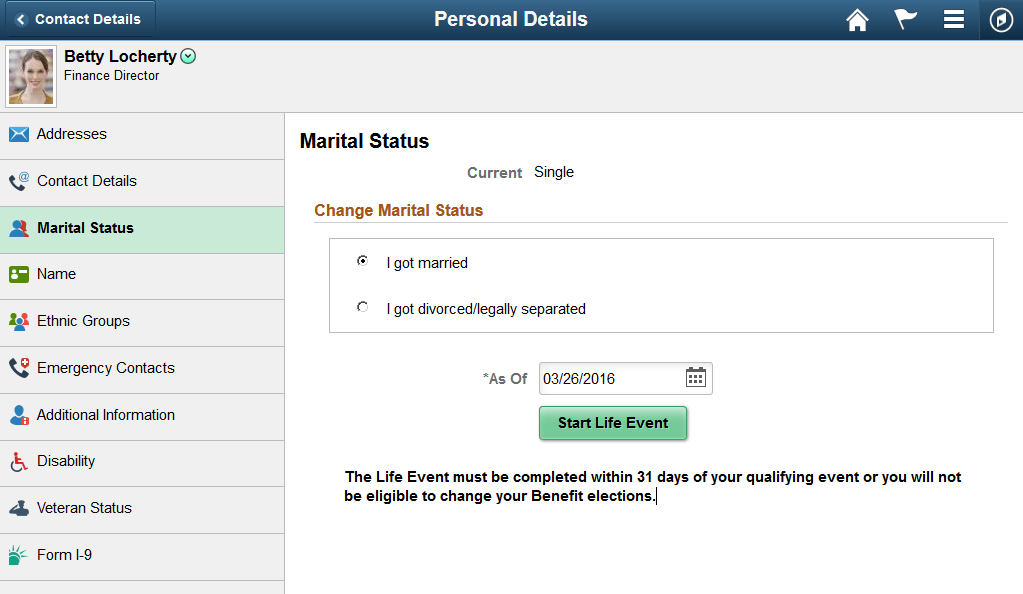
When PeopleSoft eBenefits is installed, the Marital Status page lists your organization’s life event options that relate to marital status changes. As delivered, this includes the “I got married” event and the “I got divorced/legally separated event,” but these are configurable.
When you select the type of marital status change, the page displays a message with information about the time period within which the life event information must be submitted (for example, within 31 days of the event).
Next you enter the event date in the As Of field and tap the Complete Life Event button. The system then displays the classic life event pages where you complete the transaction.
For information about the pages used to for the two delivered marital status change events, see the following topics:
For information on where to approve a request, see Using Fluid Approvals to Approve Self Service Transaction Requests and Pages Used to Approve Self Service Transaction Requests Using Fluid Approvals.
Image: Marital Status page without eBenefits
This example illustrates the Marital Status page as it appears when PeopleSoft eBenefits is not installed.
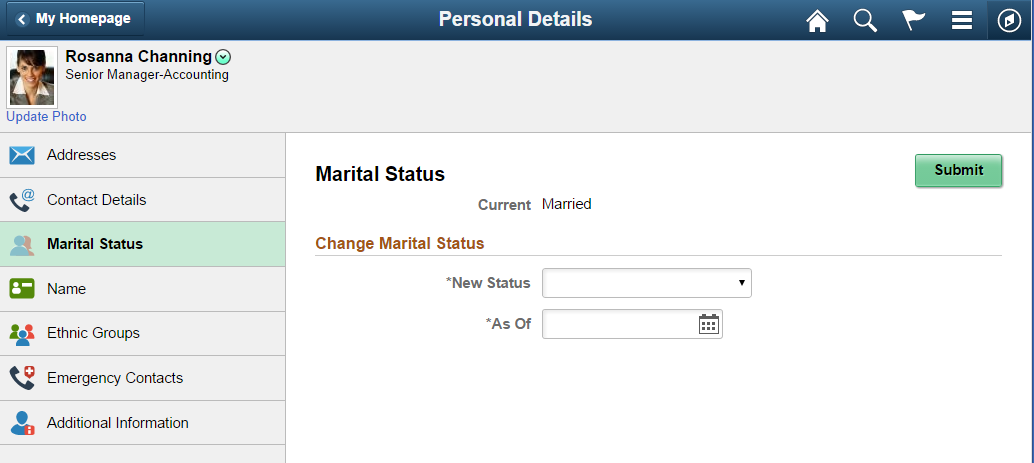
When PeopleSoft eBenefits is not installed, enter marital status change information and submit the changes directly on the Marital Status page.
Use the Name (summary) page (HR_EE_NAME_FL) to view your current name and any pending name change requests.
Navigation
Tap the Personal Details tile on a PeopleSoft Fluid User Interface home page, then tap the Name tab on the Personal Details page.
Image: Name (summary) page
This example illustrates the Name (summary) page.
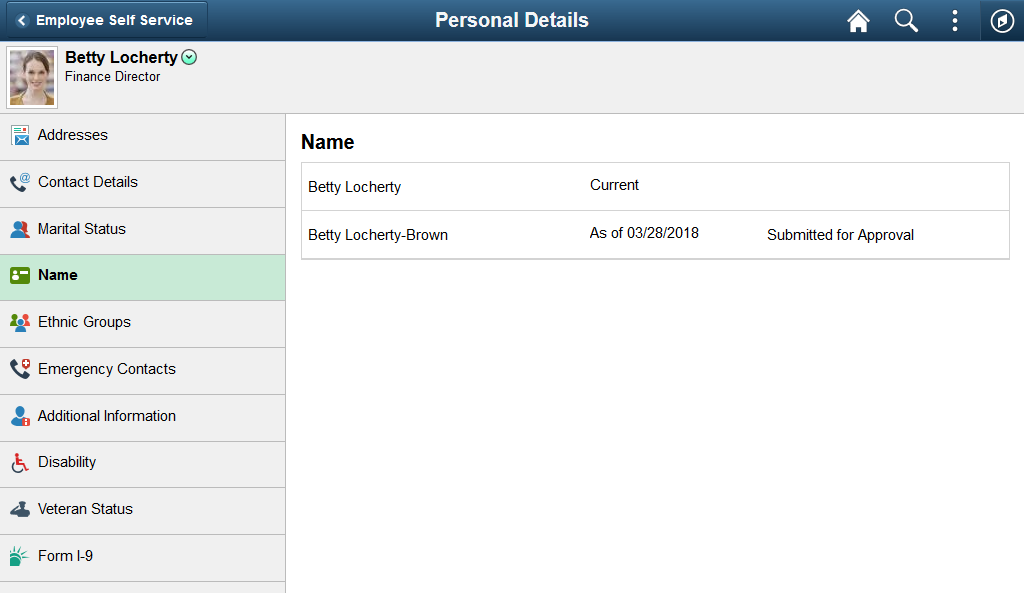
In this example, the employee has submitted a name change request. If the request is approved, the new name will become the current name on the As Of date, at which point the earlier name will no longer appear on the page.
For information on where to approve a request, see Using Fluid Approvals to Approve Self Service Transaction Requests.
Because there is a pending name change request, tapping the names does not display the name details. When there is no pending name change request, tapping the current name displays the Name (Detail) Page.
Use the Name (detail) page (NAME_DFT_SCF) to enter name change information and view or add attachments to support the change.
Navigation
Tap your name on the Name (summary) page.
Image: Name (detail) page
This example illustrates the Name (detail) page.
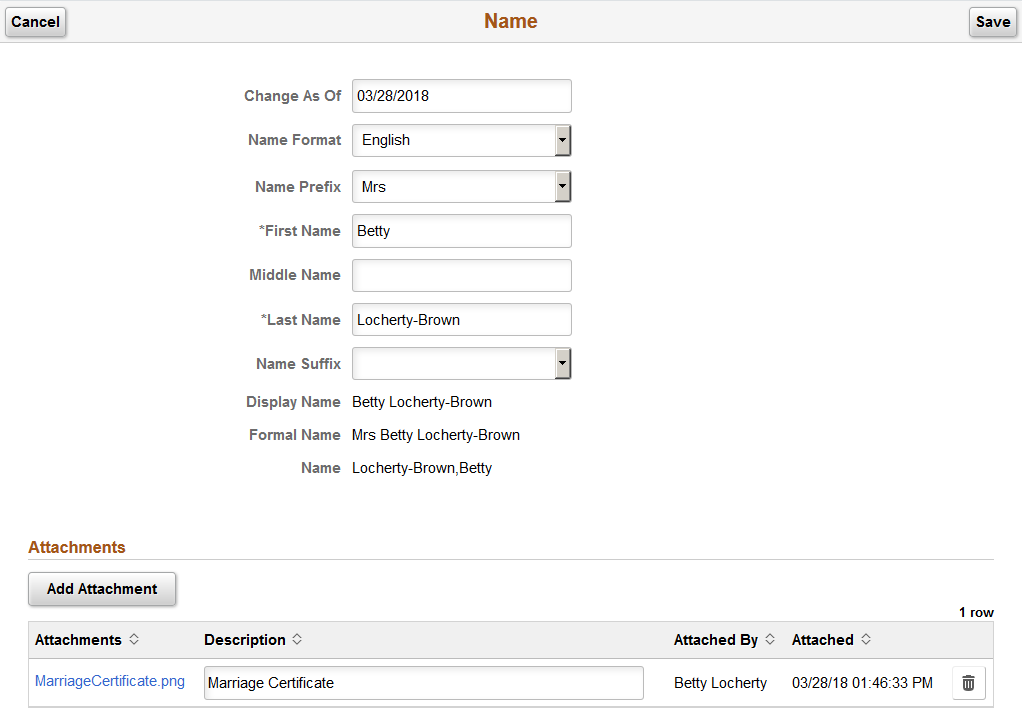
The fields on this page vary depending on the value in the Name Format field.
If approvals are required for name changes, submitting a name change request starts the approval process, and no further name changes requests are permitted until the active request is approved or denied.
Managers can use fluid Approvals to take action on a Name Change transaction request using the Pending Approvals - <Transaction Name> Page.
Attachments
Use this section to manage attachments by uploading, deleting, or updating attachments. When a user submits a name change for approval, all attachments on this page will be sent with the request. To send a name change request without an attachment, remove the items from this section.
|
Field or Control |
Definition |
|---|---|
| Add Attachment |
Click this button to access the File Attachment page and upload files. |
| Attachments |
Select the link to download and view the attachment. Enter a description, or the field will use the attachment file name as the description upon saving the page, which you can overwrite. |
| (Delete) button |
Click this button to remove an attachment from your personal details name page. |
Managers use fluid Approvals to view attachments for a Name Change transaction request using the Attachments Page.
The following videos provide an overview and demonstration of the Fluid Attachment framework:
PeopleSoft Fluid HCM Attachments
Image Highlights, PeopleSoft HCM Update Image 26: Fluid Attachments -- HR Core
Use the Ethnic Groups page (HR_ETHNIC_GRP_FL) to view your ethnic group data.
Navigation
Tap the Personal Details tile on a PeopleSoft Fluid User Interface home page, then tap the Ethnic Groups tab on the Personal Details page.
Image: Ethnic Groups page: two-question format
This example illustrates the Ethnic Groups page as it appears when two-question format is activated on the USA section on the Installation Table - Country Specific Page.
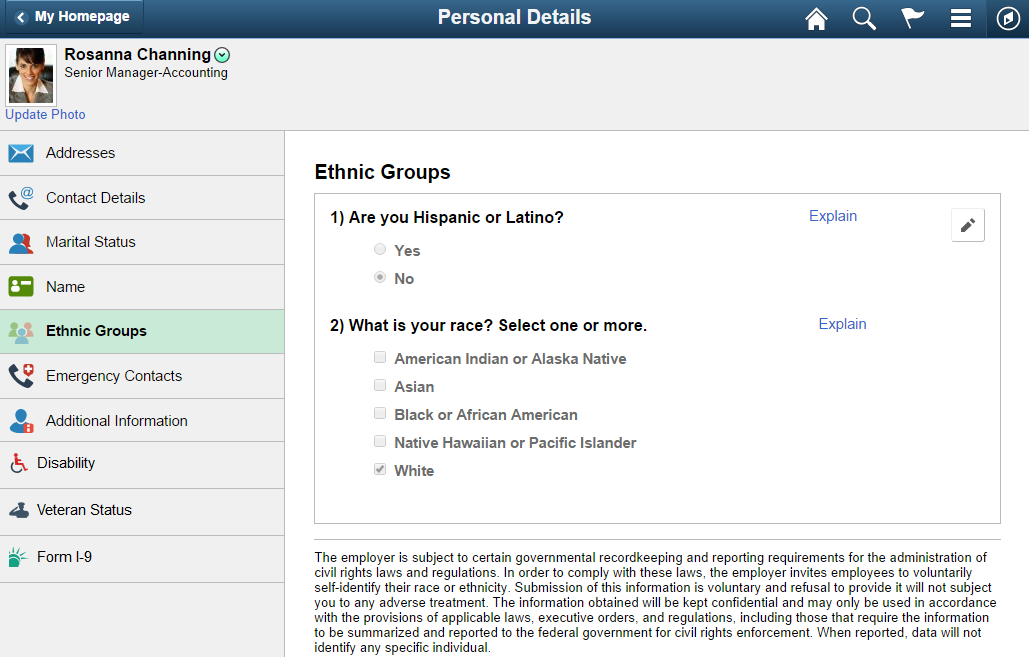
Image: Ethnic Groups page: list of ethnic groups
This example illustrates the Ethnic Groups page as it appears when the two-question format is not used. In this mode, the page lists specific ethnic groups.
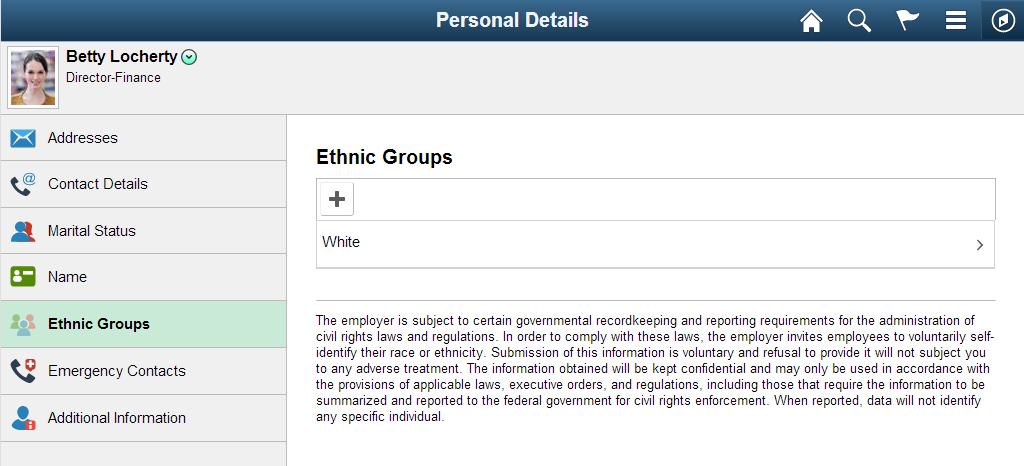
To edit ethnicity information:
When the page is in two-question mode, tap the Edit icon (or tap the questions anywhere except on the Explain links) to access the Ethnicity page.
Tap the Explain links to view definitions of the terms used in the questions.
When the page is not in two-question mode, tap Tap an existing ethnic group to view and update it, or tap the Add an Ethnic Group button or icon to add an additional ethnic group.
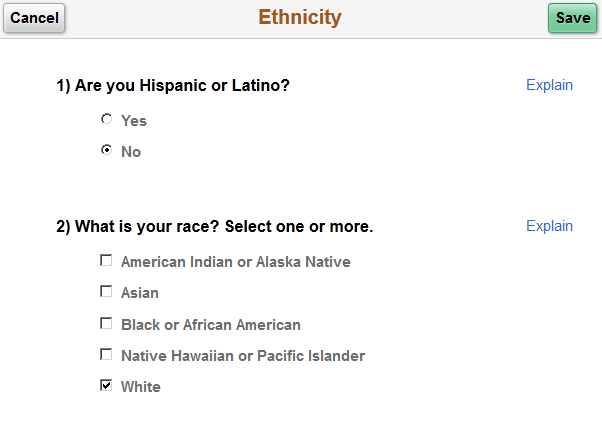
Use the Ethnicity page (HR_ETHNIC_GRP2_SCF) to enter ethnicity information when the system is configured to collect the information using the two-question format.
Navigation
Tap the ethnicity information on the Ethnic Groups page when the page displays information in the two-question format.
Image: Ethnicity page
This example illustrates the Ethnicity page.
Use the Ethnic Group page (HR_ETHNIC_GRP_SCF) to add, update, or remove an ethnic group from your personal data.
Navigation
Tap an ethnic group on the Ethnic Groups page to modify or delete an existing ethnic group.
Tap the Add an Ethnic Group button or icon to add a new ethnic group.
Image: Ethnic Group page
This example illustrates the Ethnic Group page.
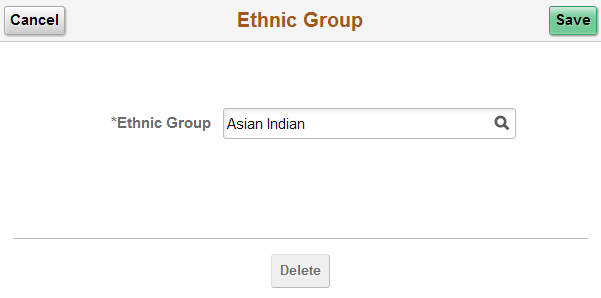
Tap the Delete button to remove the ethnic group.
Use the Emergency Contacts (summary) page (HR_EMERG_CNTCT_FL) to view a list of your emergency contacts.
Navigation
Tap the Personal Details tile on a PeopleSoft Fluid User Interface home page, then tap the Emergency Contacts tab on the Personal Details page.
Image: Emergency Contacts (summary) page
This example illustrates the Emergency Contacts (summary) page.

Tap an existing emergency contact to view and update the contact’s information or to delete the contact. Tap the Add an Emergency Contact icon to create a new contact.
Use the Emergency Contact (detail) page (HR_EMERG_CNTCT_SCF) to add, update, or delete an emergency contact.
Navigation
Tap an emergency contact on the Emergency Contacts (summary) page, or tap the Add Emergency Contact button or icon.
Image: Emergency Contact (detail) page
This example illustrates the Emergency Contact (detail) page.
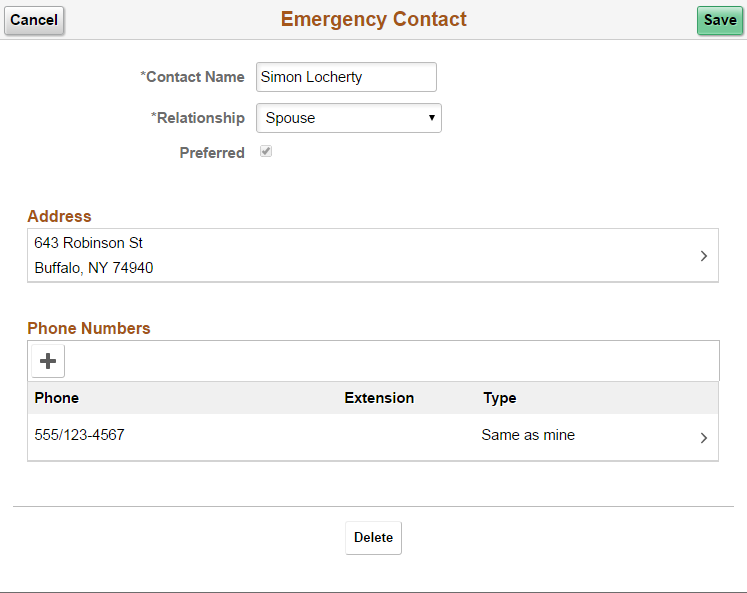
On this page, the contact name and relationship are enterable. Existing address and phone number information is read only. Tap an existing address or phone number to edit or delete it.
You can provide multiple phone numbers for an emergency contact, but only one address.
Tap the Delete button to remove the emergency contact.
Use the Emergency Contact - Address page (HR_EMERG_ADDR_SCF) to add, update, or delete an address for an emergency contact.
Navigation
On the Emergency Contact (summary) page, tap an existing address, or tap the Add button that appears if no addresses exist.
Image: Emergency Contact - Address page
This example illustrates the Emergency Contact - Address page.
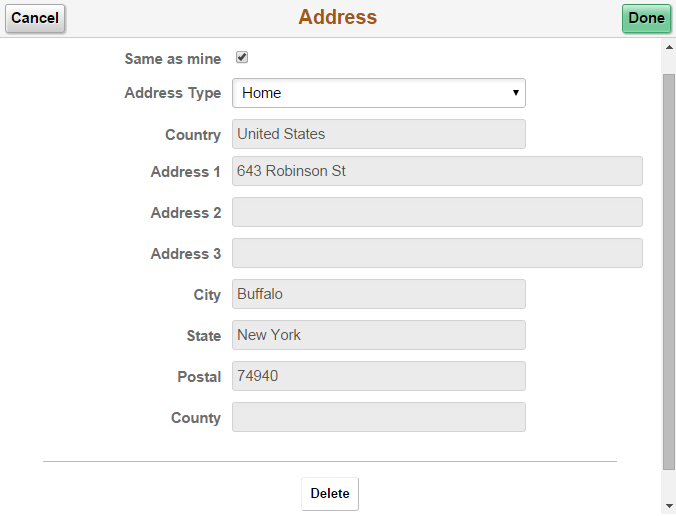
Users can either select the Same as Mine check box or manually enter a different address. Selecting the Same as mine check box populates the address detail fields and makes them read-only. The Address Type field remains editable regardless of whether the Same as Mine check box is selected.
The address format varies depending on the value in the Country field.
Use the Emergency Contact - Phone page (HR_EMERG_PHONE_SCF) to add, update, or delete a phone number for an emergency contact.
Navigation
On the Emergency Contact (summary) page, tap an existing phone number, or tap the Add Phone Number button or icon.
Image: Emergency Contact - Phone Number page
This example illustrates the Emergency Contact - Phone Number page.
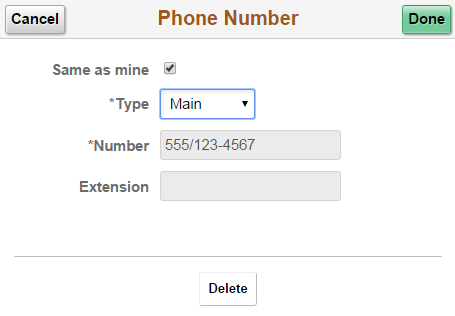
Users can either select the Same as Mine check box or manually enter a different phone number. Selecting the Same as Mine check box populates the phone number detail fields and makes them read-only. The Type field remains editable regardless of whether the Same as Mine check box is selected.
Use the Additional Information page (HR_ADDTL_INFO_FL) to review miscellaneous personal information.
Navigation
Tap the Personal Details tile on a PeopleSoft Fluid User Interface home page, then tap the Additional Information tab on the Personal Details page.
Image: Additional Information page
This example illustrates the Additional Information page.
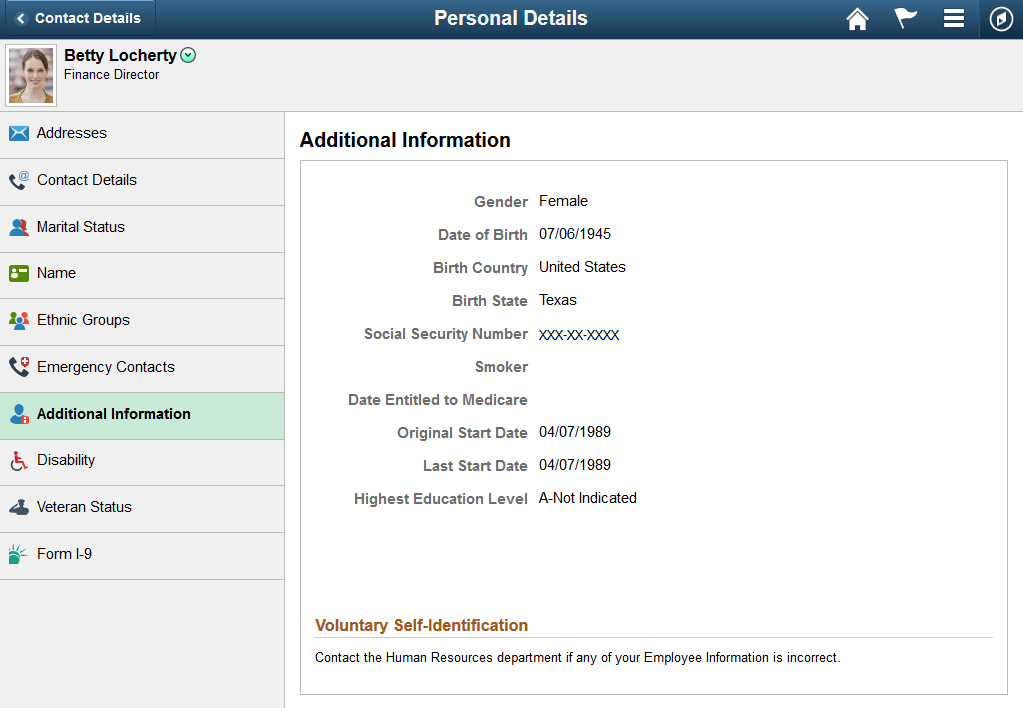
Users cannot edit the information that appears on this page. Instead, informational text directs users to contact the human resources department if information is incorrect.
Use the Voluntary Self-Identification of Disability page (HR_DISABILITY_FL) to complete and file Form CC-205 disability data electronically.
Navigation
Tap the Personal Details tile on a PeopleSoft Fluid User Interface home page, then tap the Disability tab on the Personal Details page.
Image: Voluntary Self-Identification of Disability page
This example illustrates the Voluntary Self-Identification of Disability page (1 of 2).
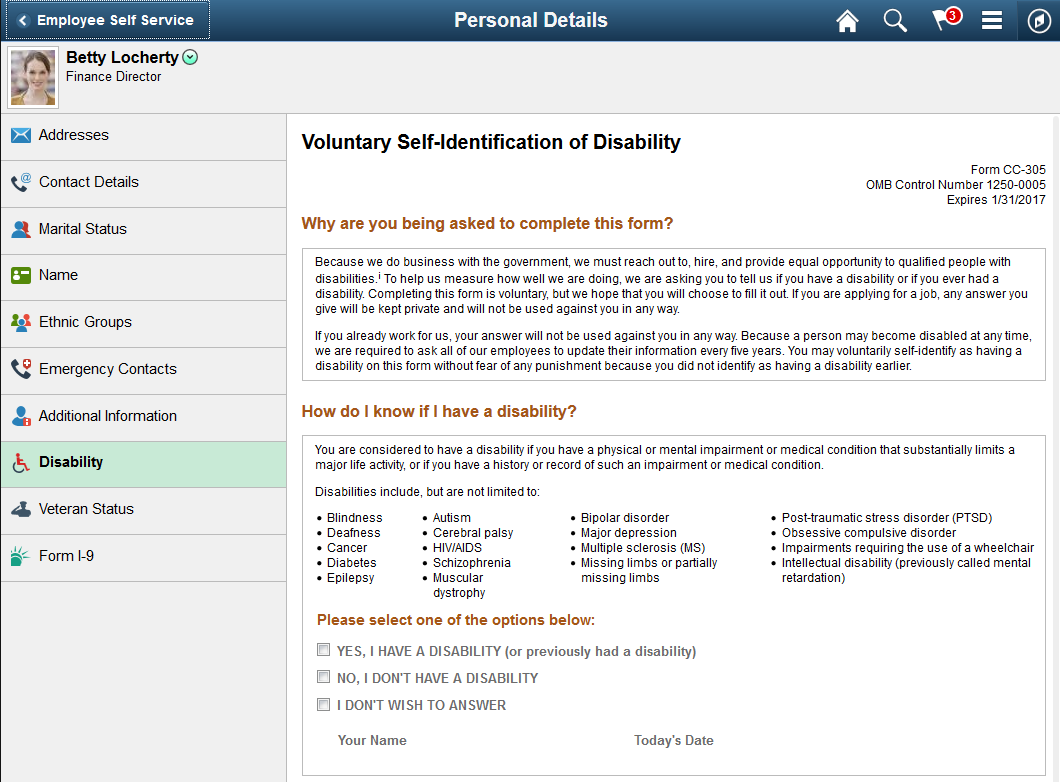
Image: Voluntary Self-Identification of Disability page
This example illustrates the Voluntary Self-Identification of Disability page (2 of 2).
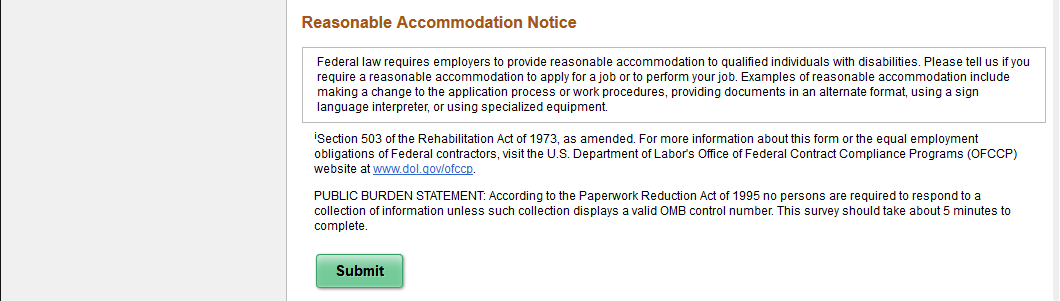
For field descriptions, see the classic self-serviceVoluntary Self-Identification of Disability Page (HR_DISABILITY) in your PeopleSoft HCM Workforce Data Management, Human Resources Administer Workforce product documentation.
Use the Veteran Status page (HR_VET_STATUS_FL) to enter and update self-identification veteran information.
Navigation
Tap the Personal Details tile on a PeopleSoft Fluid User Interface home page, then tap the Veteran Status tab on the Personal Details page.
Image: Veteran Status page
This example illustrates the Veteran Status page (1 of 2).
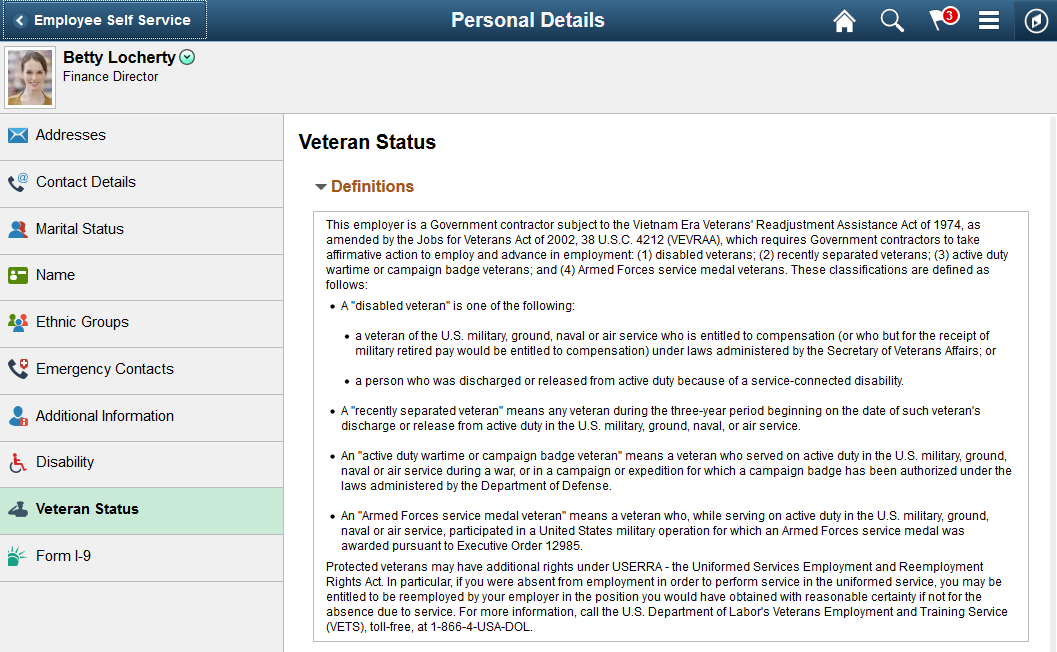
Image: Veteran Status page
This example illustrates the Veteran Status page (2 of 2).
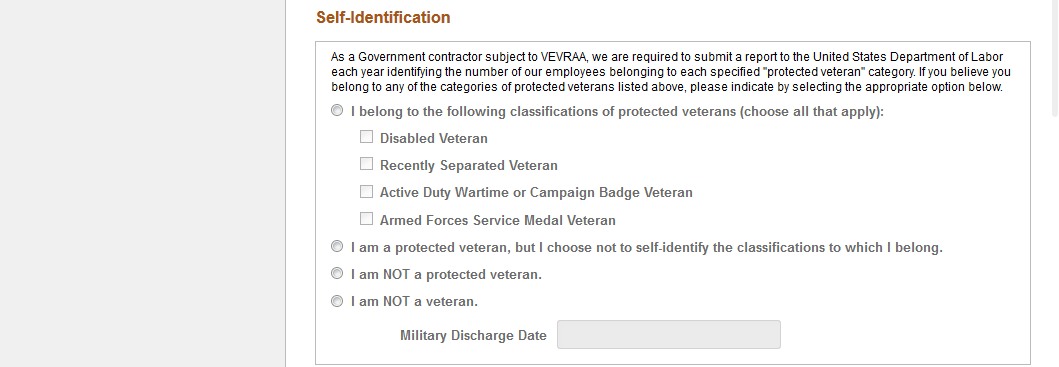
For field descriptions, see the classic self-service Veteran Status Page (HR_DISABILITY) in your PeopleSoft HCM Workforce Data Management, Human Resources Administer Workforce documentation.
Use the Form I-9 page (HR_I9_EE_FL) to access the I-9 instructions PDF, to access the Form I-9 page (HR_I9_EE) where you enter personal employee eligibility information, and to review the date on which you submitted your Form I-9,
Navigation
Tap the Personal Details tile on a PeopleSoft Fluid User Interface home page, then tap the Form I-9 tab on the Personal Details page.
Image: Form I-9 page
This example illustrates the Form I-9 page.
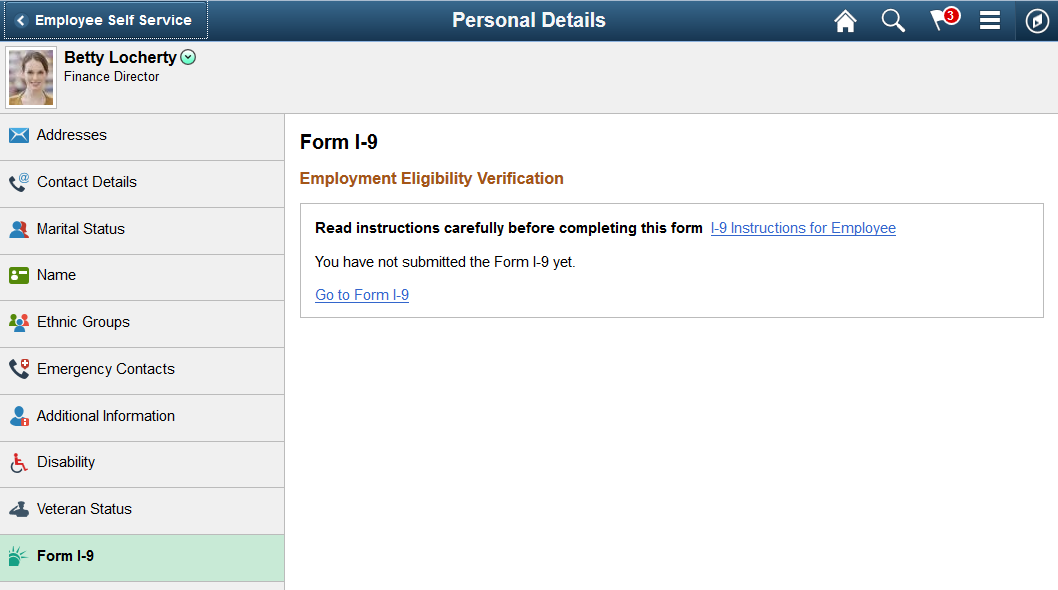
For field definitions, see the classic self-service Employment Eligibility Verification Page, Section 1 (HR_I9_EE) described in the (USA) Managing I-9 Information topic of your PeopleSoft HCM Workforce Data Management, Human Resources Administer Workforce product documentation.
Use the Select Photo page to upload or select an employee photo to display in self-service and throughout the system.
Navigation
Tap the Update Photo link beneath the photo within the header of any of the Personal Details pages.
Note: The Update Photo link is available only when the Allow Employee to Upload Photo option is enabled on the Installation Table - HCM Options Page
Image: Select Photo page
This example illustrates the Select Photo page.
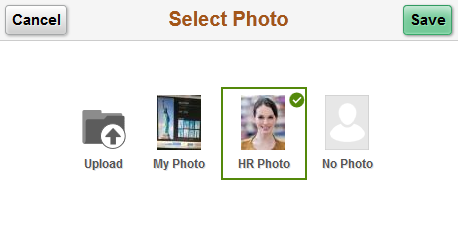
Use these option to choose the photo for pages that display an employee photo throughout the system:
|
Field or Control |
Definition |
|---|---|
| Upload |
Tap to upload your own photo image. This image becomes the My Photo image. The photo must be a JPEG. The system will re-size photos to not exceed 256KB. |
| My Photo |
Tap this option to have the pages that display an employee photo show the latest photo image that you have uploaded. If you have not uploaded an image for yourself, this option is not available. |
| HR Photo |
Tap this option to have the pages that display an employee photo show the official HR photo image of yourself. |
| No Photo |
Tap this option to have the pages that display an employee photo show a dummy photo image. |