9Customizing Siebel CRM Desktop
Customizing Siebel CRM Desktop
This chapter describes how to customize Siebel CRM Desktop. It includes the following topics:
Overview of Customizing Siebel CRM Desktop
This topic describes an overview of how to customize Siebel CRM Desktop. It includes the following topics:
You can customize Siebel CRM Desktop to do the following:
Extend the set of data that is available to the user.
Add custom business logic to support the work that the user performs.
Siebel CRM Desktop can synchronize this information with Siebel CRM data in IBM Notes. You can also make the data available to support offline usage if the user possesses limited or no connection to the Internet. You can create an interface where Siebel CRM Desktop stores the information the user requires to complete a business process. This configuration allows the user to work in a single application rather than navigating between multiple applications.
For more information, see the following topics:
Customizing How Siebel CRM Desktop Processes Objects
You can use Siebel CRM Desktop functionality, such as deduplication or data validation, to add custom logic for object processing in IBM Notes. You can also use LotusScript to create your own custom logic. You can use LotusScript to create, delete, or modify objects. You can migrate your Siebel CRM data to IBM Notes, including logic that supports a business process.
You can use a standard Siebel CRM Desktop form to display Siebel CRM objects, or you can create a completely new and custom form. A custom form can include native IBM Notes controls, such as a text box.The user can use IBM Notes embedded folders on custom forms to display relationships between Siebel CRM objects. These views are fully configurable and support the functionality of native IBM Notes views.
For more information, see Resolving Synchronization Conflicts.
Customizing Field Mapping
The Ln_siebel_basic_mapping.xml file describes objects you can add to IBM Notes. It defines mapping between a Siebel CRM field and the IBM Notes field. You can also extend a set of fields that native IBM Notes objects reference. For more information, see XML Code That Maps a Field.
Customizing Synchronization
The Ln_connector_configuration.xml file identifies the objects that Siebel CRM Desktop synchronizes. It includes synchronization settings that affect the following types of filters:
Deduplication filters. It uses special criteria that the Ln_connector_configuration.xml file describes to determine if an item already exists in the Siebel database when Siebel CRM Desktop synchronizes an item from IBM Notes to the Siebel database. For more information, see How Siebel CRM Desktop Avoids Duplicate Data and Resolving Synchronization Conflicts.
Preset filters. Defines preset filters for a custom synchronization. These presets help the user to synchronize only the data that the user requires. You can configure any filter preset as the default.
For more information, see XML Code That Customizes Synchronization.
Customizing Forms
You can use IBM Domino Designer to customize the IBM Notes forms that Siebel CRM Desktop uses. All forms modifications are exported to the corresponding .dxl files. Each .dxl file is named according to the following mask: SBL.Form.<Form Name>.dxl, where <Form Name> is the name of the form. For example, the design of an Account form is defined in the SBL.Form.Account.dxl file. For information about how to set up this capability, see Preparing the Development Environment
Validation Rules You Can Configure for Custom Forms
The SBL.Forms script library includes a description of the validation rules that Siebel CRM Desktop uses for the object that it displays on any form. You can configure Siebel CRM Desktop to examine the format of information that the user enters in a field and then inform the user if this information does not adhere to this format. Validation uses LotusScriptto configure a wide variety of validation.
Business Logic That You Can Configure for Custom Forms
You can use the SBL.Forms and SBL.BusinessLogic script librariesto implement custom business logic.
Customizing Dialog Boxes
You can customize the following behaviors of the MVG dialog box:
Object that it uses to create an association in the MVG dialog box.
Fields that it specifies for the association.
Format of the fields that it specifies for the association.
Format it uses to display the Primary record. The following is the default format:
position (name)
For example, District Manager 1 (Wasaka Takuda). You can specify the fields that Siebel CRM Desktop displays and the order it uses to display them.
Fields that it displays in the IBM Notes view that represent the associations you create. You can configure Siebel CRM Desktop to display only the record attributes. For example, if it stores the Employee name in the position record, then it can display only the Employee name for the position.
The user permissions. The customization package uses security validation rules to describe the user permissions that work with the MVG. For example, if the user is not the primary user, then the user cannot delete users from the collection because Siebel CRM Desktop turns off the delete button for any user who is not a primary user.
Behavior of a lookup control. A lookup control searches through the File As field of associated objects to search for a record.
Hide the details of the parent record, such as the Opportunity Name.
Add or remove association attributes for the associated record.
Use an OK button instead of the Save and Close icon.
For more information, see Customizing Picklists.
Customizing Views
You can use IBM Domino Designer to customize the IBM Notes views that Siebel CRM Desktop uses. All views modifications are exported to corresponding .dxl files. Each .dxl file is named according to the following mask: SBL.View.<View Name>.dxl, where <View Name> is the name of the view. For example, the design of an Accounts view is defined in the SBL.View.Accounts.dxl file.
Hiding Custom Views
You can use IBM Domino Designer to hide a custom top-level view from IBM Notes that Siebel CRM Desktop uses. The following procedure includes an example of hiding an Opportunities view.
Hiding custom views
Import the SBL.View.Opportunities.dxl file into IBM Notes using CRM Dev Utils.
Open the PAB database that contains the imported design elements in IBM Domino Designer.
Navigate to the Views list and locate the Opportunities view.
Open the Found view and then open the Found view properties.
Place the Name field value into parentheses. For example, (Opportunities).
Save and close the modified view.
Navigate to the tools folder.
In a text editor, open the export_import_config.xml file.
Locate the instructions for exporting or importing the Opportunities view. For the Opportunities view:
<file name="SBL.View.Opportunities.dxl">
<notes type="view_folder">
<note>Opportunities</note>
</notes>
</file>
Modify the name of note design element in IBM Domino Designer:
<file name="SBL.View.Opportunities.dxl">
<notes type="view_folder">
<note>(Opportunities)</note>
</notes></file>
Save and close the export_import_config.xml file.
Export the design elements to the .dxl file using CRM Dev Utils.
Publish the modified package on the Siebel server.
Obtain and apply the package and verify your changes.
To remove a custom high-level view from IBM Notes
Navigate to the package folder.
Open the dxl_config.xml file.
Locate the instructions for importing the view you want to remove. For Opportunities view:
<dxl path="SBL.View.Opportunities.dxl"/>
Comment out the instructions for importing the view.
Publish the modified package on the Siebel server.
Obtain and apply the package and verify your changes.
Customizing the SalesBook Control
The SalesBook control is a picklist that is native in IBM Notes. It defines references between objects that Siebel CRM Desktop uses in lookup controls. You can set filters for these objects. For more information, see Process of Creating Dynamic Picklists That Use a SalesBook Control.
Customizing Meta Information
The siebel_meta_info.xml file includes the following meta information:
A description of the object types that Siebel CRM Desktop supports.
Fields that are defined and the type for each field.
XML element names that Siebel CRM Desktop uses to build or parse a Siebel message. It uses information about the relations between objects from the file for the Siebel message.
The definition of each object that Siebel CRM Desktop supports. This definition includes a unique name, an XML element, and an XML collection element that Siebel CRM Desktop uses in a Siebel message.
Every object field includes a name, a Siebel data type, and an XML element. Siebel CRM Desktop uses this information in a Siebel message to display values and filters for that field.
For more information, seethe documentation in the siebel_meta_info.xsd file available in Article ID 1502099.1 on My Oracle Support.
Customizations That Oracle Does Not Support
This topic describes customizations that Oracle does not support.
Files That You Must Not Modify
The following table describes the files that implement predefined functionality. You must not modify these files under any circumstances.
| File | Description |
|---|---|
autoresolve_helpers.js |
Includes helpers that the autoresolver.js file uses. |
data_model.js |
Includes logic for handling relations between objects and joint fields. The business_logic.js file initializes this data model. |
recurrence_processing.js |
Includes transformation functions that the activity processor uses for repeating patterns that occur between Siebel CRM and IBM Notes. |
SD3.Lib.Interfaces.dxl |
Script library that includes base interfaces. |
SD3.Lib.Utils.dxl |
Script library that includes common utility classes and functions. |
SD3.Lib.Errors.dxl |
Script library that includes classes and functions for error handling. |
SD3.Lib.Strings.dxl |
Script library that includes common string constants. |
SD3.Lib.RegistryHelpers.dxl |
Script library that includes a class for working with the registry. |
SD3.Lib.Constants.dxl |
Script library that includes common constants. |
SD3.Lib.MQ.dxl |
Script library that includes the interprocess message queue implementation. |
SD3.Lib.BMProvider.dxl |
Script library that includes classes for reading the basic_mapping.xml file. |
SD3.Lib.Tools.2.dxl |
Script library that includes core wrapper classes for the current session, database, documents, arrays, lists, and so on. This script library also contains some common helper function for logging, getting documents from context, comparing date or time values, and so on. |
SD3.Lib.HandlerHelpers.dxl |
Script library that includes helper classes and functions for handling common events. For example, creating, saving, and removing documents. |
SD3.Lib.DataModel.dxl |
Script library that includes base classes for data model description, base classes for working with links, and base classes for security rules descriptions. |
SD3.Lib.Validator.dxl |
Script library that includes base classes for validation functionality. |
SD3.Lib.Translator.dxl |
Script library that includes base classes for input translation functionality. |
SD3.Lib.FormHelpers.dxl |
Script library that includes base wrapper classes for the user interface form and controls. |
SD3.Lib.Actions.dxl |
Script library that includes base classes for working with form, view, database, and custom actions. |
SD3.Lib.ProgressBar.dxl |
Script library that includes a class for working with the progress bar user interface. |
SD3.Lib.iCalendar.dxl |
Script library that includes classes and functions for working with the iCalendar format. |
SD3.Lib.NativePIM.dxl |
Script library that includes wrapper classes for native IBM Notes PIM objects. |
SD3.Lib.iCalendarUtil.dxl |
Script library that includes utility classes and functions for data interchange between native PIM objects and iCalendar values. |
SD3.Lib.Handlers.dxl |
Script library that includes base classes for handling common events. For example, creating, saving, and removing documents. |
SD3.Lib.PickListDialogs.dxl |
Script library that includes a base class for handling a picklist dialog. |
SD3.Lib.ProductAdapter.dxl |
Script library that includes factory functions for providing product object implementations for the platform code. |
SD3.View.AssociationsByLeftId.dxl |
Includes a view for searching for association documents by their LeftId (first) value. |
SD3.View.AssociationsByRightId.dxl |
includes a view for searching for association documents by their RightId (second) value. |
SD3.View.AssociationSearch.dxl |
Includes a view for searching for association documents with complex keys. |
SD3.View.CRMDocuments.dxl |
Includes a view that contains all Siebel CRM related documents. |
SD3.View.MirrorDirectSearch.dxl |
Includes a view for searching for linked documents with complex keys. |
SD3.View.SettingsDefaults.dxl |
Includes a view that contains a service document with default values. For example, current user name, currency, generic user name, and so on. |
SD3.View.ActivityHandlingSrc.dxl |
Includes a view that contains all unprocessed PIM documents. This file is not included in the preconfigured Siebel CRM product. |
SD3.Subform.ForwardInvocation.dxl |
Includes the subform used for the Forward Invocation functionality. This file is not included in the preconfigured Siebel CRM product. |
SD3.Form.PickListDialog.dxl |
Includes the form with the simple picklist dialog layout. This file is not included in the preconfigured Siebel CRM product. |
SD3.Form.PickListDialogEx.dxl |
Includes the form with the extended picklist dialog layout. |
SD3.Form.PickListDialogNarrow.dxl |
Includes the form with the narrow picklist dialog layout. |
SD3.Form.StartSync.dxl |
Includes the service form used to manually start synchronization based on a toolbar action. |
SD3.Form.MVG.dxl |
Includes the form with the MVG dialog layout. This file is not included in the preconfigured Siebel CRM product. |
SD3.Agent.NoteCreatedHandler.dxl |
Includes the agent for handling a document creation event. |
SD3.Agent.NoteDeletingHandler.dxl |
Includes the agent for handling a document deletion event. |
SD3.Agent.NoteUpdatedHandler.dxl |
Includes the agent for handing a document modification event. |
SD3.Agent.PreSynchronizeProcessor.dxl |
Includes the agent for handling a presynchronization stage. |
SD3.Agent.PostSynchronizeProcessor.dxl |
Includes the agent for handling a postsynchronization stage. |
SD3.Agent.CleanUp.dxl |
Includes the agent for handling a cleanup stage. |
SD3.Agent.SyncNow.dxl |
Includes the agent to manually start synchronization based on a toolbar action. |
SD3.Resources.dxl |
Includes platform image resources. |
Preparing the Development Environment
This topic describes how to prepare your development environment so that you can modify the customization package. The customization package includes DXL (Domino XML) files, which are files that include Domino data expressed as XML code. It is strongly recommend that you use IBM Domino Designer to edit DXL files, although you can edit them manually. Modifying the package DXL files consists of importing the DXL into the IBM Notes database and modifying the design elements with Domino Designer, and then exporting the DXL files. To automate the DXL import and export procedures, the utility notes application, CRM Dev Utils (CRMDevUtils.nsf), is provided. The CRM Dev Utils application may be located on the CRM Desktop server or in local IBM Notes data directory.
For more information, see About the Customization Package and the documentation about IBM Domino at the IBM developerWorks web site.
Preparing the development environment
Locate the customization package and tools folder on your computer.
Create a new customization project folder on your computer.
Create a new package subfolder within the project folder.
Copy the tools folder from Siebel CRM Desktop v.3.2 to your project folder.
Extract the package.zip from Siebel CRM Desktop v.3.2 to the package subfolder of your project folder.
Install IBM Notes version 8.5.3 or version 9 and IBM Domino Designer version 8.5.3 or version 9 on your development computer.
Open the IBM Notes client.
Create a new database on your local machine.
Press Ctrl+N in the IBM Notes client.
Enter the title and file name.
-
Select Personal Address Book from the list of templates.
Create another new database on your local machine.
Enter the title and file name.
Select Mail from the list of templates.
Navigate to the tools folder and open the CRMDDevUtils.nsf file in the IBM Notes client.
Open the CRM Projects view in the CRM Dev Utils application.
Click the New CRM Project button on the action toolbar to open a new Project form.
Complete the Project form fields:
In the Project Name field, enter a descriptive name of the project.
In the Tools Path field, enter the full path to the tools folder.
Save and close the Project form.
Select the project document in the CRM Projects view.
Click the New crmConfig button on the action toolbar to open a new configuration form.
Fill in Configuration form fields:
In the Config Name field, enter a descriptive name for the configuration.
In the Package Path field, enter the full path to the package folder.
-
For the Config File Path field, select the export_import_config.xml file from tools folder by clicking on accompanying button.
-
For the Import order field, enter the numeric value to define the order in which configuration should be imported. This parameter is important if a project contains several configurations. This field can contain a null value.
Save and close the Configuration form.
Open the CRM Connections view in the CRM Dev Utils application.
Click the New crmConnection button on the action toolbar to open a new Connection form.
Fill in Connection form fields:
In the Project Name field, select your previously created project.
In the DB ID field, select PAB as the target database type.
In the Path to DB field, click on accompanying button and select the Personal Address Book database from the project folder.
Save and close the Connection form.
Repeat Step 20 — Step 22 to create the Mail database. For the DB ID field, enter mail.
Importing DXL files
Follow the procedures in this topic to import DXL files to your development environment.
Importing DXL files
Open the IBM Notes Client.
Open the CRM Dev Utils application in IBM Notes client.
Open the CRM Projects view in the CRM Dev Utils application.
Select the project document for which the .dxl files should be imported.
Click the Import button on the action toolbar.
Click Yes in the confirmation dialog window.
Open the correspondent PAB and Mail databases in the IBM Domino Designer and verify that all Siebel CRM Desktop design elements were successfully imported.
Exporting to DXL files
After you import DXL files and modify custom design element, you must export the design elements from the PAB and Mail databases to DXL files.
Exporting to DXL files
Open the IBM Notes Client.
Open the CRM Dev Utils application in the IBM Notes client.
Navigate to the CRM Projects view in the CRM Dev Utils application.
Select the project document for which design elements should be exported.
Click the Export button on the action toolbar.
Click Yes in the confirmation dialog window.
Open the project package folder and verify that the .dxl file is modified.
Upload and publish the package on the Siebel server for further verification. For more information, see Creating and Publishing the Customization Package.
Using Siebel Tools
This topic describes some of the basic tasks you might perform in Siebel Tools if you customize Siebel CRM Desktop. For more information, see Using Siebel Tools.
Checking Out Projects in Siebel Tools
This topic describes how to check out a project in Siebel Tools.
To check out a project in Siebel Tools
Identify the project you must check out.
For example, if you must modify an applet, then note the value in the Project property for the applet.
In the Object Explorer, click Project, and then query the Name property for the project you identified in Step 1.
Make sure the Locked property contains a check mark.
Displaying Object Types in Siebel Tools
You can display object types in the Object Explorer that you use to configure Siebel CRM Desktop.
To display object types in Siebel Tools
Open Siebel Tools.
Choose the View menu and then click Options.
Click the Object Explorer tab.
Scroll down through the Object Explorer Hierarchy window until you locate the Integration Object tree.
Make sure the Integration Object tree and all child objects of the Integration Object tree include a check mark.
If all child objects in the Integration Object tree include a check mark, then Siebel Tools displays an embolded check mark for the tree.
Repeat Step 4 for any other object types you must modify.
Click OK.
Customizing Field Behavior
This topic describes how to customize the user interface. It includes the following topics:
Displaying Siebel CRM Fields
The example in this topic displays the Mail Stop field on the Contact form in the client. You make this field available through the Siebel API and then customize Siebel CRM Desktop to synchronize and display the field. You modify the following files:
siebel_meta_info.xml
Ln_siebel_basic_mapping.xml
Ln_package_res.xml
(SBL)\CRMContactSubform.version8 subform design element
For more information, see Files in the Customization Package.
To display a Siebel CRM field
Open Siebel Tools and then display the object type named Integration Object.
For more information, see Displaying Object Types in Siebel Tools.
Make sure the Mail Stop field exists on the Contact business component.
If it does not, then add it now.
Add the Mail Stop field to the CRMDesktopContactIO integration object.
In order for Siebel CRM Desktop to synchronize data with the Siebel database, you use Siebel CRM Desktop integration objects and integration components to make the objects and fields that you use in this example available. The Contact object is already available but the Mail Stop field is not. To make the Mail Stop field available, you add it to the Contact integration component for each of the required integration objects:
In the Object Explorer, click Integration Object and then locate the CRMDesktopContactIO integration object in the Integration Objects list.
In the Object Explorer, expand the Integration Object tree, click Integration Component, and then locate the Contact integration component in the Integration Components list.
-
In the Object Explorer, expand the Integration Component tree and then click Integration Component Field.
In the Integration Component Fields list, add a new record using values from the following table.
Property Value Name
Mail Stop
Data Type
DTYPE_TEXT
Repeat Step 3 for the CRMDesktopAccountIO integration object.
Repeat Step 3 for the CRMDesktopOpportunityIO integration object.
Compile all locked projects.
After compiling finishes, the Mail Stop field is available through the API and you can configure Siebel CRM Desktop to use the field. For more information, see Using Siebel Tools.
Specify the objects and fields to synchronize:
Use an XML editor to open the siebel_meta_info.xml file.
For more information, see Files in the Customization Package.
Locate the following tag:
object TypeId='Contact'
Several child field tags reside in the
object TypeId='Contact'tag. These children identify the fields for the Contact object.Add the following field tag as a child of the tag that you located in step b:
<field Name='Mail Stop' Label='Mail Stop' DataType='DTYPE_TEXT'
IOElemName='MailStop' />
Repeat Step b and step c for the following tag:
object TypeId='Account.Contact'
Repeat step b and step c for the following tag:
object TypeId='Opportunity.Contact'
Save and close the siebel_meta_info.xml file.
Map the Mail Stop field from the Contact object in the Siebel database to a field in Siebel CRM Desktop:
Use an XML editor to open the Ln_siebel_basic_mapping.xml file.
For more information, see Files in the Customization Package.
In the Ln_siebel_basic_mapping.xml file, add a new field tag to the type tag using values from the following table.
Tag Value type id
Contact
Add the following code to the tag you created in step b.
<field id="Mail Stop">
  <reader>
    <lotus_std>
      <lotus_field id="MailStop"/>
      <convertor>
      <string/>
      </convertor>
    </lotus_std>
  </reader>
  <writer>
    <lotus_std>
      <lotus_field id="MailStop"/>
      <convertor>
      <string/>
      </convertor>
    <lotus_std>
  </writer>
</field>
Save and close the Ln_siebel_basic_mapping.xml file.
Insert a label and the Mail Stop field just following the Job Title field on the Contact form:
Open IBM Domino Designer, locate, and then open one of the following forms:
Contact.version7 form for IBM Notes version 7
Contact.version8 form for IBM Notes version 8
This example describes how to modify the Contact.version8 design element. For more information, see Opening IBM Domino Designer.
Add the Mail Stop text field.
In IBM Domino Designer you must add one cell for the label and one cell for the field. In the label cell, you must add the localization macro. You use the following localization macro for this example:
(!loc:lb_mail_stop:loc!):
where:
(!loc. Is the beginning of the macro.
lb-mail_stop. Is the unique Id for the field.
loc!):. Is the end of the macro.
lbl_mail_stop. Specifies the key that the Ln_package_res.xml file uses to determine the localized value for the label.
Set the name of the field cell that you added in Step b to MailStop.
Add the following code to the Ln_package_res.xml file:
<str key="lbl_mail_stop">Mail stop:</str>
Add this code as a child of the res_root tag under the following comment:
<!-- Contact CRMD -->This code provides localized valuesto the client. It allows the Contact form to display the Mail Stop label through a key value. The Ln_package_res.xml file provides localized values and images to Siebel CRM Desktop. You added the new Mail Stop field to the Contact form, so you must provide the text for the label. When you modified the Contact.version7 or Contact.version8 form, you created text that contains bl_mail_stopfor the text value. This text value identifies the key to use in the Ln_package_res.xml file.
Republish the updated package files.
During the next synchronization, Siebel CRM Desktop uses the updated files to apply the modifications to the Contact form. The Mail Stop field is available on the Contact form and Siebel CRM Desktop synchronizes the values in this field with the Siebel Server. For more information, see Republishing Customization Packages.
Hiding Siebel CRM Fields
The example in this topic describes how to hide the Opportunity field so that Siebel CRM Desktop does not display it in the client.
To hide Siebel CRM fields
Remove the following objects from the Ln_connector_configuration.xml file:
Remove all child objects, such as Opportunity.Contact.Association.
Remove all association objects, such as Opportunity.Contact.Association.
Remove links to opportunities that exist in the links and natural_keys sections.
Remove the following objects from the Ln_siebel_basic_mapping.xml file:
Remove all child objects, such as Opportunity.Contact.Association.
Remove all association objects, such as Opportunity.Contact.Association.
Remove links to opportunities from objects that include fields that are similar to OpportunityId.
Remove the following controls for this Opportunity object from the (SBL)form:opportunity design form:
Remove embedded folders from forms that display opportunities and objects that are related to opportunities.
Remove lookup controls and autocomplete controls from other forms that reference the Opportunity object.
Remove related actions from the views action bars.
-
In the SBL.BusinessLogic script library, remove the following definitions where Siebel CRM Desktop uses this Opportunity object:
AddMVGLink
AddDirectLink
You can remove other code that affects opportunities, but this code must not affect other Siebel CRM Desktop functionality.
Making Fields Read-Only
To make a field read-only, you disable the corr esponding control on the form that references the field that you must make read-only. The example in this topic makes the Opportunity Name field on the opportunity form read-only.
To make a field read-only
Open IBM Domino Designer, and then open the (SBL)form:opportunity form.
For more information, see Opening IBM Domino Designer.
Choose the Name field.
Click the Objects pane and then choose Input Enabled.
In the Events Properties tab that IBM Domino Designer displays next to the workspace, add the following code:
@False;
IBM Domino Designer disables the field in the client.
Open the client and then navigate to the Opportunity form.
Open an opportunity and make sure you cannot modify the Opportunity Name.
Adding Default Values to Fields
This topic describes how to configure Siebel CRM Desktop to add a default value to a field when the user creates a new record. The example in this topic configures Siebel CRM Desktop to add the following default value to the Opportunity Name field:
CRM Opportunity
To add a default value to a field
Open IBM Domino Designer, and then open the SBL.BusinessLogic script library.
For more information, see Opening IBM Domino Designer.
Locate and then open the CreateMetaScheme function.
Locate the following code:
Set TypeDescr = MetaScheme.GetType("Opportunity")where:
MetaScheme.GetType. Identifies the name of the object type identifier of the object type that resides in the Ln_siebel_basic_mapping.xml file. This file includes definitions for object types. Each definition includes a Lotus Id attribute. This attribute is the object type identifier that you must use for the object_type. For more information, see Customizing Field Mapping.
In the With block of code that IBM Domino Designer displays immediately before the End With line, add the following code:
.Field("Name").InitialValue = "CRM Opportunity"where:
.Field("Name"). Identifies the name of a field that resides in the object type definition in the Ln_siebel_basic_mapping.xml file.
CRM Opportunity. Defines the default value that Siebel CRM Desktop adds.
Setting Default Values
This topic describes the values that you can use to specify the source of the default value. You specify this value in the InitialValue setter property of the CreateMetaScheme function.
Setting Fixed Default Values
To set a fixed value, you set the InitialValue setter property of the CreateMetaScheme function to the following value:
initial_value
You typically use this format with a number that does not require a translation, such as a Boolean number or an empty string where the default value is empty. You use the following format:
.Field("field_name").InitialValue = "value"
Example 1
To set the Appt PIM Flag field that resides in the Action object, you use the following code:
.Field("PIMOriginated").InitialValue = “1�?
This example sets the default value to true. It does not use a list of values. The Appt PIM Flag field is a text field.
Example 2
To set the country code for the phone number to a default value when the user creates a new account, you can use the following code:
.Field("MainPhone").InitialValue = "+31"
Setting Default Values That Are Language Dependent
To get a language dependent value from the resource file, you set the InitialValue variable of the CreateMetaScheme function to the following value:
initial_value_res
This value uses the value that Siebel CRM Desktop defines in the Ln_package_res.xml file and in each language-specific Ln_package_res_XX_yy.xml file. It allows you to use a different default value for each language. If the MLOVs (multi-value lists of values) are correctly configured on the Siebel Server, then Siebel CRM Desktop stores the correct Language-Independent Code on the server. You use the following format:
.Field("field_name").InitialValue = "initial_value_res"
Example
The following example specifies to set the default value of the Display field that resides in the Activity object to the value that the lang_action_display_activities_only resource key contains:
.Field("Display").InitialValue = "[!loc:lang_action_display_activities_only:loc!]"
The following values in the resource file determine the default value:
The English resource file includes the following code:
<str key="lang_action_display_activities_only" >Activities Only</str>
At run time Siebel CRM Desktop sets the default value in the English client to Activities Only.
The French resource file includes the following code:
str key="lang_action_display_activities_only">Activités uniquement</str>
At run time Siebel CRM Desktop sets the default value in the Dutch client to Alleen activiteiten.
Setting Default Values for Functions
To set the default value for a function, you set the InitialValueCallback setter property of theCreateMetaScheme function to the following value:
initial_value_fn
This value uses a function that returns a value. It allows you to do more complex lookups. You use the following format:
Set.Field("field_name").InitialValueCallback = initial_value_fn
Example
The following example comes predefined with Siebel CRM Desktop. It calls the following DefaultCurrencyIdCb function to determine the currency code that Siebel CRM Desktop sets for the account:
Ret.GetType("Account").Field("CurrencyCodeId").InitialValueCallback =
DefaultCurrencyIdCb
The following predefined code defines the CallbackDefaultCurrencyId class:
Public Class CallbackDefaultCurrencyId As CallbackObject
  Public Function Invoke (params As DynamicArguments)
    Invoke = GetSession().Defaults.Property("CRMDSibelCurrencySymbol")
  End Function
End Class
where:
Siebel CRM Desktop defines CallbackDefaultCurrencyId class as the following:
Dim DefaultCurrencyIdCb As New CallbackDefaultCurrencyId
Setting Default Values For Links
To set the default links that Siebel CRM Desktop uses for an object type, you set the InitialLinksCallback property of the descriptor that this object type uses to an instance of the class that Siebel CRM Desktop gets from the CallbackObject class. Siebel CRM Desktop uses this property to create the initial links. The following example uses a multi-value group that returns multiple records:
Set.InitialLinksCallback = New CallbackInitialLinksAccount
In this example, the following code describes the CallbackInitialLinksAccount class:
Public Class CallbackInitialLinksAccount As CallbackInitialLinks
  Public Function Invoke (params As DynamicArguments)
    Dim PositionId As String
    Dim OrganizationId As String
        'Prefill team
    PositionId = GetSession().GetCurrentUser().Property("CRMDPositionId")
   Me.Container(params).Push CreateLinkContainer(PositionId, "Position",
LINK_TAG_DIRECT)
    Me.Container(params).Push CreateLinkContainer(PositionId, "Position",
LINK_TAG_MVG)
      End Function
 Class
This example uses a multi-value group that associates multiple records. To add multiple team members instead of setting a single value, you can use a function that you specify elsewhere and use the following source:
InitialLinksCallback
Adding Postdefault Values to Fields
This topic describes how to add a value to a field if the user does not enter any data in this field when the user creates a new record. Adding a value in this way is known as adding a postdefault value. The example in this topic modifies the predefined opportunity form to make sure Siebel CRM Desktop sets the postdefault value for the Lead Quality field in the opportunity to 5-Poor if the user does not set a value for this field.
To add a postdefault value to a field
Open IBM Domino Designer, and then open the SBL.Forms script library.
For more information, see Opening IBM Domino Designer.
Locate the FormOpportunityEx class.
Add the following function to the end of the FormOpportunityEx class:
'Comments for QuerySave
  Public Function QuerySave As Boolean
    QuerySave = SBLFormEx..QuerySave
    If Len(Me.DocumentEx.SafeProperty("LeadQuality", "")) = 0 Then
      Me.DocumentEx.Property("LeadQuality") = "5-Poor"
  End If
To determine if the user set the value for the Quality field, this if statement uses the SaveProperty method of the DocumentEx property, and it returns the Quality field value:
If the field is empty, then the Len function returns a value of 0 and sets the value of the Quality field to 5-Poor.
If the field is not empty, then the empty_field_validator function returns a value of false and the code exits the if statement.
(Optional) Support an environment that does not use English. You do the following:
Replace the Me.DocumentEx.Property("LeadQuality") = "5-Poor" code that you added in Step 3 with the following code:
Me.DocumentEx.Property("LeadQuality") = "[!loc:lang_lead_quality_poor:loc!]"where:
!loc:lang_lead_quality_poor:loc! is a localization macro.
Add the following code to the Ln_package_res.xml file:
<str key="lang_lead_quality_poor">5-Poor</str>
The code you added in Step 3 works in an environment that uses English but fails in a multilingual environment because you hard-coded the field value. The localization macro allows you to retrieve a string from the resource file and to write code that is language independent.
Test your changes and then republish the customization package.
For more information, see Republishing Customization Packages.
Updating One Field If the User Modifies Values In Another Field
You can configure Siebel CRM Desktop to update the value in one field if the user changes the value in another field. This functionality is known as on field update. The example in this topic configures Siebel CRM Desktop to do the following work:
If the name of the opportunity is Test, then set the Lead Quality to 5-Poor.
If the name of the opportunity is not Test, then set the Lead Quality to 3-High.
To update one field if the user modifies values in another field
Open IBM Domino Designer, and then open the (SBL)form:opportunity form,
For more information, see Opening IBM Domino Designer.
Click the Name field in the (SBL)form:opportunity form.
In the Objects tab, locate and choose the onChange event.
From the Run drop-down list, choose the Client option, and then choose the IBM Notes Script option.
Add the following code:
m_FormHandler.FormManager.GetControl("Name").OnChange.Raise Args()where:
m_FormHandler is an instance of the FormOpportunityEx class.
Save your changes.
Open the SBL.Forms script library.
To create the CallbackOpportunityNameOnChange class, add the following code:
'===========================================================================
' CallbackOpportunityNameOnChange
' Class that represents
'===========================================================================
Public Class CallbackOpportunityNameOnChange As CallbackObject
Private m_Doc As DocumentEx
'Comments for New
Sub New(doc As DocumentEx)
  Set m_Doc = doc
End Sub
'Comments for Invoke
  Public Function Invoke(params As DynamicArguments)
    Dim NameValue As String
    NameValue = m_Doc.SafeProperty("Name", "")
    If NameValue = "Test" Then
      m_Doc.Property("LeadQuality") = "[!loc:lang_lead_quality_poor:loc!]"
    Else
      m_Doc.Property("LeadQuality") = "[!loc:lang_lead_quality_high:loc!]"
    End If
  End Function
End Class
This code defines the callback that Siebel CRM Desktop sends if the user modifies the value of the Lead Quality field. Siebel CRM Desktop uses the following localization macros in this class for each value that this field can contain:
[!loc:lang_lead_quality_poor:loc!]
[!loc:lang_lead_quality_high:loc!]
If you use these macros, then you must also modify the Ln_package_res.xml file as described in Step 4b in Adding Postdefault Values to Fields. You can also hard code these values to 5-Poor and 3-High.
In the FormOpportunityEx class, switch to the PostOpen function, and then locate the following code:
Dim ControlStatus As New ControlEditable ("Status", Me.Form)Add the following code immediately after the code you located in Step 9:
Dim ContolName As New ControlEditable("Name", Me.Form)
Dim NameCallback As New CallbackOpportunityNameOnChange (Me.DocumentEx)
ControlName.OnChange.Connect NameCallback
where:
Dim ContolName As New ControlEditable("Name", Me.Form)creates a virtual control.Dim NameCallback As New CallbackOpportunityNameOnChange (Me.DocumentEx)creates the callback for the class that you added in Step 8.ControlName.OnChange.Connect NameCallbacksigns the callback that Siebel CRM Desktop runs for the control.
Test your changes and then republish the customization package.
For more information, see Republishing Customization Packages.
Creating Calculated Fields
You can configure Siebel CRM Desktop to display a calculated field in the client so that it behaves in a way that is similar to how a calculated field behaves in the client of a Siebel Business Application. The example in this topic configures a calculated field in the client. If the user changes the opportunity name, then the value in this field also changes. You do the following:
Expose a calculated field to an integration object and synchronize it with Siebel CRM Desktop. This configuration allows Siebel CRM Desktop to get a correct starting value for the calculated field. In this example, you use a calculated field named JVD Calculated. It includes the following calculated value:
[Name] + " - Calculated"
Use a Siebel CRM Desktop calculated field to make a working copy of the original calculated field. You do this because you cannot configure Siebel CRM Desktop to make changes to a calculated field from Siebel CRM while the user is using Siebel CRM Desktop. Doing so might cause a synchronization error.
Use JavaScript in the form to make sure the copy of the calculated field changes if the user changes the opportunity name. This configuration allows you to use the same behavior that occurs in the client of a Siebel Business Application for the calculated field.
For more information about each of these items, see Alternative Ways to Create Calculated Fields.
To create a calculated field
Open Siebel Tools and then display the object type named Integration Object.
For more information, see Displaying Object Types in Siebel Tools.
In the Object Explorer, click Integration Object.
In the Integration Objects list, query the Name property for CRMDesktopOpportunityIO.
In the Object Explorer, expand the Integration Object tree and then click Integration Component.
In the Integration Components list, add a new integration component using values from the following table.
Property Value Name
JVD Calculated
Data Type
DTYPE_TEXT
Length
285
External Sequence
240
External Name
JVD Calculated
External Data Type
DTYPE_TEXT
XML Sequence
240
XML Tag
JVDCalculated
This integration component exposes the Siebel CRM calculated field to the integration object for the opportunity.
Deploy your changes to the Siebel Runtime Repository.
Use an XML editor open the siebel_meta_info.xml file.
Locate the following object:
TypeId="Opportunity"
Add the following code to the object you located in Step 8:
<field Name='JVD Calculated' Label='JVD Calculated' DataType='DTYPE_TEXT'
IsFilterable='no' IsHidden='no'IOElemName='JVDCalculated' />
This code adds the JVD Calculated field to the metadata object for Opportunity. For more information, see JavaScript Files in the Customization Package.
Set the calculated field in Siebel CRM Desktop. You add the following code to the Ln_siebel_basic_mapping.xml file:
<field id="JVD Calculated">
  <reader>
    <lotus_STD>
      <lotus_field id="JVDCalculated"/>
      <convertor>
        <string/>
      </convertor>
    </lotus_STD>
  </reader>
  <writer>
    <lotus_STD>
      <lotus_field id="JVDCalculated"/>
      <convertor>
        <string/>
      </convertor>
    </lotus_STD>
  </writer>
</field>
Open IBM Domino Designer, and then open the (SBL)form:opportunity form.
For more information, see Opening IBM Domino Designer.
Use IBM Domino Designer to add and position the JVD Calculated field. Use the same Name for this field that you specified in the Ln_siebel_basic_mapping.xml file in Step 8.
In this example, name it JVDCalculated. Make sure that the Text and Editable properties are chosen for this field.
Make the field read-only. In the Objects tab, choose the Input Enabled event, and then enter the following code in the pane that IBM Domino Designer displays next to the workspace:
@False;
A calculated field in Siebel CRM is read-only. It is recommended that you also make the calculated field in Siebel CRM Desktop read-only. For more information, see Making Fields Read-Only.
Save your work.
Open the SBL.Forms script library, and then add the following code to create a new class:
'===========================================================================
' CallbackOpportunityJVDCalculate
' Class that represents
'===========================================================================
Public Class CallbackOpportunityJVDCalculate As CallbackObject
Private m_Doc As DocumentEx
'Comments for New
Sub New(doc As DocumentEx)
  Set m_Doc = doc
End Sub
'Comments for Invoke
  Public Function Invoke(params As DynamicArguments)
    Dim NameValue As String
    NameValue = m_Doc.SafeProperty("Name", "")
    m_Doc.Property("JVDCalculated") = NameValue & " - Calculated"
  End Function
End Class
The Invoke function of this callback class gets the value of the Name field, and then writes this value to the JVDCalculated field plus the following string concatenated to the opportunity name:
– Calculated
To calculate the value, Siebel CRM uses the following code:
[Name] + “ – Calculated�?
In the FormOpportunityEx class, switch to the PostOpen function, and then locate the following code:
Dim ControlStatus As New ControlEditable ("Status", Me.Form)Add the following code immediately after the code you located in Step 16:
Dim JVDCalculateCallBack As New CallbackOpportunityJVDCalculate (Me.DocumentEx)
  ControlName.OnChange.Connect JVDCalculateCallback
This code makes sure Siebel CRM Desktop calls this function if the user changes the value in a field that the calculation uses. In this example, the calculated value depends only on the opportunity name, so this code only calls this function if the user changes the value in the Opportunity Name field.
Test your changes and then republish the customization package.
For more information, see Republishing Customization Packages.
Alternative Ways to Create Calculated Fields
This topic describes alternative ways to create a calculated field.
Exposing Calculated Siebel CRM Fields
To create a calculated field, you can expose a calculated field that exists in Siebel CRM to an integration object and then synchronize it to Siebel CRM Desktop. However, if this field is not read-only in the client, then Siebel CRM Desktop attempts to synchronize the new value back to Siebel CRM, and this synchronization fails.
Specifying Fields in the Siebel Meta Info File as Calculated Fields
You can specify a field in the siebel_meta_info.xml file as a calculated field. To do this, you set the IsCalculated attribute to yes and then use the following code to specify a value for the Formula attribute:
:[ :] Block, should contain field.
:( ) Container for fieldname.
For example, you can use the following code to combine the First Name field and the Last Name fields:
:[:(First Name) :(Last Name):]
This primary allows you to concatenate fields with the possibility to add some static characters to the concatenation. It does not allow you to configure Siebel CRM Desktop to do a calculation. You specify this code in the siebel_meta_info.xml file. Siebel CRM Desktop only determines the calculated value during synchronization. From this point the field is read-only.
Using LotusScript to Mimic Calculated Fields
You can write LotusScript that mimics the behavior of a calculated field. You can configure Siebel CRM Desktop to run this LotusScript code only in reply to something that happens in the form, such as the user changing the value in a field. This configuration updates a field if the data changes in the form but you cannot use it to control the value of a calculated field that Siebel CRM Desktop displays when the user opens a form.
Customizing UI Behavior
This topic describes how to customize behavior in the user interface. It includes the following topics:
Customizing the Product Name
The client displays the following text in a number of locations:
Siebel CRM
Siebel CRM Desktop
IBM Notes
You can change this text to a custom value.
To customize the product name
Use an XML editor open the Ln_package_res.xml file.
For more information, see Files in the Customization Package.
Create or modify any of the following attributes, as required:
<str key="app_name">CRM Desktop</str><str key="pim_name">IBM Notes</str><str key="remote_app_name">Siebel</str>For example, in the remote_app_name attribute, change Siebel to your company name.
Save and test your changes and then republish the customization package.
For more information, see Republishing Customization Packages.
Customizing the Email Address of the Support Team
The defines various resources for the customization package. In this file, you can specify the email address of the support team where the user sends feedback.
To customize the email address of the support team
Use an XML editor open the Ln_package_res.xml file.
Modify the following code of:
<!-- Feedback page -->
  <str key="support_email">email_address</str>
where:
email_address is the email address where Siebel CRM Desktop sends requests for support
For example:
<str key="support_email">support@example.com</str>
If the user clicks Send Feedback on the Feedback tab in the Options dialog box, then Siebel CRM Desktop does the following work:
Opens a new email message.
Automatically enters the value that you specify in the support_email variable. It enters this information in the To line of this email message.
If the user clicks the Send Feedback button on the Feedback tab in the Options dialog box, and if you do not specify the email address, then Siebel CRM Desktop opens the email without an email address in the To line. Siebel CRM Desktop does not come predefined with a support email address. You must specify it.
The example in this topic describes how to configure security rules to make accounts read-only.
Open IBM Domino Designer, open the SBL.SecurityRules script library, and then choose the AccountSecurityRule class.asdf
For more information, see Opening IBM Domino Designer.
Make sure the AccountSecurityRule class includes the following code. If it does not include this code, or if the AccountSecurityRule class does not exist, then add it now:
'===========================================================================
' AccountSecurityRule
' Class that represents
'===========================================================================
Public Class AccountSecurityRule As SiebelSucurityRule
  Sub New
    m_RequiredPrimaryType = "Position"
  End Sub
   Public Sub LinkAccess(docEx As DocumentEx, linkCtx As ContextLink, result As
LinkAccessItem)
    Me.TerritoryAndPrimaryPositionLinkAccess docEx, linkCtx, result
  End Sub
End Class
where:
Public Class AccountSecurityRule As SiebelSucurityRuleconfigures Siebel CRM Desktop to get the logic for this rule from the SiebelSucurityRule class.
Controlling How Siebel CRM Desktop Pins Objects
CRM Desktop pins all objects that the Online Lookup feature brings into the client. CRM Desktop pins these items for one week, by default It removes these pinned items from the client after one week, including the record and any links to the record. You can change this default duration value
Controlling How Long Siebel CRM Desktop Pins Objects
This topic describes how to change the default value that determines how long Siebel CRM Desktop pins an object.
To control how long Siebel CRM Desktop pins an object
Use a JavaScript editor to open the online_lookup_sbl.js file.
Locate the following code:
online_lookup_sbl.superclass.constructor.apply(this, arguments);
Add the following line following the code that was located in Step 2.
this.options.pinned_object_lifetime = pin_time;
where:
pin_time specifies the number of seconds to pin an item. Note the following:
The default value is 604800, which is seven days.
One day is 86400.
You can specify -1 (negative one) to pin objects forever.
Controlling How Siebel CRM Desktop Handles Data That Is Not Directly Visible
You can use the viewmodes element to configure Siebel CRM Desktop to display or hide data that is not directly visible. Data that is not directly visible is a type of data that the client does not receive during synchronization, but instead gets through an association with another Siebel CRM object type. For example, filter settings might prevent Siebel CRM Desktop from synchronizing some accounts to the client, but the synchronized contacts that reference these account might contain this account data. In this situation, Siebel CRM Desktop displays this account information in the Contact form, but not in an Account view.
Starting with Siebel CRM Desktop version 3.1, you can configure a view mode according to the type of operation that Siebel CRM Desktop performs. You can use one of the following values for the viewmodes element:
General. Specifies a value for the General viewmode. If this value exists, then it overrides a value that the ViewMode attribute specifies.
Dedup. Specifies a value for the Deduplication view mode. For more information, see Resolving Synchronization Conflicts.
QBID. Specifies a value for the Query-By-Id view mode.
Not specified. If you do not specify the viewmodes element, then Siebel CRM Desktop does the following:
Uses the default value for the deduplication viewmode that it gets from the value that you set for the General view mode
Uses All as the default value for the Query-By-Id view mode.
Siebel CRM Desktop uses a master filter only on query change requests when it uses the General view mode.
For more information, see How Siebel CRM Desktop Displays Data That Is Not Directly Visible.
Using Query By Id to Hide Data That is Not Directly Visible
The example in this topic configures Siebel CRM Desktop to hide all data that is not directly visible for contacts. It prevents Siebel CRM Desktop from getting data from the Siebel Server and storing it in the client.
To hide data that is not directly visible for contacts
Use an XML editor open the siebel_meta_info.xml file.
Define the following view modes for the contact object type:
General="Sales Rep" Dedup="All" QBID="Sales Rep"/>
Define the following view modes for the account object type:
General="Sales Rep" Dedup="All" QBID="Sales Rep"/>
Define the following view modes for the opportunity object type:
General="Sales Rep" Dedup="All" QBID="Sales Rep"/>
Define the following view modes for Contact.Account and Account.Contact:
General="Sales Rep" Dedup="All" QBID="Sales Rep"/>
Define the following view modes for Contact.Opportunity and Opportunity.Contact:
General="Sales Rep" Dedup="All" QBID="Sales Rep"/>
Make sure the user does not modify the default filter preset that restricts the number of objects that Siebel CRM Desktop synchronizes from the Siebel Server.
Using Query By Id to Synchronize Only My Accounts and Activities
Use an XML editor open the siebel_meta_info.xml file.
Locate the following code:
Account
<object TypeId='Account' Label='#obj_account' LabelPlural='#obj_account_plural'
UpsertBusObjCacheSize='0' EnableGetIDsBatching='true'
IntObjName='CRMDesktopAccountIO' SiebMsgXmlElemName='Account'
SiebMsgXmlCollectionElemName='ListOfCRMDesktopAccountIO' >
<viewmodes General="Sales Rep" Dedup="All"/>
Account.Action
<object TypeId='Account.Action' Label='Activity' LabelPlural='Activities'
EnableGetIDsBatching='true' IntObjName='CRMDesktopAccountIO'
SiebMsgXmlElemName='Action' SiebMsgXmlCollectionElemName='ListOfAction' >
<viewmodes General="All" Dedup="All" />
Modify the code you located in Step 2 to the following code. Bolded font indicates the modifications you must make:
Account
<object TypeId='Account' Label='#obj_account' LabelPlural='#obj_account_plural'
UpsertBusObjCacheSize='0' EnableGetIDsBatching='true'
IntObjName='CRMDesktopAccountIO' SiebMsgXmlElemName='Account'
SiebMsgXmlCollectionElemName='ListOfCRMDesktopAccountIO' >
<viewmodes General="Sales Rep" Dedup="All" QBID="Sales Rep"/>
Account.Action
<object TypeId='Account.Action' Label='Activity' LabelPlural='Activities'
EnableGetIDsBatching='true' IntObjName='CRMDesktopAccountIO'
SiebMsgXmlElemName='Action' SiebMsgXmlCollectionElemName='ListOfAction' >
<viewmodes General="Personal" Dedup="All" QBID="Personal"/>
Using Filters to Hide Data That Is Not Directly Visible
This topic describes how to hide data that is not directly visible for accounts from a custom IBM Notes view that Siebel CRM Desktop uses. It describes how to prevent Siebel CRM Desktop from storing data in the client. For information about how to prevent Siebel CRM Desktop from getting data from the Siebel Server and storing it in the client, see Using Query By Id to Hide Data That is Not Directly Visible.
To use filters to hide data that is not directly visible
Open IBM Domino Designer, and then choose the _Account view.
For more information, see Opening IBM Domino Designer.
In the Objects tab, choose View Selection.
Make sure IBM Domino Designer displays the View Selection code. For example:
  SELECT CRMDType="Account" & (@Contains(ObjectStateString;"P") |
!(@Contains(ObjectStateString;"I") | @Contains(ObjectStateString;"V")))
where:
CRMDType="Account"configures Siebel CRM Desktop to choose only accounts for the view.(@Contains(ObjectStateString;"P")establishes the P object state string.!(@Contains(ObjectStateString;"I")makes sure Siebel CRM Desktop does not established the I object state string.(@Contains(ObjectStateString;"V")establishes the V object state string.
Use an XML editor open the Ln_connector_configuration.xml file, and then make sure the state_field for the Account type uses the following value:
<type id="Account" state_field="ObjectState">
If you copy this view, then Siebel CRM Desktop also copies this filter. This configuration allows you to create other views that you can use with Siebel CRM data.
Preventing Users from Deleting Records
This topic describes how to configure Siebel CRM Desktop to prevent the user from deleting records in the client. You can also configure it to allow the user to delete a record in the client and then confirm this deletion during synchronization. For more information, see Configuring Siebel CRM Desktop to Disregard Erroneous Data That Users Modify and Controlling How Siebel CRM Desktop Deletes Records During Synchronization.
To prevent users from deleting records
In Siebel Tools, make sure the integration component object type is displayed.
For more information, see Displaying Object Types in Siebel Tools.
In the Object Explorer, click Integration Object.
In the Integration Objects list, query the Name property for CRMDesktopContactIO, and then make sure the Object Locked property contains a check mark.
In the Object Explorer, expand the Integration Object tree and then click Integration Component.
In the Object Explorer, expand the Integration Component tree and then click Integration Component User Prop.
In the Integration Component User Prop list, add a new record with the following value:
Property Value NoDelete
Y
Repeat Step 2 through Step 6 for every CRMDesktop integration object.
Compile your changes.
Log in to the client.
Delete a contact.
Perform a synchronization.
Make sure Siebel CRM Desktop displays a message that is similar to the following:
EAI Adapter call failed with error: No deletes are allowed in Integration
Component Action_Contact (SBhL-EAI-04183)
Republish the customization package.
For more information, see Republishing Customization Packages.
Preventing Users from Deleting Records According to Conditions
This topic describes how to configure Siebel CRM Desktop to prevent the user from deleting records in the client according to a condition. For example, not allowing the user to delete an opportunity if the Status is Pending. The delete button in the client is a native IBM Notes button that you cannot disable. Instead, you can modify the code that runs if the user clicks Delete.
The example in this topic prevents the user from deleting any Opportunity that includes a Status of Pending. You can configure Siebel CRM Desktop to handle all Siebel CRM objects in the same way. This configuration applies to contacts, accounts, opportunities, and any other custom Siebel CRM object, such as service requests or call reports.
To prevent users from deleting opportunities according to conditions
Open IBM Domino Designer, and then open the SBL.SecurityRules script library.
For more information, see Opening IBM Domino Designer.
Locate the DeleteAccess function in the OpportunitySecurityRule class.
Add the following code to the end of the DeleteAccess function:
If docEx.Property("Status") = "Pending" Then DeleteAccess = False
Configuring Siebel CRM Desktop to Automatically Add Deleted Items to the Exclusion List
When a user deletes a synced Account, Contact or Opportunity from CRM Desktop, a confirmation dialog box appears and prompts the user to add the deleted item to the Exclusion list. Deleted items are deleted from IBM Notes but not from the Siebel CRM Desktop server.
You can configure CRM Desktop to automatically add an item that the user deletes to the Exclusion list without any confirmation dialogs.
Or you can totally disable deletion of objects from CRM Desktop.
To configure Siebel CRM Desktop to automatically add deleted items to the Exclusion list
Open IBM Domino Designer, and then open the SBL.Actions script library.
For more information, see Opening IBM Domino Designer.
Locate the sub New in the ActionDeleteOrExclude class.
Set the m_ShowExclusionConfirmation variable to False.
Save the SBL.Actions script library.
Making Forms Read-Only
You can configure Siebel CRM Desktop to make a form in the client read-only. The user can view values in a read-only form but cannot modify these values. The example in this topic describes how to make the form that displays account information a read-only form. If you configure Siebel CRM Desktop to make a form read-only, then the user cannot use the Edit button or double-click the form to make it writable.
To make forms read-only
Open IBM Domino Designer, expand the Code tree, expand the Script Libraries tree, and then double-click SBL.SecurityRules:

For more information, see Opening IBM Domino Designer.
In the SecurityRules script library that IBM Domino Designer displays, in the Object tab, expand the rule for the object type that you must make read-only. For this example, expand AccountSecurityRule:

Click the ModifyAccess function that resides in the rule that you clicked in Step 2.
The ModifyAccess function does not exist in this example. If the rule that you clicked in Step 2 does not include the ModifyAccess function, then you must add it using the following code:
Public Function ModifyAccess(docEx As DocumentEx) As Boolean
End Function
Modify the ModifyAccess function so that it always returns a value of false. You add the
ModifyAccess = falseline:Public Function ModifyAccess(docEx As DocumentEx) As Boolean ModifyAccess = false End Function
To test your work, log into the client and make sure you cannot modify the account object.
Allowing Users to Add New Records in Read-Only Forms
This topic describes how to allow the user to add a new record in a read-only form. Forms should be opened in edit mode to allow adding and saving of new child records. To make a parent form read-only and allow the addition of new child records, each form field must be read only. For more information about making fields read only, see Making Fields Read-Only.
Embedded views with child records should be leaved as is, i.e., they should have correspondent actions for creating and removing child records.
To allow users to add new records in read-only forms
Open IBM Domino Designer, and then open the SBL.Forms script library.
For more information, see Opening IBM Domino Designer.
Choose the FormAccountEx class.
Add the following method to the FormAccountEx class:
Public Function QueryModeChange As Boolean
  QueryModeChange = Me.Form.Editmode Or Me.Form.Isnewdoc
  If QueryModeChange Then
    QueryModeChange = SBLFormEx..QueryModeChange()
  End If
End Function
Optional. To allow the user to edit information for a new account that the user saved but has not synchronized, replace the code that you added in Step 3 with the following code:
Public Function QueryModeChange As Boolean
  QueryModeChange = Me.Form.Editmode Or Not SiebelHelper.IsSynced(Me.DocumentEx)
  If QueryModeChange Then
    QueryModeChange = SBLFormEx..QueryModeChange()
  End If
End Function
Test your modifications, and then republish the customization package.
For more information, see Republishing Customization Packages.
Localizing Strings
To localize strings, you add a resource string to a resource file and then reference that string from other XML files.
To localize strings
Add a new resource string for the custom label and attribute name or warning message that you must localize. Add this resource string in the following files:
Use the Ln_package_res.xml file for a default resource.
Use the package_res.xx_YY.xml file for a specific locale.
where:
xx_YY is the language you use in your implementation.
For example, for Portuguese Brazilian you use package_res.pt_BR.xml.
The following standards determine the locale naming convention:
xx. The ISO 639-1 standard for the language.
YY. The ISO 3166-1 standard for the country. This standard supports dialects and language adoptions for specific countries.
For more information, see Files in the Customization Package.
Specify a localizable string. You add the following code:
<str key="string_id">localizable_string</str>
where:
string_id is the Id of the localizable string. The double quotes are required.
localizable_string is the localizable string.
Use the localizable string Id in every location where Siebel CRM Desktop must display the string.
You must use different formats to specify the string in different types of files. Use values from the following table.
File Type Description Any XML file.
Use the following format:
#string_id
For example:
<type id="Opportunity" state_field="ObjectState">
  <view label="#obj_opportunity"
label_plural="#obj_opportunity_plural"
small_icon="type_image:Opportunity:16"
normal_icon="type_image:Opportunity:24"
large_icon="type_image:Opportunity:48"
filters_display_mode="hidden_child"></view>
Any JavaScript file.
Use the following format:
session.res_string("string_id")
For example:
ui.message_box(0, session.res_string("msg_general_error"),
session.res_string("msg_general_error_caption"), 0x40);
Any DXL file.
Use the following format:
[!loc:string_id:loc!]
For example:
<formula>@If(@IsNewDoc;"[!loc:FRM_ACCOUNT_WINDOW_TITLE_NEW:lo
c!]";"[!loc:FRM_ACCOUNT_WINDOW_TITLE_EXISTING:loc!]: " +
Name)</formula>
where:
FRM_ACCOUNT_WINDOW_TITLE_NEWis an example of resource Id.
In another example, assume the user must use a string value instead of resource Id, and that this string contains a double quote ("). For example:
aaa"bbb
In this situation, you must add a backslash (\) immediately before the double quote. For example:
<formula>@If(@IsNewDoc;"aaa\"bbb";"[!loc:FRM_ACCOUNT_WINDOW_T
ITLE_EXISTING:loc!]: " + Name)</formula>
Add the XML files to the customization package.
Republish the customization package.
For more information, see Republishing Customization Packages.
Validating the Data That Users Enter
This topic describes how to validate the data that the user enters in Siebel CRM Desktop. It includes the following topics:
A validator is a type of form handler that you can specify to validate the information that a user enters. You typically specify all validators in the InitValidators procedure of correspondent form handler class in the SBL.Forms script library. There are many predefined validators in the SD3.Validator platform script library. Custom validator classes may also be added in SBL.Forms library.
For more information, see Validation Rules You Can Configure for Custom Forms.
Preparing to Use Validation
To use validation, you must make sure the InitValidators procedure is defined in the class that the form references.
To prepare to use validation
Open IBM Domino Designer, and then open the SBL.Forms script library.
For more information, see Opening IBM Domino Designer.
Add the following code to the class that the form references. For example, use the FormOpportunityEx class for the Opportunity form:
Public Sub InitValidators(vld As Validator)
  'Add validators here
End Sub
Making Sure Users Enter Information in a Field
You can use validation to make sure the user enters information in a field.
To make sure the user enters information in a field
Make sure the form_validator object is defined.
For more information, see Preparing to Use Validation.
Open IBM Domino Designer, and then open the SBL.Forms script library and then add the following code to the class that the form references:
Dim Fields As New ArrayEx("")
Dim Controls As New ArrayEx("")
Fields.Push "field_name"
Controls.Push "control_id"
vld.ValidateEmptyField Fields, Controls, "validation_message", ""
where:
field_name is the name of the field you must examine.
controlId is the Lotus Id of the control in the form that Siebel CRM Desktop uses in the InitValidators procedure.
validation_message is a variable of the validation message that Siebel CRM Desktop displays in the client if the validation fails.
For example, the following code makes sure the user enters information in the Opportunity Name field:
Dim Fields As New ArrayEx("")
Fields.Push "Name"
vld.ValidateEmptyField Fields, Fields, MSG_OPPORTUNITY_NAME_REQUIRED, ""
For more information, see Opening IBM Domino Designer.
Test your changes and then republish the customization package.
For more information, see Republishing Customization Packages.
Making Sure Users Enter Unique Values
You can use validation to make sure the value that the user enters in a field is unique.
To make sure the user enters unique values
Make sure the InitValidators procedure is defined in the class that the form references.
For more information, see Preparing to Use Validation.
Open IBM Domino Designer, open the SBL.Forms script library, and then add the following code to the class that the form references:
vld.ValidateUniqueFields fields_array_ex,
ids_array_ex,boolean_skip_empty_fields,validation_message, ""
where:
fields_array_ex is an ArrayEx of fields. This array must be unique.
ids_array_ex is an ArrayEx of control identifiers that Siebel CRM Desktop highlights in the client if the validation fails.
skip_empty_fields is aparameter that determines if Siebel CRM Desktop ignores empty fields when it compares records. You can set it to one of the following values:
true. Ignore empty fields.
false. do not ignore empty fields.validation_message is a string constant that contains the message that Siebel CRM Desktop displays in the client if the validation fails.
For example, the following code makes sure the user enters an opportunity name that is unique for a given account:
vld.ValidateUniqueFields NewSmartArray().Add("Name").Add("CRMDAccountId"),
NewSmartArray().Add("Name").Add("CRMDAccountId"), False,
MSG_OPPORTUNITY_NAME_ACCOUNT_NOT_UNIQUE, "
where:
NewSmartArray().Add("Name").Add("CRMDAccountId")identifies the fields that, when combined, must be unique. In this example, the Name field plus the Account Id field constitutes this unique combination.NewSmartArray().Add("Name").Add("CRMDAccountId")identifies the form controls that Siebel CRM Desktop highlights in the client if the validation fails. In this example, it highlights the control for the opportunity name and the control for the account name.Falseinstructs Siebel CRM Desktop to not ignore validation for an empty field.MSG_OPPORTUNITY_NAME_ACCOUNT_NOT_UNIQUE identifies the string constant that contains the text for the message that Siebel CRM Desktop displays in the client if the validation fails.
For more information, see Opening IBM Domino Designer.
Test your changes and then republish the customization package.
For more information, see Republishing Customization Packages.
Making Sure Users Do Not Exceed the Maximum Number of Characters
You can use validation to make sure the user does not enter more than a maximum number of characters in a field.
To make sure users do not exceed the maximum number of characters
Make sure the InitValidators procedure is defined in the class that the form references.
For more information, see Preparing to Use Validation.
Open IBM Domino Designer, open the SBL.Forms script library, and then add the following code to the class that the form references:
vld.ValidateFieldLength fields_array_ex, ids_array_ex, maximum_length,
StrReplace(validation_message, "[comment_max_length]", maximum_length,
boolean_skip_empty_fields), ""
where:
fields_array_ex identifies an ArrayEx of fields. This array must be unique.
ids_array_ex identifies an ArrayEx of control identifiers that Siebel CRM Desktop highlights in the client if the validation fails.
maximum_length specifies the maximum length for the field in characters.
StrReplacesubstitutes the string message in the validation_message that contains the comment_max_length string with the maximum_length value.validation_message is a string constant that contains the message that Siebel CRM Desktop displays in the client if the validation fails.
For example, the following code makes sure the user does not enter more than 1500 characters in the Comment field of an Activity:
vld.ValidateFieldLength NewSmartArray().Add("Comments"),
NewSmartArray().Add("Comments"), 1500, StrReplace(MSG_ACTIVITY_COMMENT_LENGTH,
"[comment_max_length]", 1500, False), ""
where:
Falseinstructs Siebel CRM Desktop to not ignore validation for an empty field.For more information, see Opening IBM Domino Designer.
Test your changes and then republish the customization package.
For more information, see Republishing Customization Packages.
Creating Custom Validations
You can create a custom validation.
To create custom validations
Make sure the InitValidators procedure is defined in the class that the form references.
For more information, see Preparing to Use Validation.
Open IBM Domino Designer, open the SBL.Forms script library, and then add the following code to the class that the form references:
vld.ValidateCustom ids_array_ex, validation_message, validation_callback, ""
where:
ids_array_ex identifies an ArrayEx of control identifiers that Siebel CRM Desktop highlights in the client if the validation fails.
validation_message is a string constant that contains the message that Siebel CRM Desktop displays in the client if the validation fails.
validation_callback identifies the instance of the class that this code inherits from the CallBackValidation class. This class overrides the Validate function of the base class. The function gets the ValidationContext object as input and allows it to access data and to access the user interface document, which is a form in IBM Domino Designer. If the validation is successful, then it returns a value of true.
For more information, see Opening IBM Domino Designer.
Test your changes and then republish the customization package.
For more information, see Republishing Customization Packages.
Example of Creating a Custom Validation
If the user enters a new opportunity, then the following code makes sure the close date that the user enters occurs later than the current date:
Dim ValidationCallBackCloseDate As New
ValidationOpportunityCloseDate(NewSmartArray().Add("CloseDateOnly"))
vld.ValidateCustom NewSmartArray().Add("CloseDateOnly"),
MSG_OPPORTUNITY_CLOSE_DATE_PASSED_OUT, ValidationCallBackCloseDate, ""
To do the validation, this code calls the following ValidationOpportunityCloseDate class:
Private Class ValidationOpportunityCloseDate As CallbackValidation
  Sub New(Fields As ArrayEx)
    Set m_Fields = Fields
  End Sub

  'Validate - validation implementation
  Function Validate(validationCtx As ValidationContext) As Boolean
    Dim Doc As DocumentEx
    Dim SavedDoc As DocumentEx
    Dim Item As Variant
    Dim EnteredDate As NotesDateTime
    Dim OriginalDate As NotesDateTime
    Dim CurrentDate As NotesDateTime
    Dim Field As String
    Dim i As Integer
    Dim DateWasNotChanged As Boolean

    Set Doc = validationCtx.DocEx
    Set SavedDoc = validationCtx.DocBackendEx
    Set CurrentDate = New NotesDateTime("")
    CurrentDate.Setnow

    Validate = True
    For i = 0 To m_Fields.Length - 1
      Field = m_Fields.Item(i)

      Set Item = Doc.FirstItem(Field)
      Set EnteredDate = New NotesDateTime(Item.Text)
      Set Item = SavedDoc.FirstItem(Field)
      DateWasNotChanged = False
      If Not Item Is Nothing Then
        Set OriginalDate = New NotesDateTime(Item.Text)
        DateWasNotChanged = (EnteredDate.Timedifference(OriginalDate) = 0)
      End If

      If EnteredDate.IsValidDate Then
        Validate = DateWasNotChanged Or (EnteredDate.TimeDifference(CurrentDate) >=
0)
      End If

      If Validate = False Then
        Exit For
      End If
    Next
  End Function
End Class
Process of Adding Custom Objects
To add a custom object in Siebel CRM Desktop, you do the following:
The example in this topic adds an Activity object to IBM Notes. In Siebel CRM, this object is named Action. To add this object to IBM Notes, you modify the Ln_siebel_basic_mapping.xml file. For more information about:
Overview of XML files that you modify in this example, see Overview of Customizing Siebel CRM Desktop.
Details about tags in XML files that you modify in this example, see XML Files Reference.
Creating the Custom Object
This task is a step in Process of Adding Custom Objects.
In this topic, to add a new object to IBM Notes, you describe the structure of the object and then create mappings between fields, lists, and so on. You make these customizations in the Ln_siebel_basic_mapping.xml file.
To create the custom object
Use an XML editor to open the Ln_siebel_basic_mapping.xml file.
For more information, see Files in the Customization Package.
Specify the name of the custom object. You add the following code to the Ln_siebel_basic_mapping.xml file:
<type id="Action" form="sblActivity">
</type>
This example code defines sblAction as the form to display for this object. You specify the form layout later.Create a set of fields for the custom object.
For more information, see Creating a Set of Fields for the Custom Object.
Specify intersection objects for many-to-many relationships.
For more information, see Specifying the Many-To-Many Relationships.
Specify the lists.
For more information, see Specifying the List.
Creating a Set of Fields for the Custom Object
This topic describes how to create a set of fields for the custom object. In this example, you configure Siebel CRM Desktop to synchronize the Main Phone Number and the Currency Code fields of the Account form with the corresponding data for these fields that resides on the Siebel Server.
To create a set of fields for the custom object
Open IBM Domino Designer, and then add a new Main Phone Number field and a new Currency Code field on the Account form.
For more information, see Opening IBM Domino Designer.
Use an XML editor to open the Ln_siebel_basic_mapping.xml file.
Locate the following code:
<type id="Account" form="sblAccount">
Add the following code immediately under the code you located in Step 3.
<field ver="1" id="Description" lotus_field="Description" />
<field ver="1" id="Type" lotus_field="CRMDActionType" />
<field ver="1" id="Priority" lotus_field="Priority" />
<field ver="1" id="Primary Owner Id" lotus_field="CRMDEmployeeId" />
<field ver="1" id="Planned Start" lotus_field="StartDateTime" />
<field ver="1" id="Planned Completion" lotus_field="EndDateTime" />
<field ver="1" id="Comments" lotus_field="Comments" />
<field ver="1" id="Account Id" lotus_field="CRMDAccountId" />
<field ver="1" id="Opportunity Id" lotus_field="CRMDOpportunityId" />
Use an XML editor to open the siebel_meta_info.xml file.
Locate the following code:
<object TypeId='Account' Label='#obj_account' LabelPlural='#obj_account_plural'
UpsertBusObjCacheSize='0' EnableGetIDsBatching='true'
IntObjName='CRMDesktopAccountIO' SiebMsgXmlElemName='Account'
SiebMsgXmlCollectionElemName='ListOfCRMDesktopAccountIO'>
Add the following code immediately under the code you located in Step 6.
<field Name='Main Phone Number' Label='#fld_account@main_phone_number'
DataType='DTYPE_PHONE' IOElemName='MainPhoneNumber' />
<field Name='Currency Code' Label='Currency Code' DataType='DTYPE_ID'
IsFilterable='no' IsRefObjId='yes' RefObjTypeId='Currency'
IOElemName='CurrencyCode' />
Fields That Siebel CRM Desktop Uses for the Custom Object
The following table describes the fields you create for this example.
| Field Label | Field Name | IBM Name Item | Field Type |
|---|---|---|---|
| Description |
Description |
Description |
Text |
| Type |
Type |
CRMActionType |
Picklist |
| Priority |
Priority |
Priority |
Picklist |
| Owner |
Primary Owner Id |
CRMEmployeeId |
Lookup |
| Account |
Account Id |
CRMAccountId |
Lookup |
| Opportunity |
Opportunity Id |
CRMOpportunityId |
Lookup |
| Contacts |
No field on this object |
Not applicable |
MVG |
| Employee |
No field on this object |
Not applicable |
MVG |
| Planned Start |
Planned Start |
StartDateTime |
datetime |
| Planned Completion |
Planned Completion |
EndDateTime |
datetime |
| Comments |
Comment |
Comments |
Textarea |
Specifying the Many-To-Many Relationships
You do not specify many-to-many relationships in Creating the Custom Object. A many-to-many relationship exists between contacts and activities, and between employees and activities. You must specify more objects that contain links to activity and contact, or activity and employee. The remaining description for a many-to-many relationship is the same as for other objects where you specify the object name and object fields. This object can also include a field that indicates if this intersection record is a primary record or not a primary record.
To specify the many-to-many relationships
Open IBM Domino Designer, open the Account form, and then create the MVG button.
For more information, see Opening IBM Domino Designer.
Use an XML editor to open the Ln_siebel_basic_mapping.xml.
Add the following code:
<type id="Account.Contact.Association">
  <field id="ContactId" ver="1">
    <reader>
      <lotus_std>
        <lotus_field id="CRMDRightId"/>
        <convertor>
          <binary_hexstring/>
        </convertor>
      </lotus_std>
    </reader>
    <writer>
      <lotus_std>
        <lotus_field id="CRMDRightId"/>
        <convertor>
          <binary_hexstring/>
        </convertor>
      </lotus_std>
    </writer>
  </field>
  <field id="AccountId" ver="1">
    <reader>
      <lotus_std>
        <lotus_field id="CRMDLeftId"/>
        <convertor>
          <binary_hexstring/>
        </convertor>
      </lotus_std>
    </reader>
    <writer>
      <lotus_std>
        <lotus_field id="CRMDLeftId"/>
        <convertor>
          <binary_hexstring/>
        </convertor>
      </lotus_std>
    </writer>
  </field>
  <field id="LeftStatus" ver="1">
    <reader>
      <lotus_std>
        <lotus_field id="CRMDLeftStatus"/>
        <convertor>
          <string/>
        </convertor>
      </lotus_std>
    </reader>
  </field>
  <field id="RightStatus" ver="1">
    <reader>
      <lotus_std>
        <lotus_field id="CRMDRightStatus"/>
        <convertor>
          <string/>
        </convertor>
      </lotus_std>
    </reader>
  </field>
</type>
Specifying the List
The custom object stores items that the user chooses in a list. You describe the list field in the same way as you describe a string field. You must describe the object that stores all list values. Each list uses a separate object to store the values for the list. You must build the IDs for these objects according to the following rules:
Object name and field
Name and list
You must make sure the Type list on the Activity object includes the ID of the ActionTypePicklist object. To specify a list object, you must specify the following set of standard fields:
Label
Value (string)
SortOrder (integer)
IsDefault (Boolean)
In this example, you configuring the Sales Methods drop-down list on the Opportunity form.
To specify the list
Create a new field:
Open IBM Domino Designer.
For more information, see Opening IBM Domino Designer.
Create a field of the combobox type.
-
Use IBM Domino Designer to specify the filtering parameters for the field you created in Step b.
Use an XML editor to open the Ln_siebel_basic_mapping.xml file.
Locate the following code:
<type id="Opportunity" form="sblOpportunity">
Add the following code immediately following the code you located in Step 3:
<field id="Sales Method" ver="1">
  <reader>
    <lotus_std>
      <lotus_field id="SalesMethod"/>
      <convertor>
        <string/>
      </convertor>
    </lotus_std>
  </reader>
    <writer>
      <lotus_std>
        <lotus_field id="SalesMethod"/>
        <convertor>
          <string/>
        </convertor>
      </lotus_std>
    </writer>
</field>
Add the following code anywhere that is not part of code that defines an existing type:
<type id="OpportunitySales MethodPicklist" form="sblConst">
  <field id="Label" ver="1">
    <reader>
      <lotus_std>
        <lotus_field id="Name"/>
        <convertor>
          <string/>
        </convertor>
      </lotus_std>
    </reader>
    <writer>
      <lotus_std>
        <lotus_field id="Name"/>
        <convertor>
          <string/>
        </convertor>
      </lotus_std>
    </writer>
  </field>
  <field id="Value" ver="1">
    <reader>
      <lotus_std>
        <lotus_field id="Value"/>
        <convertor>
          <string/>
        </convertor>
      </lotus_std>
    </reader>
    <writer>
      <lotus_std>
        <lotus_field id="Value"/>
        <convertor>
          <string/>
        </convertor>
      </lotus_std>
    </writer>
  </field>
  <field id="SortOrder" ver="1">
    <reader>
      <lotus_std>
        <lotus_field id="SortOrder"/>
        <convertor>
          <number/>
        </convertor>
      </lotus_std>
    </reader>
    <writer>
      <lotus_std>
        <lotus_field id="SortOrder"/>
        <convertor>
          <number/>
        </convertor>
      </lotus_std>
    </writer>
  </field>
  <field id="IsDefault" ver="1">
    <reader>
      <lotus_std>
        <lotus_field id="IsDefault"/>
        <convertor>
          <string_boolean/>
        </convertor>
      </lotus_std>
    </reader>
    <writer>
      <lotus_std>
        <lotus_field id="IsDefault"/>
        <convertor>
          <string_boolean/>
        </convertor>
      </lotus_std>
    </writer>
  </field>
</type>
Defining Synchronization for Custom Objects
This task is a step in Process of Adding Custom Objects.
In this topic, you create a custom object so that Siebel CRM Desktop can synchronize it with a Siebel CRM object.
To define synchronization for a custom object
Use an XML editor open the Ln_connector_configuration.xml file.
For more information, see Files in the Customization Package.
Create the Links section.
The Links section includes a set of fields that reference other objects. You must create these references to allow the Synchronization Engine to synchronize objects in the correct order and to download the related items. You add the following XML code to create the links:
<type id="Action">
  <view label="Activity" label_plural="Activities"
small_icon="type_image:Event:16" normal_icon="type_image:Event:24"
large_icon="type_image:Event:48"></view>
  <synchronizer name_format=":[:(Description):]">
    <links>
      <link>Account Id</link>
      <link>Opportunity Id</link>
      <link>Primary Owner Id</link>
    </links>
  </synchronizer>
</type>
Create the deduplication keys.
The business environment for this example requires that activities are the same if their descriptions are the same, so you create the Description natural key. You add the following XML code to the synchronizer tag:
<natural_keys>
  <natural_key>
    <field>Description</field>
  </natural_key>
</natural_keys>
For more information, see Resolving Synchronization Conflicts.
Add the following descriptions to the Ln_connector_configuration.xml file for the intersection records that you defined for contacts and employee in Step 3 in the topic Creating the Custom Object:
<type id="Action.Employee.Association">
  <view label="Activity Employee" label_plural="Activity Employees"
small_icon="type_image:Generic:16" normal_icon="type_image:Generic:24"
large_icon="type_image:Generic:48" suppress_sync_ui="true"></view>
  <synchronizer name_format=":[:(UserName) :]">
    <links>
      <link>EmployeeId</link>
      <link>ActionId</link>
    </links>
  </synchronizer>
</type>
<type id="Action.Contact.Association">
  <view label="Activity Contact" label_plural="Activity Contacts "
small_icon="type_image:Generic:16" normal_icon="type_image:Generic:24"
large_icon="type_image:Generic:48" suppress_sync_ui="true"></view>
  <synchronizer name_format=":[:(ContactName) :]">
    <links>
      <link>ActionId</link>
      <link>ContactId</link>
    </links>
  </synchronizer>
</type>
Adding Custom Views in IBM Notes
This task is a step in Process of Adding Custom Objects.
This topic describes how to add a custom view in IBM Notes.
To add custom views in IBM Notes
Open IBM Domino Designer, choose the File menu, New, and then click the View menu item.
For more information, see Opening IBM Domino Designer.
In the Create View dialog box, choose a View template, specify the View location, and then configure the View selection conditions.
Save your work.
Defining the User Interface
This task is a step in Process of Adding Custom Objects.
In this topic, you define the form that Siebel CRM Desktop uses to display the custom object. You configure the custom object to use the custom sblAction form that resides in the Ln_siebel_basic_mapping.xml file that you modified in Creating the Custom Object. You can use the standard functionality that IBM Domino Designer provides to create a new form, add the custom controls that your deployment requires, and to arrange the physical layout.
The following figure illustrates the layout of the Activity Form that you must create.
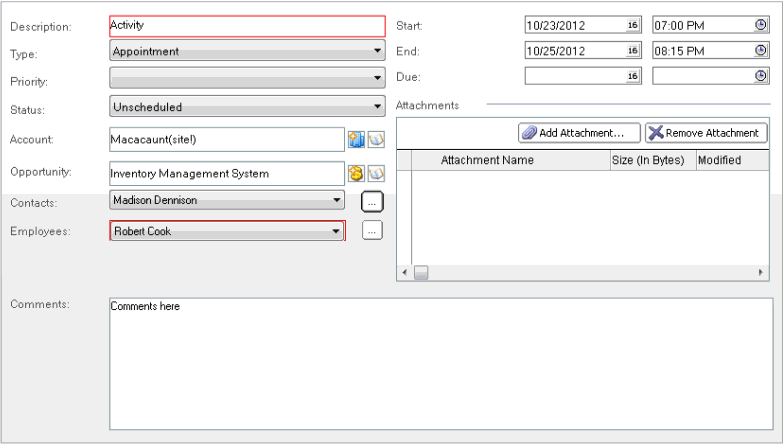
Adding Custom Logic
This task is a step in Process of Adding Custom Objects.
To improve usability, sometimes you must add custom logic to Siebel CRM Desktop that allows the user to manipulate IBM Notes data. For example:
Automatically include the current user Id in the Owner field.
Cause the first letter of each word in the description of an activity to automatically capitalize.
Siebel CRM Desktop uses LotusScript classes to customize IBM Notes data. It runs this LotusScript on events, so you define the events that are involved and you specify the code that this script calls when an event occurs. To do this, you may modify correspondent event handlers in the form's objects tab: QueryOpen, PostOpen, QueryModeChange,PostModeChange, QuerySave, PostSave, and QueryClose.
You create a new class and name it. For example, FormActivityEx.Siebel CRM Desktop inherits the FormActivityEx class from the SBL.Forms generic script library. You then add the following methods to the FormActivityEx class:
Public Sub PostOpen(uiDocument As NotesUIDocument, id As String)
Public Function QuerySave As Boolean
To add custom logic
Open IBM Domino Designer, and then open the form you must modify.
For example, open a form that you created in Defining the User Interface.
For more information, see Opening IBM Domino Designer.
Specify the Globals:
Click the Objects tab, and then navigate to Globals.
Locate the Initialize section.
Add the following code to the Sub code section that resides in the section that you located in step b:
Set m_FormHandler = New FormActivityEx
This code creates a form handler. It connects the form with the corresponding class. For more information, see Example of the FormActivityEx Class.
In the Options, add the following code:
Use SBL.Forms
This code connects the common SBL.Forms script library with the new class and the new form.
In the Declarations section, add the following code:
Dim m_FormHandler As FormActivityEx
This code declares a variable that uses the type that m_FormHandler uses.
Specify the events:
In the Objects tab, switch the events for the form.
Choose the PostOpen event and then add the following code to the Sub code section:
m_FormHandler.PostOpen Source, ""
Choose the QuerySave event and then add the following code to the Sub code section:
Continue = m_FormHandler.QuerySave
Choose the QueryOpen event and then add the following code to the Sub code section:
Continue = m_FormHandler.QueryOpen(Source)
Example of the FormActivityEx Class
The following code is an example of the FormActivityEx class:
Public Class FormActivityEx As SBLFormEx
  Public Sub PostOpen(uiDocument As NotesUIDocument, id As String)
    'This code prefills the Owner field with the Current User Id value
    SBLFormEx..PostOpen Uidocument, Id
    If Me.DocumentEx.SafeProperty("CRMEmployeeId", "") = "" Then
      Me.DocumentEx.Property("CRMEmployeeId") = GetSession().CurrentUserID
    End If
  End Sub
Public Function QuerySave As Boolean
  'This code makes the first letter in the Description field Capital
  Dim Description As String
  Description = Me.DocumentEx.SafeProperty("Description", "")
  If Description <> "" Then
    Me.DocumentEx.Property("Description") = UCase(Left(Description, 1)) &
    Mid(Description, 2)
  End If
  End Function
End Class
Defining the Toolbar
This task is a step in Process of Adding Custom Objects.
For this example, it is desirable to implement some actions for the custom object on a toolbar. An action can be simple, such as attaching a note to the custom object. An action can be more complicated, such as sending an email to all contacts that are related to the custom object. In this example, you add the following buttons to the toolbar:
Add Open in Siebel CRM
To define the toolbar
Open IBM Domino Designer.
For more information, see Opening IBM Domino Designer.
In the Applications pane, expand Resources, right-click Images, and then choose New Image Resource from the shortcut menu that IBM Domino Designer displays.
In the Open dialog, locate the image file and then click Open.
Export and then import the updated resources to the customization package.
For more information on how to do this, Preparing the Development Environment.
In IBM Domino Designer, open the following form:
(SBL)form:activity
Add a new action to the action bar for the form.
You can use a localization macro to name a new action instead of using a text label.
Do the configuration settings.
For example, in the Icons group, you can choose the Custom option, and then navigate to the icon image that you added in Step 2. IBM Domino Designer displays the new action in the bar for the action and in the Objects tab.
In the Objects tab, locate the action you created, expand it, and then choose the Click event.
In the pane next to the Objects tab, choose the Client option from the first drop-down list, and then choose the LotusScript option from the second drop-down list.
In the Sub code section, add the following code:
Dim unid As Variant
unid = m_FormHandler.DocumentEx.UniversalID
ActiveX.Script.OPEN_IN_SIEBEL unid
Open the application_script.js file, and then add the OPEN_IN_SIEBEL function. Make sure you use the correct uppercase and lowercase for the function name.
For example:
function OPEN_IN_SIEBEL(local_id_hex)
  {
  var local_id = application.session.hexstring_to_id(local_id_hex);
  var remote_id = application.synchronizer.id_to_remote(local_id);
  if (remote_id != null)
application.connector.get_async_object_page(remote_id, on_open_context_page); else ui.message_box(0, session.res_string("MSG_REMOTE_NOT_FOUND"), session.res_string("MSG_REMOTE_NOT_FOUND_CAPTION"), 0x40);
Removing Customizations
You can remove the currently installed customization for a user and install a customization that is currently published for this user on the Siebel Server. Removing a customization allows you to fix an error that might occur as a result of this customization. It also allows IBM Notes to synchronize with the Siebel Server.
To remove customizations
(Optional) Manually synchronize your data with the Siebel Server.
Removing customizations uninstalls the customization and deletes all data that is not currently synchronized with the Siebel Server. To save unsynchronized data, you must manually synchronize your data with the Siebel Server before you remove the customization.
In the Siebel CRM Desktop client, open the CRM Desktop - Options dialog box.
Click the General tab.
In the Customization section, click Remove.
Siebel CRM Desktop displays a dialog box that includes a message that is similar to the following:
All data that was not synchronized to Siebel will be lost. Are you sure you want
to continue?
If you click Yes, then Siebel CRM Desktop does the following:
Uninstalls the current customization.
Deletes all data that is not currently synchronized with the Siebel Server.
Displays the First Run Assistant and then guides you to download the customization package from the Siebel Server.
Troubleshooting Problems That Occur When You Customize Siebel CRM Desktop
To resolve a problem that occurs when you customize Siebel CRM Desktop, look for it in the list of symptoms or error messages in the following table.
| Symptom or Error Message | Solution |
|---|---|
After you add a new field to a Siebel CRM Desktop form, Siebel CRM Desktop displays an error that is similar to the following: Updating error of object name object on storage
{CEDC3D49-DDBB-93A2-4992-E5B2CAE62932}:
object_locked (Conversion of input Message to
Property Set failed with the error : Cannot
convert XML Hierarchy to Integration Object
Hierarchy. (SBL-EAI-04111)
This error occurs if the definition of an integration object in the Siebel Runtime Repository does not match the definition of the custom Siebel CRM Desktop form. |
Deploy your changes to the Siebel Runtime Repository. |