3 People Movement Page
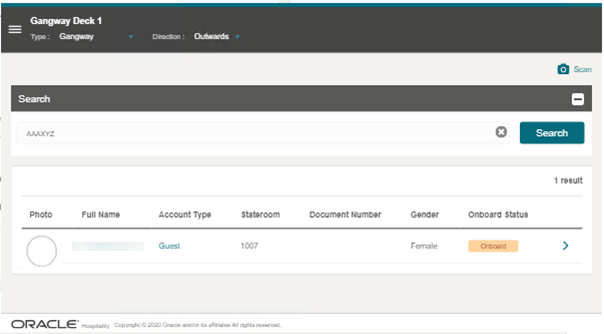
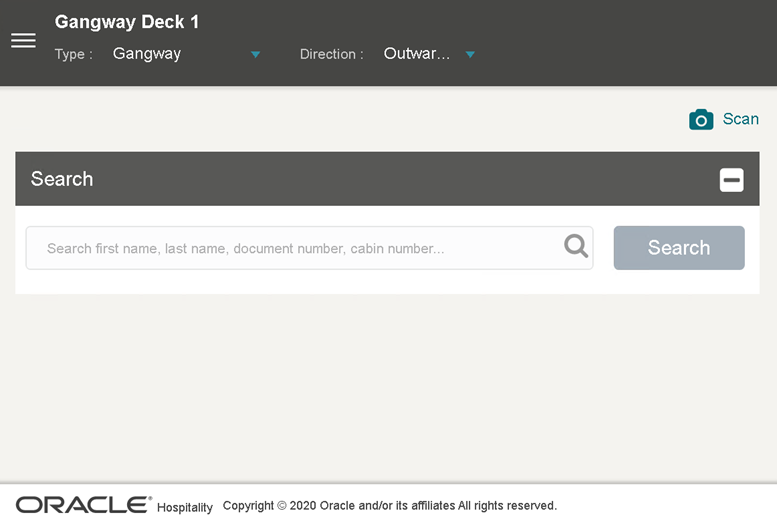
On the People Movement page, the following options are available.
-
View Profile Information
-
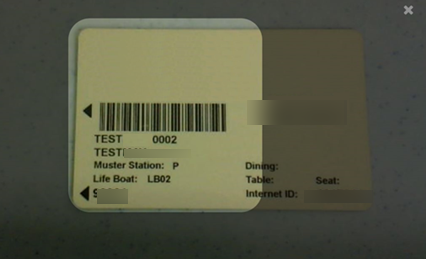
Scan a Boarding Card
-
Update Profile information such as passenger photo and update any special needs that the passenger may have.
Figure 3-1 People Movement Page
Profile Information
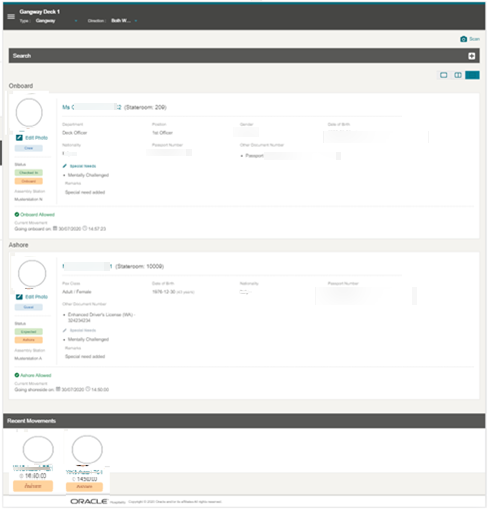
The presentation of the People Movement page for a single direction is different from the ‘Both Directions’. When ‘Both Directions’ is selected, you can change the view to show the information in a single view, or tiled vertically or horizontally by pressing the options below the search bar.
Figure 3-2 People Movement Page – Single Direction
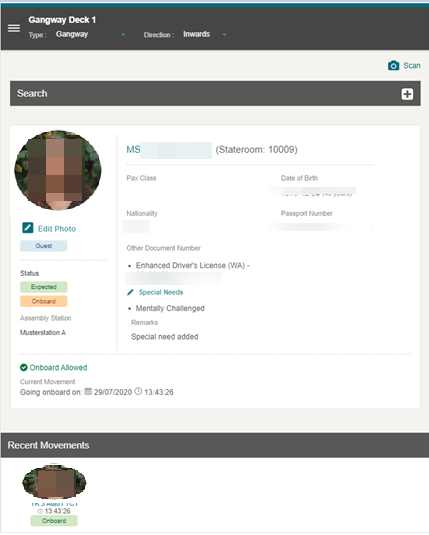
Figure 3-3 People Movement Page – Both Direction Horizontal View
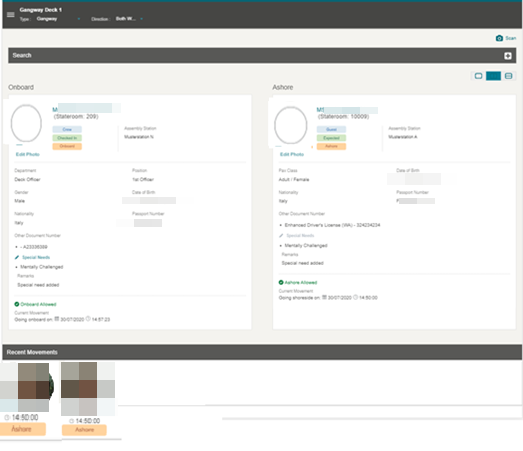
Figure 3-4 People Movement Page – Both Direction Vertical View
In the Profile section, apart from showing the profile details listed in the below table, it also records the movement, followed by a success or fail status message, depending on the direction settings, as explained below.
-
If the Inward or Outward direction is chosen, a single profile view is shown with the recorded movement and its status.
-
If the direction selected is Bothway, you can change the view to single, horizontal or vertical, by selecting the panel icon at the top right corner. The horizontal and vertical views has two panels - Onboard and Ashore.
In the Recent Movements section, tiles of the people who passed through the gate successfully are shown.
Table 3-1 Profile Details
| Field Name | Description |
|---|---|
|
Title |
Salutation, first name, middle name, last name, stateroom number |
|
Profile Type |
Guest, Resident, Crew or Visitor will be shown |
|
Status |
Current Reservation Status |
|
Onboard/Ashore |
Status of the passenger either Onboard or Ashore |
|
Assembly Station |
Location of assembly/muster station for the passenger |
|
Department |
Assigned department for the Crew Member |
|
Position |
The Crew Member position |
|
Gender |
Gender of the passenger selection |
|
Date of Birth |
Date of birth of the passenger |
|
Age |
Passenger age, calculated based on date of birth |
|
Nationality |
The Nationality of the Passenger |
|
Passport Number |
Passport Number of the Passenger |
|
Document Type |
List of Travel Documents associated to the passenger |
|
Document Number |
Travel Document number of the selected document type |
|
Special Needs Description |
List of Special Needs of the Passenger |
|
Special Needs Remark |
Additional comments/remarks of the Passenger’s Special Needs. (Visible if the remark has a value, otherwise it will be blank) |
Table 3-2 Color in Legend
| Color | Text |
|---|---|
|
Light Blue |
Color to show the profile type of Guest, Crew, and Resident |
|
Orange |
Color to show Onboard Status. Ashore, Expected, and Reservation Status |
|
Light Orange |
Color to show Expected or Future Reservation |
|
Red |
Color to show reservation status of Cancelled |
|
Green |
Color to show reservation status of Checked-in, and On-board |
|
Yellow |
Color to show the reservation status of Leaving Today |
|
Light Grey |
Color to show the reservation status of Checked Out |
|
Purple |
Color to show the passenger is on an Overnight Tour |
Profile Picture
Crew members can capture a new photo for the profile using the Take Photo function or use Edit Photo to update an existing photo.
Taking Profile Photo
-
On the Profile page, click the Take Photo button to activate the camera.
-
In the Camera window, click the Take Photo button.
-
The system shows the person's picture. To retake the photo, press the Take Again button.
-
Click the Save Photo button to save and the X to exit the page.
Editing Profile Photo
-
Click the Edit Photo link to activate the camera.
-
On the Profile Picture, click the Take Again button.
-
Click the Save Photo button to save and the X to exit the page.
Adding Special Need Request
Figure 3-7 Special Need Request Page
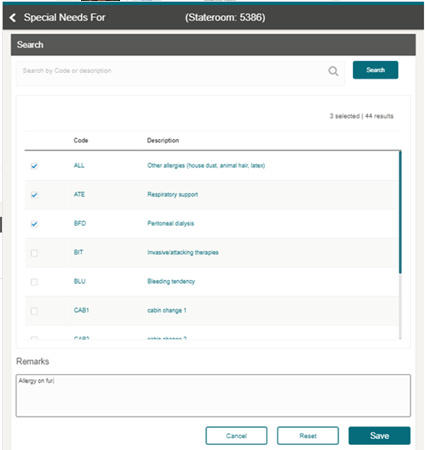
- On the People Movement Page, click the Special Needs button of the onboard profile views to navigate to the Special Needs page. This button is disabled if the status is set to Ashore.
- Check mark the special needs item from the list of values, and enter a remark in the Remarks field.
- Click the Save button.
- The special needs and remarks are shown in the profile section of the People Movement page.
Editing Special Need Request
- On the People Movement page, the profile view shows the special needs selection.
- In the onboard profile view, click the Special Needs button.
- Navigate to the Special Needs page.
- The Crew Member will see the previously selected special needs value and remarks. Check mark the list of values to select/deselect.
- Edit the Remarks field, if needed.
- Click the Save button. This navigates the user back to the People Movement page with the updated selection.
Recent Movement Tile
Figure 3-8 Recent Movement Page
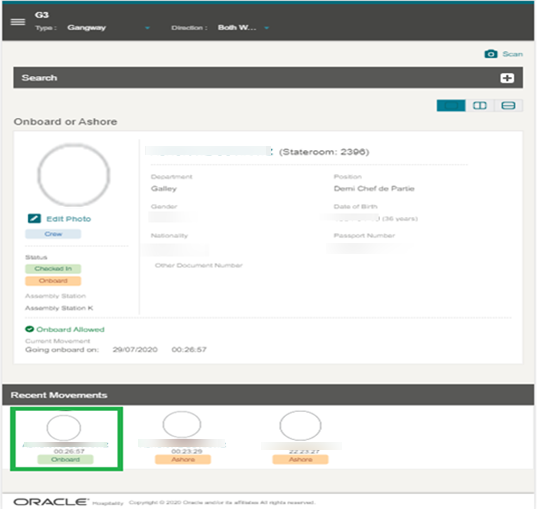
Figure 3-9 Recent Movement History
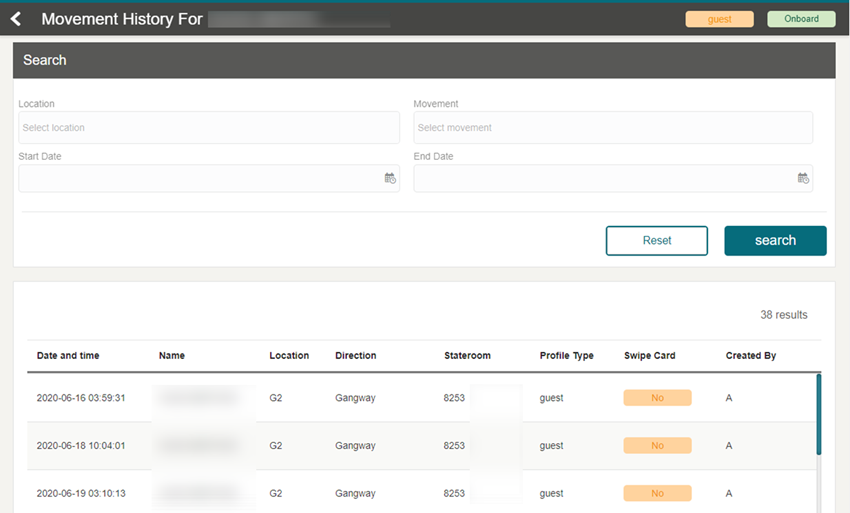
-
Location: The gate location that the passenger used to come on board or go ashore.
-
Movement: Indicates the gate direction used by the passenger (onboard/ashore).
-
Start Date: Date and time the passenger embarked or disembarked from the ship through the gateway.
-
End Date: Date and time the passenger embarked or disembarked from the ship through the gateway.
-
Click the recent movement tile.
-
Navigate to the Profile’s Movement History page.
-
On the Profile’s Movement History page, search the history by entering or selecting the value from the Search box.
-
Click the Search button.
