8 Questionnaire Setup
The Questionnaire setup enables you to configure the questionnaire template, category, and the authorize reason, for use in the Check-In application.
The Questionnaire Setup option can be found in the Administration menu, Enterprise, Questionnaire option.
The Questionnaire Setup page consists of three setup tabs:
-
Questionnaire Template
-
Questionnaire Category
-
Authorize Reason
Questionnaire Category
Figure 8-1 Questionnaire Category List
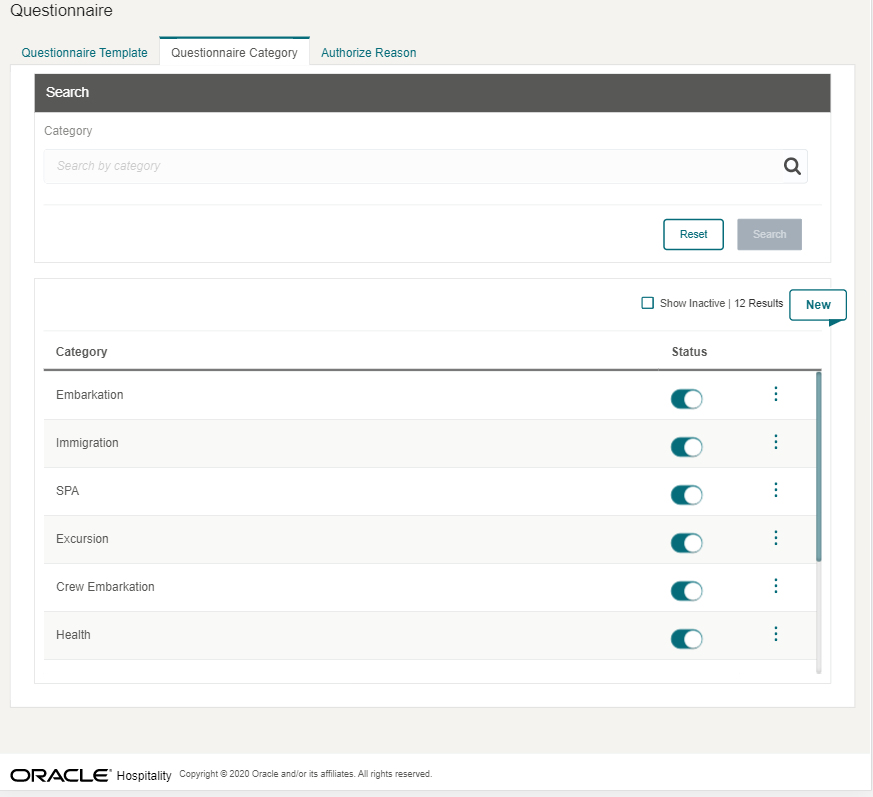
The Questionnaire Category setup allows you to categorize the questionnaire template by group and assign it to a Questionnaire Template. You can either pre-define a category before setting up a questionnaire template or while setting up the template.
Searching for a Questionnaire Category
-
Navigate to the Questionnaire Category tab. All active questionnaire categories records appear in the results view section.
-
Enter the category name in the search box and select the Search button. The searched record appears in the results view if the record is found. Otherwise, the system returns a no result prompt.
-
Select Reset to clear the search box value.
-
To view an inactive category, select the Show Inactive check box to display all the inactive categories in the results view.
Editing a Questionnaire Category
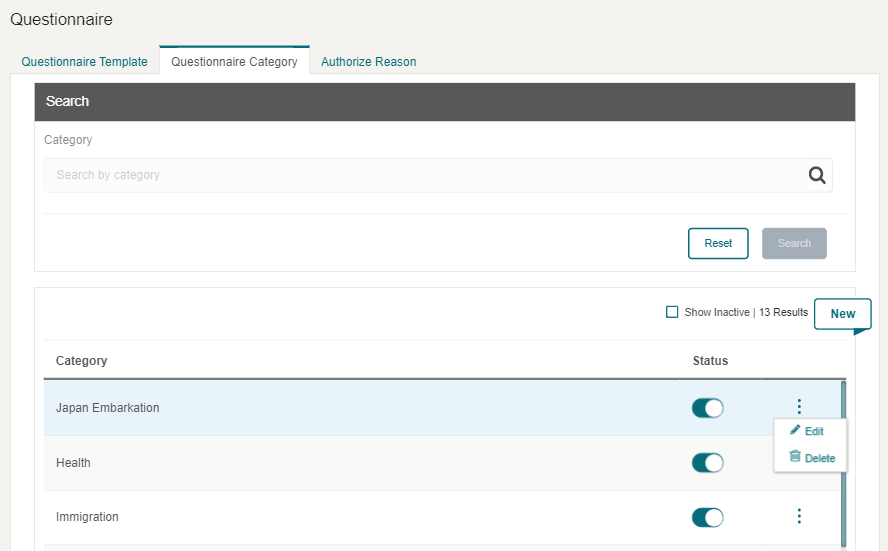
Figure 8-2 Questionnaire Category Options
-
On the Questionnaire Category tab, questionnaire category record, select the vertical ellipsis to display the Edit and Delete option.
-
Select Edit and the system displays the Edit Category page.
-
You can change the category name and status (active to inactive or vice versa) if the category is not assigned to an active Questionnaire template and has no transaction history. If the category is inactive, the Status button is greyed out.
-
You can also change the category status from the main screen by sliding the Status button.
Creating a new Questionnaire Category
-
On the Questionnaire Category tab, click New to open the Create Category page.
-
Enter a value at the Category field. This is a mandatory field.
-
Click Save.
-
Click Cancel to exit the Create Category page without updating and return to the Questionnaire Category listing page.
Note:
A duplicate category name is not allowed.Delete a Questionnaire Category
-
On the Questionnaire Category tab, select the category you want to delete.
-
Click the vertical ellipsis and select Delete.
-
The system displays a confirmation message, “Are you sure you want to delete this record?” Click Delete to remove the category from the Questionnaire Category list. If you select Cancel, the selected category will remain.
-
If the Category you are deleting is in use, the system displays a message, “Delete cannot be performed. Already have transaction history.”
Authorize Reason
Figure 8-3 Authorize Reason
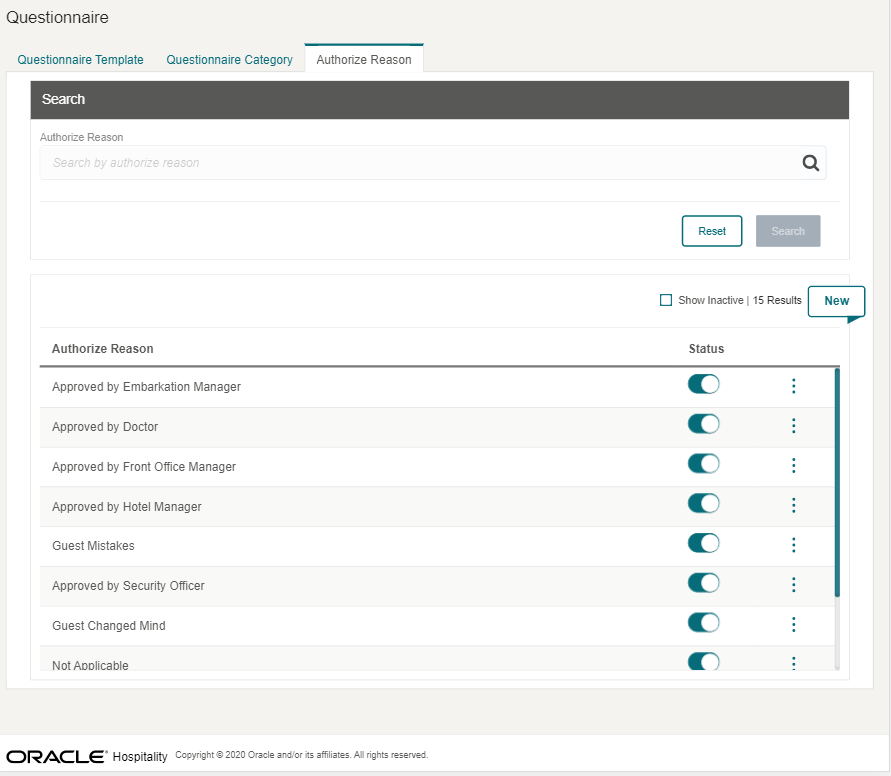
The Authorize Reason setup allows you to create overriding reasons to use in the Questionnaire to answer the questions that trigger alerts.
Searching for an Authorize Reason
-
Navigate to the Authorize Reason tab to display all active records in the results view section.
-
In the search box, enter a keyword for the authorization reason and select the Search button. If a matching record is found, the system displays the search record in the results view. Otherwise, you are prompted with a “no record found” message.
-
Select Reset to clear the search box value.
-
Select the Show Inactive check box to display all inactive reasons in the results view.
Editing an Authorize Reason
-
Navigate to the Authorize Reason tab to display all the active authorize reason records in the results view section.
-
Select an authorize reason record, select the vertical ellipsis button, and then select Edit.
-
In the Edit Authorize Reason page, change the authorize reason name and select Save. You can change the authorize reason name that has no transaction history, otherwise, the system displays an error message.
-
You can change the authorize reason status from active to inactive or vice versa.
-
Also, you can enable/disable the authorize reason status from the main screen by sliding the Status indicator or select the vertical ellipsis for more options.
Creating a New Authorize Reason
-
On the Authorize Reason tab, select New to open the Create Authorize Reason page.
-
Enter the value at the Authorize Reason field. This field is mandatory.
-
Click Save.
Note:
A duplicate authorize reason name is not allowed. -
Click Cancel to exit without updating and return to the Authorize Reason listing page.
Deleting an Authorize Reason
-
At the Authorize Reason tab, select the category to delete.
-
Click the vertical ellipsis followed by Delete.
-
The system displays the confirmation message “Are you sure you want to delete this record?”. Click Delete to proceed or click Cancel to return to the previous page.
-
If the authorize reason is in use, the system displays a message “Delete cannot be performed. Already have transaction history.”
Questionnaire Template
Figure 8-4 Questionnaire Template
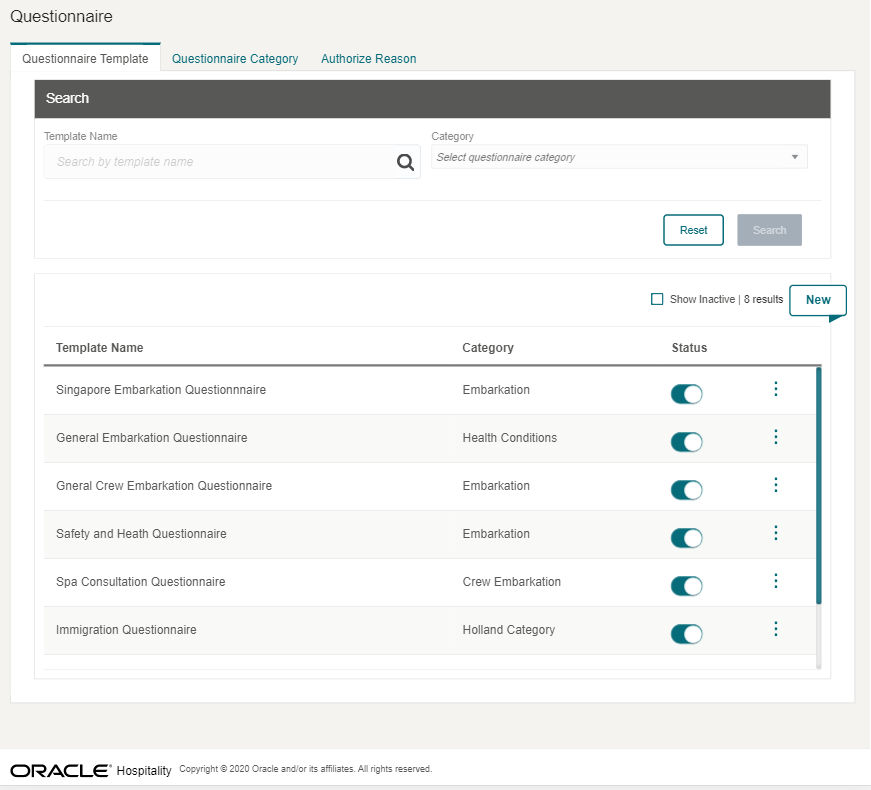
The Questionnaire Template setup is where you create and manage the questionnaire templates.
Searching for a Questionnaire Template
-
Navigate to the Questionnaire Template tab to display all the active questionnaire template records in the results view section.
-
Enter the questionnaire template name in the search box and click Search. The system displays the search record at the results view if found. Otherwise, it prompts “You have no search results yet.”
-
Clicking Reset clears the value in the search box.
-
To search by questionnaire category, go to the Category option and select a questionnaire category from the drop-down menu. The system displays the questionnaire template assigned to the selected questionnaire category.
-
To view an inactive Questionnaire Template, select the Show Inactive check box to display all the inactive questionnaire templates in the results view.
Editing a Questionnaire Template
-
Navigate to the Questionnaire Template tab to display all the active questionnaire template records in the results view section.
-
On the questionnaire template record, click the vertical ellipses button and then click Edit.
-
On the Edit Questionnaire Template screen, you can change the questionnaire template content and status from active to inactive or vice versa, if the template is not in use or has and no transaction history.
-
If the questionnaire template has a transaction history, modifications of the contents is not allowed.
-
You can also change the questionnaire template status from the main screen by sliding the Status button.
Creating a New Questionnaire Template
-
On the Questionnaire Template tab, click the New button. The system displays the Create Questionnaire Template page.
-
Enter the value in the Template Name field. This is a mandatory. Make sure the new template name does not exist before.
-
In the Category field, select the pre-configured questionnaire category from the drop-down menu. You can also create a new questionnaire category by selecting the Create New Category option, which brings up the Create New Category page.
-
There are four sections in the Configuration page:
-
Add Title for Questionnaire (optional)
-
Add Question Group (optional)
-
Add Question (mandatory)
-
Add Acknowledgement (optional)
-
Add Title for Questionnaire (optional)
Figure 8-5 Questionnaire Title
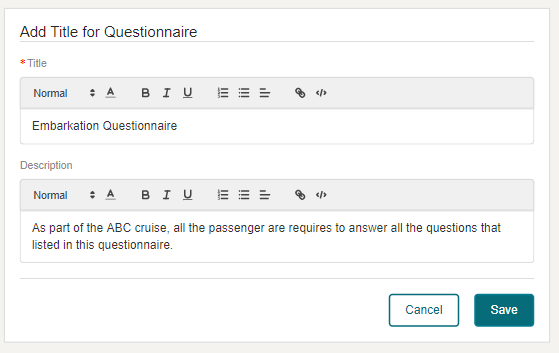
This configuration section allows you to define the questionnaire title and description for the questionnaire template, and is optional.
There are two sections within the Add Title for Questionnaire.
-
Title: Title of the questionnaire template, which is a mandatory field.
-
Description: A brief explanation of the questionnaire template that is optional.
Add Question Group (optional)
This function sets up the question group and allow you to create questions for the group.
-
On the Add Question Group field, enter the question group name and click Save.
-
Clicking Cancel exit you from the Add Question Group page.
Once the question group is saved, the Add Question option appears allowing you to create and link question(s) to the question group. You can make changes to the question group using the vertical ellipsis button. See Add Question section
Add Question
Figure 8-6 Questionnaire Add Question with trigger
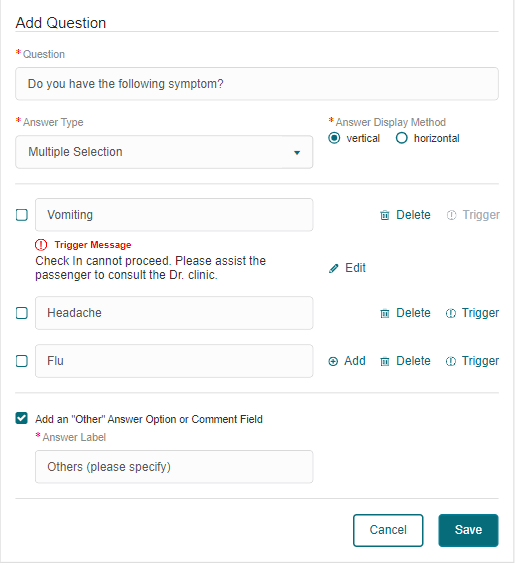
The Add Question option creates a question without linking it to a question group. The system opens the Add Question section after you select the Add Question option from either the Question Group or directly from the Add Question option.
To add a question, enter all the required information, then click Save or Cancel to exit without saving.
Note:
The Save button is disabled if the answer row is empty. You can either delete it or fill in the information.
-
Question – Field in which to enter the question.
-
Answer Type – Select the type of answer: single or multiple selection or free text answer.
-
Answer Display Method – Option to display the answer vertically or horizontally.
-
The Answer field is where you can specify the available answer to the question.
-
Delete – Option to delete the answer.
-
Add – Option to create/add more answer.
-
Trigger – Option to define the answer will have an answer trigger notification with user definable message.
-
Add an “Other” Answer Option or Comment Field – Option for answer that requires a free text input. Select the check box to enter the description on the answer label field.
You can also edit, copy, delete, and set a language for the question using the options under the vertical ellipsis.
Add Acknowledgement
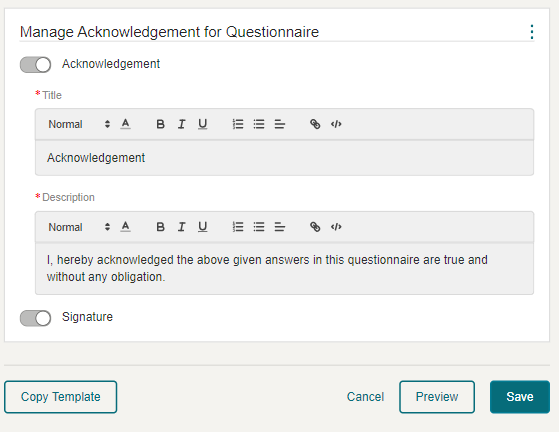
The Add Acknowledgement section allows you to defines the acknowledgement description or disclaimeras an option.
To enable, slide the Acknowledgment indicator and the signature indicator in the respective section. Proceed to enter the title and description and then select Save.
After saving the template, you can preview the questionnaire by selecting Preview and the language that you want to display.
Figure 8-7 Acknowledgement for Questionnaire
Copying Questionnaire Template
- On the Questionnaire Template tab, search for the existing questionnaire template you want to copy.
- On the result view, select the questionnaire template, select the vertical ellipsis, and then select Copy.
- The system displays the Copy Questionnaire Template page, and the template name has “- copy” appended to the selected template name.
- Make the necessary changes to the copied template and click Save.
Deleting Questionnaire Template
- On the Questionnaire Template tab, search for the questionnaire template you want to delete.
- Select the questionnaire template, and select the vertical ellipsis, and then selectDelete.
- The system displays the confirmation message “Are you sure you want to delete this record?.” Select Delete to proceed or click Cancel to return to the previous page.
- If the selected questionnaire template has a “use history”, then deleting this template displays an alert with the following message: “Delete cannot be performed. Already have transaction history.”
Viewing Questionnaire Template
- On the Questionnaire Template tab, search the questionnaire template you want to view.
- On the ellipsis button, select View. This opens the View Questionnaire Template page.
- Modifications to the template are not allowed. You can only copy or preview the template.
Creating Questionnaire Template with Multiple Languages
This function allows you to create a questionnaire template with multiple languages. Before you set up the questionnaire in multiple languages, you must enable the languages allowed in the questionnaire template.
To enable the languages, see the Language Templatesection.
-
Add Title and Description
-
Add Question Group
-
Add Question
-
Add Acknowledgement and Description
To configure the template in other languages, follow these steps.
-
On the Questionnaire Template tab, search for the questionnaire template you want to edit.
-
Navigate to the vertical ellipsis button and select Edit. This brings up the Edit Questionnaire Template page.
-
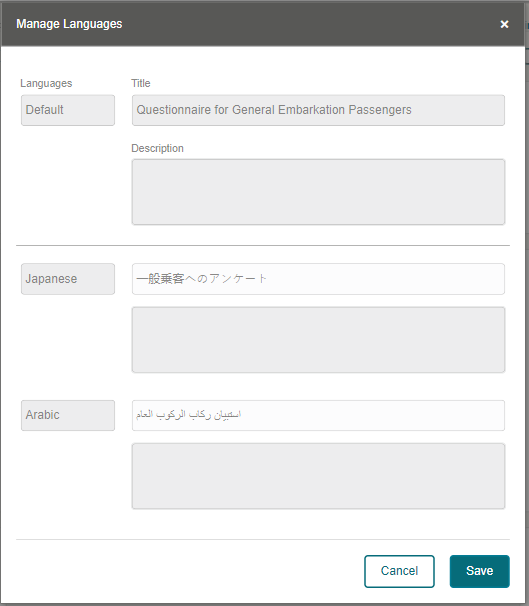
Go to the Title section, select the vertical ellipsis, followed by the Language option. This brings up the Manage Languages page.
-
On the Manage Languages page, the default language refers to the language used to setup the questionnaire template. You can view templates in other languages if they are enabled in Language Template setup.
-
Enter text in the text boxes according to the language you selected and then click Save.
-
After updating all descriptions in other languages, you can view the questionnaire in the languages that you configured using the vertical ellipsis button.
Figure 8-8 Questionnaire in Multi Language
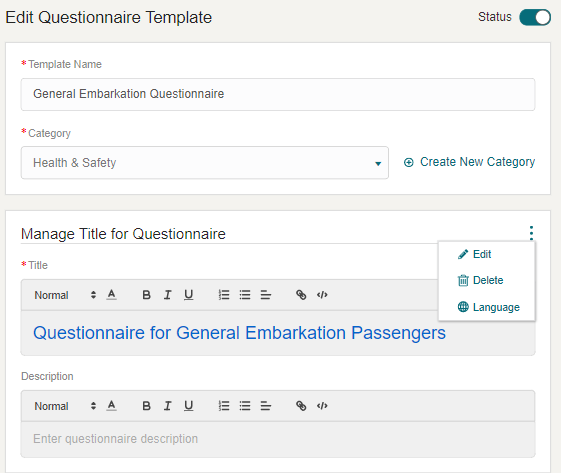
Figure 8-9 Managing Languages
