Working with Recognitions
This topic provides an overview of the Recognition card structure, where recognitions are displayed, and lists pages used to work with recognitions.
|
Page Name |
Definition Name |
Usage |
|---|---|---|
|
- |
Access Recognition pages and view recognitions that you received, sent, and have access to as the employee. |
|
|
HRRC_ESS_RECOG_FL |
View and interact with recognitions of others as the employee. |
|
|
HRRC_ESS_RECOG_FL |
View and interact with recognitions that you received as the employee. |
|
|
HRRC_ESS_RECOG_FL |
View and interact with recognitions that you sent to others as the employee. |
|
|
- |
Access Team Recognition pages and view recognitions for your team members. |
|
|
HRRC_MSS_RECOG_FL |
Select team members for whom you want to view recognitions. |
|
|
HRRC_MSS_RECVD_FL |
View and interact with recognitions received by selected team members. |
|
|
HRRC_MSS_RECOG_FL |
View and interact with recognitions that you sent to team members as the manager. |
|
|
HRRC_CREATE_RCG_FL |
Create new recognitions. |
|
|
HR_EE_PROFILE_FL |
View the profile details of the selected employee. |
|
|
HRRC_GRP_MEMB_SCF |
View the list of recipients for group recognitions. |
|
|
HRRC_LIKE_SCF |
View the list of people who have liked the post. |
|
|
HRRC_COMMENTS_SCF |
View all comments entered for the post. |
|
|
HRRC_VISIBILTY_SCF |
Modify the visibility setting of recognitions. |
|
|
HRRC_CREATE_RCG_FL |
Update posts. |
|
|
HRRC_RPT_POST_SCF |
Report inappropriate posts. |
|
|
HRRC_RPT_CMT_SCF |
Report inappropriate post comments. |
The Recognition feature adopts a simple card structure that enables users to interact with recognitions easily.
Note: The terms recognition and post are used interchangeably in this documentation.
This example displays the layout of a post.
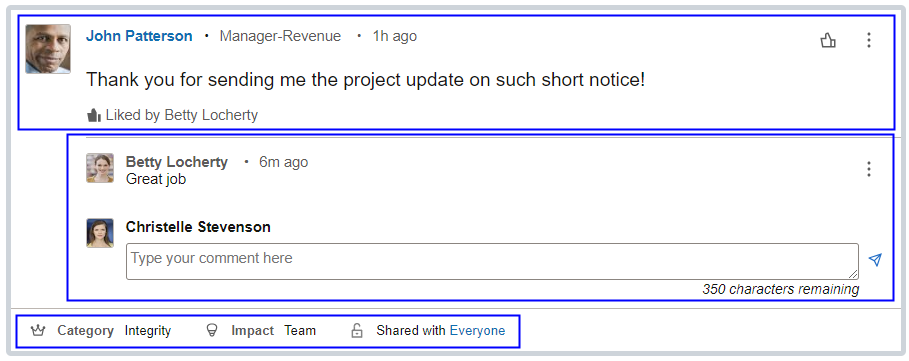
The top part of the post:
Displays photo (if used) and information of either the author or the recipient, depending on the page from which you're viewing the post.
Displays post text and time of creation.
Provides actions that you can take on posts, such as like and edit post.
You may view comments posted by others, add comments and take other actions, if comments are enabled on the HCM Options Page. If comments are not enabled, the comment portion of the post is not shown.
The footer of the post displays the category, impact and visibility information of the post if applicable.
Each post or comment shows the time stamp of when it was created.
The system uses these rules to determine how to display time for posts and comments:
|
Time Display |
Description |
|---|---|
|
Just Now |
If post or comment was created less than 1 minute ago. |
|
"X"m ago |
If post or comment was created X minutes ago, where X is equal to or greater than 1 but less than 60. |
|
"X"h ago |
If post or comment was created X hours ago, where X is equal to or greater than 1 but less than 12. |
|
Today |
If post or comment was created equal to or more than 12 hours but less than 24 hours ago. |
|
Yesterday |
If post or comment was created equal to or more than 24 hours but less than 48 hours ago. |
|
MM/DD/YYYY |
If post or comment was created equal to or more than 48 hours ago. |
A post can be visible to users in one or more places based on factors such as the visibility setting of the post, user preferences, and sometimes the role of the user (employee or manager).
Note: Posts and comments of inactive employees are not displayed.
These examples describe where users can access posts that were created for them, by them, and for others.
Example 1: Post Created By Manager For Direct Report
In this example, the manager created a post for a direct report from the Team Recognition tile:
|
Author |
Created From |
Recipient |
Visible To |
|---|---|---|---|
|
Manager |
Manager Self-Service |
Direct report |
Everyone |
The post is visible to users in these places:
The author can:
Select the recipient's row on the Team Recognition - Received page, and view the post on the Recognitions Received page.
View the post on the Team Recognition - Sent page.
View the post on the Recognition - Sent page.
The recipient can view the post on the Recognition - Received page.
Any user with the Everyone recognition preference (or in the same custom group as the recipient if custom group is defined) can view the post on the Recognition - Everyone page.
Any user with the My Peers recognition preference and is a peer of the recipient can view the post on the Recognition - My Peers page.
Example 2: Post Created By Employee For Another Employee
In this example, the employee created a post for another employee in a different reporting structure from the Recognition tile:
|
Author |
Created From |
Recipient |
Visible To |
|---|---|---|---|
|
Employee |
Employee Self-Service |
Employee |
Employee and Manager |
The post is visible to users in these places:
The recipient's direct manager can select the recipient's row on the Team Recognition - Received page, and view the post on the Recognitions Received page.
The author can view the post on the Recognition - Sent page.
The recipient can view the post on the Recognition - Received page.
Other users cannot see this post because it is set to be visible to the employee and manager only.
Example 3 - Post Created By Employee With Manager Role For Another Employee
As a continuation of example 2, the employee, who was also a manager, went on to create a post for another employee from the Recognition tile. The recipient happened to be an indirect report.
|
Author |
Created From |
Recipient |
Visible To |
|---|---|---|---|
|
Employee with manager role |
Employee Self-Service |
Indirect report |
Everyone |
The post is visible to users in these places:
The recipient's direct manager can select the recipient's row on the Team Recognition - Received page, and view the post on the Recognitions Received page.
The author, who is an indirect manager of the recipient, can also use this navigation to view the post, if Direct Reports configuration includes indirect reports.
The author can also:
View the post on the Team Recognition - Sent page.
View the post on the Recognition - Sent page.
The recipient can view the post on the Recognition - Received page.
Any user with the Everyone recognition preference (or in the same custom group as the recipient if custom group is defined) can view the post on the Recognition - Everyone page.
Any user with the My Peers recognition preference who is a peer of the recipient can view the post on the Recognition - My Peers page.
(Employee) Use the Recognition tile to access Recognition pages and view recognitions that you received, sent, and have access to as the employee.
Navigation:
The Recognition tile is located on the Employee Self-Service home page by default.
This example illustrates the Recognition tile.
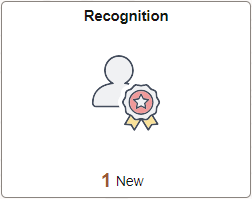
The Recognition tile displays the count of new posts created for the employee, if applicable.
(Employee) Use the Recognition - <Everyone or My Peers> page (HRRC_ESS_RECOG_FL) to view and interact with recognitions of others as the employee.
Navigation:
Select the Recognition Tile.
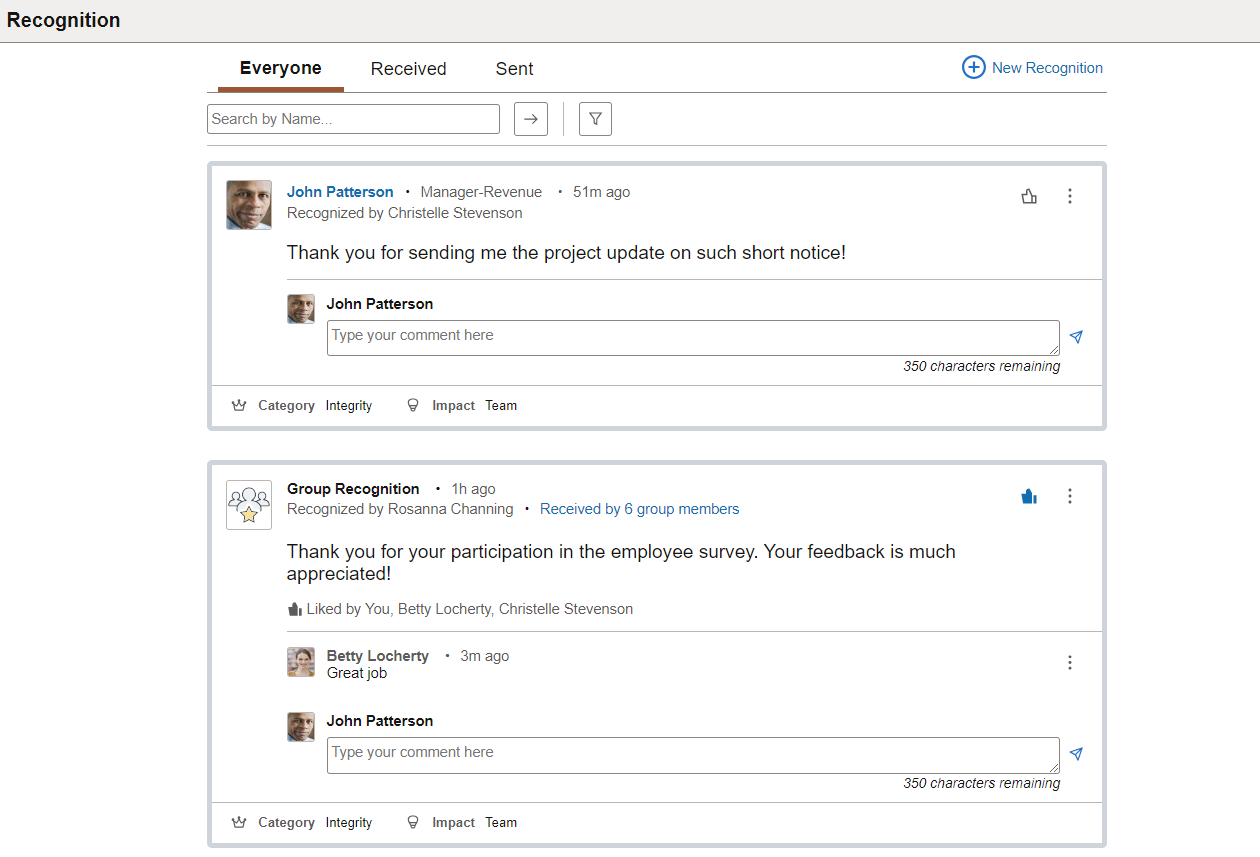
This example illustrates the fields and controls on the Recognition - <Everyone or My Peers> page.
This illustrates the Recognition - <Everyone or My Peers> page for the smartphone.

Note: The selected preference of the logged-in user on the Recognition Preferences Page determines the title and content of this page, Everyone or My Peers.
|
Field or Control |
Description |
|---|---|
|
New Recognition |
Select to create recognitions for employees. See New Recognition Page. |
|
<search field> |
Enter a partial or whole employee name to search for posts. |
 |
Select to perform the search. If the number of posts in the search results exceeds 100, only the first 100 posts are displayed. Use the filter to refine your search. |
 |
Select to specify date filter values on the Filters modal page to further refine the search results for posts. Values are Custom. When selected, specify the From and To dates of the custom period. Last 14 Days Last 30 Days The Filter icon is displayed in a highlighted color if a filter is applied. |
Post
|
Field or Control |
Description |
|---|---|
|
<Employee Name link> |
Displays the name of the employee, who is:
Select the link to view the profile information of the employee on the Profile Information Page. |
|
Received by <number > group members or Sent to <number > group members |
Select to view the list of recipients for the post on the <Received By or Sent To> Page. This link appears if you are viewing a post that has more than one recipient. |
|
|
Select to like the post or undo liking of the post. |
|
|
Valid actions may include: Edit Post: available if you are the author of the post. See Edit Post Page. Delete Post: available if you are the author of the post. Report Post: available if you are not the author of the post. See Report Post Page. |
|
|
The system displays the Liked by message when the post is liked by its viewers. The message structure changes slightly based on the number of likes. Some examples include: Liked by You, <employee name1>, <employee name2> if the post is liked by up to 5 people, including you. Like by You and [number] others if the post is liked by more than 5 people total, including you. [number] Likes if the post is liked by more than 5 people, excluding you. See Liked By Page. |
|
|
Select to perform an action on a comment if comments are supported. Valid actions may include: Edit Comment: available if you are the author of the comment. Select to update the comment on the Edit Comment modal page (HRRC_EDIT_CMNT_SCF) that appears. Delete Comment: available if you are the author of the comment. Report Comment: available if you are not the author of the comment. See Report Comment Page. |
|
See All Comments |
Select to view the comments entered for the post on the All Comments Page. From the modal page, you can:
This link appears for posts with more than one comment. |
|
<Comment field> |
Enter post comment. This field appears if the post is set to allow comments on the New Recognition Page. |
|
|
Select to save and send the post comment. |
|
Category, Impact, and Shared with |
Displays the category, impact and visibility information specified for the post, if applicable. The author or recipient of the post can use the Shared with link to change who has visibility to the post on the Privacy Settings Page. This link appears on the Received page for the recipient, and the Sent page for the author. Visibility information is not displayed on the Recognition - <Everyone or My Peers> Page. |
 or
or 


(Employee) Use the Recognition - Received page (HRRC_ESS_RECOG_FL) to view and interact with recognitions that you received as the employee.
Navigation:
Select the Recognition Tile, then the Received page.
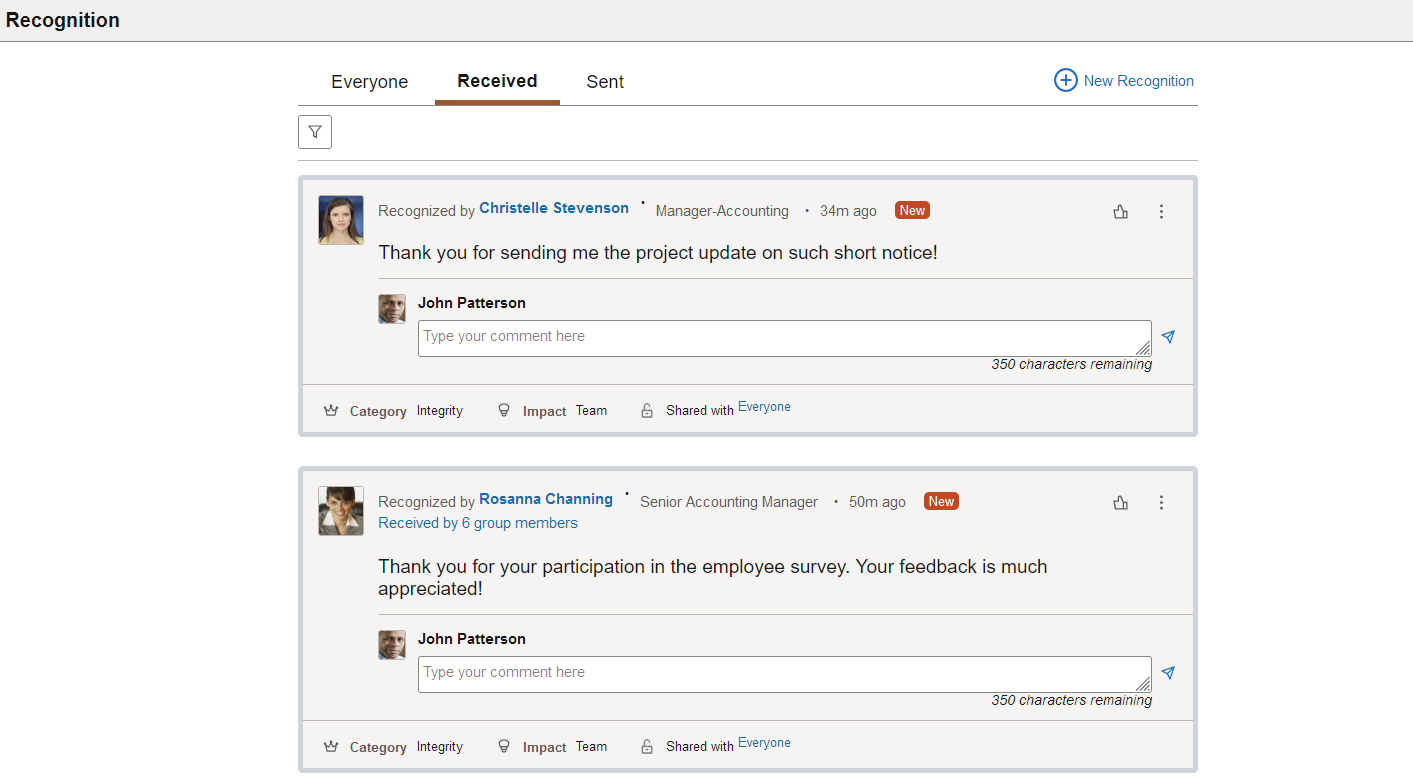
This example illustrates the fields and controls on the Recognition - Received page.
|
Field or Control |
Description |
|---|---|
|
Select to specify date filter values on the Filters modal page to further refine the search results for posts. Values are Custom. When selected, specify the From and To dates of the custom period. Last 14 Days Last 30 Days The Filter icon is displayed in a highlighted color if a filter is applied. |
Posts look and behave similarly on recognition pages where they are displayed. Refer to the Post section of the Recognition - <Everyone or My Peers> Page for descriptions of shared fields and controls.
|
Field or Control |
Description |
|---|---|
|
|
Indicates that the post is newly created. This icon appears if the recipient has not viewed the post. The recipient can also view the count of new posts they received on the Recognition tile. Note: If a new post is visible to everyone and the employee views it for the first time on the Recognition - <Everyone or My Peers> Page, the system considers the post viewed. Now, if the employee leaves without accessing the Received page and come back to the Recognition tile later, the new post count and New icon will no longer be shown. In addition to the icon display, a new post also has a colored background. |

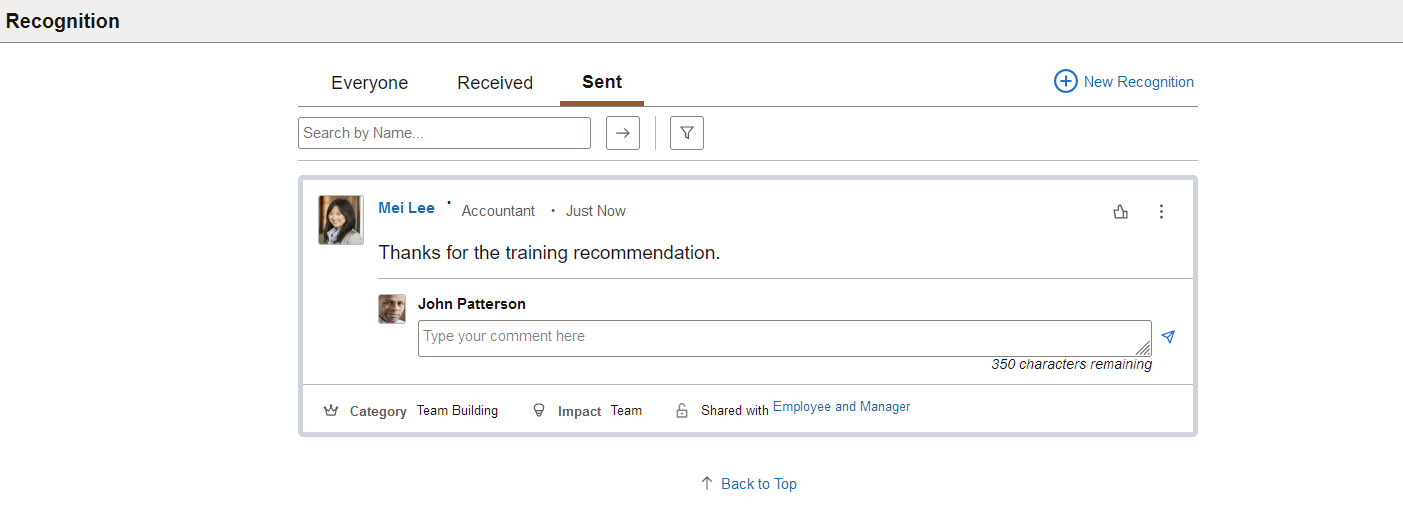
(Employee) Use the Recognition - Sent page (HRRC_ESS_RECOG_FL) to view and interact with recognitions that you sent to others as the employee.
Navigation:
Select the Recognition Tile, then the Sent page.
This example illustrates the fields and controls on the Recognition - Sent page.
|
Field or Control |
Description |
|---|---|
|
New Recognition |
Select to create recognitions for employees. See New Recognition Page. |
|
<search field> |
Enter a partial or whole employee name to search for posts. |
|
Select to perform the search. If the number of posts in the search results exceeds 100, only the first 100 posts are displayed. Use the filter to refine your search. |
|
Select to specify date filter values on the Filters modal page to further refine the search results for posts. Values are Custom. When selected, specify the From and To dates of the custom period. Last 14 Days Last 30 Days The Filter icon is displayed in a highlighted color if a filter is applied. |
Posts look and behave similarly on pages where they are displayed. Refer to the Post section of the Recognition - <Everyone or My Peers> Page for descriptions of shared fields and controls.
(Manager) Use the Team Recognition tile to access Team Recognition pages and view recognitions for your team members.
Navigation:
The Team Recognition tile is located on the Manager Self-Service home page by default.
This example illustrates the Team Recognition tile.
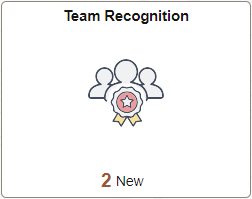
The Team Recognition tile displays the count of new posts created for team members, if applicable.
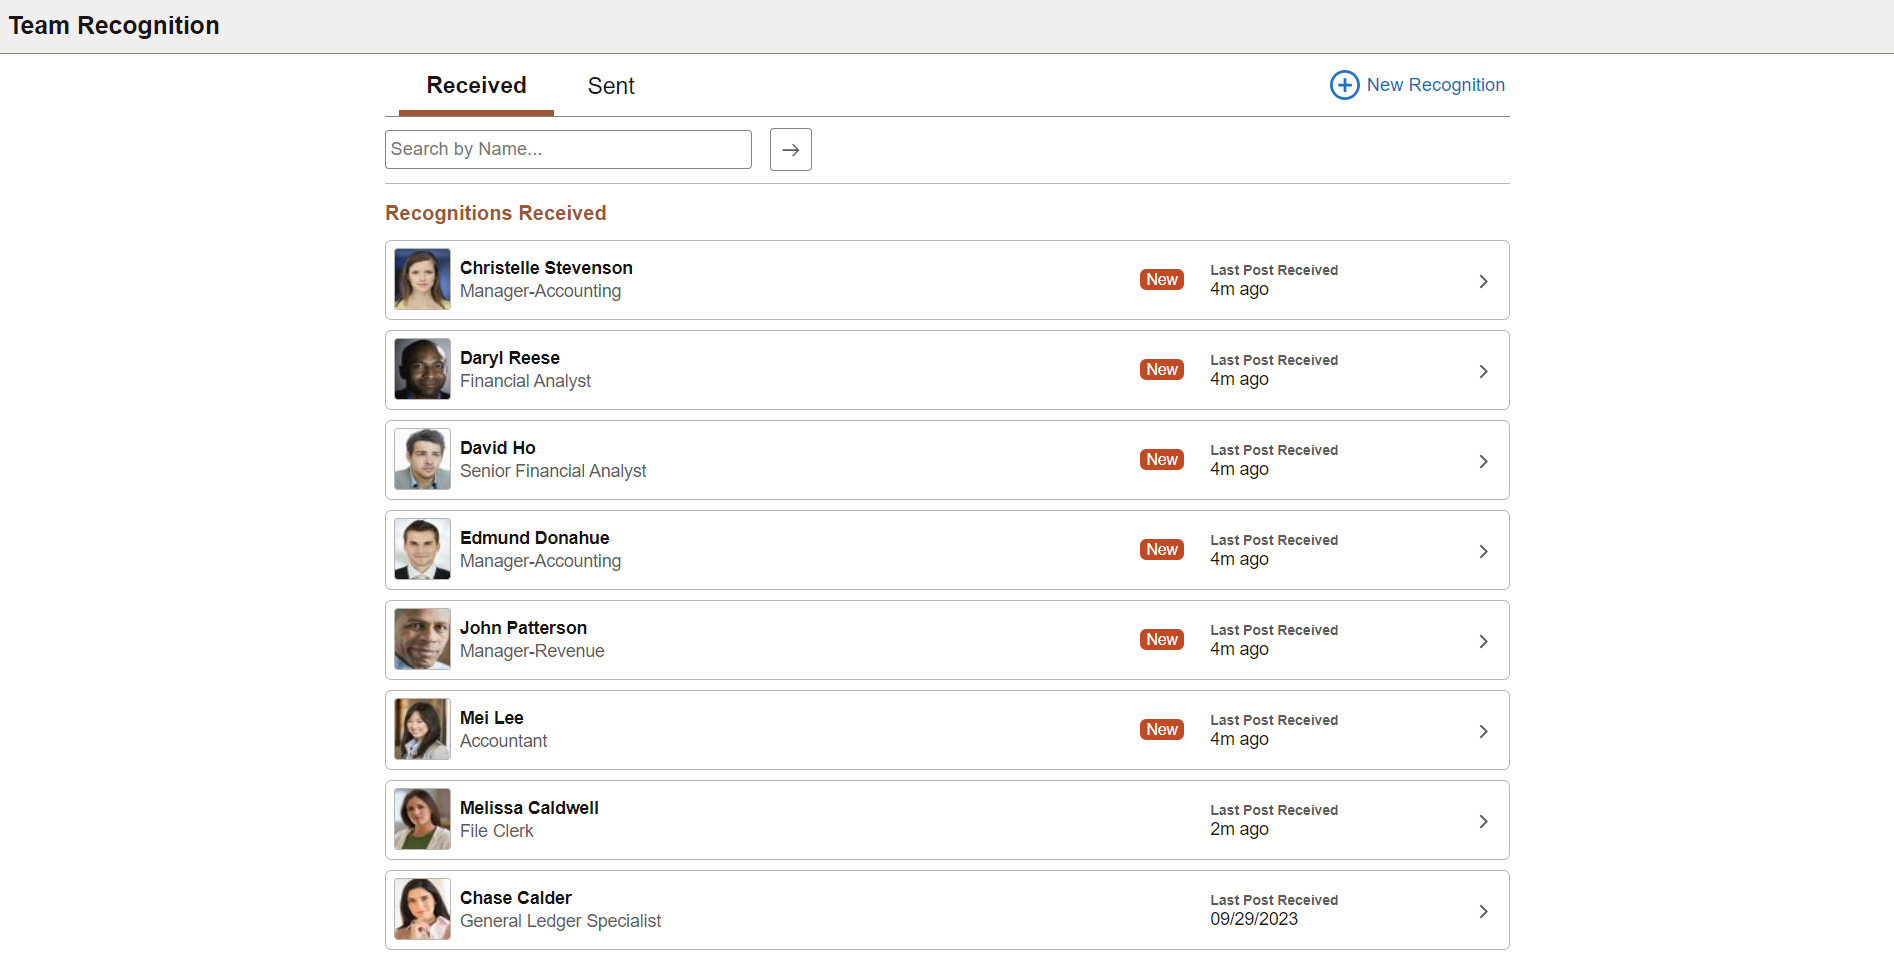
(Manager) Use the Team Recognition - Received page (HRRC_MSS_RECOG_FL) to select team members for whom you want to view recognitions.
Navigation:
Select the Team Recognition Tile.
This example illustrates the Team Recognition - Received page that displays a list of employees in your team who received recognitions.
|
Field or Control |
Description |
|---|---|
|
New Recognition |
Select to create recognitions for employees. See New Recognition Page. |
|
<search field> |
Enter a partial (using % as the wildcard character) or whole employee name to search for matching employee rows. |
|
Select to perform the search. |
Employee List
This page displays a list of your team members, which include direct reports (and indirect reports if enabled in the Direct Reports configuration for HRRC_MSS_RECOG_FL) who have received recognitions. Each employee is displayed as a card. Information presented on the card includes:
Employee's name, photo (if used), and job title.
Time when the latest post was received.
The New icon if the employee has a newly received post that hasn't been viewed.
Select an employee row to open the Recognitions Received Page for the employee where you can view and interact with recognitions created for them.
(Manager) Use the Recognitions Received page (HRRC_MSS_RECVD_FL) to view and interact with recognitions received by selected team members.
Navigation:
Select a team member from the Team Recognition - Received Page.
This example illustrates the fields and controls on the Recognitions Received page.
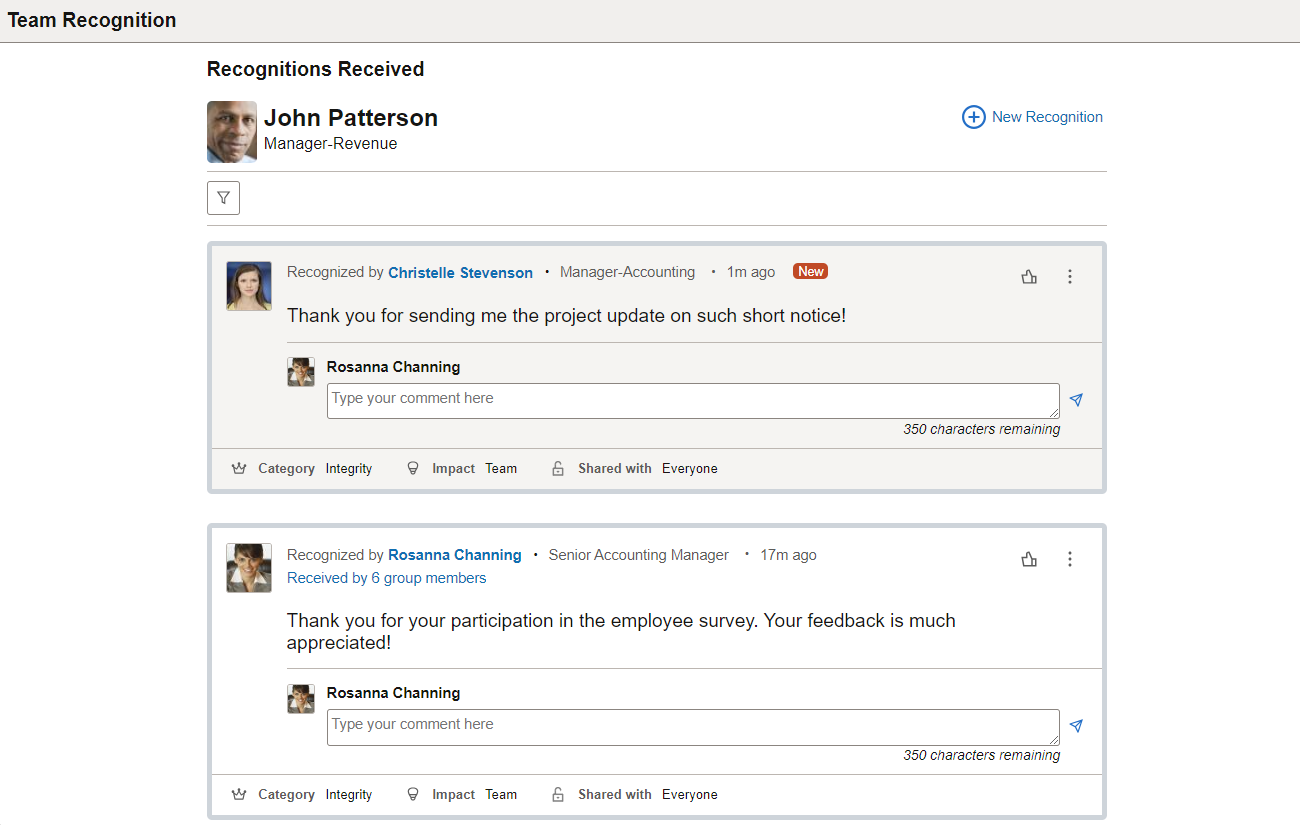
The header area of this page displays the photo (if used), name and job title of the selected team member.
|
Field or Control |
Description |
|---|---|
|
New Recognition |
Select to create recognitions for employees. See New Recognition Page. |
|
Select to specify date filter values on the Filters modal page to further refine the search results for posts. Values are Custom. When selected, specify the From and To dates of the custom period. Last 14 Days Last 30 Days The Filter icon is displayed in a highlighted color if a filter is applied. |
Posts look and behave similarly on pages where they are displayed. Refer to the Post section of the Recognition - <Everyone or My Peers> Page for descriptions of shared fields and controls.
|
Field or Control |
Description |
|---|---|
|
|
Indicates that the post is newly created. This icon appears if the post is set to be visible to Everyone or Employee and Manager, and the direct manager has not viewed the post. The manager can also view the count of new posts their team members received on the Team Recognition tile. In addition to the icon display, a new post also has a colored background. |
(Manager) Use the Team Recognition - Sent page (HRRC_MSS_RECOG_FL) to view and interact with recognitions that you sent to team members as the manager.
Navigation:
Select the Team Recognition Tile, then the Sent page.
This example illustrates the fields and controls on the Team Recognition - Sent page.

|
Field or Control |
Description |
|---|---|
|
<search field> |
Enter a partial or whole employee name to search for posts. |
|
Select to perform the search. If the number of posts in the search results exceeds 100, only the first 100 posts are displayed. Use the filter to refine your search. |
|
Select to specify date filter values on the Filters modal page to further refine the search results for posts. Values are Custom. When selected, specify the From and To dates of the custom period. Last 14 Days Last 30 Days The Filter icon is displayed in a highlighted color if a filter is applied. |
Posts look and behave similarly on pages where they are displayed. Refer to the Post section of the Recognition - <Everyone or My Peers> Page for descriptions of shared fields and controls.
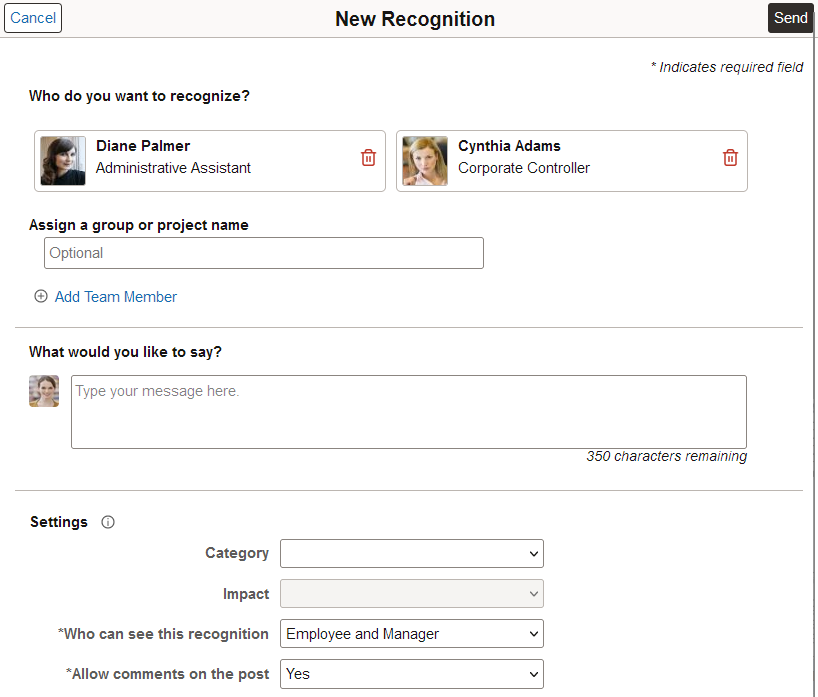
Use the New Recognition page (HRRC_CREATE_RCG_FL) to create new recognitions.
Navigation:
Select the New Recognition link on Team Recognition pages for managers and Recognition pages for employees.
This example illustrates the fields and controls on the New Recognition page.
|
Field or Control |
Description |
|---|---|
|
Who do you want to recognize |
Add recipients by selecting: (Manager) The Add Team Member link. (Employee) The Find Person link. |
|
Add Team Member |
(Manager) Select to add one or more individuals (who report to you) for whom the recognition is created. Note: If you create a new recognition from the Recognitions Received Page, which shows all posts pertaining to a selected team member, the system automatically defaults the selected team member as the recipient of the new recognition. To add other people to the new recognition, you must first delete the selected team member. The Add Team Member link reappears for you to select team members for the recognition again. Indirect team members are also available for selection, if the option to allow indirect reports is enabled in the Direct Reports setup (Component name: HRRC_CREATE_RCG_FL). See Also Configuring Direct Reports Functionality. |
|
Find Person |
(Employee) Select to add one or more individuals for whom the recognition is created. Values are: From My Peers: Search from individuals with the same manager (or managers if you have multiple jobs) as you. From Across Organization: Search from the custom group (if one is defined on the Configure Recognition Group Page), or the entire organization (if no custom group is defined). The Find Person link uses the configuration from Simple Person Search (Objective owner ID: Human Resources and Sub Application: HRRC). Contingent workers and persons of interest can be supported if enabled in the setup. See Also Configuring Person Search. |
|
Assign a group or project name |
Enter the name for the recognition that has multiple recipients, if applicable. This field appears if more than one person is selected to receive the recognition. You can enter an optional name to dedicate the recognition to a specific project or group. If a group or project name is provided, it is displayed in place of the post recipient in a group recognition, If not, the default name Group Recognition is used. See Also <Received By or Sent To> Page. |
|
What would you like to say |
Enter the recognition message (350 characters maximum). |
|
Category |
Enter a category value for the recognition. This field appears if the setup for category types exists. See Also Recognition Category Type Page. |
|
Impact |
Enter an impact value for the recognition. This field appears if the setup for impact types exists, and becomes editable when a category is selected. See Also Recognition Impact Type Page. |
|
Who can see this recognition |
Select who can see the recognition using the Team Recognition or Recognition tile. This field is required. Values are: Employee: Recognition recipients. Employee and Manager: Recognition recipients and their managers. Everyone: Everyone in the defined custom group, or in the organization if no custom group is defined. |
|
Allow comments on the post |
Select whether or not to allow viewers of the recognition to add comments. This field is required. This field appears if the Enable Comments option is selected on the HCM Options Page. When Yes is selected, the system displays the comment field on the recognition. When No is selected, the comment field is not shown; comment is not supported. This field becomes read-only if you are editing a recognition that has comments. |
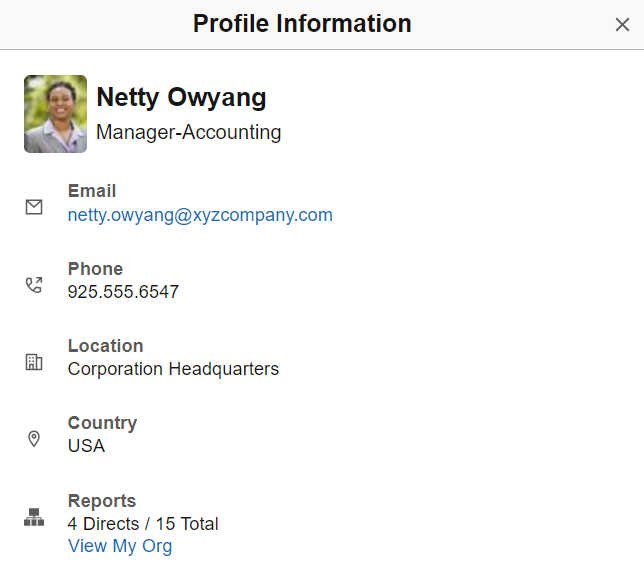
Use the Profile Information page (HR_EE_PROFILE_FL) to view the profile details of the selected employee.
Navigation:
Select the employee name link on a recognition.
This example illustrates the fields and controls on the Profile Information page.
|
Field or Control |
Description |
|---|---|
|
<Email address link> |
Select to compose an email using the email address from your default email application. |
|
View My Org |
Select to access the hierarchical reporting structure of the selected employee on the Organization Chart Page in a new browser tab or window. This link does not display if you do not have access to Company Directory. |
Use the Received By page or Sent To page (HRRC_GRP_MEMB_SCF) to view the list of recipients for group recognitions.
Navigation:
Select the Received by <number> group members link on a group recognition.
Select the Sent to <number> group members link on a group recognition.
This example illustrates the fields and controls on the Received By page.
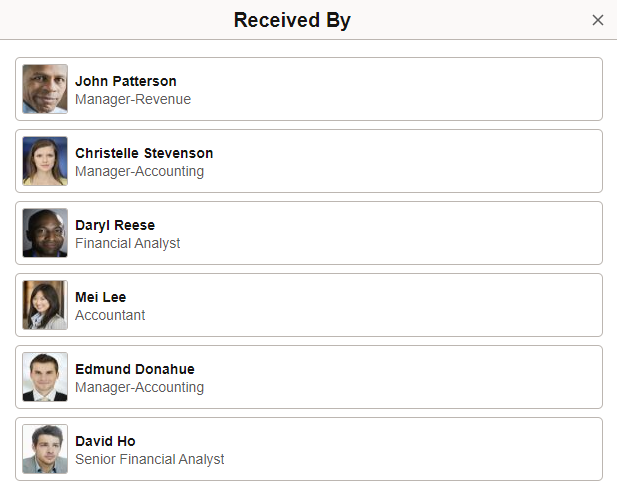
Both Received By page and Sent To page look and function the same.
The page title is Received By page if you access it from a group recognition on a Received page or the Recognition - <Everyone or My Peers> page.
The page title becomes Sent To page if you access it from a group recognition on a Sent page.
Use the Liked By page (HRRC_LIKE_SCF) to view the list of people who have liked the post.
Navigation:
Select the Liked by You and <number> others link or <number> Likes link on a recognition.
This example illustrates the fields and controls on the Liked By page.
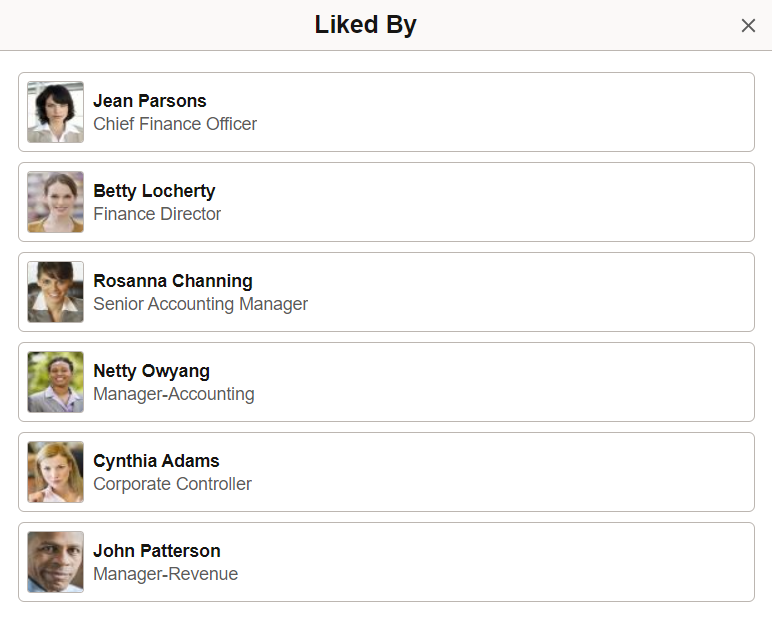
If a post is liked by more than 5 people, you can view their names and job titles on the Liked By page.
Use the All Comments page (HRRC_COMMENTS_SCF) to view all comments entered for the post.
Navigation:
Select the See All Comments link on a post.
This example illustrates the fields and controls on the All Comments page.
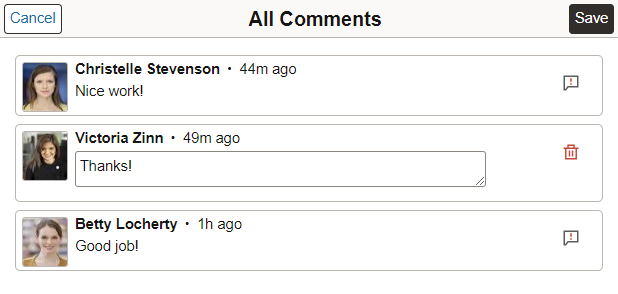
If a post has more than one comment, they are listed on the All Comments page in chronological descending order.
|
Field or Control |
Description |
|---|---|
|
<comment field> |
Update the comment if needed. It is editable if you are the author of the comment. |
 |
Select to delete the comment. This action is available if you are the author of the comment. |
 |
Select to report the comment to the system administrator. This action is available to viewers, but not the author of the comment. |
Use the Privacy Settings page (HRRC_VISIBILTY_SCF) to modify the visibility setting of recognitions.
Navigation:
Select the Shared with link of a recognition.
This example illustrates the fields and controls on the Privacy Settings page.
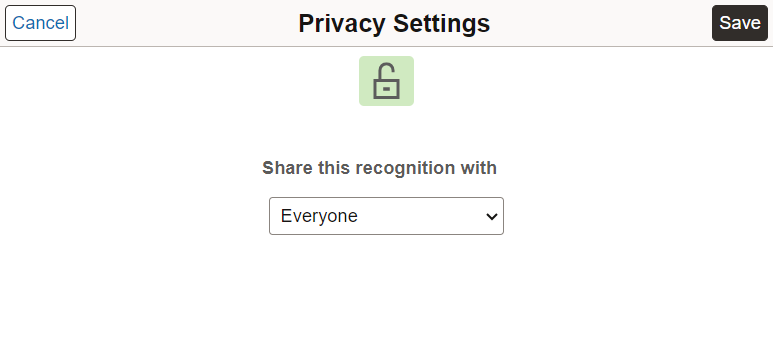
The author or recipient of the post can update the post's visibility setting after it was created.
|
Field or Control |
Description |
|---|---|
|
Share this recognition with |
Select who can view the post. Values are Employee, Employee and Manager, and Everyone. |
Use the Edit Post page (HRRC_CREATE_RCG_FL) to update posts.
Navigation:
Select Edit Post from the More Actions menu of a post.
This example illustrates the fields and controls on the Edit Post page.
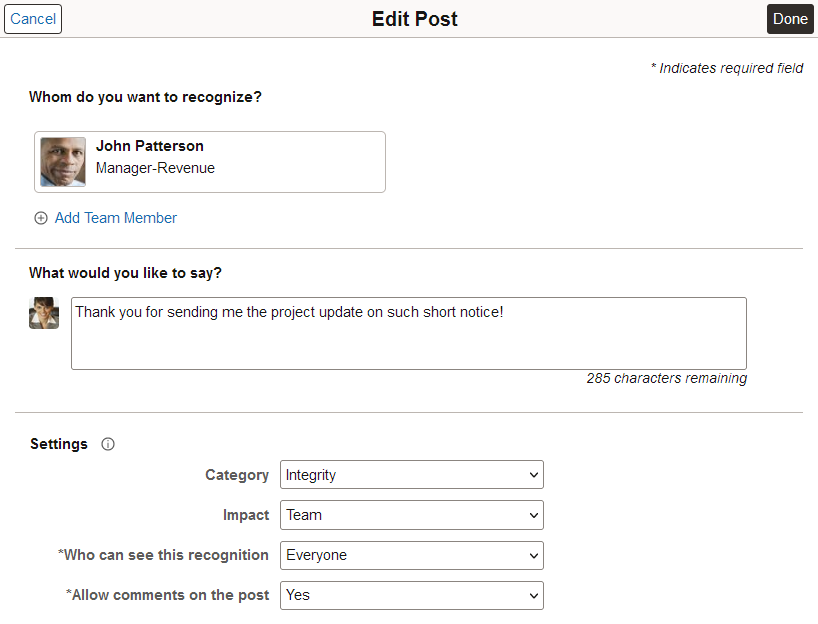
You can add recipients, and update the text and settings of the post if needed. However, you cannot delete existing recipients from the post.
The Edit Post page looks and functions the same as the New Recognition Page.
Use the Report Post page (HRRC_RPT_POST_SCF to report inappropriate posts.
Navigation:
Select Report Post from the More Actions menu of a post.
This example illustrates the fields and controls on the Report Post page.
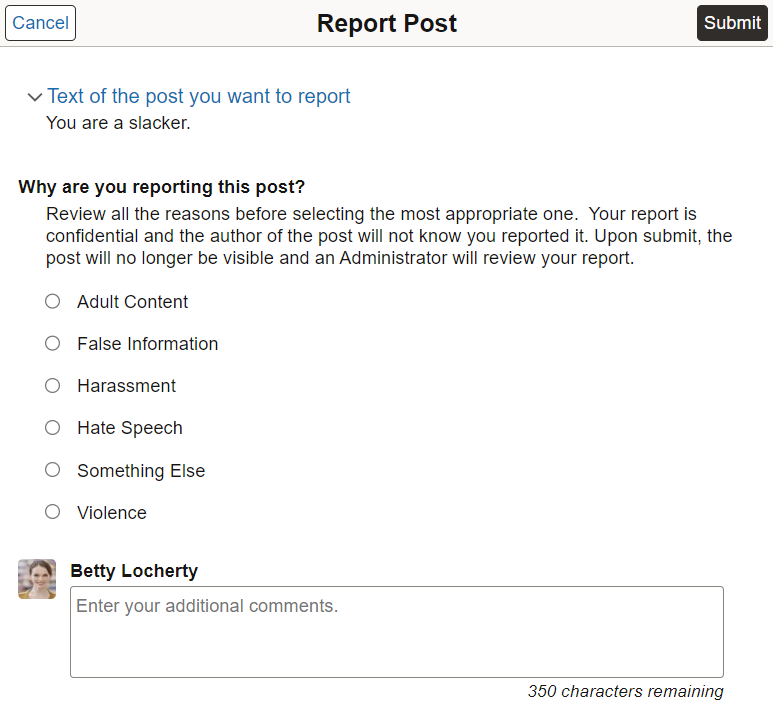
Reported posts are hidden until the administrator makes the decision to show them after review.
Note: The Report Post page is shown in read-only mode if the content you are reporting was reported by you previously.
|
Field or Control |
Description |
|---|---|
|
Text of the post you want to report |
View the content of the post you are reporting in this expanded section. |
|
Why are you reporting this post? |
Select the most appropriate reason for reporting the post. This is required. The list of reasons are translate values and can be modified. The field name is RC_REPORT_REASON. |
|
<comment field> |
Enter any comment you may have for reporting the post. |
|
Submit |
Select to submit the request to the administrator for review. The reported post is hidden until the administrator makes a decision to show it as a result of the review. Administrators review reported posts and comments on the Reported Posts and Comments Page. |
Use the Report Comment page (HRRC_RPT_CMT_SCF) to report inappropriate post comments.
Navigation:
Select Report Comment from the More Actions menu of a comment.
Both the Report Post Page and Report Comment page look and function the same, one for reporting posts and the other comments.
Reported comments are hidden until the administrator makes the decision to show them after review.
Note: The Report Comment page is shown in read-only mode if the content you are reporting was reported by you previously.
Use the View Recognitions page (HRRC_VIEW_RECOG_FL) to access employee recognitions from performance documents or notifications.
Navigation:
Select the View Recognitions icon from a performance document.
Select the notification entry of a post or comment.
This example illustrates the fields and controls on the View Recognitions page.
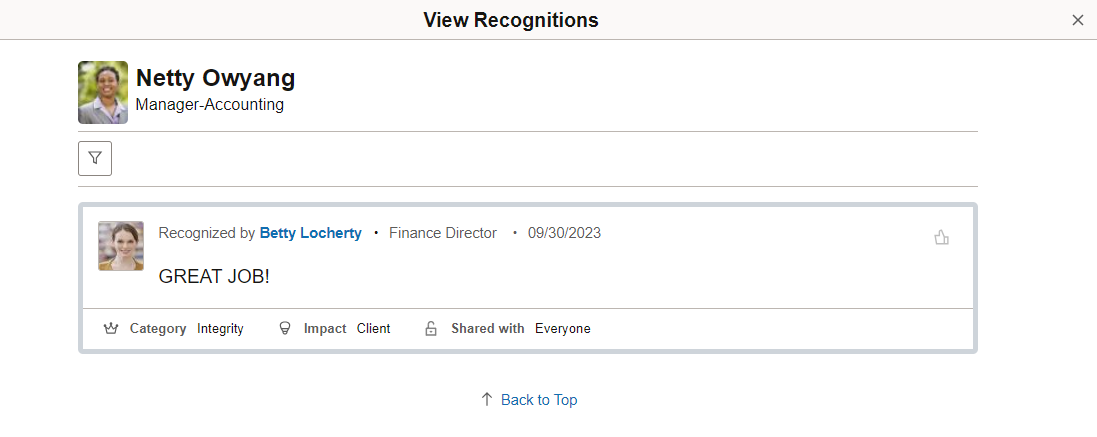
Both the manager and employee can access the View Recognitions page from:
Performance documents to view the list of posts that the associated employee has received for the respective review period, if the options to view recognitions for manager and employee are enabled in the template setup. The page appears in read-only mode.
Notification entries to view corresponding posts. The page appears in edit mode.