Tracking Assets with the Asset Tracking Homepage
Asset Tracking enables you to search for assets and display asset information without scanning a barcode, view preventative maintenance schedules and work orders associated with an asset, and scan assets within a specific location to build an audit history for assets in that location—all from your mobile device or mobile scanning device.
To facilitate mobile asset tracking, PeopleSoft Asset Management provides the new Scan Asset, Scan By Location, and Find Asset tiles within the Asset Tracking homepage.
Asset Tracking tiles in the Asset Tracking homepage

This example illustrates the fields and controls on the Asset Tracking home page. You can find definitions for the fields and controls later on this page.

The asset tracking tiles are part of the PeopleSoft Fluid User Interface and can be accessed from your mobile device or mobile scanning device.
Use the Scan Asset tile to retrieve general information, preventative maintenance schedules, and work orders associated with a scanned asset. The asset information is retrieved from the Asset Repository.
Use the Scan By Location tile to scan assets within a specific location and build an audit history for assets in that location. Audit history is stored in the Scan History (PI_SCAN_HIST) table.
Use the Find Asset tile to retrieve information for assets without scanning a barcode.
Use the Asset Tracking pivot tiles to view the pivot display of asset scans, duplicate tags, scan results, and scan history.
Note: Use the Scan Options page to configure field-level authorization and define email notification defaults for the pages within the Asset Tracking homepage.
Note: You can assign a default business unit to use with the Scan Asset, Scan By Location, and Find Asset pages using the Asset Management - User Preferences page.
|
Page Name |
Definition Name |
Usage |
|---|---|---|
|
PI_SCAN_OPTIONS |
Define email notification defaults and configure field level authorization for the pages within the Asset Tracking homepage. |
|
|
PI_SCAN_OPT_FLD |
Configure individual field display and edit properties for the Fluid pages in the Asset Tracking homepage. |
|
|
PI_SCAN_ASSET_FL |
Retrieve general information, preventative maintenance schedules, and work orders associated with a scanned asset. The asset information is retrieved from Asset Repository. You cannot edit asset information on the Scan Asset page. |
|
|
PI_SCAN_LOC_FL |
Scan assets within a specific location and build an audit history for assets in that location. |
|
|
AM_FIND_ASSET_FL |
Retrieve information for assets without scanning a barcode. You cannot edit asset information on the Find Asset page. |
|
|
Notify (Email Notification) |
PI_SCAN_EMAIL_SCF |
Send email notification regarding an asset. |
Use the Scan Options page (PI_SCAN_OPTIONS) to define email notification defaults and configure field level authorization for the pages within the Asset Tracking homepage.
Navigation:
This example illustrates the fields and controls on the Scan Options page (1 of 5). You can find definitions for the fields and controls later on this page.

This example illustrates the fields and controls on the Scan Options page (2 of 5). You can find definitions for the fields and controls later on this page.

This example illustrates the fields and controls on the Scan Options page (3 of 5). You can find definitions for the fields and controls later on this page.

This example illustrates the fields and controls on the Scan Options page (4 of 5). You can find definitions for the fields and controls later on this page.
This example illustrates the fields and controls on the Scan Options page (5 of 5). You can find definitions for the fields and controls later on this page.
Notifications
Use this group box to define email notification defaults for all four tiles within the Asset Tracking homepage. The parameters you define here correspond to the Notify (email notification) option associated with the Actions List.
Field or Control |
Description |
|---|---|
Business Unit |
Select the business unit for which you will apply email notification defaults. |
Send to Asset Custodian |
Select this option to send notifications to the asset custodian (instead of the default email address) when you use the Notify feature in the Actions List. When you select this option, the To field of the Email Notification pagelet is automatically populated with the email address of the asset custodian. Asset custodian email address is defined on the PeopleTools User Profiles page. If custodian email address does not exist, the To field of the Email Notification pagelet is automatically populated with the default email address defined on this page. |
Auto Send Email |
Select this option to bypass the Email Notification pagelet and automatically send an email when you select the Notify feature from the Actions List. |
Default Email Address |
Enter a default email address that will automatically populate the To field of the Email Notifications pagelet when you use the Notify feature from the Actions List. |
Use the Email Text tab to define subject line and message body default text for the Email Notifications pagelet when you use the Notify feature from the Actions List. PeopleSoft Asset Management delivers Message Catalog Set Number 8040 and Message Numbers 102 and 103.
Note: You can modify the delivered messages, but you must ensure you accurately maintain the bind variables when doing so.
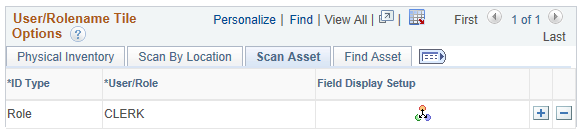
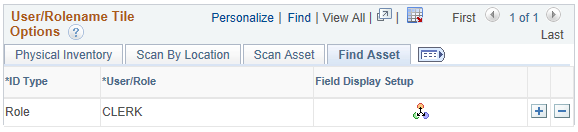
User/Rolename Tile Options
Use this group box to configure field authorization for the Asset Tracking homepage. You can configure field behavior at an individual (user) level or by role. There are four tabs in this group box, each corresponding to one of the four Asset Tracking homepage tiles.
Note: If a user belongs to multiple roles, the superset of enabled options is used.
Field or Control |
Description |
|---|---|
ID Type |
Select the ID type for which you will configure field behavior. You can select User or Role. |
User/Role |
Select an individual user or role. |
|
Click the Field Display Setup icon to access the Field Display Setup page and configure individual field display and edit properties. |
Show Inventory List (Physical Inventory) |
Select this option to display the asset inventory list on the Physical Inventory page. If you do not enable this option, the asset inventory list is hidden from the Physical Inventory page. |
Allow Retirements (Physical Inventory) |
Select this option to enable asset retirement using the Edit Scan Record page from the Physical Inventory tile. |
Show Assets Not in List Message (Physical Inventory) |
Select this option to display an alert on the Physical Inventory page when a scanned asset is not in the Scan Scope. |
Show New Scan Record Message (Physical Inventory) |
Select this option to display a confirmation message on the Physical Inventory page when you create a new asset and click the Done button in the New Asset Scan Record page. |
Show Edit Scan Record Message (Physical Inventory) |
Select this option to display a confirmation message on the Physical Inventory page when you edit an asset scan record and click the Done button in the Edit Scan Record page. |
Show Find Asset Message (Physical Inventory) |
Select this option to display a confirmation message on the Physical Inventory page when an asset is confirmed in the Find Asset page. |
Force Asset Location Update (Scan By Location) |
Select this option to automatically update the Asset Location (ASSET_LOCATION) table with the scan location in place of the current location. When set to ‘Yes,’ the system inserts an effective dated location record into the Asset Location table. Location attributes are also stored in the Scan History (PI_SCAN_HIST) table. |
Scan Any Location (Scan By Location) |
Select the check box to allow the user to select any scan location. The Business Unit default for the Scan By Location tile is the Business Unit value specified in the Define User Preferences page. This value determines which Scan Location values are available (via Tableset Sharing). When the Scan Any Location check box is selected, the Select Scan Location page will display a Business Unit field to allow the user to initially select a Business Unit value before selecting a Scan Location. The prompt values for the Scan Location field will be locations available for the selected Business Unit value. |
Update Other BU (Update Other Business Unit) |
Select this option to update the location for all assets sharing the same tag number, regardless of which business unit the asset originates. In other words, if a user updates a single asset location, the system will update all related assets sharing the same tag number across all business units. If you do not select this option, the system only updates location for related assets within the same business unit. |

Use the Field Display Setup (PI_SCAN_OPT_FLD) page to configure individual field display and edit properties for the Fluid pages in the Asset Tracking homepage.
Navigation:
Field Display Setup page

|
Physical Inventory Field Display Setup |
Scan By Location Field Display Setup |
Scan Asset Field Display Setup |
Find Asset Field Display Setup |
|---|---|---|---|
|
The field display setup options for Physical Inventory include the Show Field and Allow Field Edit options. The Allow Field Edit option is disabled for Business Unit, Asset ID, and Tag Number, and cannot be selected. |
The field display setup options for Scan By Location include the Show Field and Allow Field Edit options. The Allow Field Edit option is disabled for all fields except for Comment. Disabled fields cannot be selected. |
The field display setup options for Scan Asset include the Show Field only. |
The field display setup options for Find Asset include the Show Field only. |
Use the Scan Asset (PI_SCAN_ASSET_FL) page to retrieve general information, preventative maintenance schedules, and work orders associated with a scanned asset.
Navigation:
This example illustrates the fields and controls on the Scan Asset page - Assets.

This example illustrates the fields and controls on the Scan Asset page - Preventative Maintenance.

This example illustrates the fields and controls on the Scan Asset page - Work Orders.

Scan an asset barcode to retrieve general information, preventative maintenance schedules, and work orders associated with the asset. Asset information displayed on this page is retrieved from Asset Repository.
The Scan By toggle switch is displayed based on the value entered in the Installation Options - Asset Management page. For details see Setting Up Application-Specific Installation Options
Select the Assets tab to view general information about the asset. Hazardous assets, warranties, and asset hierarchies are indicated with icons when an asset has that attribute.
Select the PMs tab to view preventative maintenance schedules for the asset. Upcoming maintenance is indicated with an icon when an asset has that attribute.
Select the Work Orders tab to view work orders associated with the asset.
Note: You cannot edit asset information on this page. If an asset does not have preventative maintenance or work orders associated with it, the related tabs are disabled.
Use the Scan By Location (PI_SCAN_LOC_FL) page to scan assets within a specific location and area ID to build an audit history for assets in that location.
Navigation:
This example illustrates the fields and controls on the Select Scan Location page.

This example illustrates the fields and controls on the Select Scan Location page. You can find definitions for the fields and controls later on this page.

Select a location for the Scan Location field.
When an asset’s location differs from the scan location, you can use the Force Asset Location Update toggle button to update the asset location and area ID. When set to ‘Yes,’ the system inserts an effective dated location and area ID record into the ASSET_LOCATION table. Location attributes are also stored in the PI_SCAN_HIST table. In addition, the system creates comments in the ASSET_COMMENTS table. The user can view the comments in the Basic Add Asset Comment page.
Select Done to retrieve a list of assets associated with the specific location and area ID.
This example illustrates the fields and controls on the Scan By Location page.
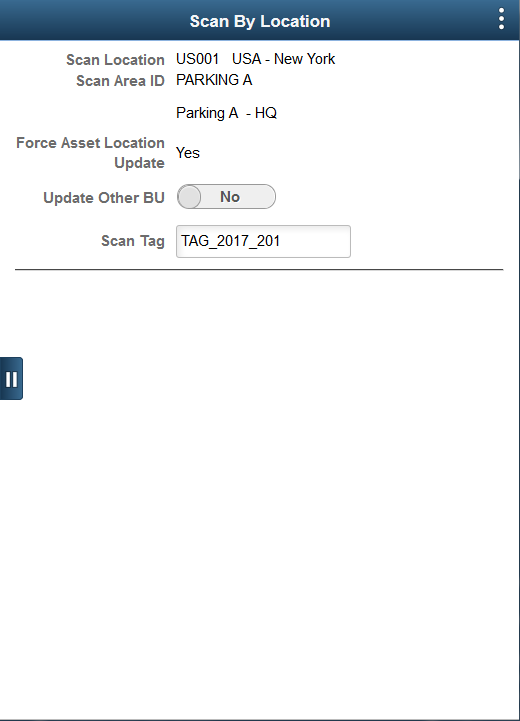
This example illustrates the fields and controls on the Scan By Location Page. You can find definitions for the fields and controls later on this page.

Enter a valid tag number. The system displays the old and new location as well as the old and new area ID.
Select Edit Comments to edit comments for the asset.
This example illustrates the fields and controls on the Edit Comments. You can find definitions for the fields and controls later on this page.
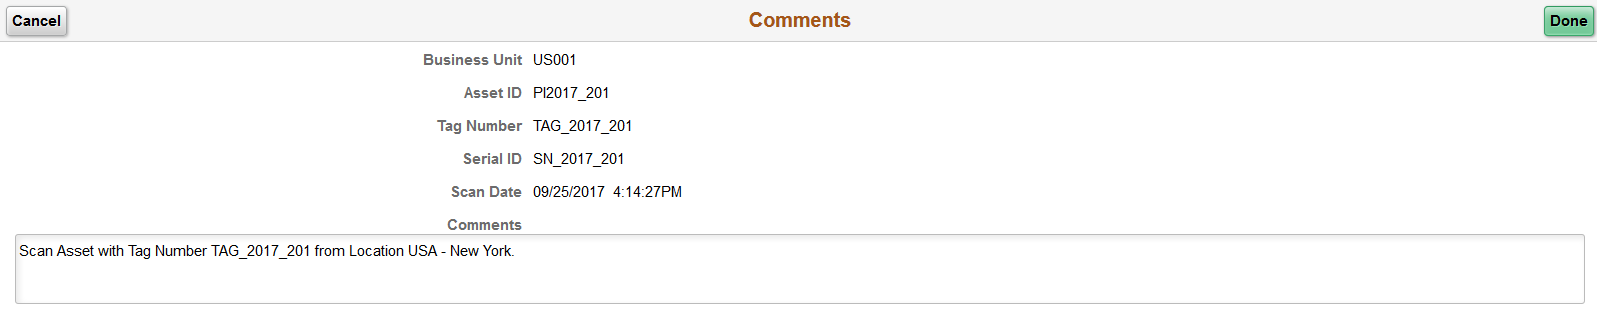
Make the required modifications to the comment displayed and save your changes.
You can view the new location, area ID, and asset comments on the Basic Add - Location/Comments/Attributes page.
For information about Basic Add - Location/Comments/Attributes page, see Location/Comments/Attributes Page.
Use the Find Asset (AM_FIND_ASSET_FL) page to retrieve information for assets without scanning a barcode.
Navigation:
Find Asset page

Enter search parameters, such as Business Unit,Asset ID, or Location, and select Search to retrieve information for scanned assets. Asset information displayed on this page is retrieved from the Asset Repository.
Use the Scan Scope List pivot display to view the status of Physical Inventory IDs in progress and the list of assets scanned.
Navigation:
Select the Scan Scope List tile on the Asset Tracking Home page.
This example illustrates the fields and controls on the Scan Scope List Pivot Grid.

Use the Scan Duplicate Tag pivot display to identify the assets with duplicate tags.
Navigation:
Select the Scan Duplicate Tag tile on the Asset Tracking Home page.
This example illustrates the fields and controls on the Scan Duplicate Tag pivot grid.
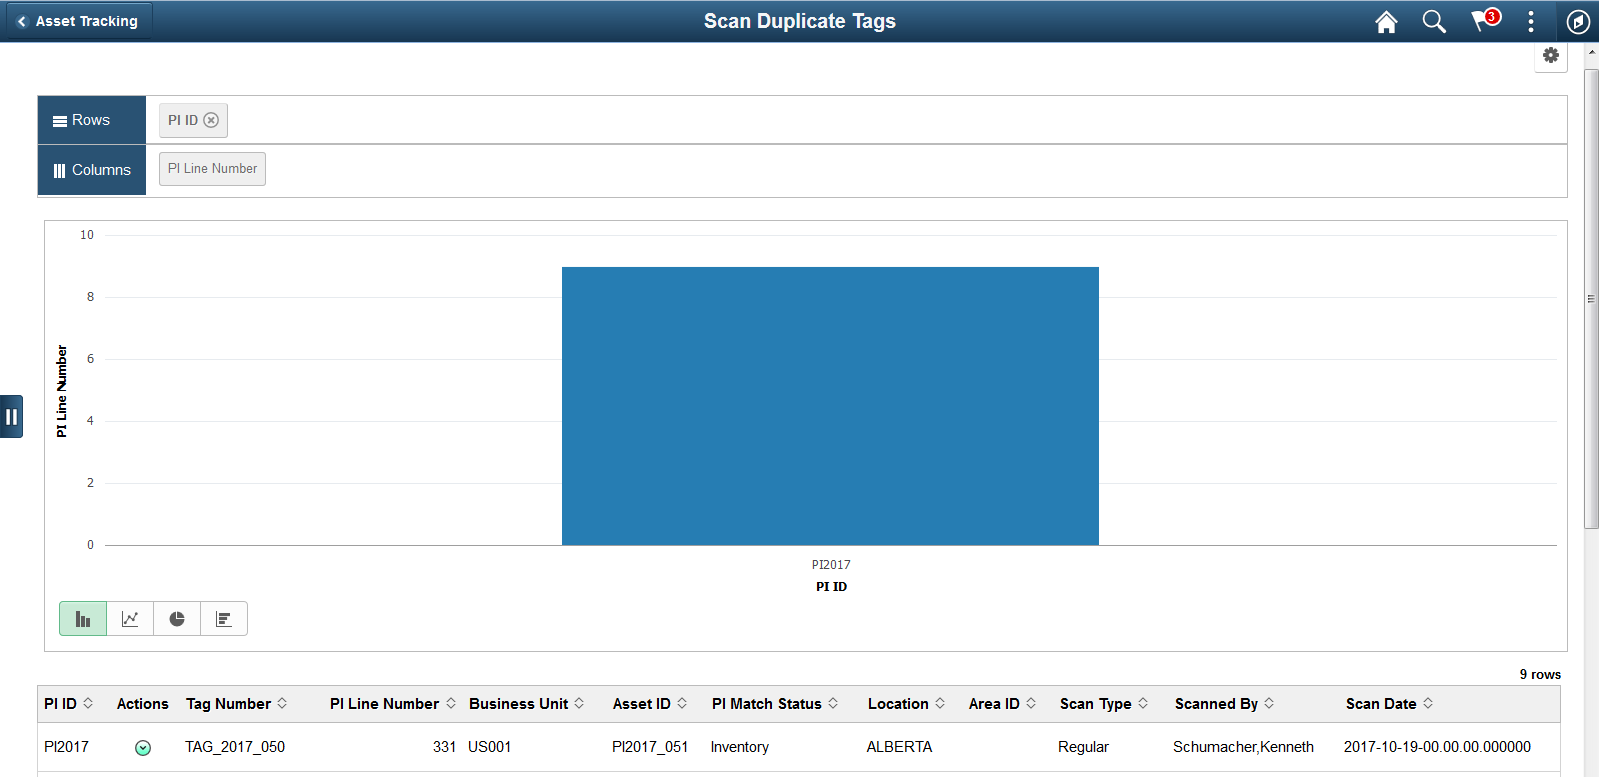
Field or Control |
Description |
|---|---|
|
Select this icon to navigate to the Verify Duplicate Tags page to verify duplicate tags. You can make changes to the tag number and save the changes. |
 Related Actions Icon
Use the Scan Results pivot display to review the matching results and take the necessary actions.
Navigation:
Select the Scan Results tile on the Asset Tracking Home page.
This example illustrates the fields and controls on the Scan Results pivot grid.
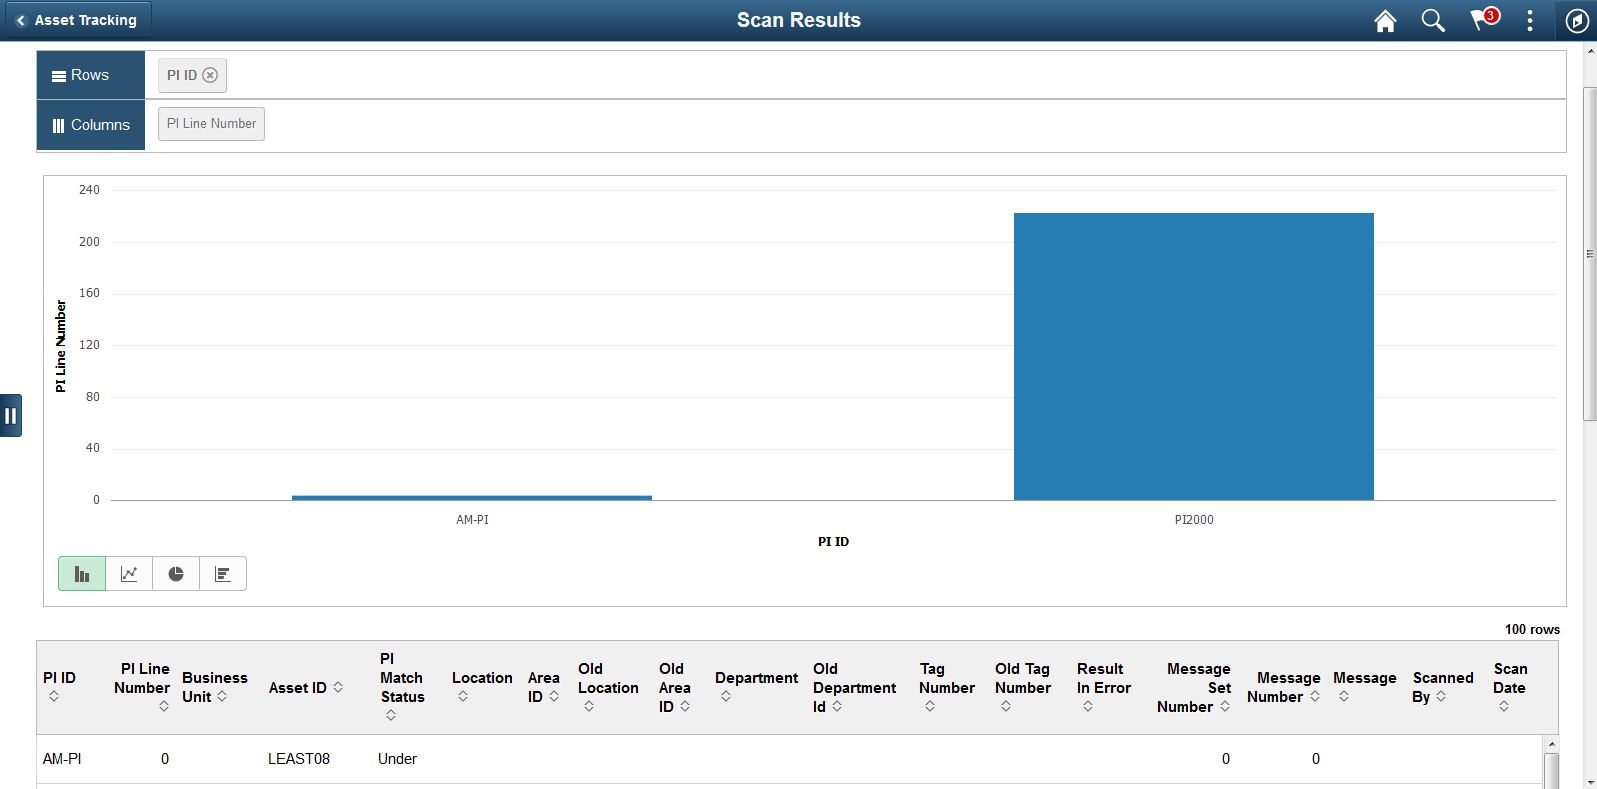
Field or Control |
Description |
|---|---|
|
Select this icon to navigate to the Review Matching Results page and to review and make changes to the scan result. |
Use the Scan History pivot display to browse Scan History Audit trails.
Navigation:
Select the Scan History tile on the Asset Tracking Home page.
This example illustrates the fields and controls on the Scan History pivot grid.

Use the Asset Transactions page (AM_SS_ASSETS_FL) to perform asset physical transfer and asset retire transactions.
Navigation:
This example illustrates the fields and controls on the Asset Transactions page. You can find definitions for the fields and controls later on this page.
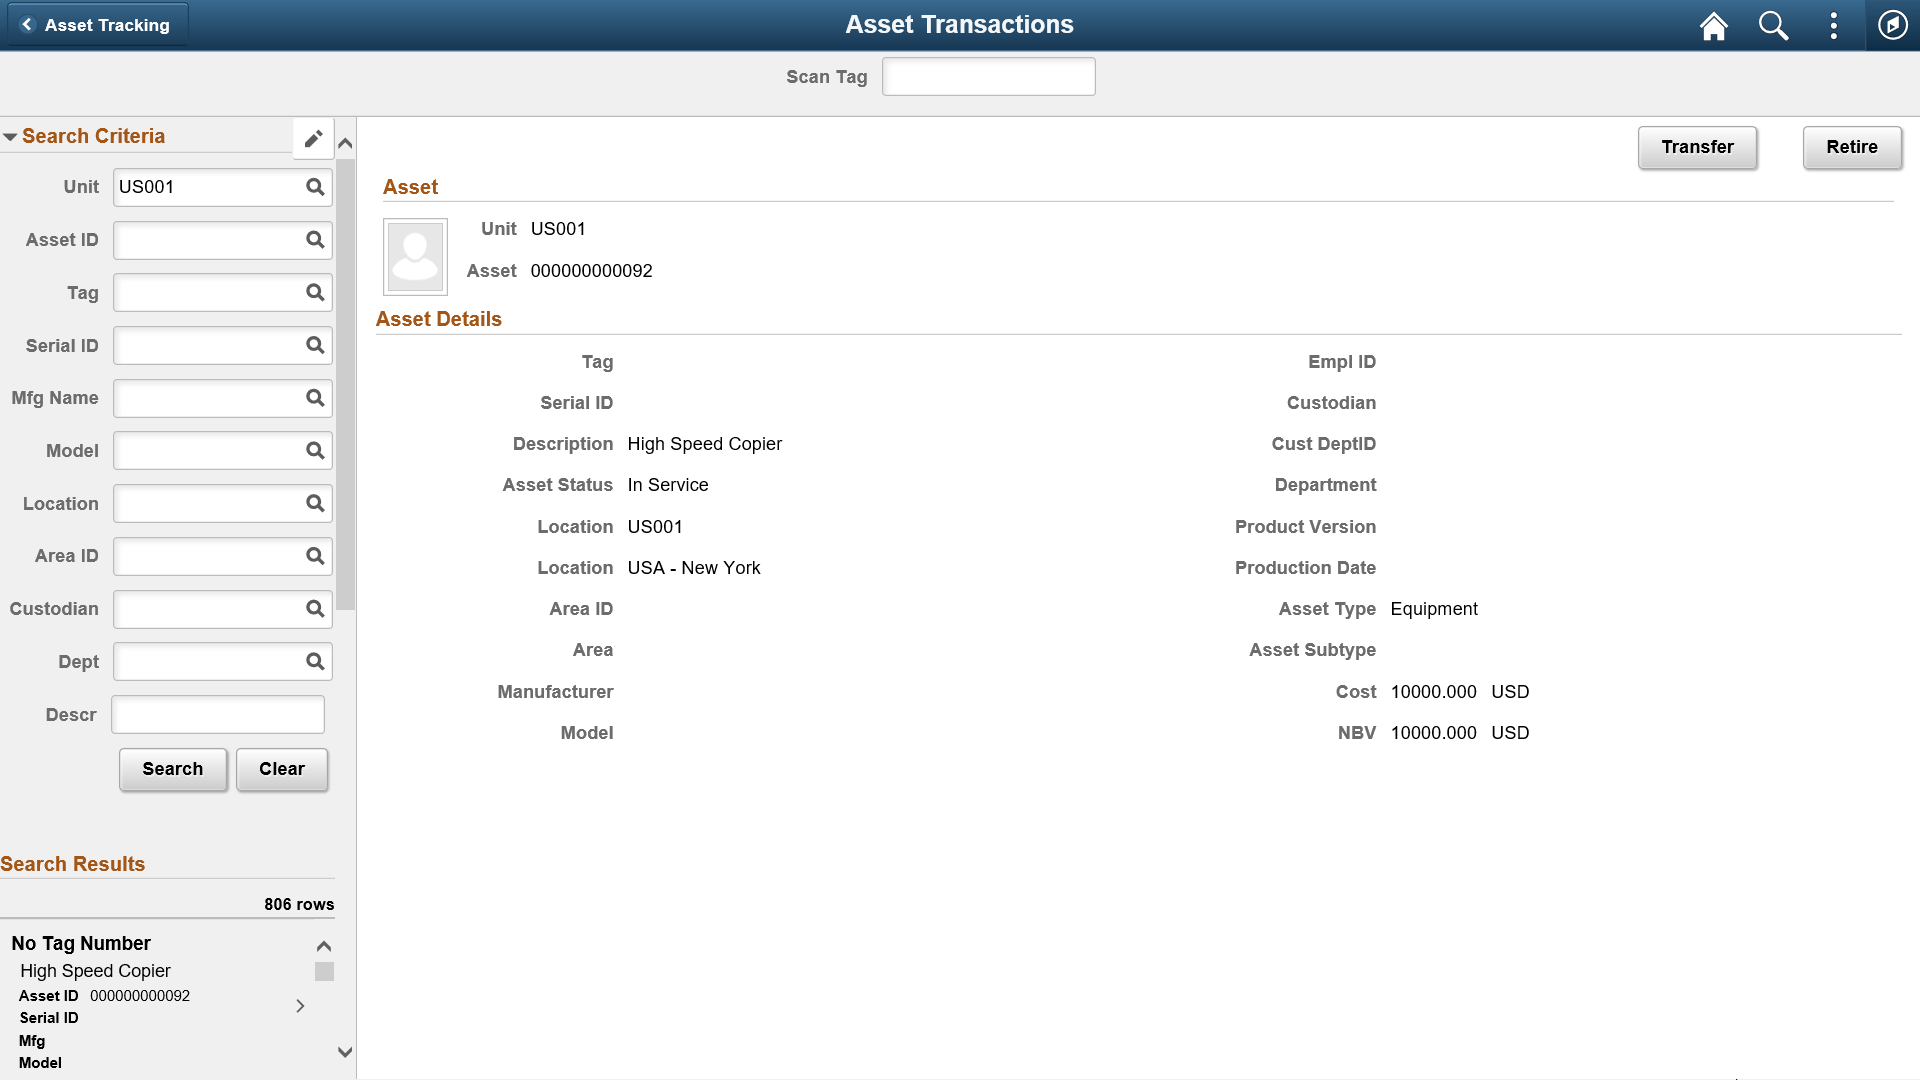
Field or Control |
Description |
|---|---|
Search Criteria |
Enter the search criteria to perform manual search for assets, if an asset tag cannot be scanned. View the details and perform the transfer or retire transaction as required. |
Edit icon |
Select to configure the search criteria. The Edit option is available only in large form factor. |
Scan Tag |
Scan the tag number of the asset to view the details and perform the transaction. |
Transfer |
Select the Transfer button to navigate to the Asset Physical Transfer page. The page allows you to review the asset and transaction details, and modify the asset transfer location and custodian details if required. |
Retire |
Select the Retire button to navigate to the Asset Retire page to perform the asset retire transaction. |
This example illustrates the fields and controls on the Asset Physical Transfer page. You can find definitions for the fields and controls later on this page.

Field or Control |
Description |
|---|---|
New Value |
Modify the existing field value or select new values. |
Current Value |
Displays the existing values for comparison purposes. |
Comments and Attachments |
Enter comments and add attachments about the transaction, if any. |
Submit |
Select the Submit button to proceed with the transaction. |
During the Asset physical transfer approval process, the approvers can review the new values. After the final approval, the asset details display the new values.
See Pending Approvals - Asset Physical Transfer page.
This example illustrates the fields and controls on the Asset Retire page. You can find definitions for the fields and controls later on this page.
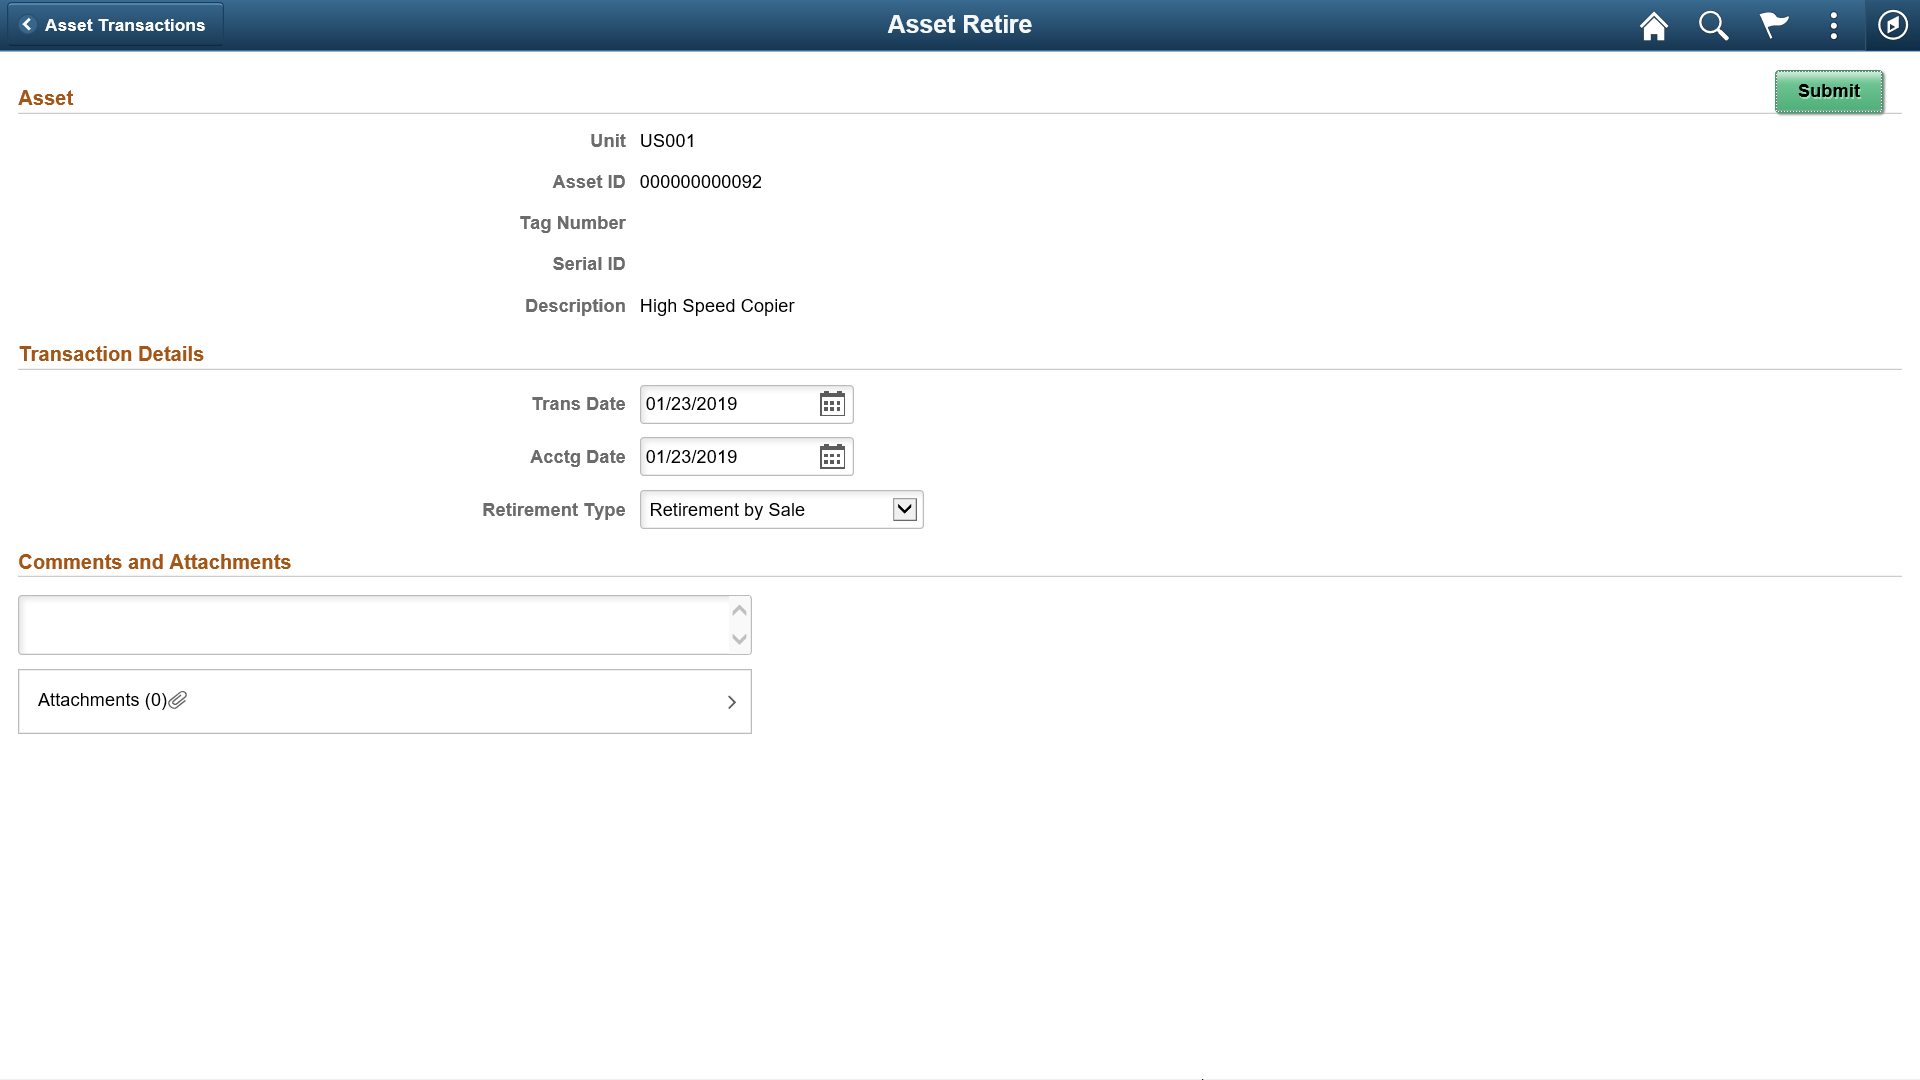
Review the details and modify them if required, and submit for approval. After final approval for Asset Retire transaction, you need to run the transaction loader to update the asset transaction tables.
See Load into AM Page.