Dispatching Payments in Financial Gateway
This topic covers how to dispatch payments.
You dispatch payments in Financial Gateway by running the Payment Dispatch Application Engine process (PMT_DISPATCH). You can run this process manually or schedule it to run at a specified time using PeopleSoft Process Scheduler.
When the Dispatch on Load check box is selected on the Source Registration page, the payment dispatch process is executed for each message ID upon payment load.
|
Page Name |
Definition Name |
Usage |
|---|---|---|
|
Schedule Payment Dispatch Page |
PMT_BATCH_DISPATCH |
Use PeopleSoft Process Scheduler to automate the payment dispatch process by scheduling the Dispatch Payment process to run in batch mode as the payments arrive in Financial Gateway. Use the Parameter fields to define the payment batches. See the product documentation for PeopleTools: Process Scheduler. |
|
PMT_INQUIRY |
Manually send selected payments to a bank from Financial Gateway. |
|
|
Payment Preferences Page |
PMT_PREFERENCE |
Modify functionality and define how data are displayed on the Dispatch Payments page. See the Payment Preferences Page for more information. |
|
Addenda Page |
PMT_ADDENDA_SP |
Add instructional information that will appear in the actual payment file for a specified payment. See the Enter Transfer Templates - Addenda Page for more information. |
|
Payment Dispatch Results Page |
PMT_DISP_RESULT |
View details of a particular payment dispatch. See the Payment Dispatch Page for more information. |
Use the Payment Dispatch page (PMT_INQUIRY) to manually send selected payments to a bank from Financial Gateway.
Navigation:
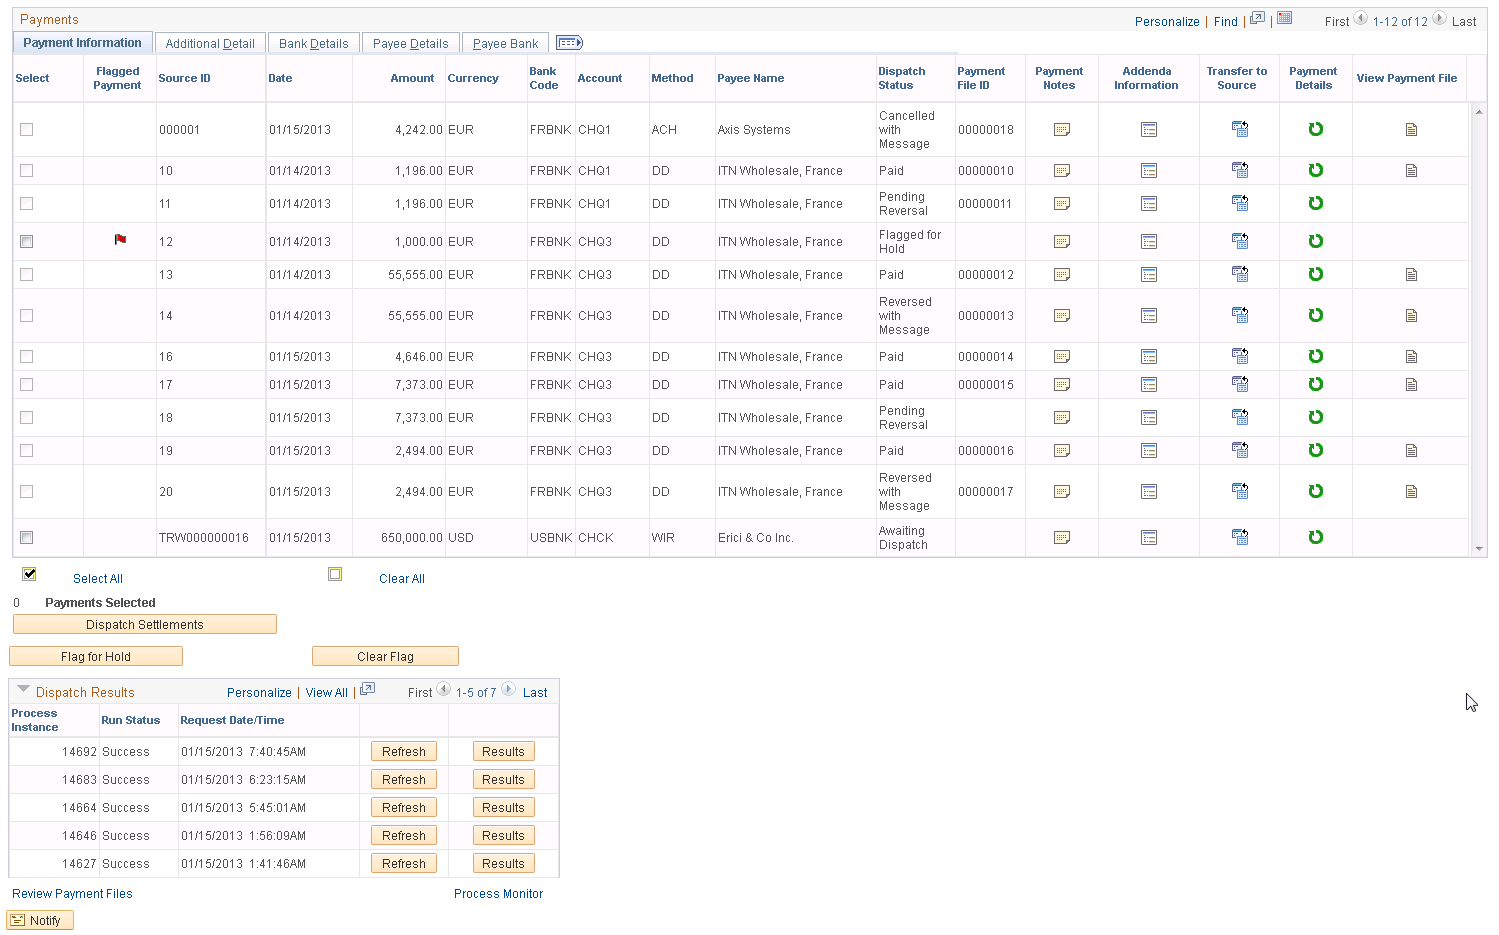
This example illustrates the fields and controls on the Payment Dispatch page (1 of 2). You can find definitions for the fields and controls later on this page.

This example illustrates the fields and controls on the Payment Dispatch page (2 of 2). You can find definitions for the fields and controls later on this page.
Field or Control |
Description |
|---|---|
Edit User Preferences |
Click to access the Payment Preferences page, which you use to define how certain elements of the Dispatch Payments page are displayed and function. |
Search Fields
Use these fields to query the tables in Financial Gateway for specific payment transactions.
Payment Totals
Displays the number of payments and the monetary total for each currency type.
Payments
Field or Control |
Description |
|---|---|
Select |
Select the payments to be dispatched or flagged for hold. This field is unavailable for entry for payments that have already been dispatched |
Dispatch |
Click to send selected payments to the banks. |
Flagged for Hold |
Click to hold selected payments for further review and approval. |
Payments Selected |
Displays the number of payment rows that have been selected for dispatching or placing on hold. |
Flagged for Clear |
Click to remove the hold on selected payments. |
|
Click the Payment Notes icon to access the Payment Notes page, which you use to add and view comments about the specified transaction. Comments added here appear only online within the Financial Gateway system— including the event log—for the particular payment. |
|
Click the Addenda Information icon to access the Addenda page, which you use to add additional instructions for the specified payment. Instructions here will appear within the actual payment file. |
|
Click the Transfer to Source icon to access the source application to view detailed information about the specified transaction. |
|
Click the Review Payment Details icon to access the Review Payment Details page to view the payment progress, events, and detailed information on the transaction. |
Review Payment File |
Click to access the Review Payment Files page to review payment file transmittal information. See Payment Files Page. |


Bank Details Tab
Field or Control |
Description |
|---|---|
Cutoff Time and Cutoff Date |
Payments arriving by this time and date are processed by the bank that day. Payments arriving afterwards are processed on the next business day. |
Manually Dispatching a Payment
To manually dispatch a payment:
Select a payment.
Click the Dispatch button.
If prompted, confirm that you are an authorized user by typing your system sign-in password on the Verify Identity page.
The system displays a message stating that the Payment Dispatch Application Engine is scheduled to process the payment. If the process is successful, a payment file is created.
Dispatch Results
This grid provides a view of payment dispatch processes.
Field or Control |
Description |
|---|---|
Refresh |
Click to update the grid and view the results of more recent dispatch processes. |
Results |
Click to access the Payment Dispatch Results page and view details of a particular payment dispatch. |