Recording Express Putaway
Use express putaway processing when you want to put incoming materials into their material storage locations without taking the time to receive the items and create a putaway plan.
The Express Putaway component does not update original or expected receipt information; therefore, you cannot use this processing method to put away material from POs, interunit transfers, or RMAs. To receive POs, use the Receiving component in PeopleSoft Purchasing; to receive and put away interunit transfers or RMAs, use the InterUnit and RMA Receiving component. Once receipt information for stock has been staged to the PeopleSoft Inventory staging interface table (STAGED_INF_INV), use auto-putaway or multi-step putaway processing to put away the stock.
When you save the Express Putaway component, the system performs the same validation as that performed by the Load Staged Items process. If you specify a new lot for a lot-controlled item, the system also calculates lot availability, retest, and expiration dates, provided that you have defined shelf life, availability lead time, and retest lead-time values on the Lot Control Information page.
Availability Date = Creation Date + Availability Lead Time
Retest Date = Creation Date + Retest Lead Time
Expiration Date = Creation Date + Shelf Life
Note: If the business unit requires closure calendar validation and processing for materials management activities as defined on the Closure Calendar page, and if the calculated lot retest date falls on a defined closure date, the system uses the first previous valid date.
To record express putaway:
Enter mandatory express putaway information.
Specify tracking information.
Define information common to all putaway lines.
|
Page Name |
Definition Name |
Usage |
|---|---|---|
|
PUTAWAY_ENTRY1_INV |
Enter mandatory information for the express putaway method. |
|
|
Edit Cost Page |
IN_PTWY_CST_ELEMT |
Enter the unit cost by cost element. |
|
PUTAWAY_ENTRY2_INV |
Use if the items being put away require specific tracking information, such as PO information. |
|
|
PUTAWAY_ENTRY3_INV |
Define information common to all of the putaway lines that you are processing. |
Use the Express Putaway page (PUTAWAY_ENTRY1_INV) to enter mandatory information for the express putaway method.
Navigation:
This example illustrates the fields and controls on the Express Putaway page. You can find definitions for the fields and controls later on this page.

Field or Control |
Description |
|---|---|
Receipt No (receipt number) |
Enter a receipt number. To generate a unique number automatically, select NEXT. If you do not require receiver information, enter the installation default or leave the field blank to enable the system to populate it with the installation default. |
Putaway Date |
The default is today's date. If the items were put away at a different time, enter the correct date. This field is for informational purposes and is not used when costing the putaway transaction. |
Sort Display |
Click to sort the information by receiver line, or if receipt line information is not available, by item ID. |
Putaway Detail
Field or Control |
Description |
|---|---|
Receipt Line |
For each putaway line, the default receipt line number is either the next sequential line number or the installation default. |
GTIN |
Displays the Global Trade Item Number of the associated item. |
UDI Barcode |
Displays the Universal Device Identifier barcode. You can scan and parse the data represented in the barcode. Note: UDI barcodes may contain GTIN, Lot/Serial information, creation and expiration dates. |
Storage Location |
If you defined a default putaway location for the item, that location appears. If you are not putting the item into an existing container, you can override the default putaway location. If no default putaway location exists, or if you are overriding the default, enter the material storage location where you want to put the item. If the business unit is a VMI business unit, you can place owned items into non-owned locations without invoicing the customer. Note: The business unit's default display options determine how many location level fields appear upon entry to this page. If you are entering a material storage location that requires additional levels, enter the storage area, then refresh the page to display the remaining levels for that area. |
Storage Location Search |
Select this button to search for a material storage location to putaway the received items. The potential material storage locations are then displayed on the Storage Location Search page. If the item does not have a default putaway location defined, then the search criteria may be too large, resulting in a delay to access the Storage Location Search page. To eliminate this performance issue, go to the Inventory page of the Installation Options component and enter the maximum number of locations to retrieve on the initial search. This number is entered in the Initial Search Row Limit field. |
Putaway Locations |
Click to access the Directed Putaway Locations page, where you can view and select material storage locations that meet putaway rules established for the item or business unit. Enter the item, quantity, and UOM information before calling the Directed Putaway function. |
Container ID and Container Sequence |
To assign the item to a container, enter a container ID. If you are assigning the item to an existing container, leave the Container Sequence field blank. If the business unit allows automatic generation of container IDs, you can assign multiple items to the same new container by defining the container ID as NEXT and entering a container sequence number. The system puts all items with the same container sequence into the same container. |
Lot ID and Lot Creation Date |
If the item is lot-controlled, enter the lot ID and, if necessary, the lot creation date. The default lot creation date is today's date. Note: If the business unit does not allow the automatic addition of new lots, you must create the new lot before entering a lot ID here. |
Config Code |
If the item is configured, enter a configuration code. When you enter an existing lot ID for a configured item, the configuration code appears automatically. |
Serial ID |
Enter a value if the item is serial-controlled. Each item must have a unique serial identifier. Note: The business unit defaults that you established on the Inventory Display Options page govern whether lot, serial, and configuration fields appear upon entry to this page. Any fields for which the default is Yes always appear. Any fields for which the default is No appear when you save or refresh the page, and only if they apply to the item being put away. |
Lot Expiration Date |
Enter the date the lot expires. |
Quantity and Base Quantity |
Enter the received quantity and select a stocking UOM. If the stocking UOM differs from the standard UOM, the system automatically converts the entered quantity to the standard UOM and displays the base quantity. For serial-controlled items, the quantity must be 1 and the stocking UOM must be the same as the standard UOM. |
Total Unit Cost |
Enter the cost per unit if the item uses actual or average cost; otherwise, leave the field at 0. |
Use Current Cost |
Selecting the Use Current Costs check box overrides the entries on the Edit Costs page. |
Edit Costs |
Select to access the Edit Cost page, where you can enter the unit costs by cost element. This link cannot be used if you have selected the Use Current Costs check box. |
Stock Type |
Reflects the type of item being put away. Required if the item is non-owned. |
Non-Owned |
Select if the item is not owned by the business unit and is not consigned. The system does not cost the putaway transaction for a non-owned item. In addition, if the item uses average cost, this transaction does not affect the average cost calculations. |
ChartField Overrides |
Click to access the ChartField Overrides page, where you can override the credit accounting information for the putaway line. |
PO Information |
Click to access the Express Putaway - PO Information page if any of the items that you are entering require specific PO tracking information. |
Line Defaults |
Click to access the Express Putaway - Putaway Line Defaults page if you are entering multiple items on this page that share putaway information. |
Use the Express Putaway - PO Information page (PUTAWAY_ENTRY2_INV) to use if the items being put away require specific tracking information, such as PO information.
Navigation:
Click the PO Information link on the Express Putaway page.
This example illustrates the fields and controls on the Express Putaway - PO Information page. You can find definitions for the fields and controls later on this page.

Entering information about the PO is optional and is informational only. The purchase order, PO date, supplier, and purchase lot information should come from the receiving paperwork.
Use the Express Putaway - Putaway Line Defaults page (PUTAWAY_ENTRY3_INV) to define information common to all of the putaway lines that you are processing.
Navigation:
Click the Line Defaults link on the Express Putaway page.
This example illustrates the fields and controls on the Express Putaway - Putaway Line Defaults page. You can find definitions for the fields and controls later on this page.
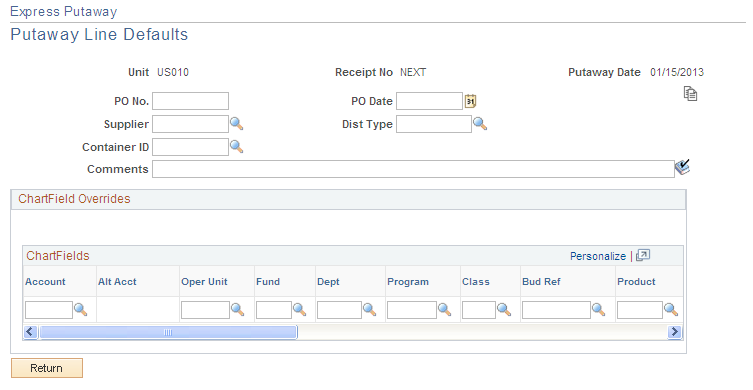
Putaway Line Defaults
If you enter information here during entry of the first putaway line or after entering other items on the Express Putaway page, click the Copy button to copy the default information to the current or already existing express putaway lines. The copied information overwrites any line-specific information that you have defined. The system only copies defaults with specified values to the lines. If you do not click this button, the changes that you make here apply only to newly created lines.
ChartField Overrides
Enter default credit accounting information for the express putaway items.