- Diameter Signaling Router Diameter SDS Software Upgrade Guide
- Primary or DR SDS NOAM Upgrade Execution
- Perform Health Check (Primary or DR NOAM Pre- upgrade)
8.1 Perform Health Check (Primary or DR NOAM Pre- upgrade)
This procedure is part of software upgrade preparation and is used to determine
the health and status of the entire SDS network and servers. This may have run multiple
times, but must also be run at least once within the period of 24-36 hours before
starting a maintenance window.
- Run SDS Health Check procedures as specified in Health Check Procedures
- Upgrade the Primary SDS NOAM, this procedure is used to upgrade the SDS NOAM servers.
Note:
The order of the upgrade for the primary NOAM NE and DR NOAM NE needs to be followed as shown in Table 3-7. See section Primary SDS Site or DR SDS Site Upgrade Execution Overview for more details before proceeding.- Log in to the SDS NOAM GUI, use the VIP address to access the primary SDS NOAM GUI as described in Access the OAM GUI Using the VIP (NOAM/SOAM).
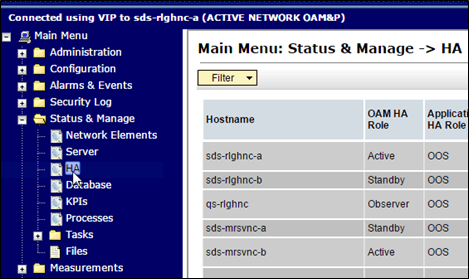
- In the Primary SDS NOAM VIP GUI, expand Status & Manage click HA
- Click Filter
Figure 8-1 Filter
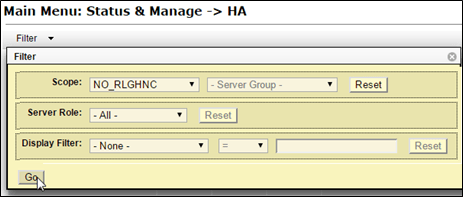
- Locate the primary SDS NOAM NE, using the information provided in section Logins, Passwords, and Site Information, select the primary SDS NOAM Network Element from the Scope field. Click Go.
Figure 8-2 Scope
- Identify servers and record server names, identify each server by Host name, Server Role, and OAM HA Role and record the name of each server.
Figure 8-3 Identify Server
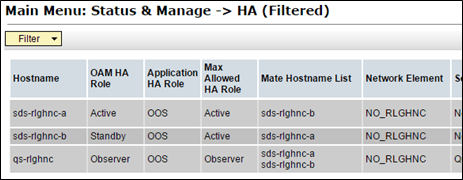 Note the following information:
- Active Primary SDS NOAM.
- Standby Primary SDS NOAM.
- Primary Query Server (if equipped).
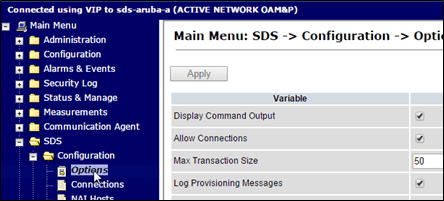
- Expand SDS select Configuration click Options.
Figure 8-4 Options
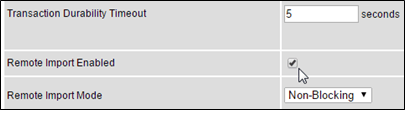
- Locate the Remote Import Enabled check box and record the pre-upgrade state.
Figure 8-5 Remote Import Enabled
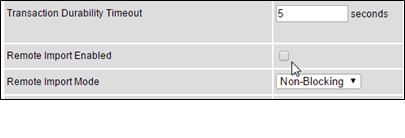
- Un-check the Remote Import Enabled check box if it was checked previously.
Figure 8-6 Uncheck
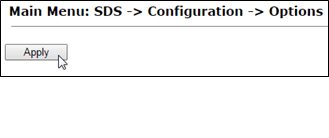
- Apply the changes and verify the same.
Figure 8-7 Apply
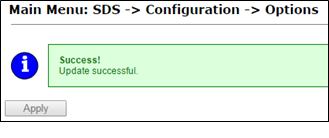
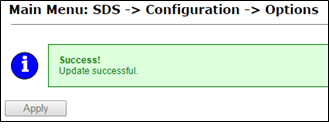
- Verify the successful response in the banner.
Figure 8-8 Success Banner
- Upgrade the Standby Primary SDS NOAM server, upgrade the Standby Primary SDS NOAM server (as identified and recorded in step 5 of this procedure) using Upgrade Server Administration on SDS 9.0.
- Access the active primary SDS NOAM, use the VIP address to log into the active primary SDS NOAM with the
admusraccount.sds-rlghnc-a login: admusr Password: <admusr_password> *** TRUNCATED OUTPUT *** RELEASE=6.4 RUNID=00 VPATH=/var/TKLC/rundb:/usr/TKLC/appworks:/usr/TKLC/awpcommon:/usr/TKLC/comagent-gui:/usr/TKLC/comagent-gui:/usr/TKLC/comagent:/usr/TKLC/sds PRODPATH=/opt/comcol/prod RUNID=00 - 1. Verify if the DbReplication status is Active for the Standby Primary SDS NOAM and Query Server, if equipped.
[admusr@sds-rlghnc-a ~]$ sudo irepstat -w -- Policy 0 ActStb [DbReplication] AA To sds-rlghnc-b Active 0 0.25 1%R 0.05%cpu 47B/s AA To qs-rlghnc Active 0 0.25 1%R 0.05%cpu 56B/s AA To sds-mrsvnc-a Active 0 0.50 1%R 0.04%cpu 47B/s AB To kauai-sds-SO-b Active 0 0.50 1%R 0.04%cpu 63B/s AB To florence-sds-SO-a Active 0 0.51 1%R 0.03%cpu 65B/s AB To turks-sds-SO-b Active 0 0.50 1%R 0.04%cpu 65B/s irepstat ( 8 lines) (h)elp - 2. If a DbReplication status is received as Audit, then repeat the command until Active status is returned.
Note:
Do not proceed until the status is Active. Check Replication is showing as Active for the standby primary SDS NOAM, Query server, active DR SDS NOAM, and standby DR SDS NOAM (if equipped). - Repeat the step until the status is Active for all the mentioned servers.
Note:
If a DbReplication status is received as Audit or some other value for these servers, repeat this step until a status of Active is returned. Servers are:- Standby Primary SDS NOAM
- Query Server
- Active DR SDS NOAM
- Standby DR SDS NOAM
Contact My Oracle Support for any assistance. - Exit the CLI prompt for the Active Primary SDS NOAM.
[admusr@sds-rlghnc-a filemgmt]$ exitlogout - Access the primary SDS NOAM GUI, use the VIP address to access the primary SDS NOAM GUI as described in Access the OAM GUI Using the VIP (NOAM/SOAM).
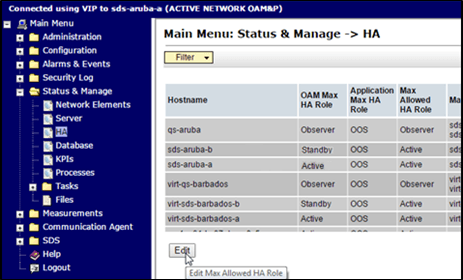
- In the Primary SDS NOAM VIP, edit the server. Expand Status & Manage click HA.
- Click Edit.
Figure 8-9 Edit Server
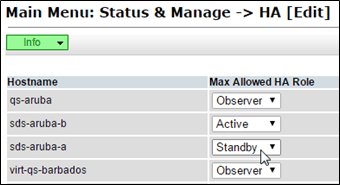
- Change Max Allowed HA Role status, select the Active Primary SDS NOAM server and change a Max Allowed HA Role value from Active to Standby.
Figure 8-10 Standby
 Click OK. The users GUI session ends as the active primary SDS server goes through HA fail over and becomes the standby server.
 - 3. If an automatic log out of the GUI does not happen, click Logout to log out of the SDS NOAM GUI.
Figure 8-11 Log out
- In the Primary SDS NOAM VIP (GUI), clear cached data. JavaScript libraries, images, and other objects are often modified in the upgrade. Browsers can sometimes cause GUI problems by holding on to the old objects in the built-in cache. To prevent these problems, always clear the browser cache before logging into an OAM GUI that has just been upgraded.
Follow this procedure:
- Simultaneously press and hold the Ctrl, Shift, and Delete keys (most Web browsers).
- Select the appropriate object types to delete from the cache (for example, Temporary Internet Files, Cache, or Cached images and files, so on). Other browsers may label these objects differently.
- Clear the cached data.
Note:
Do NOT proceed until the browser cache has been cleared. - Log in to the SDS NOAM GUI, use the VIP address to access the primary SDS NOAM GUI as described in Access the OAM GUI Using the VIP (NOAM/SOAM).
- In the Primary SDS NOAM VIP, edit the server. Expand Status & Manage click HA.
- Click Edit.
Figure 8-12 Edit Server

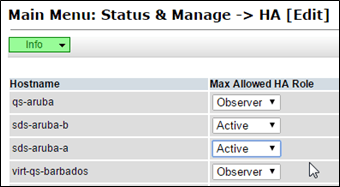
- Change Max Allowed HA Role status, select the Standby Primary SDS NOAM server and change a Max Allowed HA Role value from Standby to Active .
Figure 8-13 Active
 Click OK.
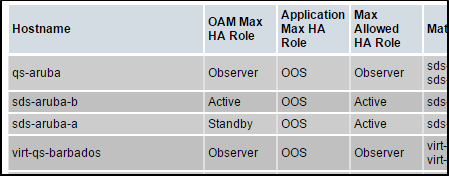
 - In the Primary SDS NOAM VIP, verify the change to Active state. Verify the Max Allowed HA Role value has been updated to Active for the Standby Primary SDS NOAM server.
Figure 8-14 Max Allowed HA Role
- If the server in topology shows as an Out of Service state, perform a CmHA restart, otherwise, proceed to the next step. Refer to Workaround to Resolve Server HA Failover Issue for more information.
Note:
You will see Out of Service state on the server on which CmHA restart is performed. Ignore this state and continue with the upgrade. - Upgrade the current Standby Primary SDS NOAM server (as identified and recorded in step 5 of this procedure) using Upgrade Server Administration on SDS 9.0.
- Upgrade the Primary Query server (as identified and recorded in step 5 of this procedure) using Upgrade Server Administration on SDS 9.0.
Note:
If the Query server status is not reported on the Status and Manage server screen, refer to Workaround to Fix DNS Issue for more details. - Verify status, perform a replication check as explained in step 13.
Note:
The replication link between the primary and secondary (DR-NO site) server is broken at this point until the DR-NO servers are upgraded completely. - Proceed to step 42 for remote import.
- In the Primary SDS NOAM VIP (CLI), log in using the VIP address, log into the Active Primary SDS NOAM with the
admusraccount.sds-rlghnc-a login: admusr Password: <admusr_password> *** TRUNCATED OUTPUT *** RELEASE=6.4 RUNID=00 VPATH=/var/TKLC/rundb:/usr/TKLC/appworks:/usr/TKLC/awpcommon:/usr/TKLC/comagent-gui:/usr/TKLC/comagent-gui:/usr/TKLC/comagent:/usr/TKLC/sds PRODPATH=/opt/comcol/prod RUNID=00 - Verify the DbReplication status is Active for the Standby Primary SDS NOAM, Query Server, Active DR SDS NOAM, and Standby NOAM servers (if equipped).
[admusr@sds-rlghnc-a ~]$ sudo irepstat -w -- Policy 0 ActStb [DbReplication] AA To sds-rlghnc-b Active 0 0.25 1%R 0.05%cpu 47B/s AA To qs-rlghnc Active 0 0.25 1%R 0.05%cpu 56B/s AA To sds-mrsvnc-a Active 0 0.50 1%R 0.04%cpu 47B/s AB To kauai-sds-SO-b Active 0 0.50 1%R 0.04%cpu 63B/s AB To florence-sds-SO-a Active 0 0.51 1%R 0.03%cpu 65B/s AB To turks-sds-SO-b Active 0 0.50 1%R 0.04%cpu 65B/s irepstat ( 8 lines) (h)elp - Repeat the step until the status is Active for all mentioned servers.
Note:
If a DbReplication status is received as Audit or some other value for these servers, repeat this step until a status of Active is returned. Servers are:- Standby Primary SDS NOAM
- Query Server
- Active DR SDS NOAM
- Standby DR SDS NOAM
Contact My Oracle Support for assistance.
- Exit the CLI for the Active Primary SDS NOAM.
[admusr@sds-rlghnc-a filemgmt]$ exitlogout - Verify the DbReplication status is Active for the Standby Primary SDS NOAM, Query Server, DR Site Active, and Standby NOAM servers (if equipped).
- Repeat step 13 to step 16 to verify irepstat is showing Active.
- Ensure the replication is Active for the Standby Primary SDS NOAM, Query Server, Active DR SDS NOAM, and Standby DR SDS NOAM servers (if equipped).
- If the server in topology shows as an Out of Service state, perform a CmHA restart; otherwise, proceed to the next step. Refer Workaround to Resolve Server HA Failover Issue for more information.
Note:
You will see Out of Service state on the server on which CmHA restart is performed. Ignore this state and continue with the upgrade. - In the Primary SDS NOAM VIP, verify status. Perform a replication check as explained in step 34.
Note:
The replication link between the primary and secondary (DR-NO site) server is broken at this point until the DR-NO servers are upgraded completely. - In the Primary SDS NOAM VIP, re-enable provisioning Remote Import (if applicable). Re-enable the Remote Import Enabled check box if the check box recorded in step 7 of this procedure was Checked. If the Remote Import Enabled check box recorded in step 7 of this procedure was not checked, then this procedure is complete.
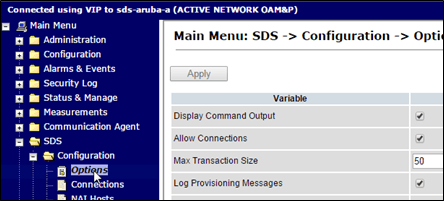
- Expand SDS select Configuration click Options
Figure 8-15 Options
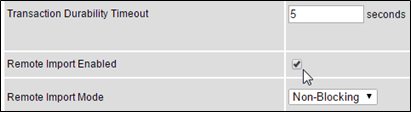
- Locate the Remote Import Enabled check box and check mark it.
Figure 8-16 Remote Import Enabled
- In the Primary SDS NOAM VIP, apply change and verify. Click Apply. Verify the successful response in the banner.
Figure 8-17 Success Banner
