Using the Shipping/Issues Component
Use the Shipping/Issues component to manually assign demand lines to shipping IDs, enter or change shipping information, and set the demand lines to the shipped state. If a shipment is canceled, this component can also be used to unship demand lines, that have not yet been depleted. When you save the Shipping/Issues component, your entries are applied directly to the inventory demand tables. In addition, the Shipping/Issues component will:
Assign a unique shipping ID to each shipment that you confirm in this component.
When you add a new shipment, you can either enter a shipping ID or accept the default assignment of NEXT. If you accept NEXT, PeopleSoft Inventory automatically generates a new shipping ID.
(Optional) Create delivery IDs when the delivery management feature is enabled. Deliveries are optional; however, a single delivery is always created for each shipping ID in order to hold any manual freight charges and miscellaneous charges that the user enters.
(Optional) Perform a manifest freight action when using the auto-process freight option.
Create any backorders or cancel backorders based on the Backorder Rule for shipping on the demand line.
If no rule exists, the Cancel Backorder check box on the demand line is used.
(Optional) Check for order holds on any sales orders based on your setup in the Order Management Definition-Holds Processing page.
(Optional) Launch the Deplete On Hand Qty process from this component to set the demand lines to the depleted state.
The Auto Process at Save check box on the Fulfillment Engine Options page (business unit or SetID level) determines if the Deplete On Hand Qty process is launched when you save this component; otherwise, you can use the Run Process link on component.
Note: If the Deplete On Hand Qty process is defined to launch the direct invoicing job or the auto-putaway job, then the Auto Process at Save option launches these jobs from the Shipping/Issues component.
(Optional) Produce warnings at shipping time if the information on the previously printed shipping documents does not match the current shipping information.
Using the Message Dashboard functionality, the system compares a number of fields based on the specific shipping document. The comparison includes; item ID, quantity shipped, ship ID and line, carrier ID, ship via, ship to customer and address, export flag, and scheduled shipment date and time. For the Shipping/Issues Component, an online warning displays in addition to a warning in the Message Dashboard. The system can be set up to generate an email or worklist from the Message Dashboard.
(Optional) For the selected demand lines, change the value in the Defer Depletions field based on your entry in the Defer Depletions on Shipment field on the Shipping/Issues - Order Summary page. For more information in the Defer Depletions feature, go to the "Shipping Inventory" topic, "Delaying the Billing and Costing of Inventory Shipments" section.
See Delaying the Billing and Costing of Inventory Shipments.
|
Page Name |
Definition Name |
Usage |
|---|---|---|
|
Shipping/Issues - Order Summary Page |
SHIPPING6_INV |
Confirm that orders are ready for shipment. |
|
SHIP_SEL_INV_SP |
Select orders to ship. |
|
|
SHIPPING8_INV_SP |
Override shipment field values for the demand lines included in an order. This page provides an efficient method of changing information for multiple demand lines at once. For single-shipment restricted orders, this page is the only place in which you can modify the shipment fields. |
|
|
SHIPPING16_INV_SP |
Mark individual demand lines for shipment. For orders containing many demand lines, use this page to gain rapid access to order details for a specific demand line. |
|
|
SHIPPING5_INV_SP |
Select shipping containers to include in a shipment. The system automatically adds all orders associated with the containers to the shipping ID. |
|
|
SHIP_INV_DFT_SP |
Define default pro numbers, shipping dates, and shipping times. |
|
|
Shipping/Issues - Shipping Comments Page |
SHIP_COMMENTS_SP |
Enter any comments for the shipment. These notes are for informational purposes only and do not appear on any other page or printed on any reports. |
|
SHIP_MISC_CHRG_SP |
Enter any miscellaneous charges (for example, pallet or packing charges) for orders originating in PeopleSoft Order Management. |
|
|
Shipping/Issues - Order Details PageShipping/Issues - Order Details Page |
SHIPPING7_INV_SP |
Modify shipment quantity and transportation information for a particular demand line. |
|
SHIPPING10_INV_SP |
Enter picking exceptions or new picking feedback at shipment time. You can only change picking information here after completion of the Picking Confirmation process. |
|
|
Shipping/Issues - Export Proforma Comments Page |
SHIPPING17_INV_SP |
Enter any notes that should print on the Export Proforma report. |
|
SHIPPING9_INV_SP |
View product kit information for a shipment or enter the actual kit quantity shipped. |
|
|
SHIPPING13_INV_SP |
Generate shipping serial ID numbers for the items in a shipment. |
|
|
AUTO_SERIAL_WRK |
Generate shipping serial ID numbers automatically. |
|
|
Shipping/Issues - Additional Information Page |
CP_CFGCDE_SEC_PNL5 |
View configuration information items in a shipment. |
|
LOAD_OPT_INV_SP |
Modify load information for the shipping ID. |
|
|
Load Capacity Inquiry Page |
LOAD_INQ_SP |
View additional information about the selected shipment load by clicking the Load Details link on the Shipping/Issues - Order Defaults page. |
|
Order Address Page |
INV_ADDRESS |
Override address information. You can override the address for single shipments only at the order header level by clicking the Override Address link on the Shipping/Issues - Order Defaults or Shipping/Issues - Order Details page. |
|
Ship Container Hierarchy - Ship Container Inquiry Page |
SHIP_CNTR_INQ1_INV |
View orders or shipping IDs packed into shipping containers by clicking the Container link on the Shipping/Issues - Order Details page. |
Field or Control |
Description |
|---|---|
Ship Action |
The shipping action applies to different levels within an order, depending upon which page you're using.
Identify where the action is to be applied (order, demand line, or shipping container), by using the Select check box or Select All button, then select one of the following values:
|
Select or Selected |
Selects individual orders, demand lines, or shipping containers for shipping actions. |
Include in Ship ID |
Indicates that an order, demand line, or shipping container should be included in the current shipping ID. This field is for display only. |
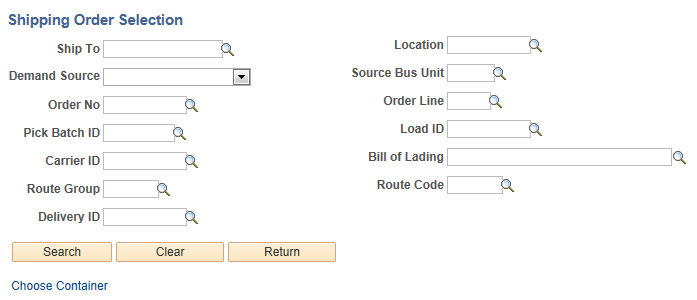
Use the Shipping/Issues - Shipping Order Selection page (SHIP_SEL_INV_SP) to select orders to ship.
Navigation:
. Click the Search link on the Shipping/Issues - Order Summary page.
This example illustrates the fields and controls on the Shipping/Issues-Shipping Order Selection page. You can find definitions for the fields and controls later on this page.
Field or Control |
Description |
|---|---|
|
Click the Print icon to print the Shipping Document report for the shipment. |
 (Print icon)
Delivery/Freight Controls group box
Field or Control |
Description |
|---|---|
Complete Delivery |
Select this check box to set the status of the delivery to Complete Delivery which indicates that all fulfillment steps for the delivery are complete and all demand lines in the delivery are ready to be depleted using the Deplete On Hand Qtys process. If the PeopleSoft Inventory business unit is using deliveries, the Deplete On Hand Qtys process only pick ups demand lines that are on a delivery with the Complete Delivery status. |
Commit Freight for Billing |
Select this check box to indicate that the freight on this delivery is ready to be processed by PeopleSoft Billing and by PeopleSoft Cost Management. |
Validate Delivery |
Select an option to validate the deliveries when this page is saved. The system confirms that the attributes of the delivery and the demand lines that are assigned to the delivery are still valid. The system looks for demand lines on the delivery that do not match the values in the delivery key fields defined on the Inventory Definition - Business Unit Options: Delivery Management page used to build a delivery. For example, if the carrier ID must be the same for all demand lines on the delivery but not all the demand lines have the same carrier ID, then the system produces an error. The system also recalculates the total weight and volume, total number of containers, and total number of packages. The options are:
|
Freight Option |
Select the freight calculation method:
|
Freight Type |
Enter the freight type code to be used by the external third-party freight system. Freight types are defined at the SetID level and used to derive the correct freight service definition to send with the outbound message to the third-party provider. |
See Understanding PeopleSoft Delivery Management and Freight Calculations.
Shipping Fields
Field or Control |
Description |
|---|---|
Ship Action |
Select one or more orders within the Order Summary group box and then enter a shipping action to be applied:
|
Defer Depletions on Shipment |
Select the value of Override to Y or Override to N to change the value of the Defer Depletions field on each demand line selected by this page. For more information in the Defer Depletions feature, go to the "Shipping Inventory" topic, "Delaying the Billing and Costing of Inventory Shipments" section. See Delaying the Billing and Costing of Inventory Shipments. |
Order Summary group box
Field or Control |
Description |
|---|---|
Select |
Selects individual orders for shipping actions. |
Include in Ship ID |
Indicates that an order is included in the current shipping ID. This field is for display only. |
Direct Invoicing |
Indicates that this sales order or intercompany transfer has been defined for direct invoicing. The system automatically creates an invoice for the order when the Deplete On Hand Qty process is launched. PeopleSoft Inventory sends accounting information to the PeopleSoft Billing business unit defined on the Inventory Definition-Business Unit Definition page or on the PeopleSoft Order Management Order Management Definition - Order Management Setup page. |
|
Click the Order Defaults icon to access the Order Defaults page where you can override shipment field values for the demand lines included in an order. |
|
Click the Ship Detail Summary icon to access the Shipping/Issues - Ship Details Summary page where you can to mark individual demand lines for shipment. |
Freight Amount |
Displays the current freight amount for a sales order from PeopleSoft Order Management. This amount appears in the Inventory business unit's base currency. |
Additional Freight Charge |
Enter any additional freight amounts to be added to the existing freight charge. This field applies only to sales order from PeopleSoft Order Management. A positive number is added to the current freight amount. A negative number is subtracted from the current freight amount. The additional freight charge can be greater than the current freight amount; however, it cannot drive the total freight charge negative. |
|
Click the Misc Charges icon to access the Shipping/Issues - Shipping Miscellaneous Charges page where you can enter additional charges to be applied to this order. |
 (Order Defaults icon)
 (Ship Detail Summary icon)
Links on the Shipping/Issues-Order Summary Page
Field or Control |
Description |
|---|---|
Run Process |
Click to run the Deplete On Hand Qty (Depletion) process. If the Inventory business unit has been defined to launch the direct invoicing or auto-putaway jobs when depletion is run and this order contains sales orders or interunit transfers, then selecting this link will take you to a Process Scheduler Request page to choose the jobs to run. Note: You can define the system to launch the Deplete On Hand Qty (Depletion) process, the Direct Invoicing jobs, and the Auto-Putaway job when you save this page. The user is not asked to choose which jobs to run. To use this method; first, select the Auto Process at Save check box for the Shipping/Issues row on the Fulfillment Engine Options page (business unit or SetID level), then turn on direct invoicing by selecting the Run Direct Invoicing check box on the Setup Fulfillment-Shipping page, and then turn on auto-putaway by selecting the Flag Items for Auto-Putaway and Run Auto-Putaway Job check boxes on the Inventory Definition-Business Unit Definition page. |
Manage Loads |
Click to access the Manage Loads (LOAD_CONS_INV) page to add or modify information for a load ID. |
Build Bill of Lading |
Click to access the Bill of Lading (BOL_HDR_INV) page to create or update a bill of lading. |
Delivery Workbench |
Click to access the Delivery Management Workbench where you can adjust the delivery linked to this shipping ID and calculate freight charges. |
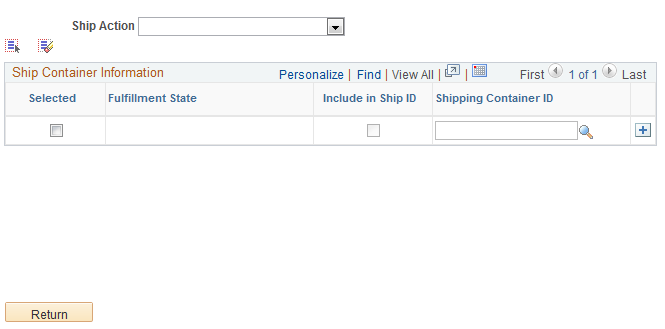
Use the Shipping/Issues - Ship Containers page (SHIPPING5_INV_SP) to select shipping containers to include in a shipment.
The system automatically adds all orders associated with the containers to the shipping ID.
Navigation:
Click the Choose Container link on the Shipping/Issues - Order Summary page or on the Shipping/Issues - Shipping Order Selection page.
This example illustrates the fields and controls on the Shipping/Issues - Ship Containers page. You can find definitions for the fields and controls later on this page.
For more field descriptions on these search criteria, see the Common Elements Used in This Topic
See Common Elements Used in Understanding Shipping Rules.
Note: This page uses a special processing mechanism called smart prompting. When you click the prompt button next to a field, the system transfers you to a smart prompting page. Unlike most PeopleSoft search pages, this prompting page takes into account any other search fields that you have already entered on the Shipping/Issues - Shipping Order Selection page and only displays orders consistent with the entered values. For example, suppose that you have specified a particular load ID and you are now searching for a valid order number, the prompting page displays only the orders assigned to that load ID. Click the prompt button for all fields to ensure that you do not enter conflicting search criteria.
Field or Control |
Description |
|---|---|
Unpacked Orders and Shipping Containers |
When you click Search, the system retrieves any unpacked orders and shipping containers matching the selection criteria. If you leave all the selection criteria blank, the system retrieves all orders and shipping containers in the business unit that are not already assigned to a shipping ID and are eligible for shipment. Select the check box next to each order or shipping container that you want to add to the shipping ID on the Shipping/Issues - Order Summary page. |
Return |
Select to return to the Shipping/Issues-Order Summary page. Any orders or containers that you have selected are placed on the Shipping/Issues-Order Summary page. |
Use the Shipping/Issues - Order Defaults page (SHIPPING8_INV_SP) to override shipment field values for the demand lines included in an order.
This page provides an efficient method of changing information for multiple demand lines at once.
Navigation:
Click the Order Defaults icon on the Shipping/Issues - Order Summary page.
This example illustrates the fields and controls on the Shipping/Issues-Order Defaults page. You can find definitions for the fields and controls later on this page.
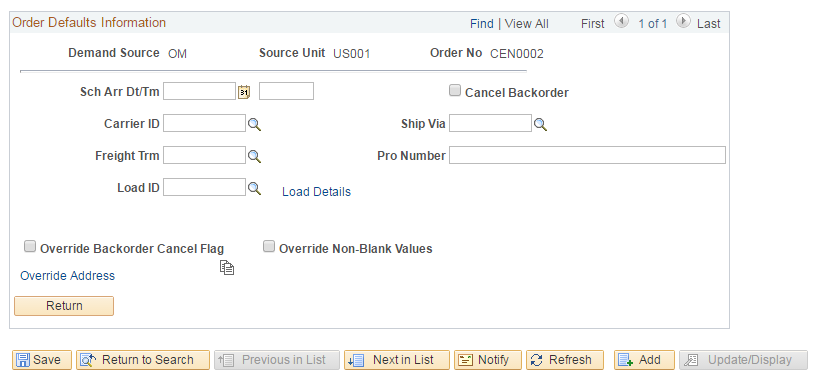
Use this page to override shipment field values for the demand lines included in an order. This page provides an efficient method of changing information for multiple demand lines at once.
For more field descriptions on these search criteria, see the Common Elements Used in This Chapter section.
See Common Elements Used in Understanding Shipping Rules.
Field or Control |
Description |
|---|---|
Override Backorder Cancel Flag |
Select to apply the cancel backorder setting to all order lines that appear on this page. Note: The cancel backorder check box, including this override, are not used if a Backorder Rule for shipping exists for the demand line. |
Override Non-Blank Values |
Select to override existing field values when copying the attributes that you modify here. This option does not appear for single-shipment restricted orders; it is assumed to be in effect for these orders. |
|
Click to apply the values entered on this page to all lines for the order. Unless you have elected to override non-blank values, PeopleSoft Inventory verifies that each field is blank before permitting the copy. You cannot copy values for order lines that have already been depleted or selected for Intrastat processing. Note: If you do not override non-blank values, the system applies the copy to a demand line only if: (1) the field to be copied is blank on the demand line, or (2) the field value on the demand line matches the original value of a field that you just changed here. |
 (Copy Values to Order Lines icon)
Note: If the order is designated as a single-shipment restricted order, the system automatically populates all fields on this page with the appropriate values.
Use the Shipping/Issues - Ship Details Summary page (SHIPPING16_INV_SP) to mark individual demand lines for shipment.
For orders containing many demand lines, use this page to gain rapid access to order details for a specific demand line.
Navigation:
Click the Ship Detail Summary icon on the Shipping/Issues - Order Summary page.
This example illustrates the fields and controls on the Shipping/Issues-Ship Details Summary page. You can find definitions for the fields and controls later on this page.
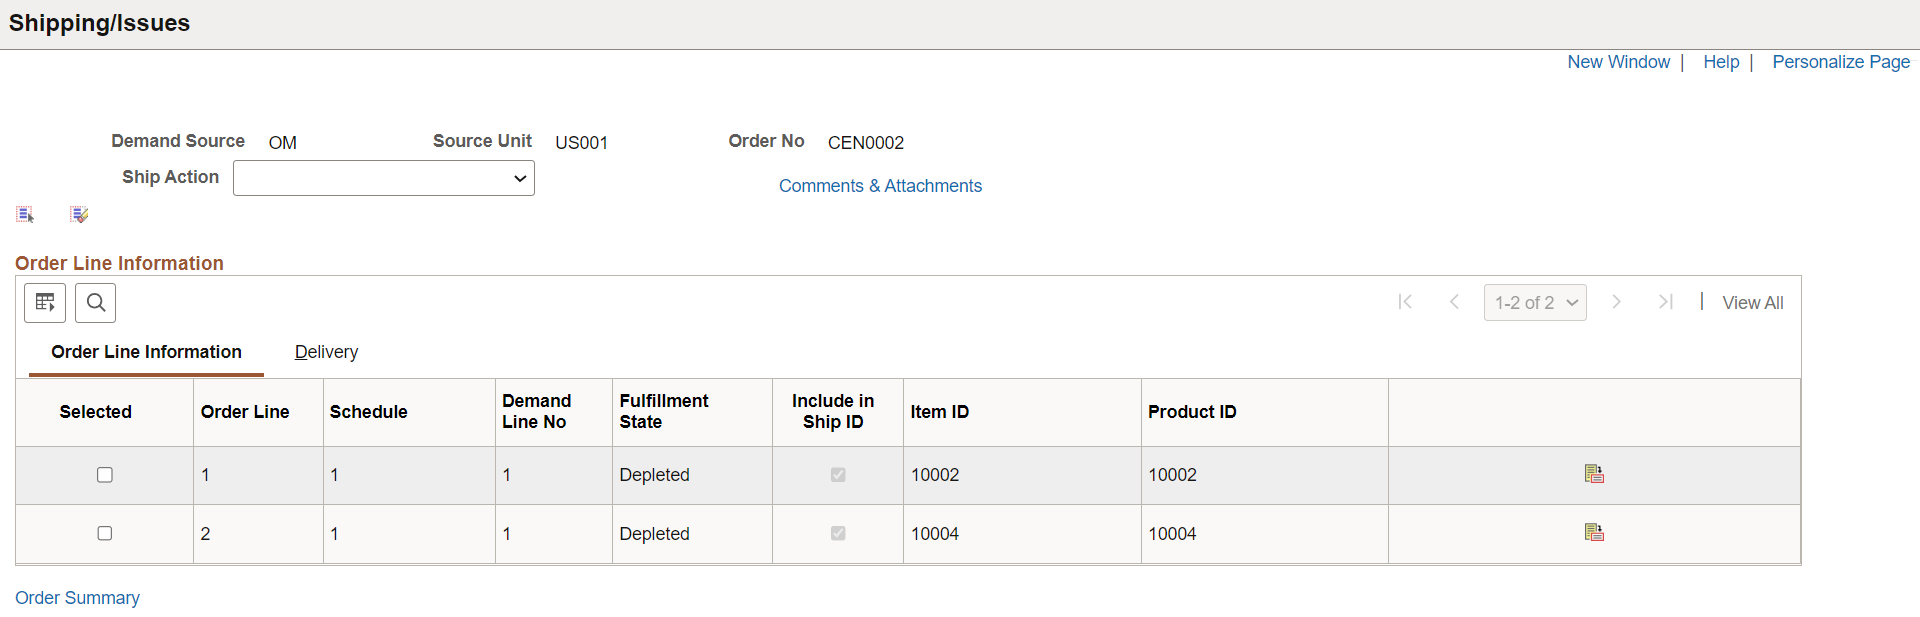
Use this page to mark individual demand lines for shipment. For orders containing many demand lines, this page enables you to ship specific demand line instead of the entire order.
For more field descriptions, see Common Elements Used in This Chapter.
See Common Elements Used in Understanding Shipping Rules.
Field or Control |
Description |
|---|---|
|
Click the Shipping Detail icon to access the Shipping Issues - Order Details page. |
|
Comments & Attachments |
Click to add or view the header level comments and attachments. For more details, see Comments & Attachments Page. Note: If the shipping is not Depleted, then user can add, view, and delete the comments and attachments on this page. If the shipping is Depleted, then user can only view the comments and attachments. |
 (Shipping Detail icon)
Use the Shipping/Issues - Ship Containers page (SHIPPING5_INV_SP) to select shipping containers to include in a shipment.
Navigation:
Click the Choose Container link on the Shipping/Issues - Order Summary page or on the Shipping/Issues - Shipping Order Selection page.
This example illustrates the fields and controls on the Shipping/Issues-Ship Containers page. You can find definitions for the fields and controls later on this page.
As you select shipping containers, PeopleSoft Inventory automatically adds all orders in the shipping container hierarchy to the shipping ID. When you save the Shipping/Issues component, the system validates all included shipping containers to ensure proper shipping. These validations include:
The sum of the shipped quantities from the demand lines included in this shipping ID must be equal to the packed quantity for the selected shipping containers.
All demand lines associated with the shipping containers must be identified with the same information as the shipping containers.
For example, suppose that only the Include in Ship ID check box is selected for the shipping container, all demand lines in the shipping container hierarchy must also have only this check box selected. If any of the demand lines differ, the system issues an error message.
If errors are found during the validation, an error message and a suggested resolution appear. Once you resolve the errors, you can repeat the validation by saving the Shipping/Issues component again.
Note: You cannot save or ship the current shipping ID until you resolve all errors in the shipping container information.
For more field descriptions, see Common Elements Used in This Section.
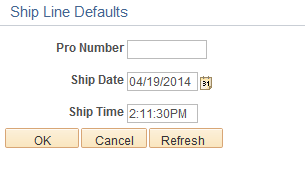
Use the Shipping/Issues - Ship Line Defaults page (SHIP_INV_DFT_SP) to define default pro numbers, shipping dates, and shipping times.
Navigation:
Click the Default Shipment Fields link on the Shipping/Issues - Order Summary page.
This example illustrates the fields and controls on the Shipping/Issues-Ship Line Defaults page. You can find definitions for the fields and controls later on this page.
Field or Control |
Description |
|---|---|
Pro Number |
Any demand line added to the shipping ID that has not already been assigned a pro number inherits this value. You can modify the pro number for an order on the Shipping/Issues - Order Summary page or for an individual line on the Shipping/Issues - Order Details page. |
Ship Date and Ship Time |
The default values are the current date and time. Any new demand lines added to the shipping ID and identified as shipped inherit these values. If the Verify Ship Date and Verify Ship Time check boxes have been selected on the Setup Fulfillment component, then the system does not allow you to ship until the scheduled shipment date and time on the order are less than or equal to the current date and time. If the Ship Prior to Schedule Date check box is selected on the order, then the early ship date and early ship time would also be used to determine when shipping was allowed. |
Note: The defaults that you define here apply only to newly added orders in the shipping ID; the values for already included or shipped orders do not change.
Use the Shipping/Issues - Shipping Miscellaneous Charges page (SHIP_MISC_CHRG_SP) to enter any miscellaneous charges (for example, pallet or packing charges) for orders originating in PeopleSoft Order Management.
Navigation:
Click the Miscellaneous Charges icon on the Shipping/Issues - Order Summary page.
This example illustrates the fields and controls on the Shipping/Issues-Shipping Miscellaneous Charges page. You can find definitions for the fields and controls later on this page.
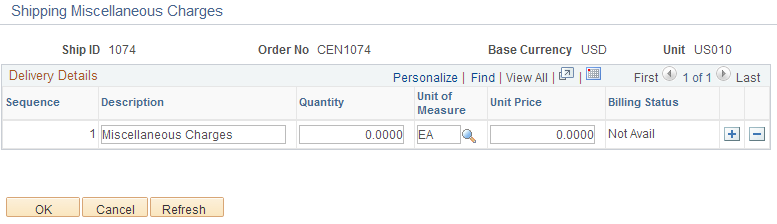
The description that you enter here appears as a bill line on the PeopleSoft Billing invoice.
Use the Shipping/Issues - Order Details page (SHIPPING7_INV_SP) to modify shipment quantity and transportation information for a particular demand line.
Navigation:
Click the Shipping Detail icon on the Shipping/Issues - Ship Details Summary page.
This example illustrates the fields and controls on the Shipping/Issues-Order Details page. You can find definitions for the fields and controls later on this page.
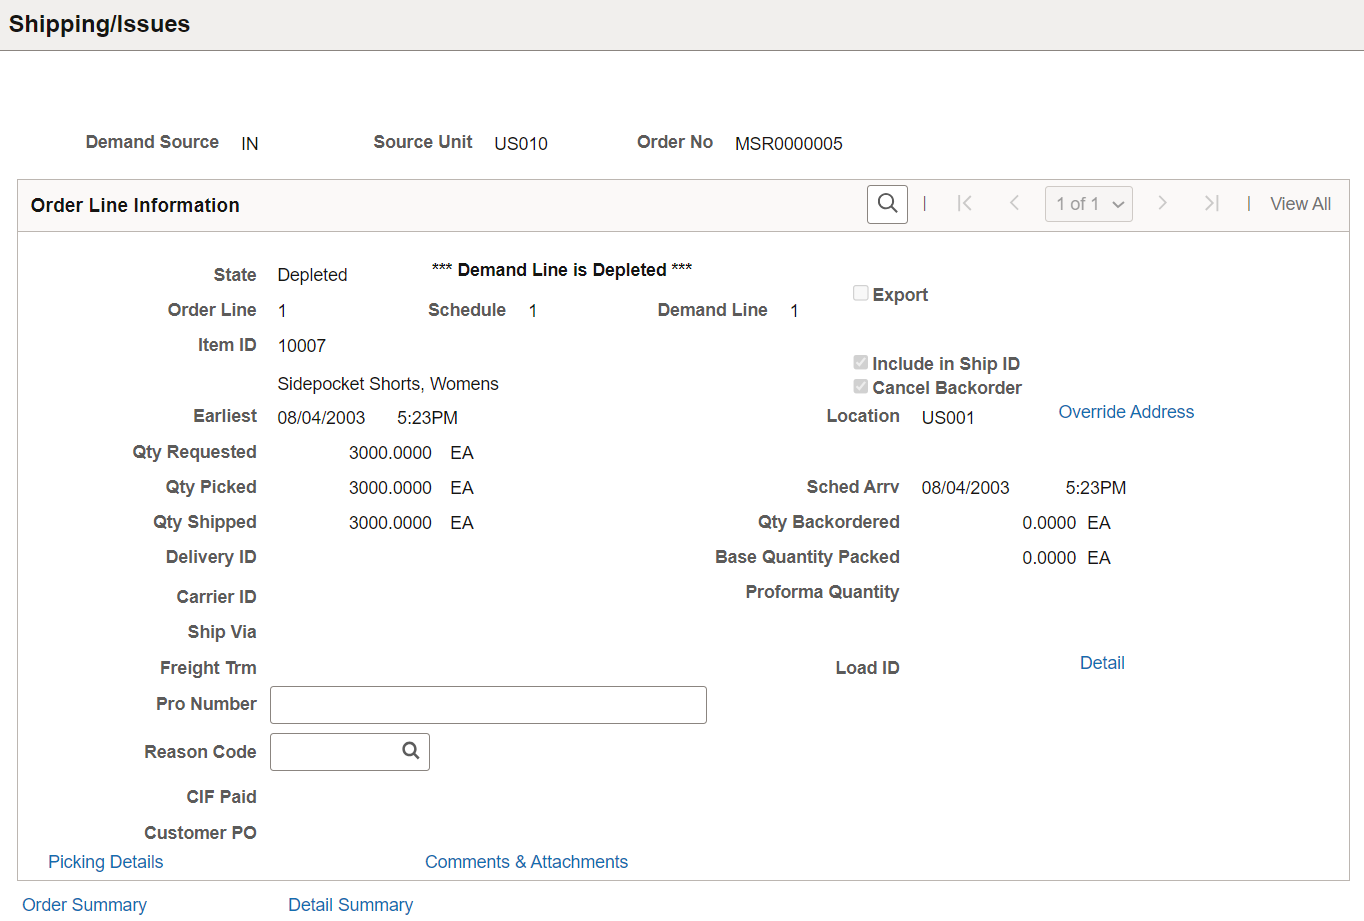
Note: Under certain circumstances, such as if the order line is part of a kit component or a single-shipment restricted order, has already been depleted, or has already been selected for Intrastat processing, most fields are display only. In such cases, a message indicating why certain fields are not available appears at the top of the page.
For more field descriptions, SeeCommon Elements Used in Understanding Shipping Rules
Field or Control |
Description |
|---|---|
Export |
Indicates that the order is an intercompany transfer order requiring export shipping documentation. |
Cancel Backorder |
Modify to change the cancel backorder check box for the demand line. Note: The cancel backorder check box, including this override, are not used if a Backorder Rule for shipping exists for the demand line. |
Earliest Ship Date |
Enter a date to ship the line before the designated scheduled ship date when using the verify ship date and time option. If the Verify Ship Date and Verify Ship Time check boxes have been selected on the Setup Fulfillment component, then the system does not allow you to ship until the scheduled shipment date and time on the order are less than or equal to the current date and time. If the Ship Prior to Schedule Date check box is selected on the order, then the Earliest Ship Date and Earliest Ship Time would also be used to determine when shipping was allowed. |
Sched Arrv (scheduled arrival) |
For interunit transfers, PeopleSoft Inventory calculates these values by adding the scheduled ship date and the in-transit time required for the ship via. If the scheduled ship date changes, you can adjust the scheduled arrival date manually. |
Qty Shipped |
Reflects the actual shipment quantity. This field is automatically populated and unavailable for entry under the following circumstances:
|
|
Comments & Attachments |
Click to add or view the line level comments and attachments. For more details, see Comments & Attachments Page. Note: If the shipping is not Depleted, then user can add, view, and delete the comments and attachments on this page. If the shipping is Depleted, then user can only view the comments and attachments. |
The Intrastat Interunit Returns and Replacement fields are only available for Intrastat interunit transfers. If both the source and destination business units are members of the European Union and require Intrastat reporting, identify the interunit receipt as a replacement or a return. Your selections populate the Receipt Line page when the destination business unit receives the transfer order.
Field or Control |
Description |
|---|---|
Intrastat InterUnit Returns |
The interunit or intercompany transfer contains goods that were previously sent to another business unit but are now being returned. The transfer is reported on the Intrastat return with a nature of transaction code indicating that it is a return. (If you clear this option, the transfer is a normal transfer and is reported on the intrastat return with a nature of transaction code indicating that it is a purchase. If you select this option, the Replacement field value is NA (not applicable). A transfer can be a return or a replacement, but not both. |
Replacement |
This field works in conjunction with the Intrastat InterUnit Returns field. Values are: NA(not applicable): The interunit transfer is a normal transfer order or a return. This is the default value when the Intrastat InterUnit Returns option is selected. RN (replacement of goods not returned): The transfer replaces an order that had been previously received but was scrapped or otherwise disposed of. The transfer is reported on the intrastat return with a nature of transaction code indicating that it is a replacement of goods that have not been returned. RR (replacement of returned goods): The transfer replaces an order that was returned to the source business unit. The transfer is reported on the intrastat return with a nature of transaction code indicating that it is a replacement of goods that have been returned. |
Load ID |
If you specify a load, the system populates the Carrier ID and Ship Via fields with the associated default values. If you enter these values manually, enter a valid combination of carrier, ship via, and load. |
Route Code and Stop No stop number |
When you change a route assignment on this page, PeopleSoft Inventory does not validate the new route. In addition, if you modify either the carrier ID or the ship via, any existing route assignment must be valid for the ship via and carrier selection. If the combination of carrier, ship via, and route is not valid, the system issues an error and prevents you from saving the page. |
Freight Charge Override |
This field is not used. |
Freight Charge Method |
Determines how the freight charges are allocated from the delivery-level to the sales orders within the delivery. |
CIF Paid (cost/insurance/freight paid by) |
PeopleSoft Order Management's OMBILL multiprocess job uses this value to determine whether freight charges should be included on sales order invoices. |
Customer PO (customer purchase order), Customer Contact, Int'l Prefix (international prefix), Phone, and Ext (extension) |
If the demand line belongs to a PeopleSoft Order Management sales order, you can update customer fields here, but the new information does not transfer to Order Management. Note: You must use the Order Entry Form component to update demand lines originating from a sales order. |
Note: If you have set up ad hoc replenishment for the business unit or for the item, the online shipping process creates an ad hoc replenishment request when a backorder occurs. If the business unit requires closure-calendar validation and processing for receiving activities, as defined on the Closure Calendar page, and if the calculated required date for the requisition falls on a closure date, the system selects the first valid previous date for the required date. It then takes this new required date and adds the number of replenishment lead days to arrive at the expected date. If this calculation encounters a closure date, the system selects the first valid future date for the expected date. Therefore, the lead days include only open business days.
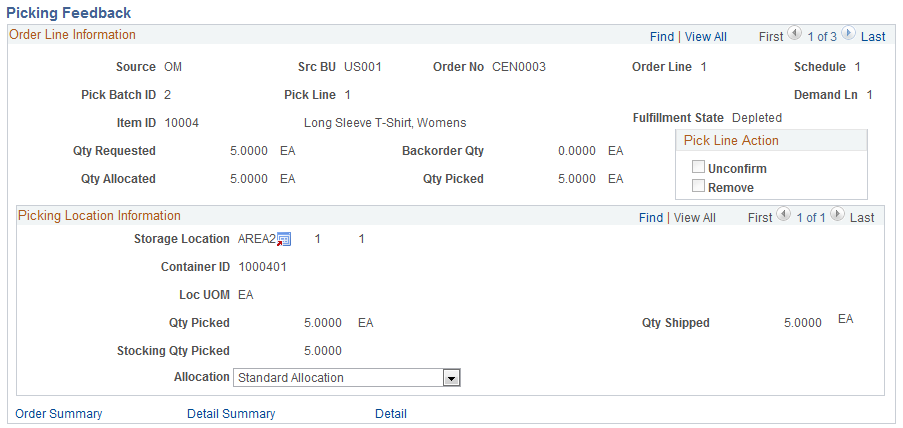
Use the Shipping/Issues - Picking Feedback page (SHIPPING10_INV_SP) to enter picking exceptions or new picking feedback at shipment time.
Navigation:
Click the Picking Details link on the Shipping/Issues - Order Details page.
This example illustrates the fields and controls on the Shipping/Issues-Picking Feedback page. You can find definitions for the fields and controls later on this page.
Field or Control |
Description |
|---|---|
Pick Line Action |
Select a pick line action. The options are:
|
Note: The Unconfirm and Remove options are only available for demand lines that have not been depleted or identified as shipped. In addition, if stock has been assigned to a shipping container or a ship serial ID, you must cancel this association before unpicking the demand line.
Picking Location Information Group Box
In the Picking Location Information group box, the system displays either the material storage location and associated location unit of measure or the container ID selected by the picking plan.
If you actually picked the stock from a different location, delete the old picking line and enter a new line. PeopleSoft Inventory returns the stock to the original storage location and removes it from the new one. If you want to enter a new location for an order line that does not permit overpicking, you must either set the quantity picked to 0 or delete the current row and insert a new one.
Note: The business unit's default display options determine how many storage location levels appear for new rows. If you are entering a storage location that requires additional levels, enter the storage area, then refresh the page to display the remaining levels for that area.
Field or Control |
Description |
|---|---|
Qty Picked |
Adjust the quantity picked as necessary, in the ordering UOM. If the demand line is identified as shipped, this field is not available for entry. |
Stocking Qty Picked |
Enter the stocking quantity picked if the stocking and ordering units of measure differ. If the demand line is identified as shipped, this field is not available for entry. |
Allocation |
Displays the type of allocation on this demand line. The options are:
|
Qty Shipped |
Enter the correct quantity shipped. If you enter a shipped quantity greater than the picked quantity, an error message appears. This field is available only if the demand line has been identified as shipped and only if partial shipments are permitted. |
Short Ship Opt(short shipment option) |
If you are short shipping, select an option in this field to determine what to do with the undershipped quantity. If partial shipments are permitted, you can short ship. Unless you have a backorder rule for shipping that cancels backorders or, if no rule, you have selected the Cancel Backorder check box for the demand line, PeopleSoft Inventory automatically creates a backorder for the under-shipped quantity. The Short Ship Options are:
|
Detail |
Select this link to access the Shipping/Issues - Order Details page. |
Note: If you have set up ad hoc replenishment for the business unit or for the item, the online shipping process creates an ad hoc replenishment request when a backorder occurs. If the business unit requires closure calendar validation and processing for receiving activities, as defined on the Closure Calendar page, and if the calculated required date for the requisition falls on a closure date, the system selects the first valid previous date for the required date. It then takes this new required date and adds the number of replenishment lead days to arrive at the expected date. If this calculation encounters a closure date, the system selects the first valid future date for the expected date. Therefore, the lead days include only open business days.
Use the Shipping/Issues - Kit Definition page (SHIPPING9_INV_SP) to view product kit information for a shipment or enter the actual kit quantity shipped.
Navigation:
Click the Product Kit Detail link on the Shipping/Issues - Order Details page.
Field or Control |
Description |
|---|---|
Maximum Kit Quantity |
PeopleSoft Inventory determines the maximum kit quantity that can be shipped for a component by dividing the quantity picked for that component by the quantity per kit. The component with the least quantity available to ship determines the maximum kit quantity that can be shipped. |
Kit Quantity Shipped |
PeopleSoft Inventory automatically calculates the shipment quantities for the component pieces of the product kit and updates the Qty Shipped field on the Shipping/Issues - Order Details page. If the kit was shipped previously, this field is populated with the quantity actually shipped. |
Opt (optional) |
Demand lines that are optional kit components require special processing under the following circumstances:
If an optional component is not available or is only partially available, PeopleSoft Inventory ships as much as possible and backorders the remaining quantity. The unavailability of an optional component does not keep the required parts of the kit from shipping. If, however, there is insufficient quantity of a required component to make a full kit (or if no quantity was picked), the system sets the maximum kit quantity to 0 and issues an error message, preventing you from shipping any of the kit component's detail lines. |
Note: Changing either the shipped quantity or the picked quantity for any demand line that is part of a kit automatically updates all other component demand lines and all quantity information on this page. In addition, changing the picked quantity prompts the system to recalculate the maximum kit quantity. If you short ship a kit, saving the Shipping/Issues component prompts the system to update the kit definition and reduce the maximum kit quantity to the quantity actually shipped.
Use the Shipping/Issues - Ship Serial page (SHIPPING13_INV_SP) to generate shipping serial ID numbers for the items in a shipment.
Navigation:
Click the Enter Serial IDs link on the Shipping/Issues - Order Details page.
Field or Control |
Description |
|---|---|
Request Number |
Indicate how many serial numbers should be generated automatically by the Rapid Serial Numbers page. The default value is either the quantity that you are shipping or (if the demand line has not been identified as shipped) the quantity picked, expressed in the base UOM. |
Serial ID |
Use this field to assign shipping serial IDs manually. For lot-controlled items, you can associate the serial ID with a lot ID. The system verifies that the ratio of shipping serial numbers to lot IDs is correct. For example, if 10 items were picked from lot A and 15 items were picked from lot B, the system ensures that 10 shipping serial ID numbers are associated with lot A and 15 shipping serial ID numbers are associated with lot B. |
Use the Shipping/Issues - Rapid Serial Numbers page (AUTO_SERIAL_WRK) to generate shipping serial ID numbers automatically.
Navigation:
Click the Rapid Data Entry button on the Shipping/Issues - Ship Serial page.
Field or Control |
Description |
|---|---|
Serial Number Count |
The request number entered on the Ship Serial page. |
Serial Number Prefix |
Enter a prefix to be attached to each shipping serial ID. |
Multiplier |
Indicate the size of any gaps that you want between serial numbers. For example, a multiplier of 5 creates the serial numbers 10, 15, 20, and so forth. |
Serial Number Length |
Enter the maximum length permitted for the shipping serial ID. |
Start Number |
Indicate what number to start with when generating shipping serial IDs. For example, suppose that you start at 100 with a multiplier of 5, the first three serial IDs are 100, 105, and 110. |
Zero Pad |
Select to place zeros at the beginning of the shipping serial ID whenever this number is shorter than the defined maximum length. |
Lot ID |
If you are working with lot-controlled items, you can associate all of the generated shipping serial ID numbers with a particular lot. You can generate only one batch of shipping serial ID numbers per lot ID, so if you want to associate shipping serial ID numbers with more than one lot, you must generate them in separate batches. The lot ID must be one of the lots actually picked for the line. |
Use the Load Assignment Options page (LOAD_OPT_INV_SP) to modify load information for the shipping ID.
Navigation:
Click the Assign Load link on the Shipping/Issues - Order Summary page.
This example illustrates the fields and controls on the Shipping/Issues-Load Assignment Options page. You can find definitions for the fields and controls later on this page.
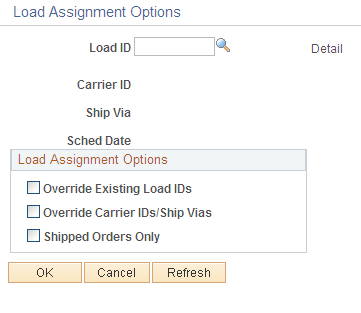
Modify load information for a shipping ID.
Field or Control |
Description |
|---|---|
Override Existing Load IDs |
Select to assign the load ID defined here to all selected order lines, including those for which a different load has already been assigned. |
Override Carrier IDs/Ship Vias |
Select to assign the carrier ID and ship via for the load ID defined here to all order lines. If you leave this option blank, the system does not copy the load ID to lines whose carrier and ship via values differ from those assigned to this load. |
Shipped Orders Only |
If you accessed this page from the Shipping/Issues - Order Summary page, select to apply load assignment changes only to orders with a Shipped status on the Order Summary page. |