Creating Lookups

A lookup associates values used by one application for a specific field to the values used by other applications for the same field. This provides the capability to map values across vocabularies or systems. For example, you can map country codes, city codes, currency codes, and so on.
Creating a Lookup

Create a lookup to map values between applications.

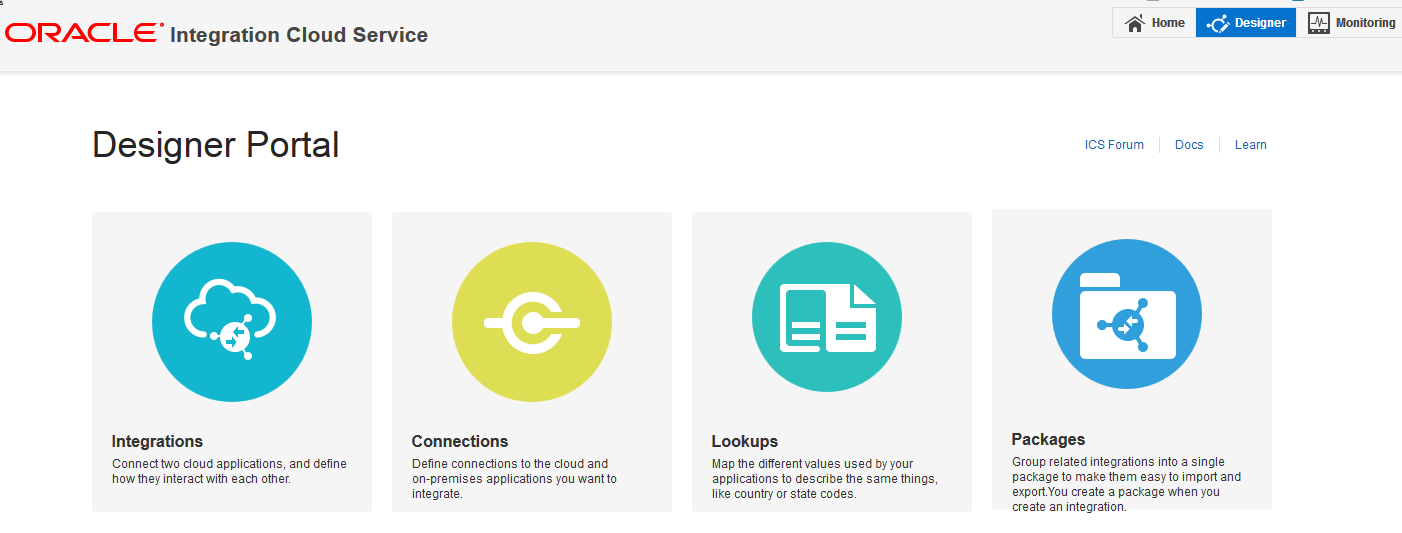
  1. From the Designer Portal, select Lookups.

  2. Click Create New Lookup.
    The New Lookup — Information dialog is displayed.
  3. Enter a name and optional description for the lookup.
  4. Click Create.

Adding Adapters to a Lookup

Add adapters to a lookup to map values between connections.

  1. Click Use Adapter 1.
    The Select Adapter dialog is displayed.
  2. Click Select to add an adapter.
    The adapter name is now the column heading.
  3. Click Use Adapter 2.
    The Select Adapter dialog is displayed.
  4. Click Select to add an adapter.
    The adapter name is now the column heading.
  5. Repeat to add more adapters to the lookup.

Adding Values to a Lookup

Map values from one adapter to another.

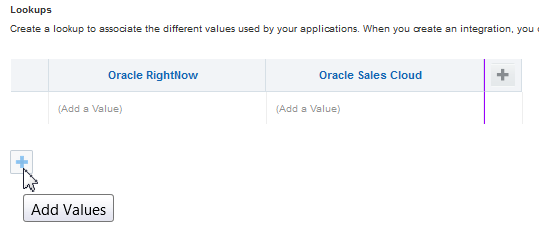
  1. In the row for the first adapter, click Add a Value.
    Enter a value under your first adapter.
  2. In the row for the second adapter, click Add a Value.
  3. Click the Add Values icon to add another value to the lookup.

  4. Click Save, then click Exit Lookup.

Cloning a Lookup

You can clone a copy of an existing lookup. It is a quick way to create a new lookup with similar information.

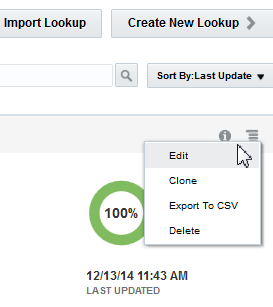
  1. On the Lookups page, click Clone from the Lookup menu.
    Description of GUID-BB87952E-D303-4649-90C6-4A4A26DF15DA-default.png follows
    Description of the illustration GUID-BB87952E-D303-4649-90C6-4A4A26DF15DA-default.png
    The Clone Lookup dialog is displayed.
  2. Enter the lookup information.
  3. Click Clone.
  4. Click Edit to further configure your cloned connection.

Deleting a Lookup

You can delete a connection from the Lookup menu.

  1. Click Delete from the Lookup menu.

    The Delete connection dialog is displayed.
  2. Click Yes to confirm deletion.