Managing Integrations

When you are ready for your integration to go live, you must activate the integration in Integration Cloud Service. You can also deactivate a running activation if you must make changes to it or if it is no longer needed.

Activating an Integration

Once you create an integration and the progress indicator shows 100 percent, you can activate that integration to the runtime environment. An integration shows as 100% and is eligible for activation after you have specified the source connection, the target connection, the data mappings, and the tracking fields.

To activate an integration:

Note:

If you activate a new version of an existing integration, tracking instances or logs of the old version are not deleted. However, related artifacts are deleted and redeployment is performed on the back end. Monitoring data is also removed.
  1. If you are not already on the Integrations page, click Designer on the toolbar, then click Integrations.
  2. In the Integrations list, locate the integration you want to activate.
  3. Click Activate.

    .
    The Confirmation dialog is displayed.
  4. If you want to enable detailed tracing, click the Enable detailed tracing checkbox.
    When selected, detailed logging information about messages processed by this integration flow at runtime is collected. This can aid in troubleshooting issues. However, this may also impact performance. To disable tracing, you must deactivate the integration, then reactivate it without selecting the Enable detailed tracing checkbox.
  5. Click Activate.
    The status of the integration changes to ACTIVE in the list. If you selected to enable tracing, the words TRACE ENABLED are displayed next to ACTIVE.

    To access the detailing trace logging information:

    1. Click the Monitoring tab.

    2. Click the Activity Stream tab.

    3. Click Download Logs.

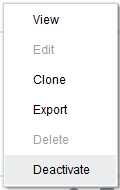
  6. View active integrations by clicking the integration name or selecting View from the menu at the far right of the integration. The active integration is displayed with a message saying Viewing.
Note the following details about read-only mode:
  • No Save button and Actions button are displayed.

  • There is no Connections Palette for adding adapters.

  • You can click through multiple parts of the integration to view configuration details, such viewing the business identifiers under the Configuration tab, viewing the source-to-target and target-to-source mappings in the mapper, and viewing the configurations on the pages of the connection wizards, but you cannot modify anything.

Deactivating an Integration

You can deactivate an integration to stop it from processing any new messages. If you want to modify an active integration, you need to deactivate it first.

Deactivation is equivalent to undeployment of a project, which means all existing history, monitoring, and runtime data are lost. Integration Cloud Service does not support the notion of starting and stopping projects. With asynchronous patterns, the queue for the deactivated project is deleted and all messages associated with this queue are also deleted. Therefore, if there are pending requests unprocessed, they are lost after deactivation. The previous version is deactivated and all existing history, monitoring, and runtime data is lost.
  1. In the Integration Cloud Service toolbar, click Designer.
    The Designer Portal appears.
  2. Click Integrations.
  3. On the expanded Integrations page, find the integration you want to deactivate.
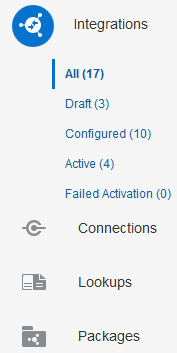
    To view only active integrations, select Active in the Integrations list. You can also filter by integration name or integration type (prebuilt, custom, or developed) to narrow down the list.
  4. In the row containing the integration you want to deactivate, click the vertical bars icon to the far right and then click Deactivate.

  5. Click Yes on the dialog that appears.

Modifying an Integration

You can modify an existing integration, including changing a source or target connection, reconfiguring the connection, and updating the data mapping. Changes to the source or target can cause changes to the existing mappings.

If the integration you want to modify is active, deactivate it first. See Deactivating an Integration for instructions.
To modify an integration:
  1. In the Integration Cloud Service toolbar, click Designer.
    The Designer Portal appears.
  2. Click Integrations.
  3. On the Integrations page, find the integration you want to modify. You can filter the display of integrations by their current status on the left side of the page.

    You can also search by entering a partial or complete integration name in the Search field or filter integrations by selecting an option from the Filter By list. From this list, you can filter by Type (Custom, Developed, and Prebuilt ) or Pattern (Map My Data, Publish to Integration Cloud Service, Subscribe To Integration Cloud Service, File Transfer, Orchestration, and others). Search or filter criteria are displayed in the blue banner above the returned list of integrations. To remove search or filter criteria, click the x icon in the blue banner or the x icon to the right of the Filter By list.
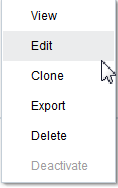
  4. On the row that contains the integration you want to change, click the integration name or click the vertical bars icon on the far right and select Edit.

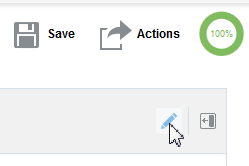
  5. To modify the name, package, or description, click the Edit icon on the right side.

  6. To modify the source or target configuration, click the connection on the canvas and click Edit on the menu that is displayed.

  7. Modify any of the open fields in the wizard that appears. See Connection Configuration Reference for instructions.
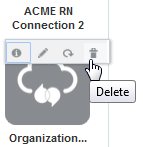
  8. To assign a new connection as the source or target, click the connection to delete, then click Delete on the menu that is displayed.

  9. Click the Show Palette icon on the right side and drag the new adapter from the Connections or Technologies panel on the right to the connection on the canvas that you want to replace. Configure the new connection. See Connection Configuration Reference for instructions.
  10. To modify a data mapping, click the appropriate map icon in the middle of the integration and update the mappings. See Mapping Data of Using the Oracle Mapper.
  11. When you are done making changes, click Save and then click Exit Integration.

Viewing the Trigger, Invoke, and Enrichment Details of an Integration

You can view the details associated with trigger, invoke, and enrichment endpoints of an integration.

To view the trigger, invoke, and enrichment details of an integration:
  1. In the Integration Cloud Service toolbar, click Designer.
    The Designer Portal appears.
  2. Click Integrations.
  3. On the Integrations page, find the integration you want to view. You can filter the display of integrations by their current status on the left side of the page.
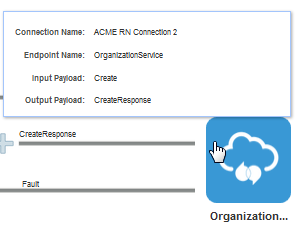
  4. Click the trigger, invoke, or (if configured) enrichment endpoint of the integration.
  5. Click the Details icon.
  6. View the connection name, endpoint name, input payload, and output payload of the integration.

Cloning an Integration

Cloning an integration creates a new copy with identical connections and data mappings. You give the clone a new name, identifier, version number, and package name, but the remaining configuration is the same. You can reconfigure the clone after you create it.

To clone an integration:
  1. In the Integration Cloud Service toolbar, click Designer.
    The Designer Portal appears.
  2. Click Integrations.
  3. On the Integrations page, find the integration you want to clone. You can filter the display of integrations by their current status on the left side of the page.
  4. In the row containing the integration you want to clone, click the vertical bars icon on the far right and then click Clone.

  5. In the dialog that appears, enter a name, unique identifier, version number, package name, and an optional description.
    You can include English alphabetic characters, numbers, underscores, and dashes in the identifier. Enter the version using numbers only in this format: xx.xx.xxxx.
  6. Click Clone.
  7. You can modify the clone in any of the ways described in Modifying an Integration.

Deleting an Integration

You can delete an integration that is no longer needed.

Make sure the integration you want to delete is not active. To deactivate the integration, see Deactivating an Integration.
To delete an integration:
  1. In the Integration Cloud Service toolbar, click Designer.
    The Designer Portal appears.
  2. Click Integrations.
  3. On the Integrations page, find the integration you want to delete. You can filter the display of integrations by their current status on the left side of the page.
  4. In the row containing the integration you want to delete, click the vertical bars icon on the far right and then click Delete.

  5. Click Yes on the dialog that appears.

Reactivating Integrations After Instance Upgrade to View the Latest Business Identifier Tracking Behavior

After your Integration Cloud Service instance is upgraded to a newer version, you must reactivate your integrations to view the latest and correct business identifier behavior in the Tracking page.

Filtering the Display of Integrations By Type

You can filter the display of integrations by their type (custom, user-developed, or prebuilt).

To filter the display of integrations by type:
  1. In the Integration Cloud Service toolbar, click Designer.
    The Designer Portal appears.
  2. Click Integrations.
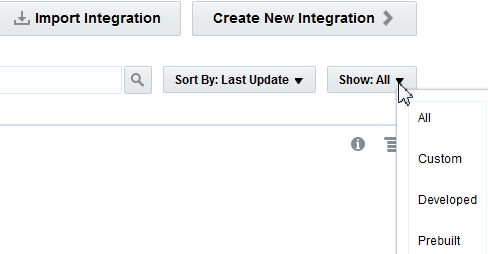
  3. Select the Show list to filter the display of integrations.

    You can filter integrations by the following types:
    • All: Displays all integrations, regardless of their type.

    • Custom: Displays prebuilt integrations imported from the Oracle Marketplace that have been customized.

    • Developed: Displays integrations created completely from scratch.

    • Prebuilt Displays prebuilt integrations imported from the Oracle Marketplace.

  4. Select the Sort By list to filter the display of integrations by the last update or name.

Changing the Time Zone

You can change the time zone that is displayed in Integration Cloud Service.

To change the time zone:
  1. In the upper right corner, click the username dropdown list, then select Preferences.
  2. From the Time Zone Settings list, select the time zone you want to use.
  3. Click Save.
  4. Go to the Integrations page and note that the time zone is changed in the message below the status of the integration and inside the information icon at the far right.
    The time zone change is also shown in other parts of Integration Cloud Service in which the time is displayed (for example, on the Tracking page).