Responsys 등록 라이트박스에 필드 추가
중요: 이 기능은 계정에 사용으로 설정되었으며 Oracle Maxymiser가 있는 경우에만 사용할 수 있습니다.
기본적으로, 전자메일 등록 라이트박스 템플리트에는 전자메일 주소 필드만 있습니다. 라이트박스의 코드를 수동으로 편집하여 이름, 성, 국가 등의 기능을 추가할 수 있습니다.
다음 예제는 전자메일 등록 라이트박스에 이름 및 성 필드를 추가하는 방법을 보여 줍니다.
- Responsys 목록 스키마에서 라이트박스에 추가할 필드의 이름을 선택합니다. 해당 이름은 Oracle Maxymiser 라이트박스의 필드 이름과 일치해야 합니다. 이 예제에서 필드 이름은 다음과 같습니다.
FIRST_NAMELAST_NAME
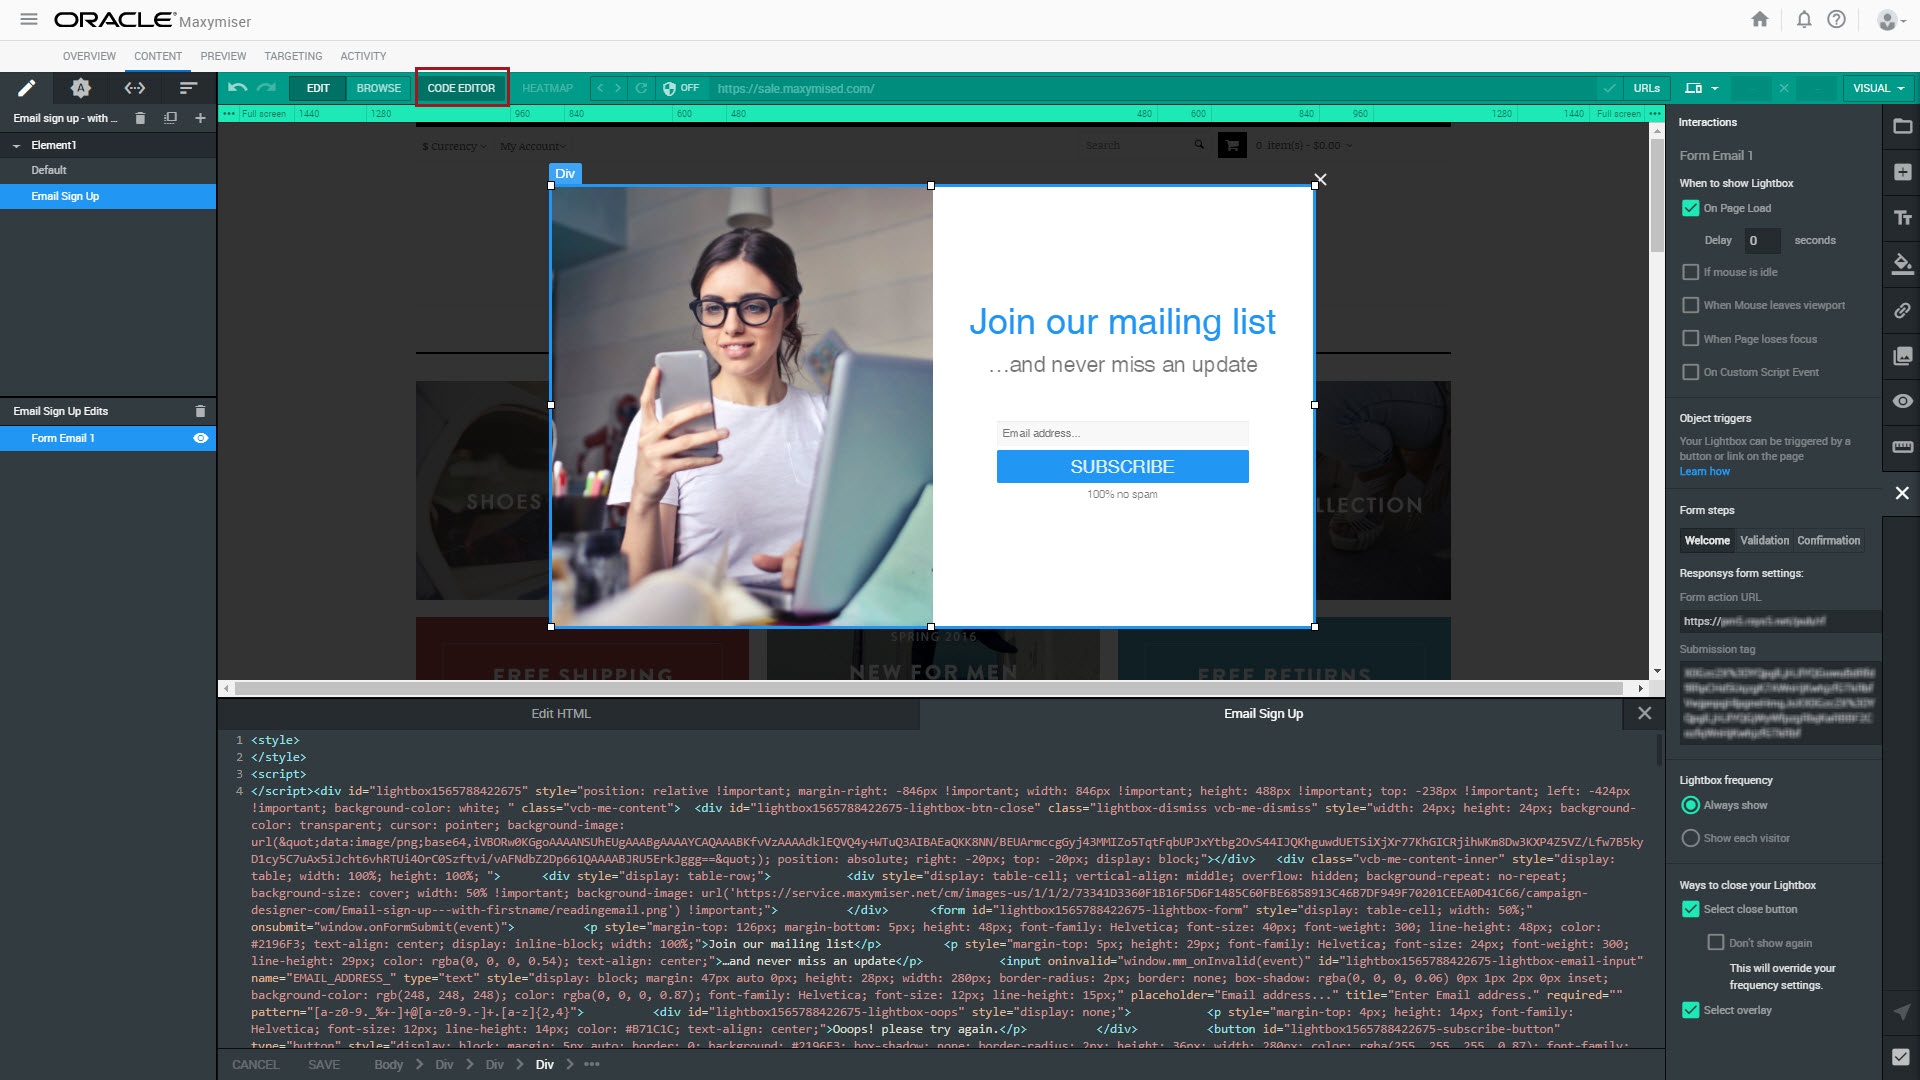
- Oracle Responsys 등록 라이트박스를 생성합니다.
- 코드 편집기를 누릅니다.
<form>태그 내에서 다음을 수행합니다.emailaddress필드의<input>태그를 검색합니다.- 위 태그 뒤에 이름의 새
<input>태그를 추가합니다. <input>속성을 다음과 같이 수정합니다.- Id: 라이트박스 ID와 입력 필드 이름 및 유형으로 구성된 고유 ID입니다. 예:
lightbox1565788422675-lightbox-firstname-input. - Name: 1단계의 Responsys 테이블에 있는 필드 이름입니다.
- Placeholder: 텍스트 상자가 비어 있는 경우 표시되는 힌트 텍스트입니다.
- Pattern: 텍스트 상자에 입력할 수 있는 문자를 결정하는 정규 표현식입니다. 이 예제에서는 a-z 또는 A-Z 범위의 문자를 입력할 수 있지만 하이픈, 공백 등의 다른 문자도 허용할 수 있습니다.
- 성의 다른
<input>태그를 추가하고 수정합니다.
<input oninvalid="window.mm_onInvalid(event)" id="lightbox1565788422675-lightbox-email-input" name="EMAIL_ADDRESS_" type="text" style="display: block; margin: 47px auto 0px; height: 28px; width: 280px; border: none; box-shadow: rgba(0, 0, 0, 0.06) 0px 1px 2px 0px inset; background-color: rgb(248, 248, 248); color: rgba(0, 0, 0, 0.87); font-family: Helvetica; font-size: 12px; line-height: 15px;" placeholder="Email address..." title="Enter Email address." required="" pattern="[a-z0-9._%+-]+@[a-z0-9.-]+.[a-z]{2,4}"><input oninvalid="window.mm_onInvalid(event)" id="lightbox1565788422675-lightbox-firstname-input" name="FIRST_NAME" type="text" style="display: block; margin: 5px auto 0px; height: 28px; width: 280px; border-radius: 2px; border: none; box-shadow: rgba(0, 0, 0, 0.06) 0px 1px 2px 0px inset; background-color: rgb(248, 248, 248); color: rgba(0, 0, 0, 0.87); font-family: Helvetica; font-size: 12px; line-height: 15px;" placeholder="First name..." title="Enter First name." required="" pattern="^[a-zA-Z]+$">
참고: 라이트박스를 생성할 때 라이트박스 외부 div의 속성이나 위에서 설명한 전자메일 필드 ID 속성의 일부로 확인할 수 있는 고유 ID를 제공합니다.
<input oninvalid="window.mm_onInvalid(event)" id="lightbox1565788422675-lightbox-lastname-input" name="LAST_NAME" type="text" style="display: block; margin: 5px auto 0px; height: 28px; width: 280px; border-radius: 2px; border: none; box-shadow: rgba(0, 0, 0, 0.06) 0px 1px 2px 0px inset; background-color: rgb(248, 248, 248); color: rgba(0, 0, 0, 0.87); font-family: Helvetica; font-size: 12px; line-height: 15px;" placeholder="Last name..." title="Enter Last name." required="" pattern="^[a-zA-Z]+$">
- 폼을 제출할 때, 새 입력 필드가 제출 URL에 추가되었는지 확인합니다.
window.onFormSubmit함수를 찾은 다음, 함수 내에서 다음 코드 라인을 찾습니다.- 이 라인 아래에 이름과 성을 변수에 저장하는 다음 라인을 추가합니다.
var emailInput = document.getElementById(id + '-lightbox-email-input');
var firstnameInput = document.getElementById(id + '-lightbox-firstname-input');
var lastnameInput = document.getElementById(id + '-lightbox-lastname-input');
이러한 변수에 저장된 값은 오류를 검사하고 폼을 제출할 때 사용됩니다.
- 이름 및 성 필드의 콘텐츠를 검증하도록 오류 검사 코드를 업데이트해야 합니다.
- 이 예제에서는 다음과 같은 기존 코드를 찾습니다.
- 위 코드를 다음 코드로 바꿉니다.
var re = /[a-z0-9._%+-]+@[a-z0-9.-]+.[a-z]{2,4}/;if (!re.test(emailInput.value)) {oops.style.display = 'block';
emailInput.style.cssText = emailInput.style.cssText.replace(/border:[^;]*;/, "border: 1px solid #B71C1C;");
emailInput.style.cssText = emailInput.style.cssText.replace(/border-radius:[^;]*;/, "border-radius: 2px;");
return;
}
var re = /[a-z0-9._%+-]+@[a-z0-9.-]+.[a-z]{2,4}/;var reName = /^[a-zA-Z]+$/;
emailInput.style.cssText = emailInput.style.cssText.replace(/border:[^;]*;/, "border: none;");
firstnameInput.style.cssText = firstnameInput.style.cssText.replace(/border:[^;]*;/, "border: none;");
lastnameInput.style.cssText = lastnameInput.style.cssText.replace(/border:[^;]*;/, "border: none;");
if (!re.test(emailInput.value) || !reName.test(firstnameInput.value) || !reName.test(lastnameInput.value)) {oops.style.display = 'block';
if (!re.test(emailInput.value)) {emailInput.style.cssText = emailInput.style.cssText.replace(/border:[^;]*;/, "border: 1px solid #B71C1C;");
emailInput.style.cssText = emailInput.style.cssText.replace(/border-radius:[^;]*;/, "border-radius: 2px;");
}
if (!reName.test(firstnameInput.value)) {firstnameInput.style.cssText = firstnameInput.style.cssText.replace(/border:[^;]*;/, "border: 1px solid #B71C1C;");
firstnameInput.style.cssText = firstnameInput.style.cssText.replace(/border-radius:[^;]*;/, "border-radius: 2px;");
}
if (!reName.test(lastnameInput.value)) {lastnameInput.style.cssText = lastnameInput.style.cssText.replace(/border:[^;]*;/, "border: 1px solid #B71C1C;");
lastnameInput.style.cssText = lastnameInput.style.cssText.replace(/border-radius:[^;]*;/, "border-radius: 2px;");
}
return;
}
- To ensure the new values get submitted when the visitor clicks the Subscribe button, find the following code:
- 이 코드 뒤에 폼 제출 URL에 이름과 성을 추가하는 다음 라인을 추가합니다.
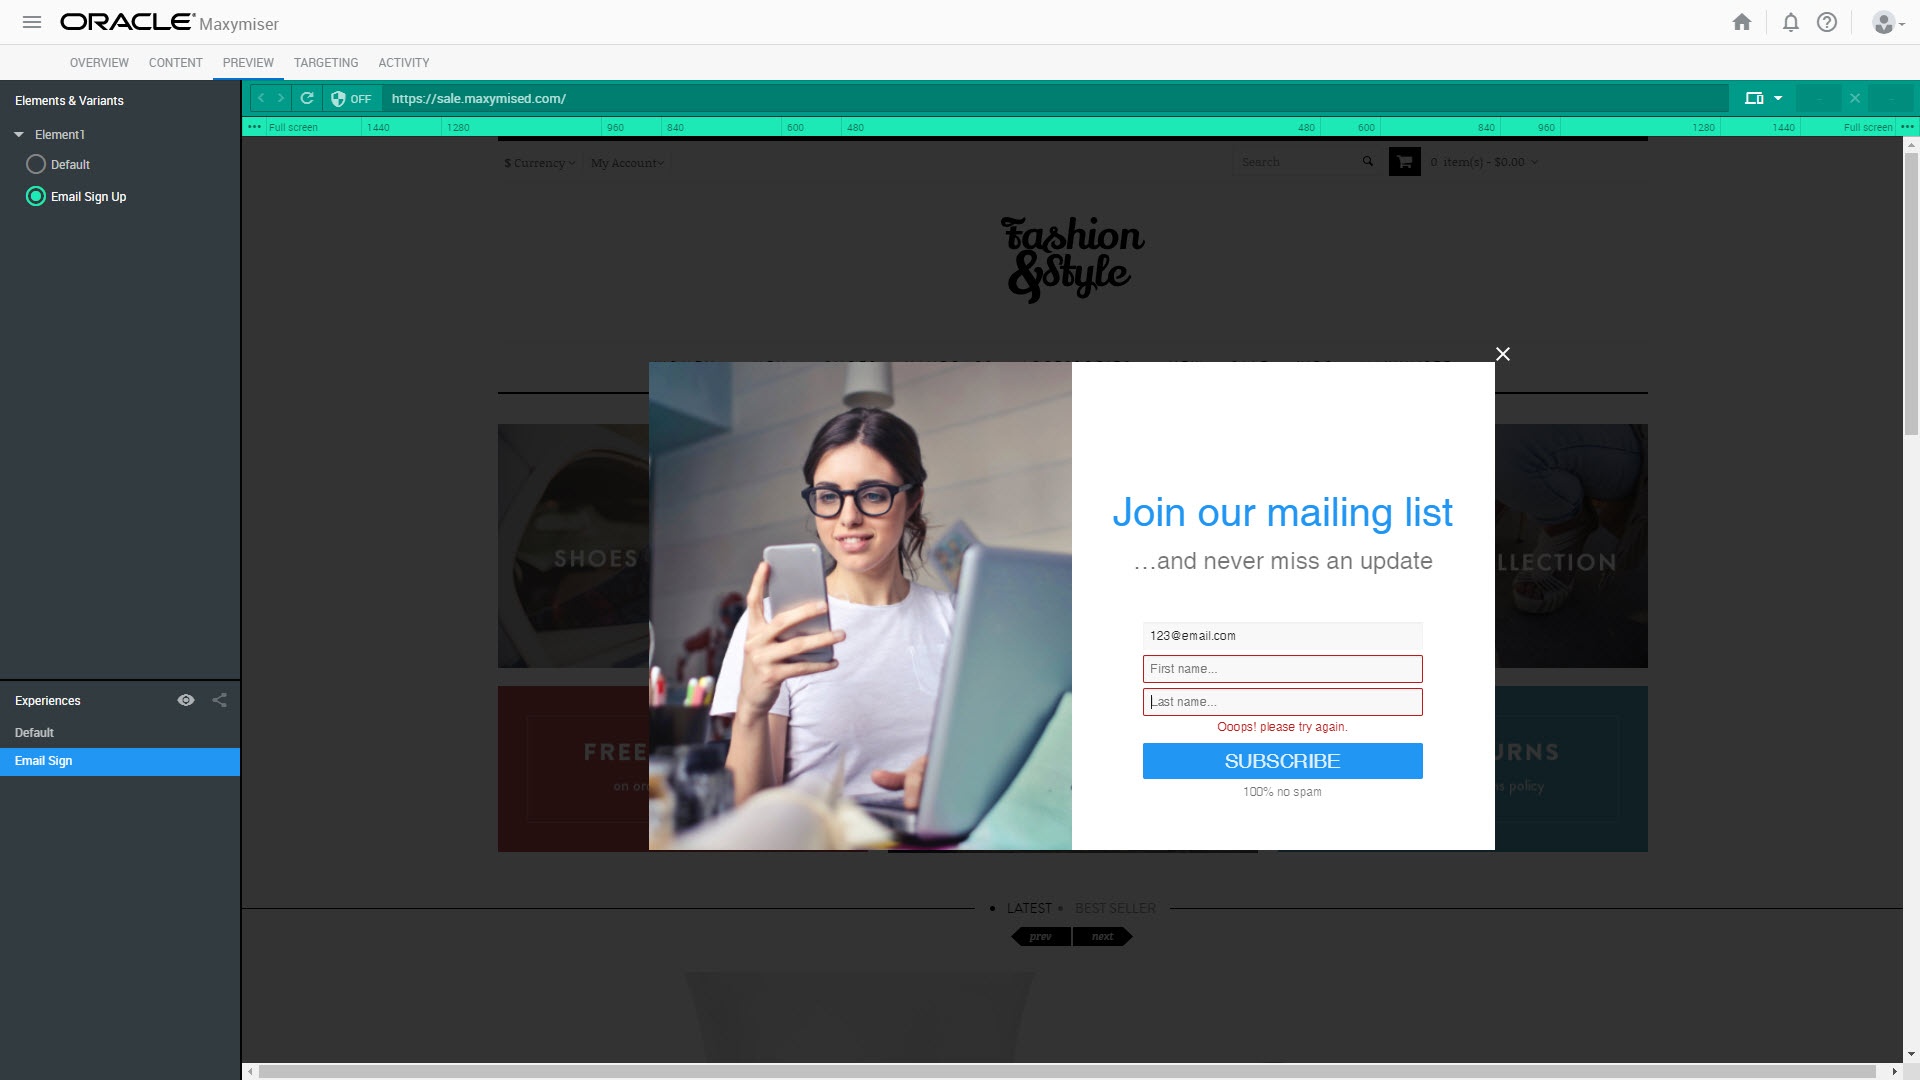
- 미리보기 패널로 전환하여 라이트박스에서 새로 생성된 필드를 테스트합니다.

참고: 코드 편집기에서 라이트박스 코드를 수동으로 편집한 다음, 상호작용 패널로 돌아가서 변경하는 경우, 상호작용 패널에서 formSubmit 함수의 수동 변경사항을 덮어씁니다.
parameters.push(encodeURIComponent('EMAIL_ADDRESS_') + '=' + encodeURIComponent(emailInput.value));
parameters.push(encodeURIComponent('FIRST_NAME') + '=' + encodeURIComponent(firstnameInput.value));parameters.push(encodeURIComponent('LAST_NAME') + '=' + encodeURIComponent(lastnameInput.value));
관련 항목
Oracle Responsys 통합(Oracle Maxymiser 도움말 센터)