6 Developing the Team Member Pages
Develop the Team Member report generated by the Create Page Wizard into a useful directory of team members, then develop the Team Member form so that your users can edit the Team Member data more easily.
About This Lesson
You used the Create Application Wizard to generate a report and form for the DEMO_TEAM_MEMBERS table.
In this lesson, you use Page Designer to develop a common pair of pages: a report and form. reports are the formatted results of an SQL query; forms are pages paired with reports that enable users to update the table that the report queries. (Typically, a form is a child page to a parent report page.) Both pages query the DEMO_TEAM_MEMBERS table.
The Team Members report serves as a repository for your users’ contact information, whereas the Team Members form is a separate page that users can open to update the information in the Team Members report.
You develop the report page by updating the list of queried columns in the SQL query, updating the Primary report by removing some of the columns that are displayed in the runtime, and moving a button on the page and editing its text.
When the Create Application Wizard creates a report and form, forms appear in the runtime by default as modal dialogs. A modal dialog is an overlay window that displays within the same browser window. It remains active and focused until the user finishes with it and closes it.
For the form page, you update the appearance and function of the fields from the Create Page Wizard defaults, including the addition of a required condition to some fields and configure some Display Only items. You also add a sub region that users can expand if necessary to view information that is used less frequently.
Starting from here:
Basic Projects App Export - Topic 4.sqlIf you have not completed the previous lessons, you can use the appendix "Importing an Application into a Workspace" to import the above SQL script into your workspace and continue working from this lesson forward. You can find this script in the /files subdirectory of where you unzipped the .zip file accompanying this tutorial.
6.1 Editing the SQL Query of an Interactive Report
End users can manipulate the data in interactive reports in Oracle Application Express for their own requirements, rather than needing you (the application developer) to define numerous reports. To enable end users to manipulate what data is shown and how it is displayed, you must define the SQL statement to retrieve all of the data from the underlying Oracle Database tables.
Use the Code Editor in Page Designer to edit the interactive report SQL to query columns in the DEMO_TEAM_MEMBERS table. This enables users to do things such as view other users’ tasks and update their own workflow.
To edit the Team Members interactive report in Page Designer:
6.2 Changing Which Columns Display in an Interactive Report in the Runtime
While the SQL statement of the interactive report must query all the above columns to function, displaying all of them in the interactive report hinders your users. Columns such as ID, CREATED, and CREATED_BY, exist primarily to inform you, not the end user.
Use the Actions menu in the runtime to configure the Primary report of the interactive report to change which columns end users can access.
To change which columns display in the interactive report:
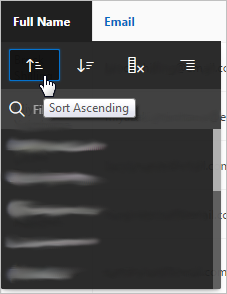
You can also improve the report’s usability by setting the default order of the table to the alphabetic order of the Full Name column.
To sort the order of the rows by Full Name:
Finally, you must save the report to preserve these changes to the Primary report of the interactive report (other report types include Private, Alternative, and Public).
All users can save a Private report, but only the developer can save a Primary report. A Primary report is the report that initially displays. A Primary report cannot be renamed or deleted by other users.
To save the current settings as the default:
6.3 Moving Buttons to a Different Region
The Create Page Wizard added a CREATE button automatically to the interactive report so that end users can add new members to the table quickly, but it would be more appropriate to relocate the button to a different place.
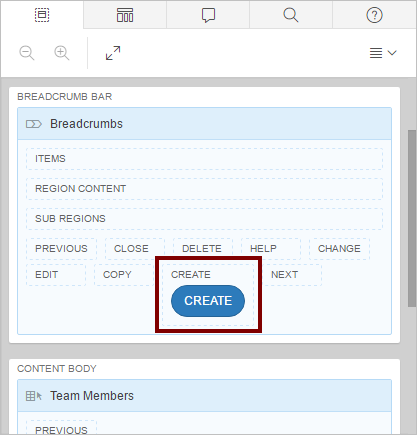
Use the context menu in Page Designer to move the CREATE button to the Breadcrumbs region.
Tip:
You can also move items in the Layout via drag and drop.
Tip:
![]() To undo a previous action, click the Undo button.
To undo a previous action, click the Undo button.
To move a button to a different region using the context menu:
You have moved the Create button.
The Report portion of the Team Members Report and Form is complete. Next, you develop the Team Members Form.
6.4 Enabling Stretch Form Fields for a Modal Dialog
Next, develop the Maintain Team Member form for the Team Members report page.
The Maintain Team Member form is a modal dialog. Modal dialogs are treated as separate pages in Page Designer because even though they behave like a page within a page, they can be as equally complex.
Begin by navigating to the form in Page Designer, then configuring the field widths in the form’s Template Options so that the form looks cleaner and more consistent.
To stretch the width of all fields in a region:
6.5 Updating Form Fields to and Textarea
DEMO_TEAM_MEMBERS table. Technically, the fields are all functioning and displaying correctly; however, your users would benefit from the following interface changes:
-
Require users complete certain fields, such as username. This is common and a good practice. The NOT NULL constraint enforces a column to NOT accept NULL values. This enforces a field to always contain a value, which means that you cannot insert a new record, or update a record without adding a value to this field.
-
Increase the size of the Profile field to encourage users to provide information. This field serves as a description of their roles and duties on the team.
-
Change the label of Photo Blob.
-
Hide the unnecessary fields from view to reduce clutter.
To change the Username and Full Name fields to required (so that users cannot leave them blank):
The Profile field is where users enter biographical information, so it should support the display of multiple lines of text. To convert it to a Textarea:
To change the label of the “Photo Blob” field:
Several fields are completely unnecessary for users when they update their profile.
To hide fields from view:
6.6 Creating an Expandable Sub Region
Some details (such as timestamps) can be useful, but most of the time your users do not need to see them. You can group them into an "Audit Details" sub region to preserve them for future use but still save space in the form.
To create a collapsible sub region:
To move audit columns into the Audit Details sub region with the Property Editor:
6.7 Restricting User Access with the Display Only Item Type
While it is acceptable for your users to view the information in the audit columns, they should never have permission to alter this system-generated data directly. You can restrict users from editing these items by making them Display Only.
You should also verify this information is restricted in the runtime for security purposes.
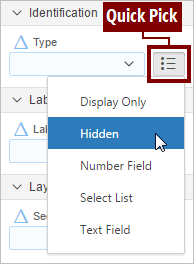
To restrict users’ access to the audit columns in the region to Display Only:
When you are editing a modal dialog in Page Designer, the Save and Run button only saves your changes; it does not navigate to the page in a new browser window. You must open modal dialogs in their parent page in the runtime.
To view the modal dialog in the runtime:
You have completed updating the report and the form for the Team Members page.
In this lesson, you learned about interactive reports and how to edit their SQL queries and Primary reports; how to relocate buttons to the Breadcrumbs region; update the fields of a modal dialog from their default settings; and create a sub region with Display Only items.
Proceed to the next lesson.


