Using the Two-Panel Action View
Use the two-panel action view to view and act on all of your actionable notifications.
Navigation:
From the Notifications panel,
This example illustrates the fields and controls on the two-panel action view.
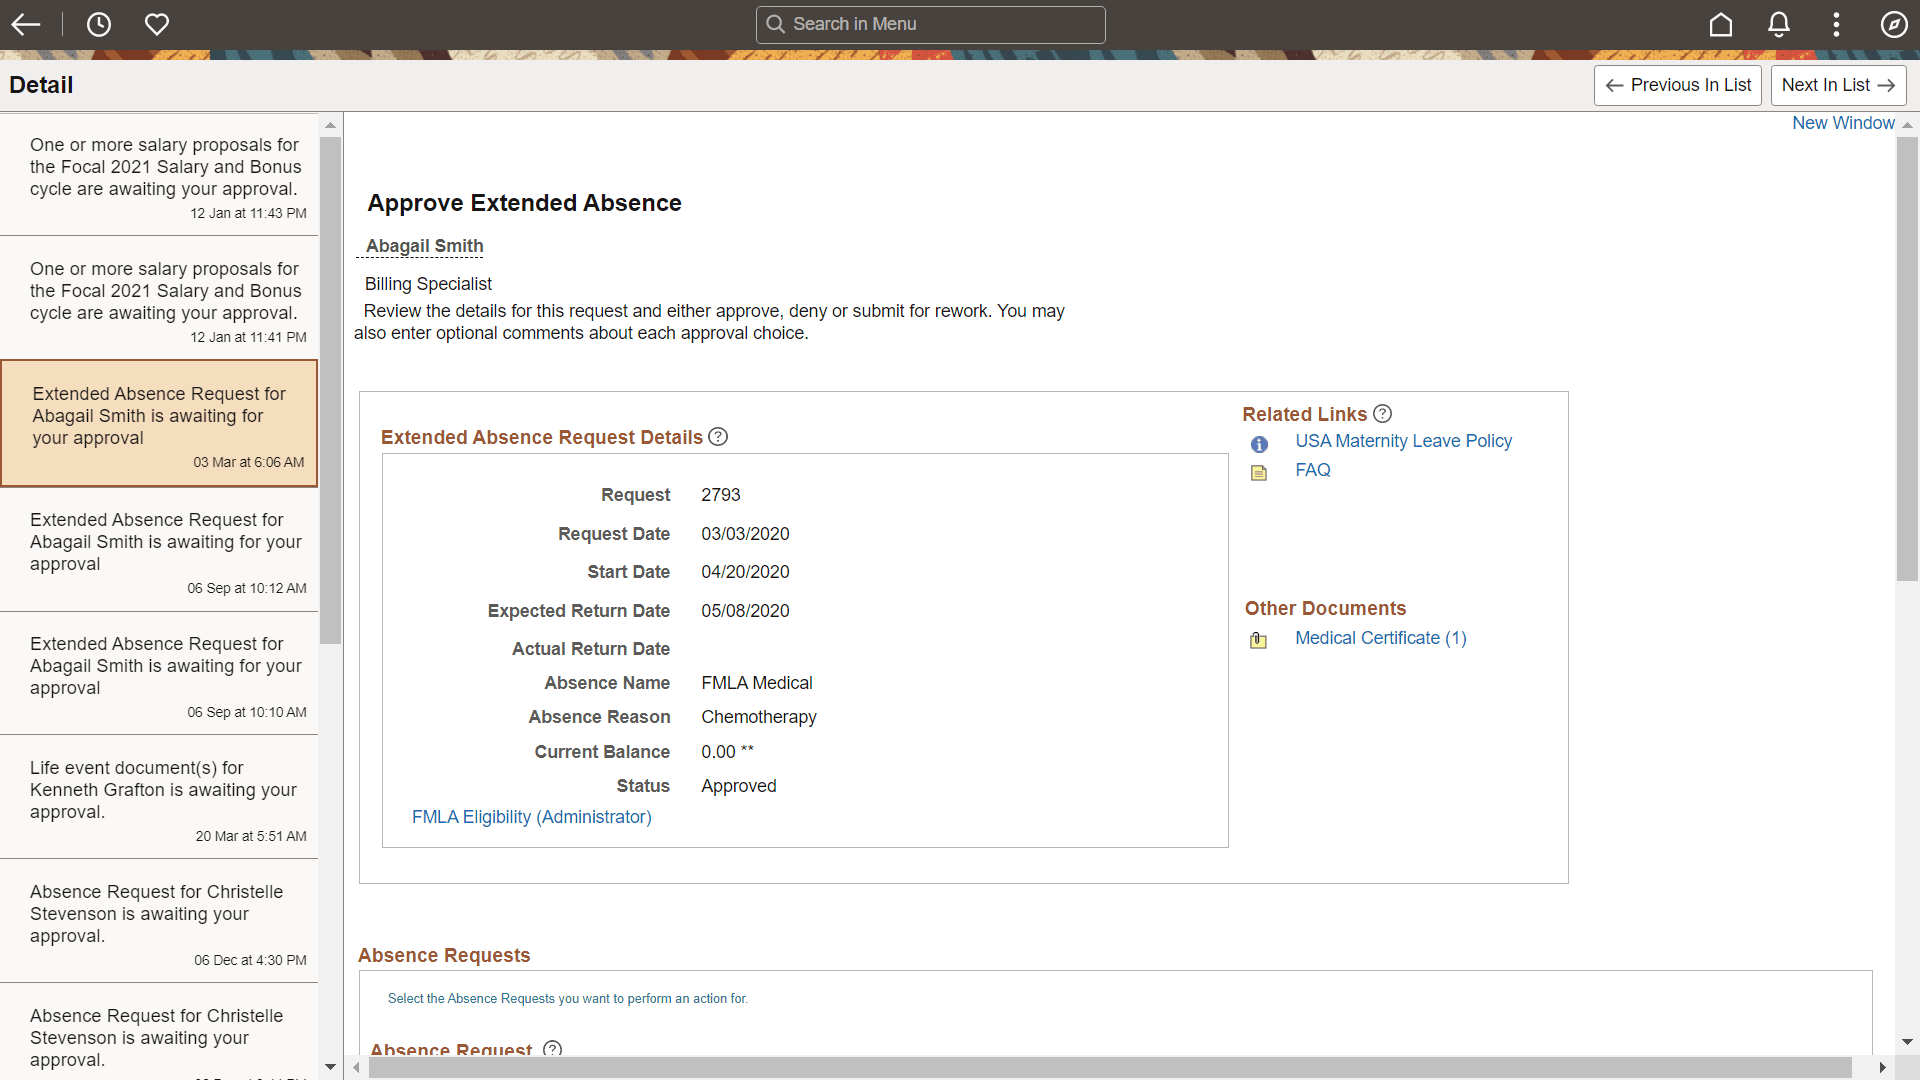
The action view uses the master/detail architecture to display a master list of your actionable items in the left panel while displaying the notification target content on the right. You can act directly on this target content—for example, to approve, deny, or take any other action appropriate to the transaction. To navigate in the action view, click a notification listed in the left panel to display it on the right. Alternatively, use the Previous in List and Next in List navigation buttons to navigate sequentially through your list of actionable items.
Because the action view is a master/detail component, some transactions are presented to you different from the preceding example:
-
If the transaction cannot be displayed directly within the action view, then you will be presented with the following message:
The notification source can’t be directly displayed within this area. Click on the link below to navigate to target notification:
Notification Target
Click the Notification Target link to open the notification in a new browser window.
-
If the transaction includes its own inner left panel, the list of notifications is initially collapsed so that the inner left panel of the target transaction is displayed. To redisplay your list of notifications, click the Notifications tab to slide out the outer left panel. See Working with the Slide-out Left Panel for more information.