Tour: Explore a Multiple Verbs and Resources Invoke Integration
This example shows the Use Multiple Verbs and Resources Invoke recipe, which demonstrates how to use multiple HTTP verbs and resources configured in the REST Adapter trigger connection of an integration. This recipe is available from the Integration Store.
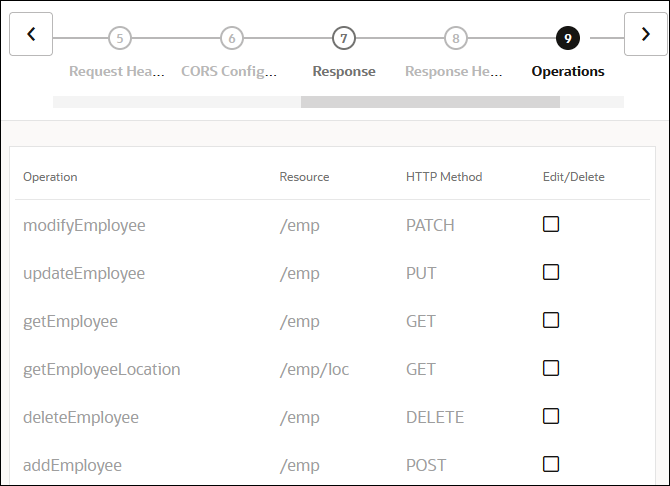
/emp resource and
an /emp/loc subresource are used.
Step 1. View the Integration Design
- In the navigation
pane, click Design, then
Integrations.
This integration consists of the following:

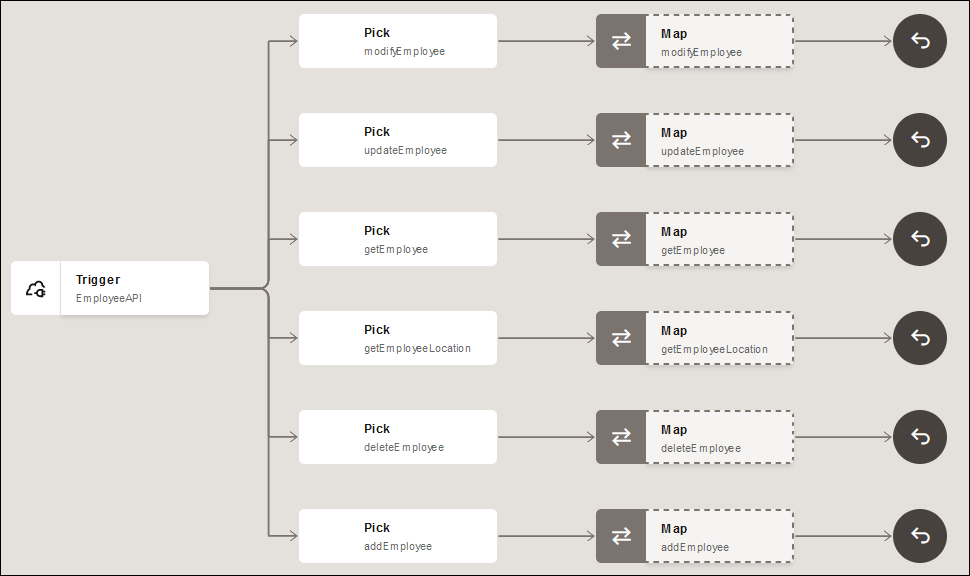
- A REST Adapter connection (EmployeeAPI) is configured as a trigger
(inbound) connection in the integration. The REST Adapter connection is configured with multiple operations:
modifyEmployee (PATCH),
updateEmployee (PUT),
getEmployee (GET),
getEmployeeLocation (GET),
deleteEmployee (DELETE), and
addEmployee (POST).

- The REST Adapter is triggered when you specify the URL.
- Each operation is shown as a different path that branches out from the trigger connection.
- Each branch has a map and a reply action configured.
- The tracking configuration for each branch can be viewed by clicking
Actions
 , then tracking on each pick action.
- A REST Adapter connection (EmployeeAPI) is configured as a trigger
(inbound) connection in the integration. The REST Adapter connection is configured with multiple operations:
modifyEmployee (PATCH),
updateEmployee (PUT),
getEmployee (GET),
getEmployeeLocation (GET),
deleteEmployee (DELETE), and
addEmployee (POST).
Step 2. View How to Run the Integration
-
In the navigation pane, click Design, then Integrations.
-
Hover your cursor over Sample Multiple Verbs and Resources Invoke, then click Activate
 .
.
- Click Activate when prompted.
- Wait for the icon to turn green and the word Active to appear in the Status column, indicating that the integration is activated.
- Hover your cursor over Sample Multiple Verbs and Resources
Invoke, then click Actions
 and select Run. The Configure and run page is displayed
with details about running, tracking, and testing the integration.
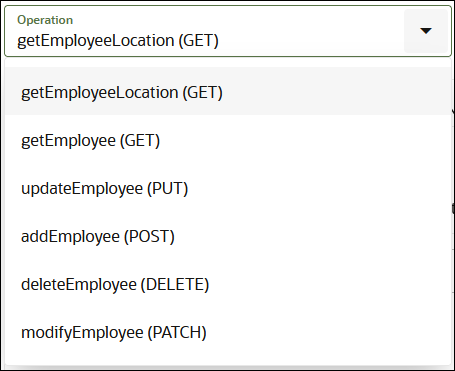
- Click the Operation drop-down list to view all configured options and HTTP verbs.
- From the drop-down list, select the operation to perform. For this example,
addEmployee (POST) is selected.

The section following the drop-down list shows all the options available for the selected operation such as URI Parameters and Body.
- Click Run to run the selected operation.
Step 3. View the Movement of Messages Through the Integration
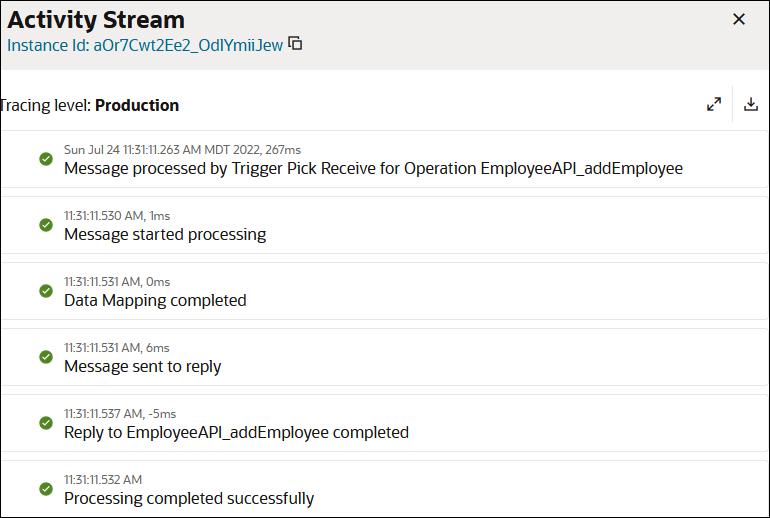
The Activity Stream panel slides open on the Configure and run page. The activity stream shows the status of message processing through the major milestones of the integration.

Step 4. View How to Monitor the Integration
- Click the instance ID at the top of the Activity Stream panel. The Instance
Details page provides a graphical view of the integration flow. The path taken by this
instance is highlighted in green, indicating it was successful. The same Activity Stream
panel is also visible on the right.

- Click < to return to the Configure and run page.
- Click Track Instances and note that the
Sample Multiple Verbs and Resources Invoke integration instance
is listed as Succeeded in the Status
column.

- In the
navigation pane, click Observability, then
Integrations.
The message is listed as successfully received and processed without any errors.
