Add a Frame Action

The frame action lets you interact with any inline frames on a page.

Use the frame action for the following scenarios:

  • Interact with inline frames in an <iframe> or <frame> element in a web page's underlying HTML.

    The inline frames can be either direct children of a page or nested inline frames. You typically find <iframe> elements on newer websites and <frame> elements on older websites.

  • Interact with pop-ups for accepting and rejecting website cookies.

Requirements and Restrictions

Familiarize yourself with the frame action's requirements and restrictions before adding it to a robot.

  • If you need to interact with UI elements that are in an inline frame, you must use the frame action.

  • Add one frame action for each inline frame that a robot interacts with, and include all the actions for the inline frame within the frame container.
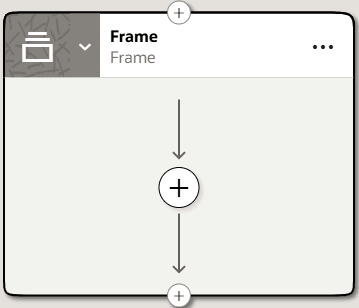
    Empty frame action on the canvas

  • You cannot add the following actions within the frame action:

    • Close Browser
    • Frame
    • Open browser
    • Switch browser

Add a Frame Action Using the Low-Code Tools

Note:

You must use the low-code capabilities to add this action to a robot. Keep reading for step-by-step instructions.
  1. Open the robot for editing.
  2. In another browser window or tab, open the application where the robot works.
  3. If the robot needs to work with a UI element that's in a nested inline frame, and the robot must navigate to the nested inline frame, add actions to the robot for the navigation.

    For example, if you need to select a tab to show the nested inline frame, add a click element action. See Add a Click Element Action.

  4. Add the action to the robot.
    1. On the canvas, point to an action, and click +.
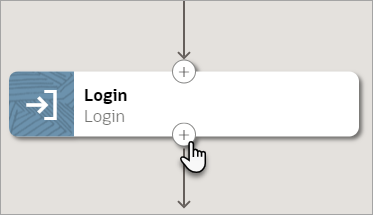
      A mouse cursor points to an action in the canvas and hovers over the plus sign button, which appears at the bottom of the rectangle that represents the action. A plus sign button also appears at the top of the rectangle, for adding an action after the current action.

      A menu of available actions appears.

    2. Select Frame.

      A frame action appears on the canvas, and the Frame panel appears.

  5. In the panel, enter a Name and Description for the action.

    The Name appears on the action in the canvas and should help you and others understand the goal of the action.

  6. On the Input tab, specify input details for the action.
    Field Description

    Locator

    1. In the robot, click within the Locator field, and select Target a page element Target a page element.

      The Target a page element panel appears.

    2. In the panel, from the Select browser tab to target drop-down, select the application where the robot works, and select Go. You might need to scroll down to find the application.

      The application opens.

    3. In the application that contains the inline frame, point to any UI element within the inline frame, but don't select it yet.

      For example, if the field is shaded purple and the magnifying lens icon appears, don't click yet. The recorder is still collecting information.

      A checkbox control (the checkbox itself, not including its text label) is shaded purple, and a magnifying lens icon appears above it. A big red X appears, indicating that the control isn't ready to be selected

    4. Wait for the shading to turn green and the mouse icon to change to a hand, and then select the UI element.

      A checkbox control (the checkbox itself, not including its text label) is shaded green, and a target icon appears above it. A big green checkmark appears, indicating that the control is ready to be selected

      For more tips, see Quick Start for Building Robots.

      One of the following events occurs:

      Tip:

      Your settings determine whether Oracle Integration reuses targets for previously selected UI controls. You can override these settings, if needed. Reusing a target offers benefits. For example, you can update a target one time, and all actions that use the target get the update.
  7. Click OK.
  8. Expand the frame action, and add actions within the frame action.

    Include all actions that the robot must perform within the frame. See Add an Action to a Robot.

    Empty frame action on the canvas

  9. After you finish adding actions, save the robot. Above the canvas, select Save.