3 Using Eclipse and IntelliJ

The following sections provide information about how to connect to Oracle Autonomous Database using Eclipse and IntelliJ IDEs:

3.1 Using the Eclipse IDE

You can establish a connection to Oracle Autonomous Database using the Eclipse IDE.

3.1.1 Setting Up a Maven Project

This section lists the steps to set up a Maven project.

Make sure to complete all the steps from the Prerequisites section.
  1. Create a Maven project.
    1. From the File menu, select New, and then select New Maven Project. You can either use maven archetype or select Create a simple project (skip archetype selection) .
    2. Choose GAV for your Maven project. These will appear in the pom.xml file for the project.
      • Group Id: com.oracle
      • Artifact Id: ADBquickstart
      • Version: Leave it as 0.0.1-SNAPSHOT
  2. Create the ADBQuickStart.java file.
    1. Right-click on src/main/java, select New, and then select Class.
    2. Enter the following values, and then click Finish.
    • Package: com.oracle.jdbctest
    • Name: ADBQuickStart

      Note:

      Make sure to copy contents of the ADBQuickStart.java file to the new file created.
  3. Modify the pom.xml file and add Oracle JDBC driver as a dependency.

    Note:

    ojdbc8-production will download the Oracle JDBC driver (ojdbc8.jar) along with ucp.jar (required for using UCP as a client-side connection pool), oraclepki.jar, osdt_core.jar, and osdt_cert.jar. These JARs are required for using Oracle Wallets while connecting to Oracle Autonomous Database.
    <properties>
        <maven.compiler.source>11</maven.compiler.source>
        <maven.compiler.target>11</maven.compiler.target>
    </properties>
    <dependencies>
      <dependency>
        <groupId>com.oracle.database.jdbc</groupId>
        <artifactId>ojdbc8-production</artifactId>
        <version>19.18.0.0</version>
        <type>pom</type>
      </dependency>
    </dependencies>

3.1.2 Building and Running a Sample Java Program

This section lists the steps to build and run a Java program.

Make sure that you do not have any compilation errors in the Java code and you are using the latest JDK version.
  1. Right-click ADBQuickStart.java .
  2. Click Run As, and then click Java Application to run the sample Java program.

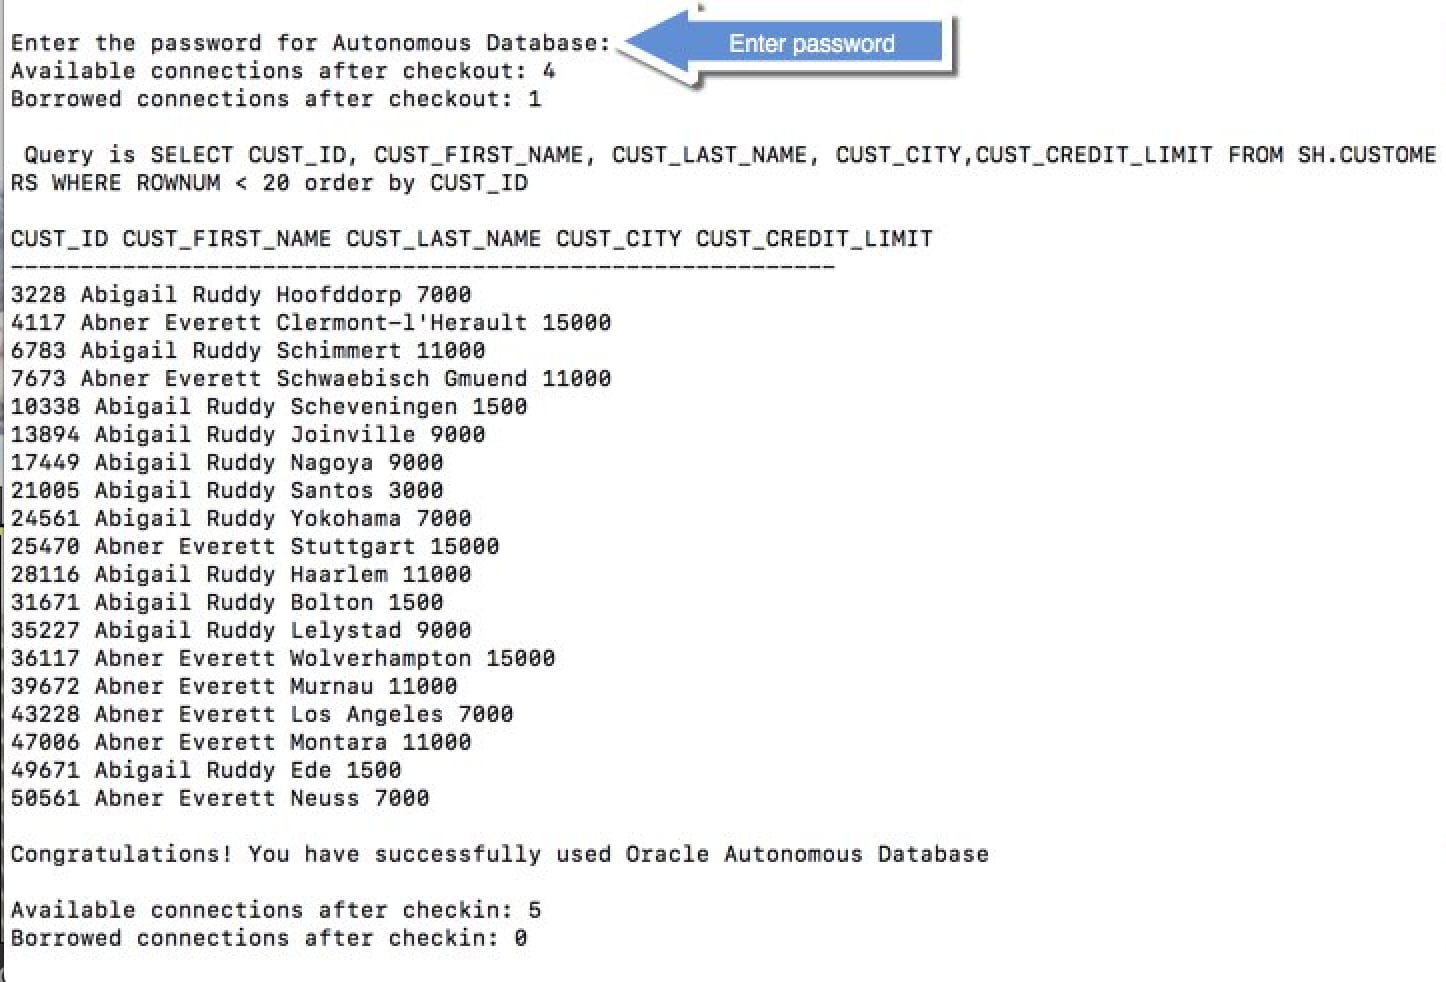
    You are prompted to enter the database password. Once you enter the password, the results are displayed.

Sample Output:

The screenshot below shows the queried rows, along with a success message:

Sample Output

Note:

If you connect to Oracle Autonomous Database from behind a firewall, you will likely encounter a connection timeout error. Make sure to be outside the firewall while running this sample or update the tnsnames.ora file to use an HTTPS proxy.

See Also:

Using Oracle Autonomous Database Serverless for more information.

3.2 Using the IntelliJ IDE

You can establish a connection to Oracle Autonomous Database using the IntelliJ IDE.

3.2.1 Setting Up a Maven Project

This section lists the steps to set up a Maven project.

Make sure to complete all the steps from the Prerequisites section.
  1. Create a Maven project.
    1. Click from File menu, select New, and then select Project.
    2. Select Maven on the left hand side and select the latest version of JDK as Project SDK.
    3. Click Next.
    4. Give Name as ADBQuickstart.
  2. Create the ADBQuickStart.java file.
    1. Right-click on src/main/java.
    2. Select New, and then select Java Class.
    3. Enter com.oracle.jdbctest.ADBQuickStart.java. This will create the required package structure as well. Make sure to copy contents of the ADBQuickstart.java file to this new file.
  3. Modify the pom.xml file and add Oracle JDBC Driver as a dependency.

    Note:

    ojdbc8-production will download the Oracle JDBC driver (ojdbc8.jar) along with ucp.jar (required for using UCP as a client-side connection pool), oraclepki.jar, osdt_core.jar, and osdt_cert.jar. These JARs are required for using Oracle Wallets while connecting to Oracle Autonomous Database.
    <properties>
        <maven.compiler.source>11</maven.compiler.source>
        <maven.compiler.target>11</maven.compiler.target>
    </properties>
    <dependencies>
      <dependency>
        <groupId>com.oracle.database.jdbc</groupId>
        <artifactId>ojdbc8-production</artifactId>
        <version>19.18.0.0</version>
        <type>pom</type>
      </dependency>
    </dependencies>

3.2.2 Building and Running ADBQuickStart

This section lists the steps to build and run ADBQuickStart.

  1. Compile the Java code.

    Right-click ADBQuickStart.java, and then click Build Module ADBQuickStart.

    Make sure that there are no compilation errors.

  2. Run the sample Java program.

    Right-click ADBQuickStart.java, and then click Run ADBQuickStart.main().

    Make sure to enter the database password on the console.

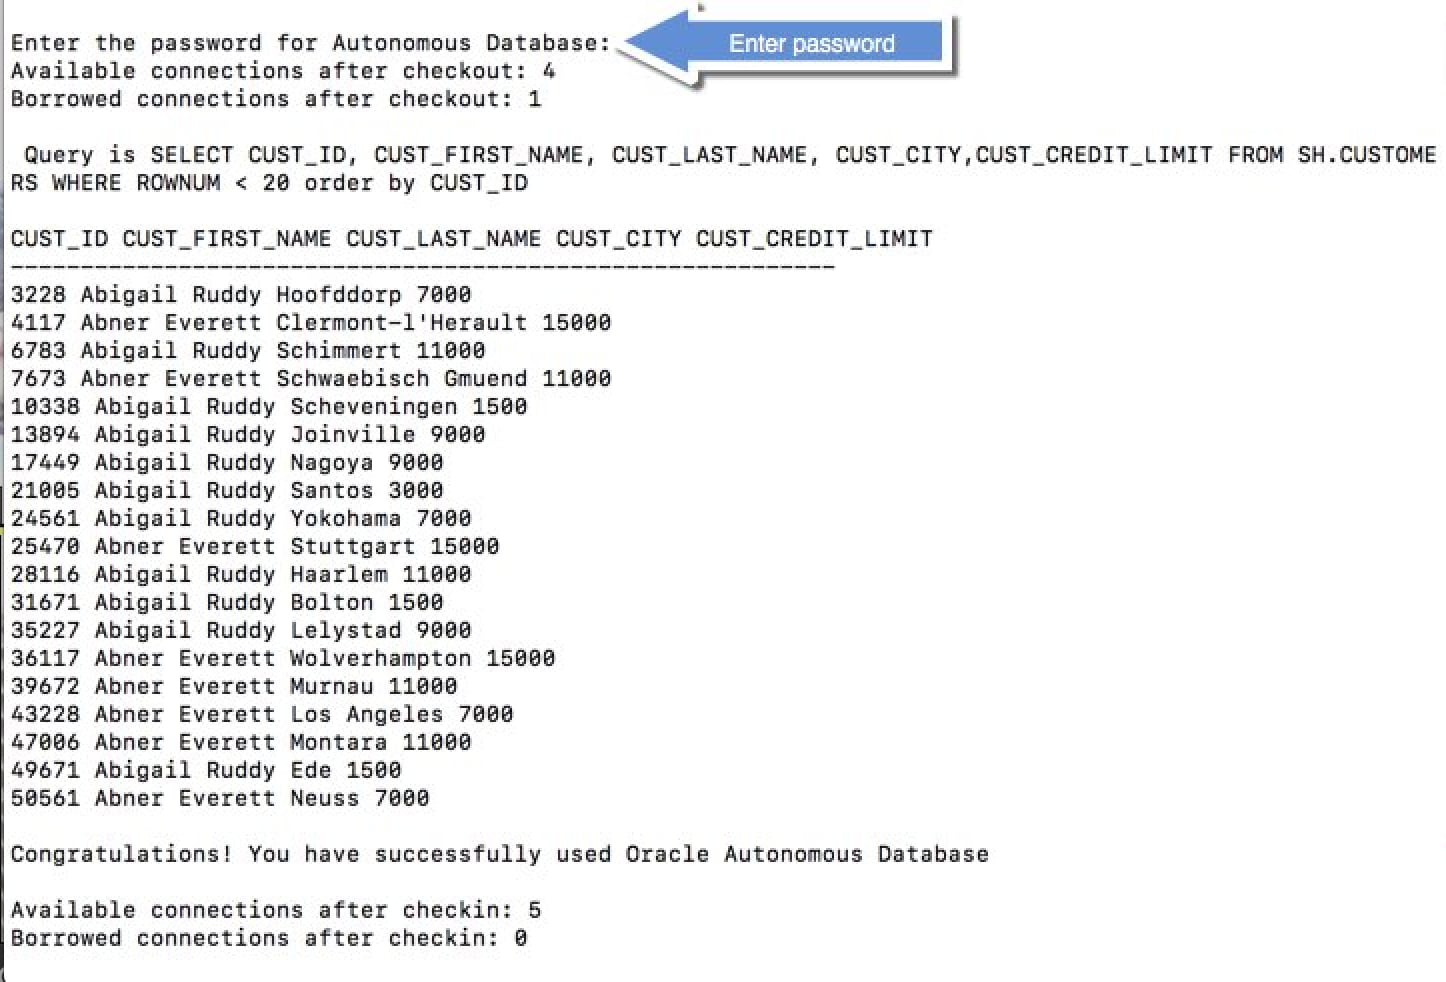
Sample Output:

The screenshot below shows the queried rows, along with a success message:

Sample Output

Note:

If you connect to Oracle Autonomous Database from behind a firewall, you will likely encounter a connection timeout error. Make sure to be outside the firewall while running this sample or update the tnsnames.ora file to use an HTTPS proxy.

See Also:

Using Oracle Autonomous Database Serverless for more information.