Configure Folders and View List of Files

Use the Files page to create and manage folders and set their permissions. A user’s permissions are a combination of individual assigned permissions and those of any groups the user is a member of.

Before you configure folders, you should configure group access.

Once folders are configured, users with the appropriate permissions can add files to folders using an external SFTP client. Administrators can view these files in selected folders in File Server.

  1. From the side pane of the Oracle Integration Home page, choose Settings, then File Server, then Files.
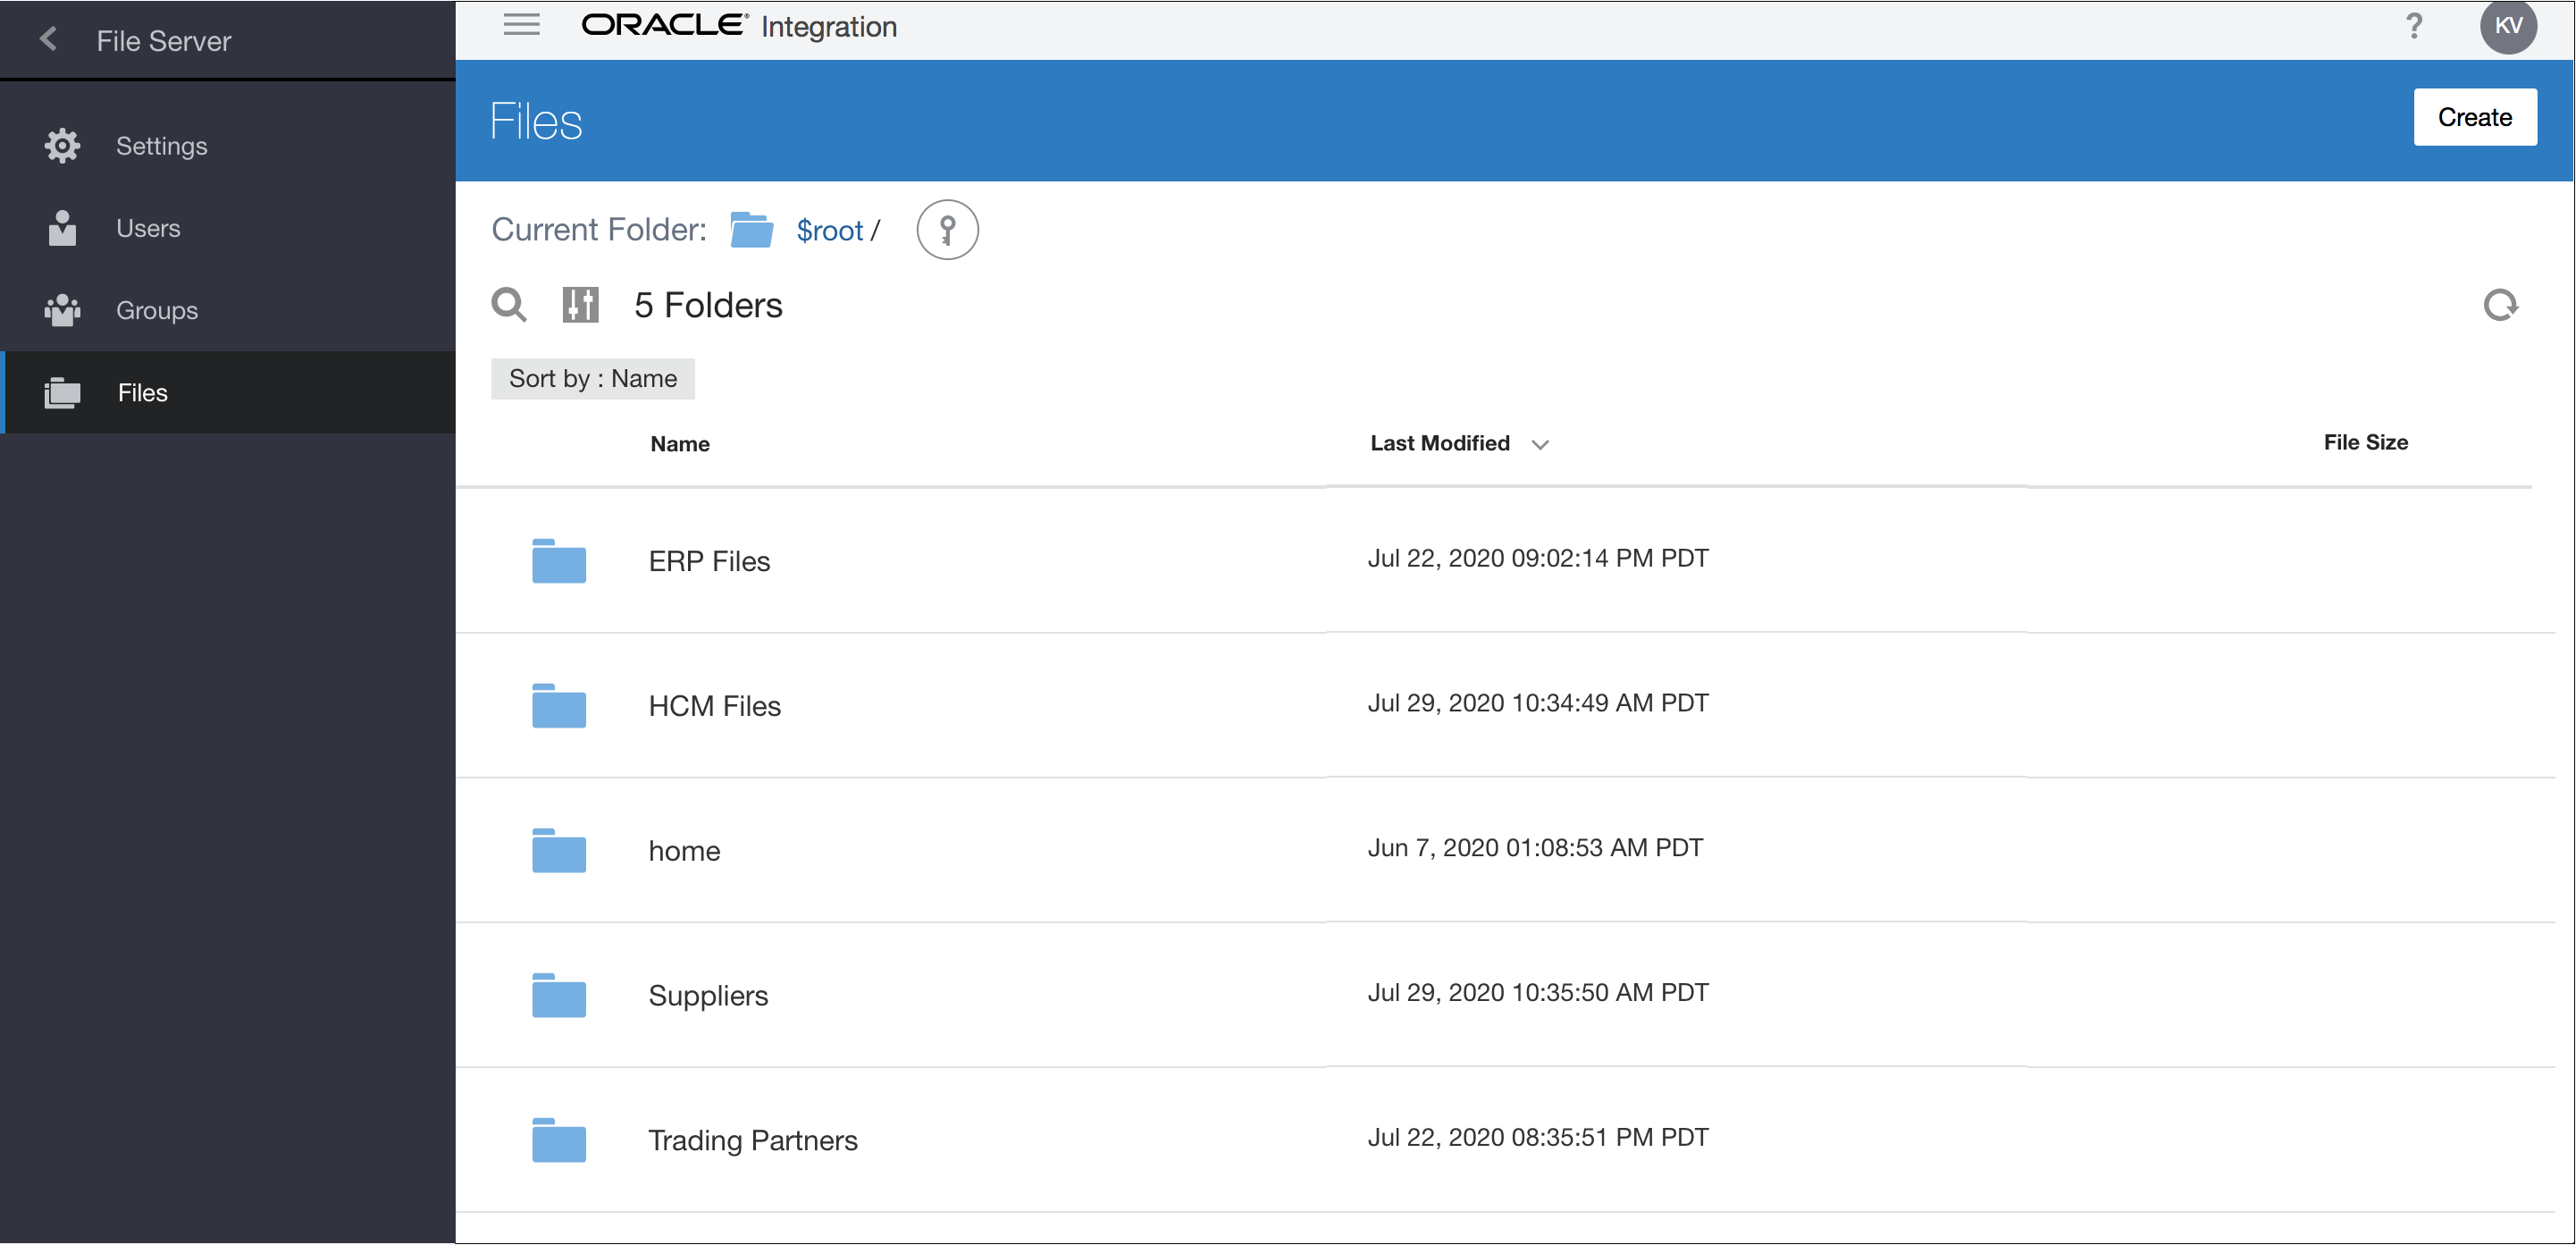
    The Files page is displayed, with the current folder's path shown. The top folder in the table, [Current Folder], represents the selected folder, and its subfolders are listed below. Navigate to a desired folder by clicking a folder name. Each folder has a context menu on the right side to access specific functionality.
  2. If needed, find a folder using the search or filter functions.
    • Sort folder contents by clicking a column heading. Folders are listed above files. By default, folders are sorted by last modified date, starting with most recent.
    • Click Search, enter one or more characters in the folder's name, and press Enter. Click x to return to the default display.
    • Click Filter, sort by name or last modified date, and click Apply. Select Clear Filters to return to the default display.
  3. Create, rename, or delete folders as needed.
    • Add a folder in the currently selected path by clicking Create, entering a name, and clicking Create.
    • Rename a folder by clicking the folder's Actions menu and choosing Rename, then entering a new name.
    • Delete a folder by clicking the folder's Delete icon. Deleting a folder deletes all contents, and any subfolders and files contained within it.
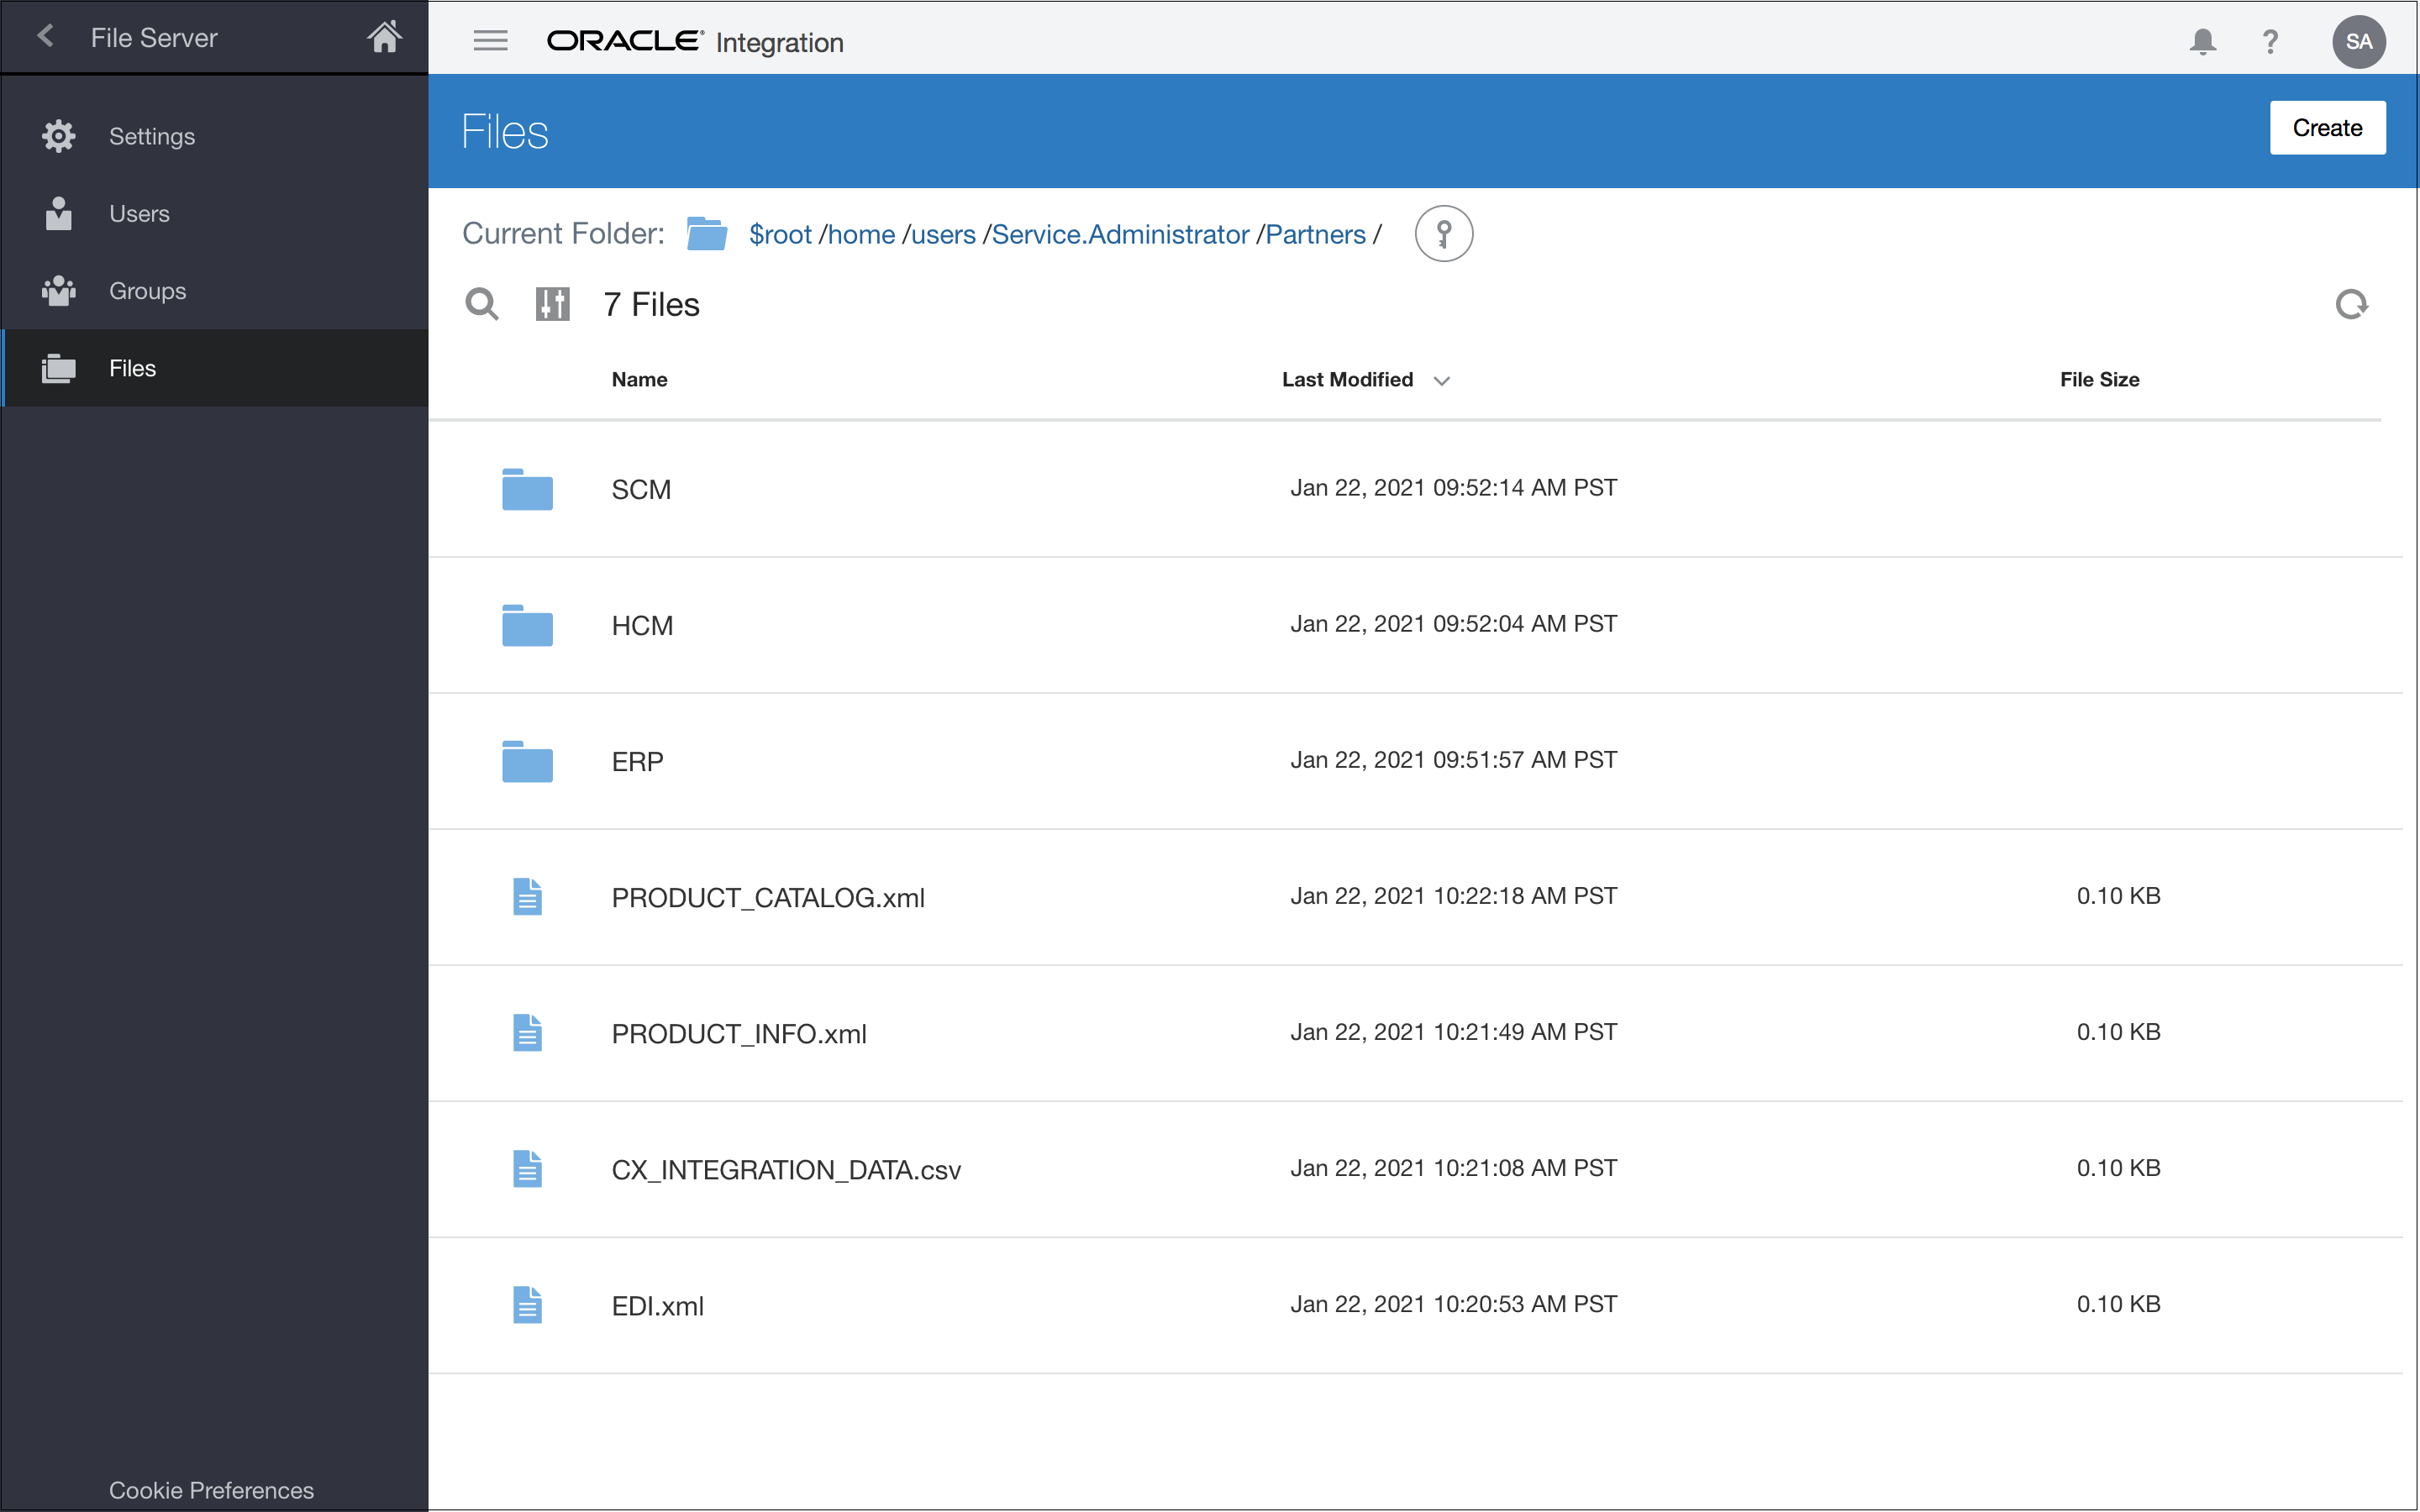
  4. Optionally, open a folder and view its list of folders and files.
    Files are listed with name, last modified date, and size displayed.
    • Sort the list of files by name, last modified date, or file size by clicking a column heading.
    • Search for a file by entering its full or partial name.
    • Filter the list to display folders or files only.
  5. Set folder permissions. Hover over a row and click Permissions Permissions icon. The Permissions screen appears.
  6. If needed, revert changes made to the folder's permissions since the last save by clicking Revert.
  7. Click Save.

Set Folder Permissions

Use the Permissions page to set a selected folder's permissions.

  1. From the side pane of the Oracle Integration Home page, choose Settings, then File Server, then Folders.
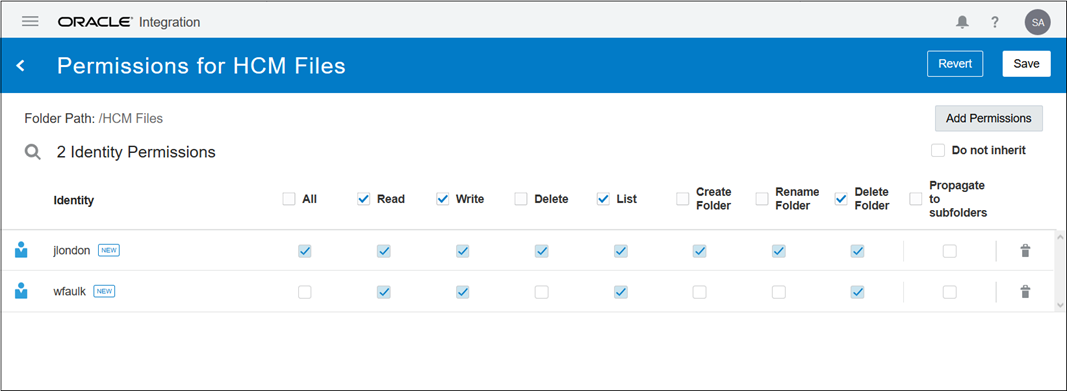
  2. Click a folder's Permissions icon. The Folders Permissions page is displayed, showing a list of users or groups with permissions configured for the current folder. The left-most icon identifies a user versus a group.
  3. Change permissions as needed. Select or deselect permission checkboxes to change permissions to the selected folder for the users and groups. Click Delete to remove a selected permission.
  4. Optionally select Do not inherit.
    This setting blocks any permissions set to Propagate to Subfolders from applying to the selected folder. This setting allows permissions to be propagated to all subfolders except those marked Do Not Inherit.
  5. Grant additional users or groups permissions to the folder, as needed.
    1. Click Add Permissions.
    2. From the side pane that is displayed, click the Users or Groups tab, select one or more identities, and click Add. The new identities are added to the permissions list.
    3. Select checkboxes to set specific permissions. Select a top checkbox to assign a permission to all listed users and groups.
    Field Description

    Propagate to subfolders

    Apply the selected permissions to all subfolders within the folder (and all child subfolders within and so on) unless you block this setting for a selected subfolder using the Do Not Inherit setting.

    All

    Assign all permissions to this user or group.

    Read

    Allow files to be downloaded.

    Write

    Allow files to be uploaded.

    Delete

    Allow files to be deleted.

    List

    Allow listing of the folder's contents.

    Create Folder

    Allow subfolders to be created.

    Rename Folder

    Allow renaming of subfolders.

    Delete Folder

    Allow deletion of subfolders.

    Propagate to subfolders

    Apply the selected permissions to all subfolders within the folder (and all child subfolders within and so on) unless you block this setting for a selected subfolder using the Do Not Inherit setting.

  6. Click < to return to the Folders page.
  7. If needed, revert changes made to folders since the last save by clicking Revert.
  8. Click Save.
After setting folder permissions, you must create an allowlist so you can control access to File Server.

Default Folders for Users and Groups

In the File Server folder directory, the root/home folder contains default folders for groups and users that an administrator creates in Oracle Identity Cloud Service console and that you enable for File Server. You can delete the files and sub-folders within the folders but not the folders themselves.

The folders are in the following locations:

  • When you enable a group's access to File Server, a folder for the group is created in /home/groups/<group>
  • When you enable a user's access to File Server, a folder for the user is created in /home/users/<user>

If an administrator deletes a group in Oracle Identity Cloud Service console, the group no longer appears on the Groups page for File Server. Similarly, deleted users no longer appear on the Users page. However, the folder for the group or user remains in File Server to preserve access for people or groups who rely on the files in the folder.