Patch and Upgrade Oracle Integration Classic (User-Managed)

In Oracle Integration Classic (user-managed), you can apply a patch to an Oracle Integration Classic instance.

About Patching an Oracle Integration Classic (User-Managed) Instance

You can quickly and easily apply patches to an Oracle Integration Classic (user-managed) instance, without any command-line intervention.

Once you navigate to the Patching page in the Oracle Integration Classic user interface, applying a patch to service instance is a one-click operation.

When to Apply Patches?

New approved patches are available and displayed on the Patching page. Apply the most recent patches promptly to ensure new features and fixes are available.

What Happens to the Service During Patching?

Patching operations are rolling operations, so the service functions with very little interruption during the patch process. The patching operation shuts down one virtual machine at a time and the patching operation continues patching the servers on one virtual machine at a time until all servers are patched. Patching restarts virtual machines. For example, if you have a two-node, each node exists on a separate machine, and one node keeps running while the other is being patched.

The user sessions that are running on a specific node can be lost during patching operation. We recommend you to plan your patching operation during a time when there are minimal user changes happening.

During patching, request for any administration task using REST API will be denied, and administrative requests will not be accessible from the Integration Console.

What Happens When Patching is Not Fully Successful or Fails?

If the patching operation fails, then the patch is automatically reverted back.

Typical Workflow for Patching an Oracle Integration Classic (User-Managed) Instance

Consider the typical workflow for patching an Oracle Integration Classic (user-managed) instance, as described in the following table.

Task Description More Information

Learn about approved patches

View approved patches displayed on the Patching page periodically.

View Details About the Available Patches

Perform optional prechecks

Learn about problems that would cause patching to fail, so you can address those problems before you try to apply a patch.

Perform Prechecks Before Applying a Patch

Apply a patch

Initiate a patching operation.

Apply a Patch

Quick Tour of the Patching Page

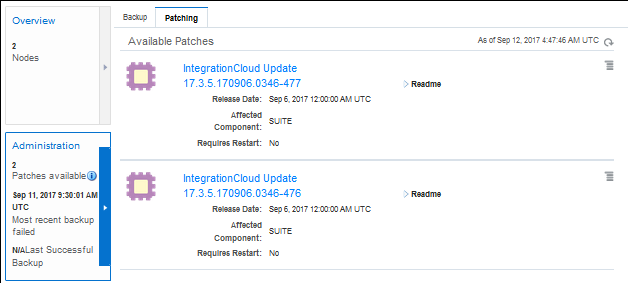
You can use the Patching page to view the available patch, initiate a patching process.

To access the Patching page, click the Administration tile on the Service Overview page, then click the Patching tab.

The following table describes the key information shown on the Patching page.

Element Description

Scheduled Patches

Displays details about any scheduled patches. Oracle handles all patch installations:

  • Patch name

  • Status

  • Patched By

  • Notes

  • Readme link that displays information about the patch

Patch icon

Represents an available patch.

Menu icon

This menu has two choices:

  • Precheck—Performs prechecks without attempting to patch, and reports any errors found so that you can address them before you patch.

  • Patch—Performs prechecks, then patches the Oracle Integration Classic (user-managed) instance with the selected patch.

Patch precheck success icon

Represents a successful patching precheck operation.

Patch precheck failure icon

Represents a failed patching precheck operation.

Patch in progress icon

Represents a patching operation in progress.

Patch History

Displays the history of patch installation.

Note: You cannot roll back a patch.

Patch success icon

Indicates a successful patching operation. Appears in the Patch History section. Click this icon to obtain more information about the patching operation.

Warning icon

Displayed on a tools patch, indicates that the patch version for your existing Oracle Integration Classic (user-managed) instance is older than the current version. You will also see a warning stating that the service is on a deprecated tools version. To address this issue, apply the latest tools patch to your Oracle Integration Classic instance.

View Details About the Available Patches

You can use the Patching page to view the information about the available patches and service patch history.

To view details of available patches:
  1. Sign in to the Oracle Cloud Infrastructure Console.
  2. In the Oracle Integration Classic (user-managed) console, click the name of your Oracle Integration Classic instance.
  3. In the Service Overview page, check the Administration tile to see the number of available patches, and the date and time of the previous backup.
  4. If patches are available, click the Administration tile, then click the Patching tab.
  5. On the Patching page, check the information in the Available Patches section.

Perform Prechecks Before Applying a Patch

The patching process performs prechecks before applying a patch, but you can perform an optional precheck operation before patching to identify and remedy issues first.

Prechecks occur automatically once you make a selection from the menu, then produce messages letting you know the results.
Prechecks check for the following conditions:
  • Disk space shortage

  • Missing database connectivity

  • Servers not running

  • Storage access failure

Prechecks do not check whether another administration task (backup, restoration, or scaling) is in progress, which prevents patching.

If prechecks pass or you address all the issues identified by prechecks, you can run a patching operation that will not encounter these issues.

You can only request prechecks for an approved patch that is listed on the patching page.
  1. Navigate to the Patching page.
  2. On the Patching page, click Menu icon to the right of the patch you want to check and select Precheck.
    A message appears beneath the patch name: Prechecks in progress.
  3. Click Refresh Refresh icon to check whether prechecks are done.
    When prechecks are done, a link appears: Precheck results.
    • If prechecks pass, a green check mark icon appears.

    • If prechecks fail, a red exclamation mark icon appears.

  4. Click the Precheck results link.
    The Patch Precheck Results dialog appears.
    • If the prechecks succeed, the following message appears in the dialog: Precheck succeeded for patch patch_name_and_version on date_and_time. No conflicts found.

    • If the prechecks fail, the following message appears in the dialog: Precheck failed for patch patch_name_and_version on date_and_time.

      Error messages appears in the dialog as well. If there are precheck failures, check the error messages to learn about the problems that you need to address.

The Precheck results link remains after prechecks complete.

Complete Prerequisites Before Applying a Patch

Every patch in an Oracle Integration Classic (user-managed) instance has a Readme, which provides information required to apply the patch. Be sure to read the instructions carefully and contact Oracle Support for any questions before applying the patch.

Note:

These prerequisite steps are required only if you are upgrading a 17.4.1 or “new” 17.4.5 Oracle Integration instance to 18.1.x.  They are not required if you previously upgraded a 17.4.1 instance to 17.4.5 and are now upgrading to 18.1.x, or if you already have an 18.1.x instance provisioned.

To view the history of your patch, see the Patch History section in the Patching page. Patch success icon indicates a successful patching operation.

Expand the Readme icon to read the instructions.


Description of ic-patchreadme.png follows
Description of the illustration ic-patchreadme.png
If required (see Note above), complete the following one-time prerequisites for each Oracle Integration instance:
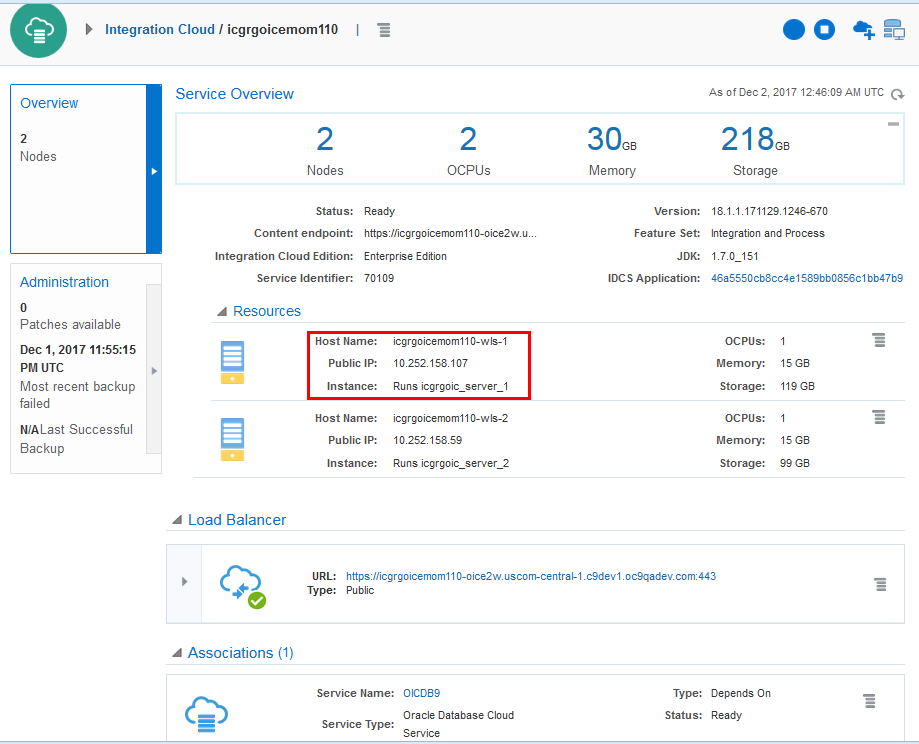
  1. Access the Oracle Integration Oracle Cloud Infrastructure Console Overview page using your browser and make a note of the administration server IP address.
  2. Use an SSH client to connect to the Oracle Integration instance:
    ssh -i private_key_file opc@admin_ip_address

    where admin_ip_address is the IP address of the administration server.

  3. Switch to the user oracle:
    sudo su oracle
  4. Delete the rexDataBag.json file, if it exists:
    rm /u01/data/domains/rexDataBag.json
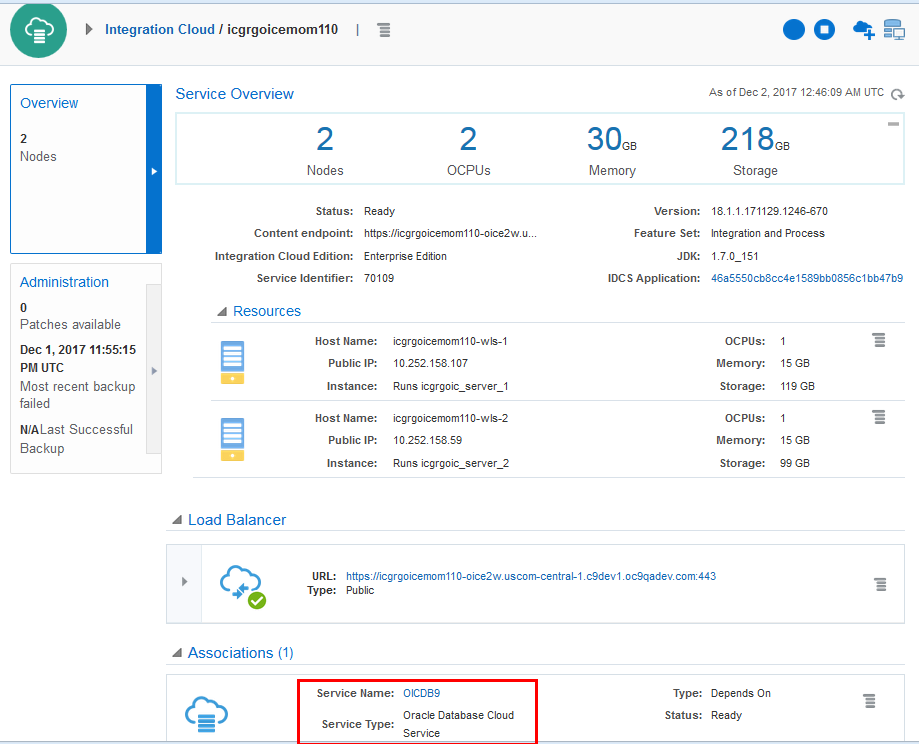
  5. Access the Oracle Integration Oracle Cloud Infrastructure Console Overview page using your browser and make a note of the database server details.
  6. Connect to the database as a DBaaS Database Administrator.
  7. After you connect to the database, execute the following query to list all owners in your current installation.
    SELECT OWNER from "SYSTEM"."SCHEMA_VERSION_REGISTRY" where COMP_ID = 'SOAINFRA';

    A list of owners that are currently created in the database is displayed. Here is the sample output and you’ll find one entry for each Oracle Integration instance.


    The image shows the list of Owners in the database.
  8. For each owner listed in the database (see step 7), execute the following command to set the status to VALID:

    UPDATE "SYSTEM"."SCHEMA_VERSION_REGISTRY" SET STATUS = 'VALID' where STATUS='INVALID' and OWNER='OWNER';

    where OWNER is the name of the owner or schema user.

    For example, UPDATE "SYSTEM"."SCHEMA_VERSION_REGISTRY" SET STATUS = 'VALID' where STATUS='INVALID' and OWNER='SP670824491_SOAINFRA';

    Note:

    If a schema is INVALID, it is set to VALID and the following output appears:

    1 rows updated.

  9. For each owner listed in the database (see step 7) execute the following command to grant the SELECT and UPDATE permissions to the database table:

    GRANT SELECT,UPDATE on "SYSTEM"."SCHEMA_VERSION_REGISTRY$" to OWNER;

    For example, GRANT SELECT,UPDATE on "SYSTEM"."SCHEMA_VERSION_REGISTRY$" to 'SP670824491_SOAINFRA';

  10. For each owner listed in the database (see step 7) execute the following command to grant the SELECT and UPDATE permissions to the database view:

    GRANT SELECT,UPDATE on "SYSTEM"."SCHEMA_VERSION_REGISTRY" to OWNER;

    For example, GRANT SELECT,UPDATE on "SYSTEM"."SCHEMA_VERSION_REGISTRY" to 'SP670824491_SOAINFRA';

  11. For each owner listed in the database (see step 7) execute the following command to provide access to DBA_TABLESPACE_USAGE_METRICS:
    GRANT SELECT ON sys.DBA_TABLESPACE_USAGE_METRICS to OWNER;

    For example, GRANT SELECT ON sys.DBA_TABLESPACE_USAGE_METRICS to SP670824491_SOAINFRA;

Apply a Patch

You can use the Patching page to apply a patch of an Oracle Integration Classic (user-managed) instance.

To apply a patch:

  1. Navigate to the Patching page.
  2. In the Available Patches section, click Menu icon to the right of the patch you want to apply and select Patch.
  3. In the Patch Service dialog, enter the following information:
    • Additional Note (optional): Type notes pertaining to the patch.

    • Database Schema Password: You can either leave the field blank or enter the correct database schema password only if you've changed the password since the last time a patch was applied.

      Note:

      If you've not changed the database schema password, leave the Database Schema Password field blank.
  4. In the Patch Service dialog, click Patch.