Activate Applications
If you have administrator privileges, then you can activate applications to a production or testing environment from the Manage Active Applications page in design time.
Note:
To quickly back up your application, export it as an EXP file, and save it locally. You can then import it at anytime from the Process Applications page. See Import and Export Applications and Snapshots.To activate an application:
-
In the Oracle Integration navigation pane, click Processes, click Process Applications, and then click Activate.
-
Click Options
 and select Activate.

Description of the illustration manage-environments-ic.pngThe activate wizard opens. It will walk you through the activation process from selecting your application to setting options and viewing results. Continue reading if you want a preview of the activation process.
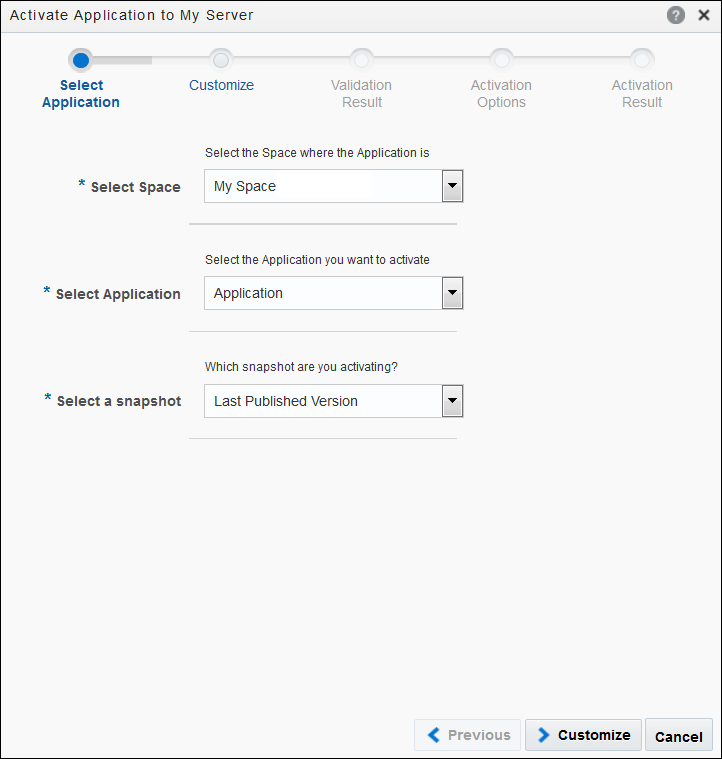
Select the Application to Activate
In the activate wizard, you select the space where the application is located, and the name and version of the application you want to activate. The available versions of the application are the Last Published Version and all snapshots that have been created.

Description of the illustration activate-production.png
Note:
As an administrator, you can select from all applications inside any space.Customize REST and SOAP Services and Properties
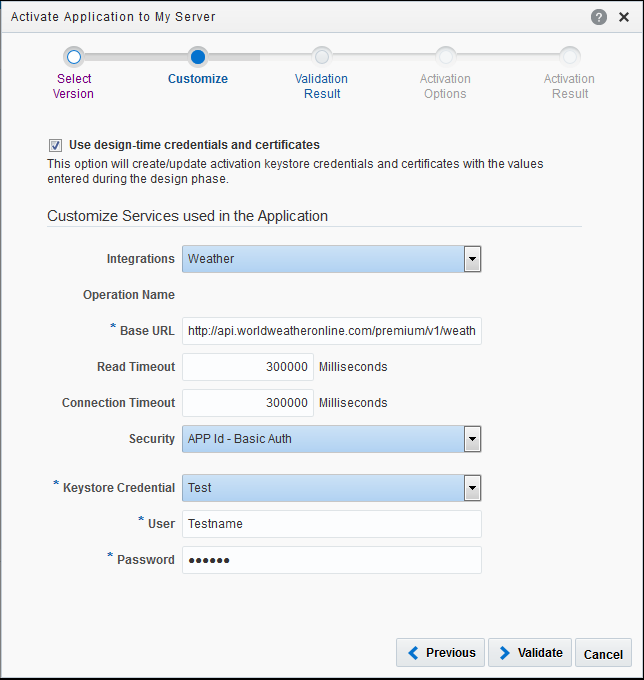
If the process application you are activating uses REST or SOAP integrations, you can select different production settings for these integrations before activation. Your changes modify the original application and will be activated to the server. Your changes aren’t published to the repository so you won’t see them when editing the application.
Note:
OIC Integrations (integrations created in the Integrations feature) cannot be customized here, and are not shown. If your application contains no REST or SOAP integrations, this page is skipped and you move directly to the Validation Result page.
Description of the illustration activate-customize.png
-
From the Integrations field, select a REST or SOAP integration used in the process application to customize, and its properties display. (Integrations must be used in the process application to display in this list.)
-
From the selected integration’s properties, make changes as needed. For example, you might change a REST integration’s address in the Base URL field.
-
Specify credentials and certificates to use for the integration. As described below, you can create new runtime credentials or check the Use design-time credentials and certificates option, which populates the fields with design time settings.
When designing the application, you can define authentication keys to use when activating the application to the test environment. There are two different sets of credentials:
-
One set for design time
-
One set for runtime
This helps to keep the two environments completely isolated from one another. Nobody can change or use a runtime credential when designing or testing the application.
When the Customize page opens, it displays a list of connectors that are used in the processes. After you select a connector, you can view and edit its advanced options and security policy. Depending on the security policy, you must either select or create a security credential, and select or add a certificate alias.
On the Customize page, you’re defining the runtime credentials. Remember that. You can select the Use design-time credentials and certificates check box to determine which set of certificates and credentials display in the Certificate Alias and Keystore Credential fields. Selecting the check box is a shortcut. It’s a quick way to add the credentials and certificates that were defined at design time, and use them to create the runtime credentials.
If you select one of the design-time credentials to use (for example, myKey), then that credential is copied and a new runtime credential is created in the credential store. There are now two versions of this credential key: one for design time; the other for runtime. If you change the username and password during the activation wizard, then your change only affects runtime credentials. If you change the username and password in the design-time web service connector wizard, then your change only affects design-time credentials.
The credential and certificate are created or updated when you click Activate.
Want to learn more about integrations, credentials, and certificates? See Integrate with Applications and Services.
Review Validation Results
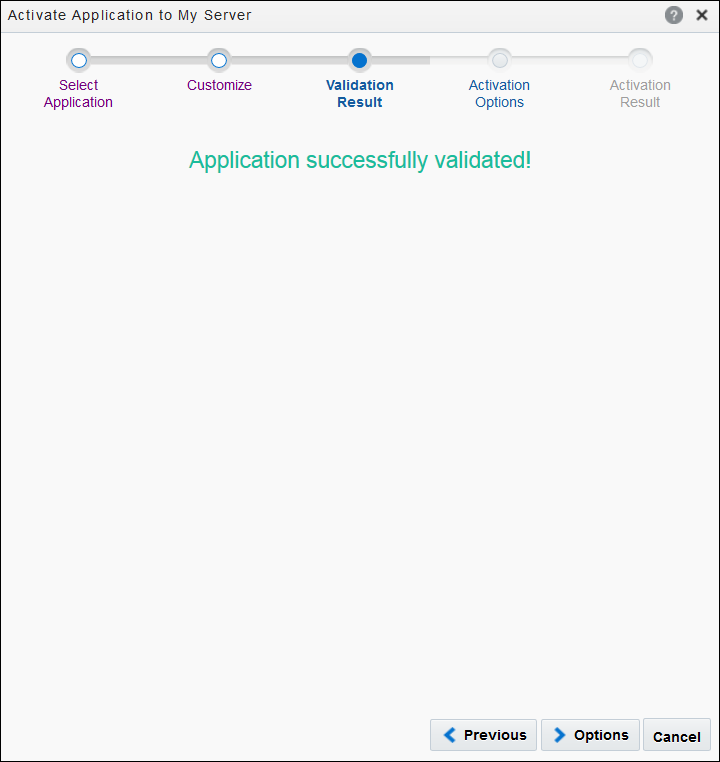
The Validation page displays the validation results.
-
Validation Success: A message indicating validation is successful displays. However, although the validation may be successful, a table with a list of warning messages may display.

Description of the illustration activate-validate-result.pngIf no warnings exist, a placeholder image is displayed. The Options button is now enabled.
-
Validation Failed: A message indicating validation failed displays as well as a table with the validation errors. The Options button is inactive.
When validation fails, you can’t continue until all errors have been fixed and validation is successful.
Specify Activation Options
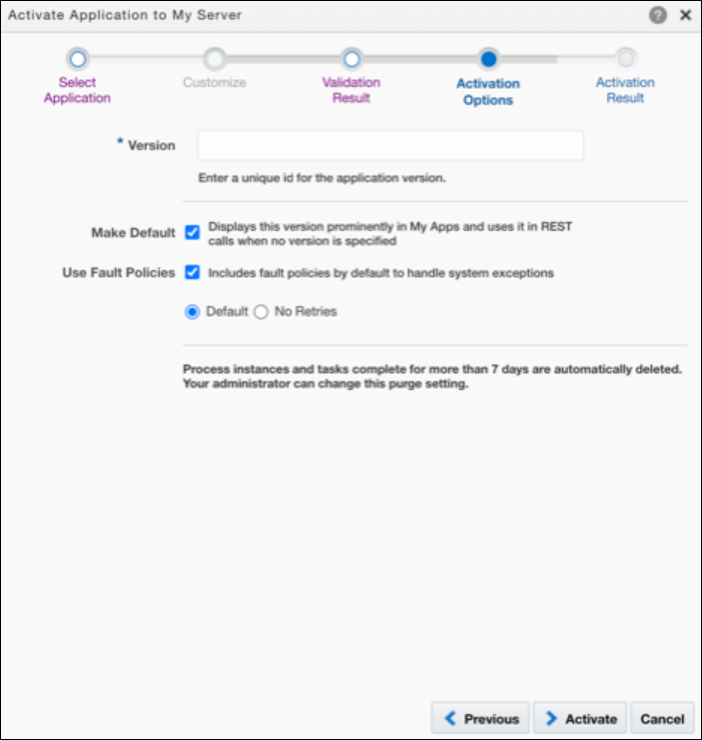
On the Activation Options page:
-
Enter a number in the Version field, such as 1 or 1.0, for this application revision. When activating the same process multiple times, use incremental version numbers each time.
-
Optionally, make the new revision the default version. If you select the Make Default check box, only the default (primary) version of each application is used.
-
In certain cases, it may be useful to disable automatic importing of system or runtime exceptions so that they can be handled at the process level. By default, however, the Use Fault Policies check box is selected and system faults are NOT caught by the process.
You have two options under Use Fault Policies. If you want any failed activity to be retried twice in runtime before it is considered as FAILED, select Default. If you want to skip failed activities being retried, select No Retries.
View Activation Results
When you click Activate, the application is activated to the selected environment.
-
Activation Success: A message indicating the application activated successfully displays. The active application is added to the Active Applications table for the environment.
-
Activation Failed: A message indicating an error displays with more specific information about the error.
