Add Dynamic Behaviors to a Form
Use events to introduce dynamic behaviors into your web forms, and combine them with actions, conditions, functions, and REST connector calls.
For example, you can introduce the following behaviors into your forms:
-
Populate data in a control field based on another control field in the form. For example, a Country select field will impact the State select field and the State select field will impact the City select field.
-
Enable control field validation based on another form control field. For example, if Start Date is given then End Date is mandatory or a Full Name gets its value from the First Name and Last Name.
-
Make a REST call on demand, store the call’s response, and use response data in an event action or condition.
Note:
To use logged-in user's credentials when loading a form to execute a REST operation, define a REST connector without credentials. To use the same operation as a service call in the process, define another identical REST connector with credentials. This applies to internal REST API calls only.
Configure Events
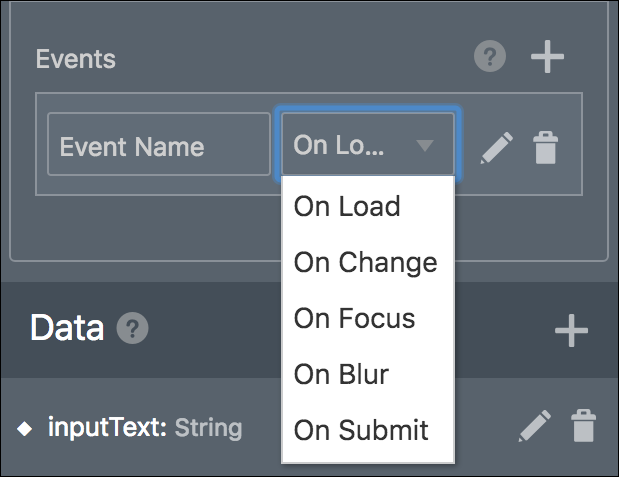
By configuring one or more events on a control or presentation, you change the control or presentation’s behavior. Configuring events in forms enables you to trigger connector calls, actions, conditions, and functions.
Specify Actions
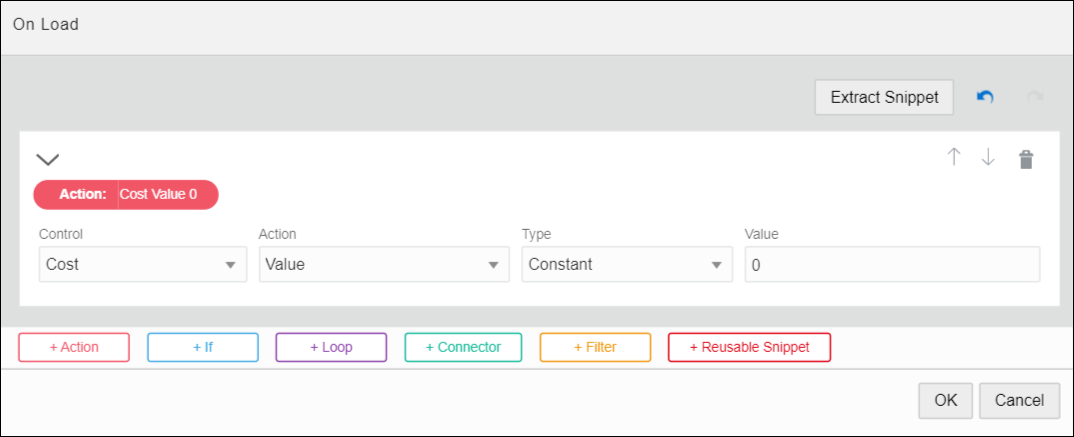
Actions let you trigger changes to a control. You can choose from a variety of control and style actions. For example, you might configure a Clear button to clear the values of other form controls.
Specify Conditions
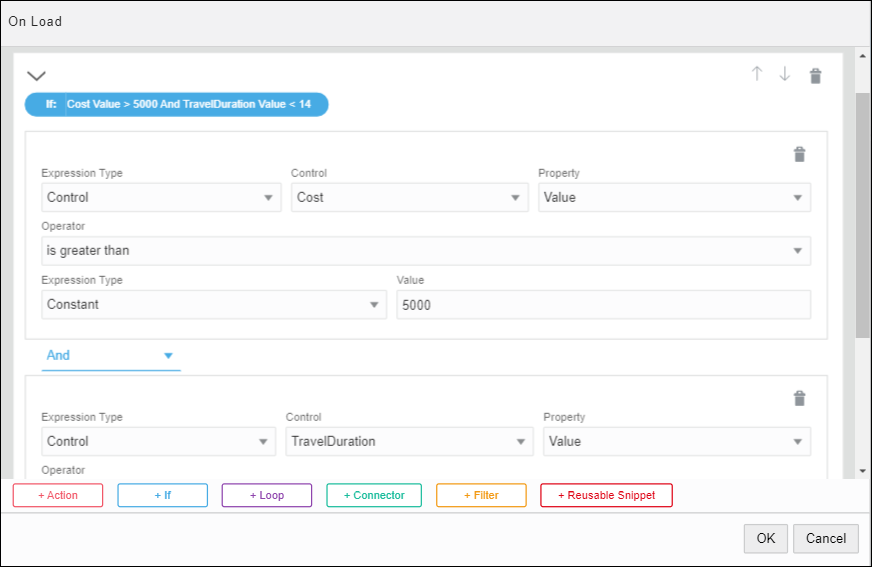
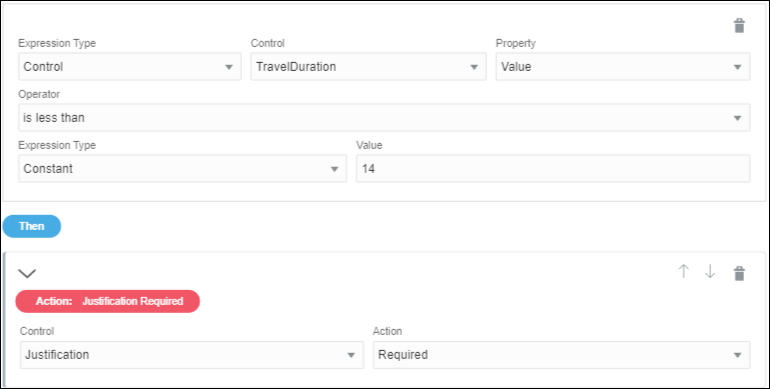
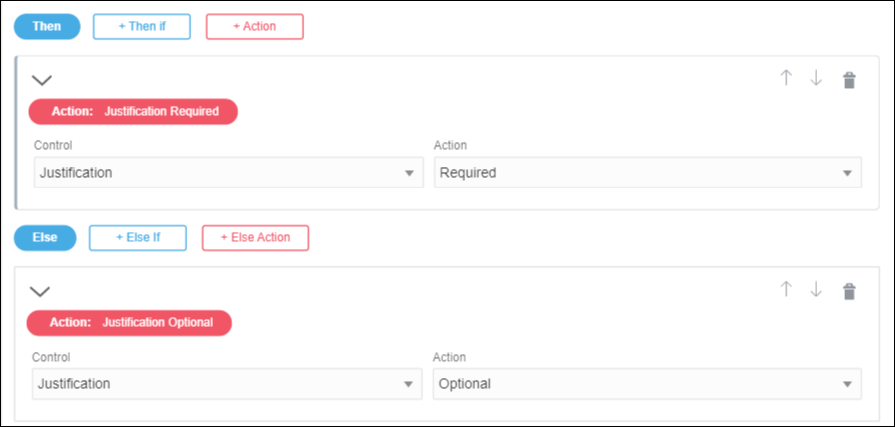
Conditions let you configure an If/Then/Else condition to trigger an action or connector call for a control’s selected event or a control’s specified action.
Specify Functions
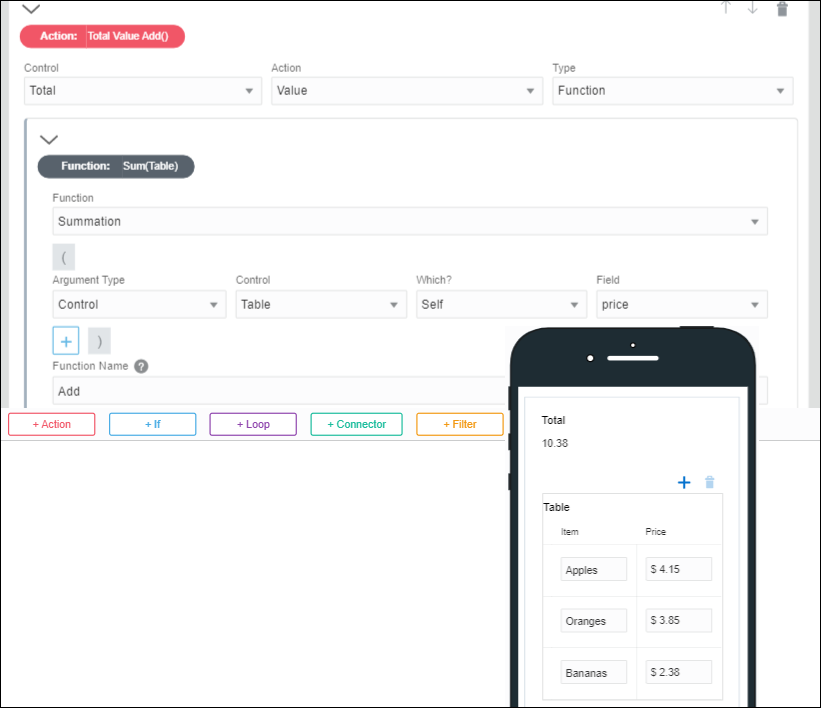
Use functions in event actions and conditions to perform common operations with strings, values, and arrays. For example, use a function to add two values, concatenate two strings, or sum items in table rows.
-
You can specify parameters for selected functions. The parameter value can be a constant, data definition value, control value, other function, or connector data value.
-
Some functions support selecting arrays of data or repeatable controls.
-
You can nest functions, such as concatenate multiple strings or the results of multiple rows. You might select a concatenate function and concatenate a data value, connector data value, or control value with another value such as a constant.
| Function Category | Function Name | Parameters | Description |
|---|---|---|---|
| Other | Create UUID | None |
Generates a universally unique identifier. |
| Date | Current Date | None |
Generates the date in yyyy-mm-dd format. |
| Date | Current Time | None |
Generates the time in 24 hour T00:00:00 format (for example, T23:59:59). |
| Date | Current Date Time | None |
Generates the date/time in yyyy-mm-dd T00:00:00 format. |
| Logic | And | (Input1, Input2, Input3...) |
Checks if Input1 && Input2 && Input3... is true or false. |
| Logic | Or | (Input1, Input2, Input3...) |
Checks if Input1 || Input2 || Input3... is true or false. |
| Logic | Not | (Condition) |
Negates the value of the specified condition. |
| Logic | Inline If | (Condition, ValueIfTrue, ValueIfFalse) |
Implements an If…Else statement. If the condition specified is true, the first value is returned as the result, else the second value is returned. Example: Inline If (N=5, 60, 70) returns 60 if N=5 else returns 70. |
| Relational | Equal (=) | (Input1, Input2) |
Checks if Input1 equals Input2 and returns a Boolean value. |
| Relational | Greater than (>) | (Input1, Input2) |
Checks if Input1 is greater than Input2 and returns a Boolean value. |
| Relational | Less than (<) | (Input1, Input2) |
Checks if Input1 is less than Input2 and returns a Boolean value. |
| Relational | Greater than or equal to (>=) | (Input1, Input2) |
Checks if Input1 is greater than or equal to Input2 and returns a Boolean value. |
| Relational | Less than or equal to (<=) | (Input1, Input2) |
Checks if Input1 is less than or equal to Input2 and returns a Boolean value. |
| Math | Sum ( + ) | (Number, Number) |
Adds two numbers. |
| Math | Summation | ([Number]) |
Adds arrays of numbers. |
| Math | Subtract ( - ) | (Number, Number) |
Subtracts numbers (for example, 10–5). |
| Math | Multiply ( * ) | ([Number]) |
Multiplies numbers. For example, multiply all values in a column. |
| Math | Divide ( / ) | (Number, Number) |
Divides numbers and includes the decimal portion, up to 10 decimal places (for example, 4/3=1.3333333333). |
| Math | Integer Division | (Number, Number) |
Divides numbers and truncates the result (for example, 5/2=2, -5/2=-2). |
| Math | Modulo ( % ) | (Number, Number) |
Finds the remainder after division of one number by another. |
| Array | Min | ([Number]) |
Finds the minimum value in an array. |
| Array | Max | ([Number]) |
Finds the maximum value in an array. |
| Array | Count | ([Any]) |
Finds the count value in an array. |
| Array | Avg | ([Number]) |
Finds the average value in an array. |
| Array | Concat | ([Any]) |
Joins array values. |
| Text | Concat | ([String]) |
Joins a text string. |
| Text | Split | (String, String) |
Splits a string into an array using the second parameter as a separator. For example, you can split a series of numbers in a text field into a checklist. |
| Text | Join | ([String], String) |
Joins an array into a string using the second parameter as a separator. For example, you can fetch values of all rows within a table column and create a series. |
| Text | Trim | (String) |
Removes leading or trailing spaces. |
| Text | Contains | (String or Array, Element) |
Checks if a string or array (within a control) contains a specific element and returns a Boolean value. |
| Text | Replace | (String, String, String) |
Replaces a text string. Uses three parameters, where:
|
| Text | Matches | (String, String) |
Checks if two strings or expressions match and returns a Boolean value. |
|
Interval |
Duration in days |
(Date, Date) |
Calculates the difference between two dates and returns the result in number of days. To calculate the interval, you can manually enter start and end dates in the event window or supply them through date controls present within the form. If you choose to manually provide dates for calculation, use the following valid formats:
You can use the following separators interchangeably:
|
|
Interval |
Duration in months |
(Date, Date) |
Calculates the difference between two dates and returns the result in number of months. |
|
Interval |
Duration in years |
(Date, Date) |
Calculates the difference between two dates and returns the result in number of years. |
Specify Filters in Events
Filters let you selectively use a subset of data from a larger set. For a form control, you can define a filter within an event and use the filter data in other controls through event actions and conditions.
To specify filters within an event:
-
Select a control on the form canvas and specify an event for it. See Configuring Events.
-
Click the event editing icon adjacent to the Event field.
The event window displays with the selected event option (for example, On Change) at the top and color coded buttons for adding actions, conditions, connectors, or filters to the event.
-
Click +Filter to add a filter, and specify the data source from which you want to filter specific information. You can choose data attributes, another control, or a REST connector.
-
If the data source selected is valid (of the type: array), additional +Filter and +If buttons appear as shown in the following figure:

Description of the illustration filter.png -
Click +Filter to specify how data is filtered from the data source. You can also use an If condition to do the same.
Note:
You can specify more than way to filter data from the source; the results are combined or unioned and stored within the filter. -
Provide a suitable name for the filter; the information extracted from the data source is stored within this filter.
-
In the same event window, you can use the data in the filter to populate other controls dynamically through actions or conditions.
-
After completing the event, click OK, then Save.
Filtering Using Events – An Example
This section demonstrates filtering through events using a web form with a drop-down select control and a table.
Based on the option you choose in the select control, you will be able to filter data from a data source and selectively use the extracted data to populate the table.
In this example, we use a previously created REST connector to fetch data from a web server, which contains a list of items. Each item, in this case, is a complex data object that contains personal details of individuals, such as first name, last name, unique ID, company name, email, phone number, city, and so on. To create a REST connector from scratch, see Creating a REST Connector.
We use this REST connector to define a global connector call, globalResponse, under Presentation properties of the form. Want to know more about global connectors? See Working with Presentations. In addition, this connector also serves as the input to the select control.
-
Add and configure a drop-down select field on the form’s canvas.
-
From the Basic Palette, drag and drop a Select control onto the canvas.
-
Select the control, and on the General tab, change the Label field to First Name.
-
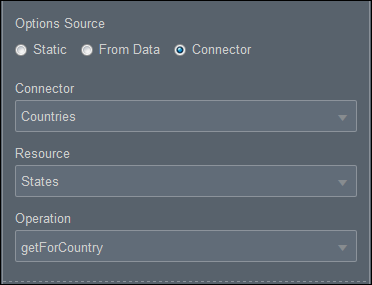
Under Options Source, select the Connector option and populate the Resource and Operation fields with respect to the REST connector defined within the application. See Populating Controls Using REST Calls.
-
Under Response, specify the items list to display as options of the control.
-
For this particular example, we map the first name attribute to the Label Binding field, so that only first names of all individuals appear as options in the select control. Also, the unique ID attribute is mapped to the Value Binding field as follows:
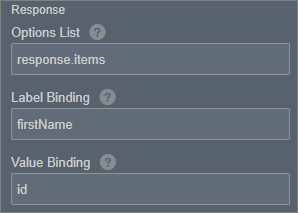
Description of the illustration filter-response.png
-
-
-
Add and configure a table control on the form’s canvas.
-
From the Advanced Palette, drag and drop a Table control onto the canvas.
-
Add two additional columns, and edit column labels as Last Name, Organization, and Email.
-
Drag and drop an input text control into each column.
-
-
Click on the select control, and define an On Change event for it in the General tab.
-
Click the event editing icon to open the event window. In this window, click +Filter to add a filter.
-
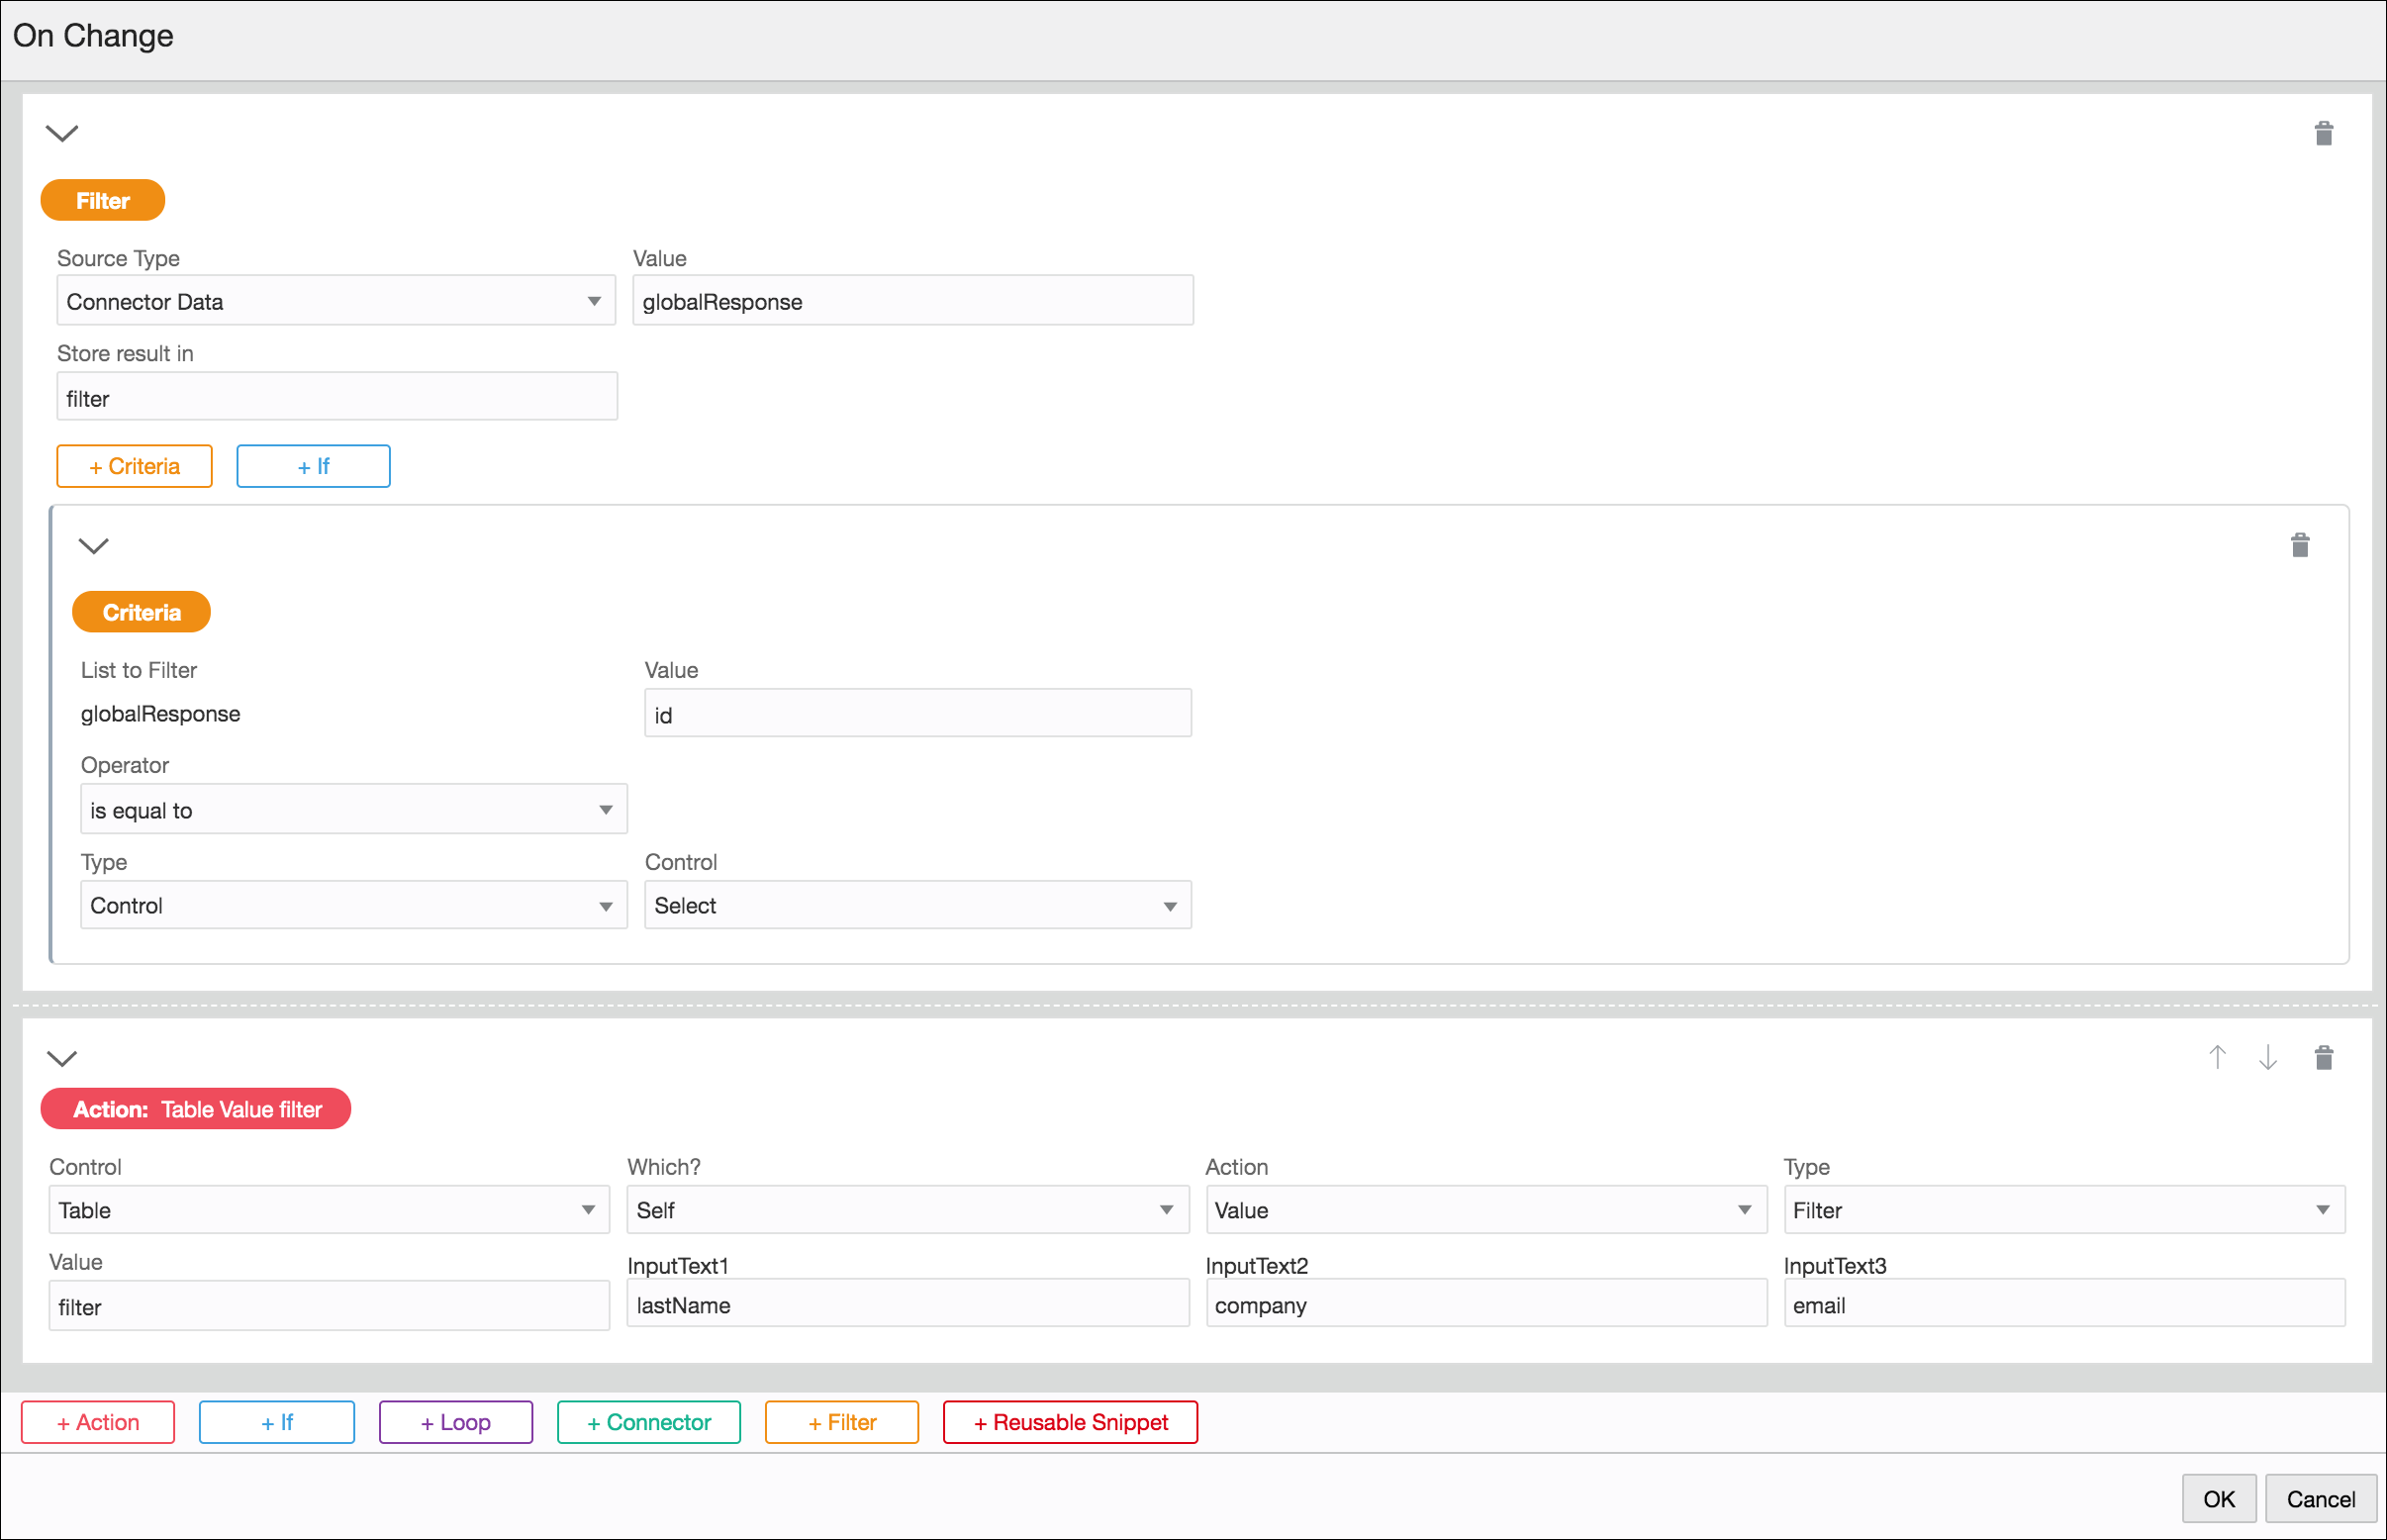
The following figure shows the event configuration for this example:
-
Connector data is set as the data source and its value comes from the global connector call, globalResponse, defined previously.
-
The subsequent Filter section shows how the data is filtered from the source, that is, when the ID of an item in the source list matches with the ID of the option selected by the user, all data associated with that item is stored in the filter, personalDetails.
-
An event action selectively uses the data contained in this filter to populate the table. Although each item may have several attributes associated with it, here we use only last name, company, and email attributes. We map each of these attributes a corresponding input text control or table column.
Description of the illustration filter-actions.pngNote:
While defining event actions, if you choose to map the filter data to a control of simple data type (for example, input text), you have to specify an index value in addition to the attribute that you would like to map to the control.
-
-
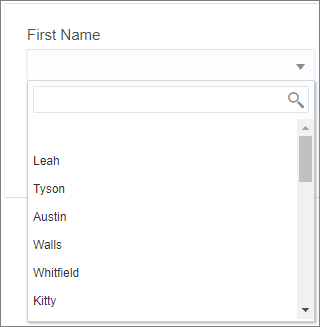
When the form loads, the select control displays first names of all individuals as follows:
Description of the illustration filter-names.png -
After you make a selection, all data associated with the selected option is stored within the filter, and this data is selectively used to populate the table as shown in the following figure:

Description of the illustration filter-output.png
Specify Custom Outcomes for Forms
In addition to Submit, you can specify custom outcomes (such as Approve, Reject, On Hold, and so on) for a form according to your requirements and test the same in the Composer. Also, you can specify conditions to prevent users from submitting a form.
You can trigger submit of a form with a custom outcome using any event on a control or presentation. Want to know how to define events? See Configuring Events.
-
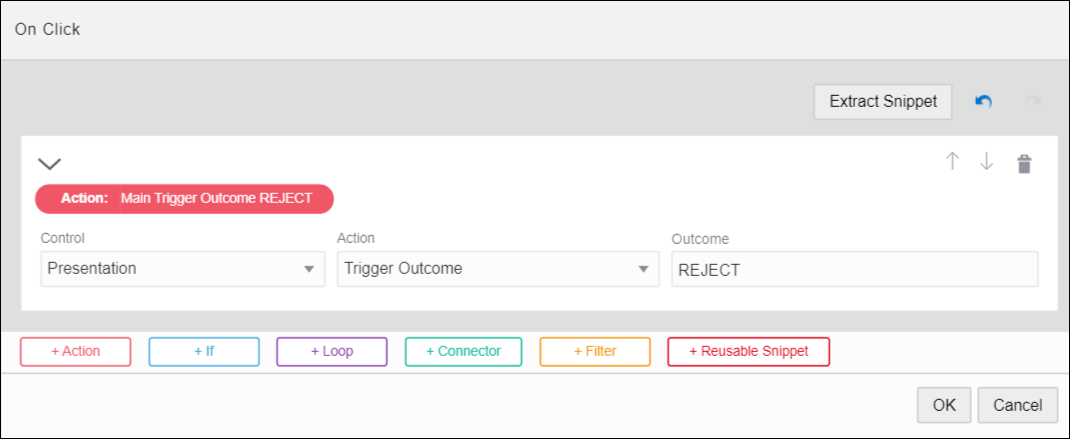
Click +Action and select the Trigger Outcome action available for the Presentation control.
-
Specify a custom value in the Outcome field, for example, REJECT.
When a user clicks this button in runtime, the form is submitted with the outcome value as REJECT.
Description of the illustration outcome-trigger.png
-
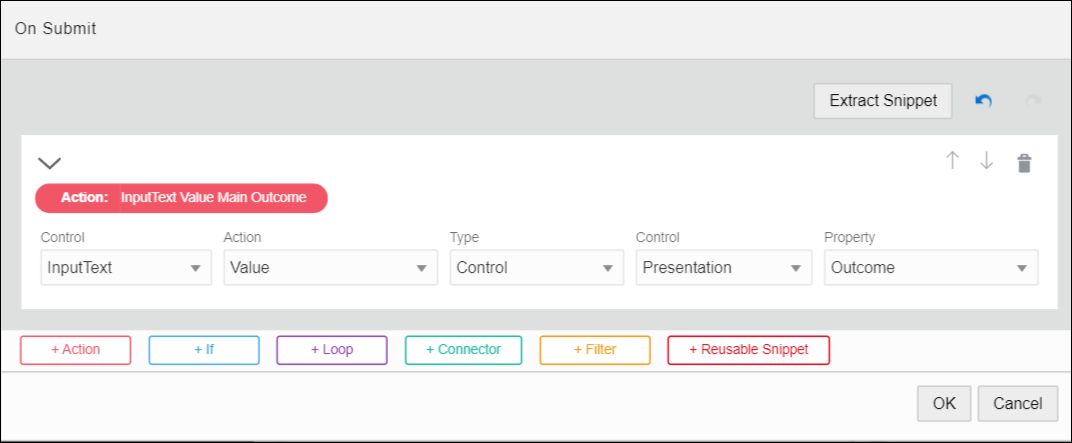
Click +Action and select parameters for all fields as shown in the following figure.
Description of the illustration outcome-submit.png -
When a user submits the form in runtime, the input text control is populated with the form’s outcome value.
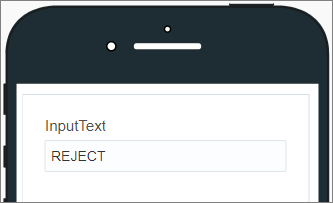
Description of the illustration outcome-reject.pngYou can input and test different custom outcomes using the Preview feature, see Previewing Forms and Their Payload.
Preventing Form Submit
By default, the form submission is prevented when the form is incomplete or invalid. You can also define custom conditions within an On Submit event to prevent users from submitting a form. For example, you can prevent submit based on a data attribute’s or control’s value.
The following example shows an On Submit event defined for a Presentation. Here, the form submission is prevented if the outcome variable of the form contains a specific value, that is, PREVENT.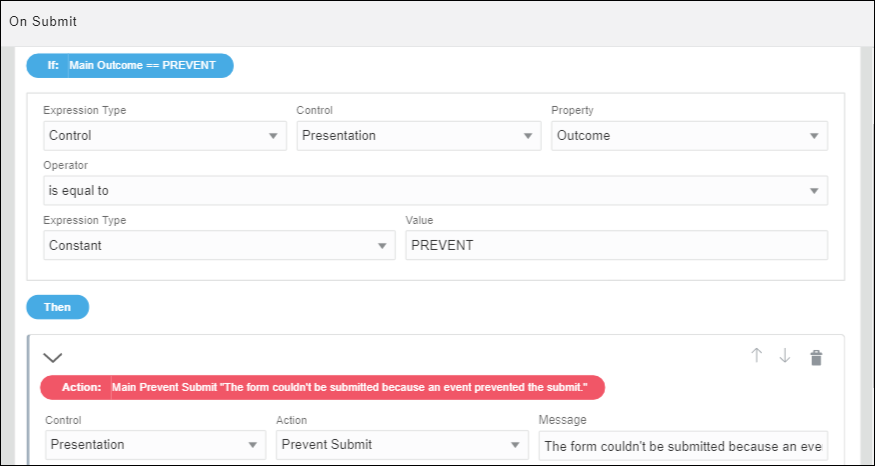
Description of the illustration outcome-prevent.png
Execute REST Connector Calls in Events
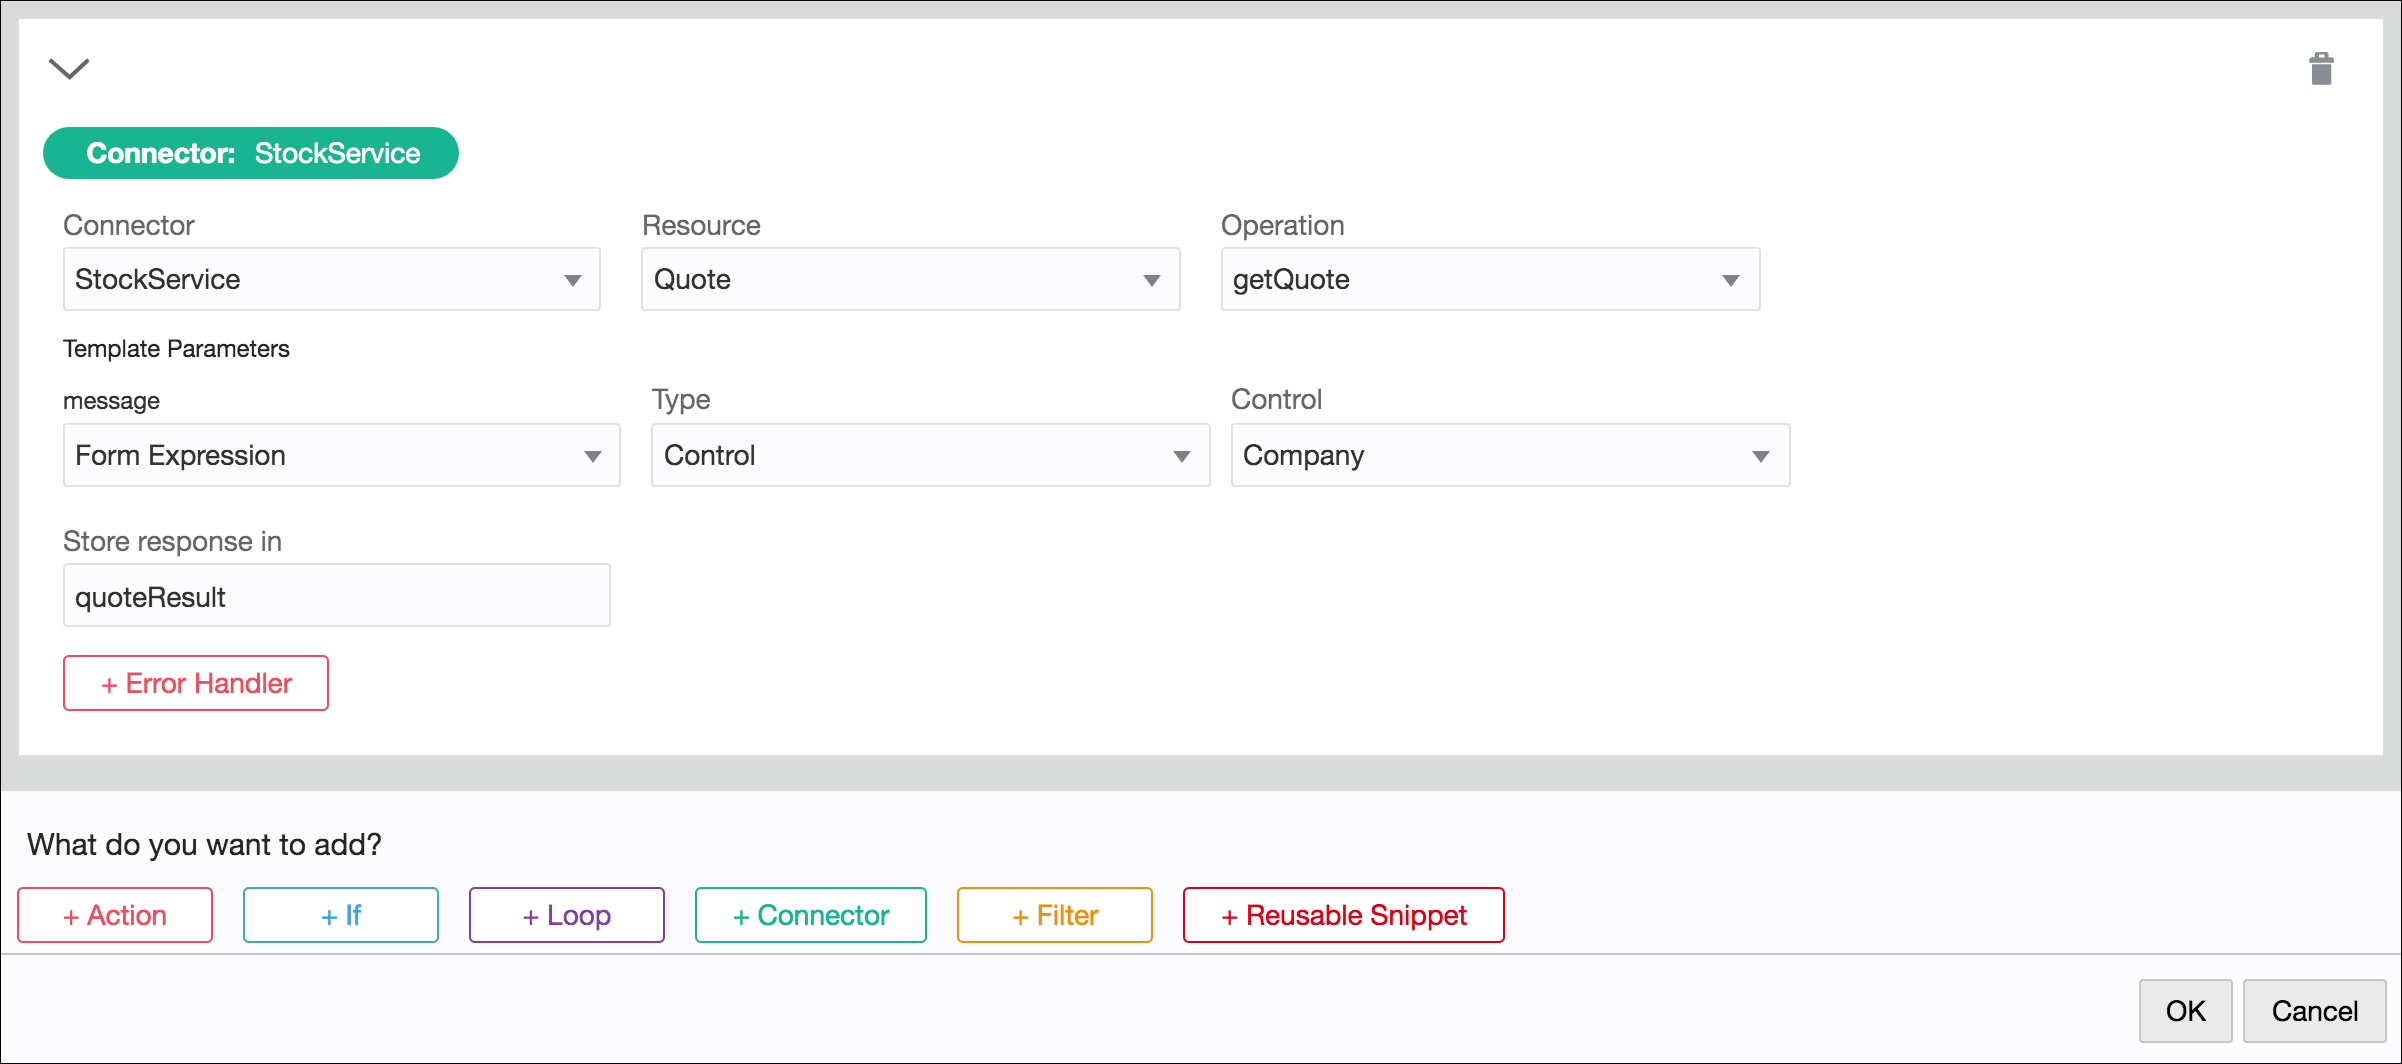
Executing a REST call in an event enables you to store the call’s response and use it in an event action or condition.
Examples
-
Configure a web form that prompts users to enter a zip code. Add an event that calls a weather site to query weather values. Store the response data, then add actions to the event that display temperature-related values.
-
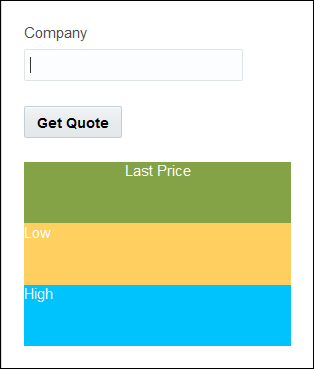
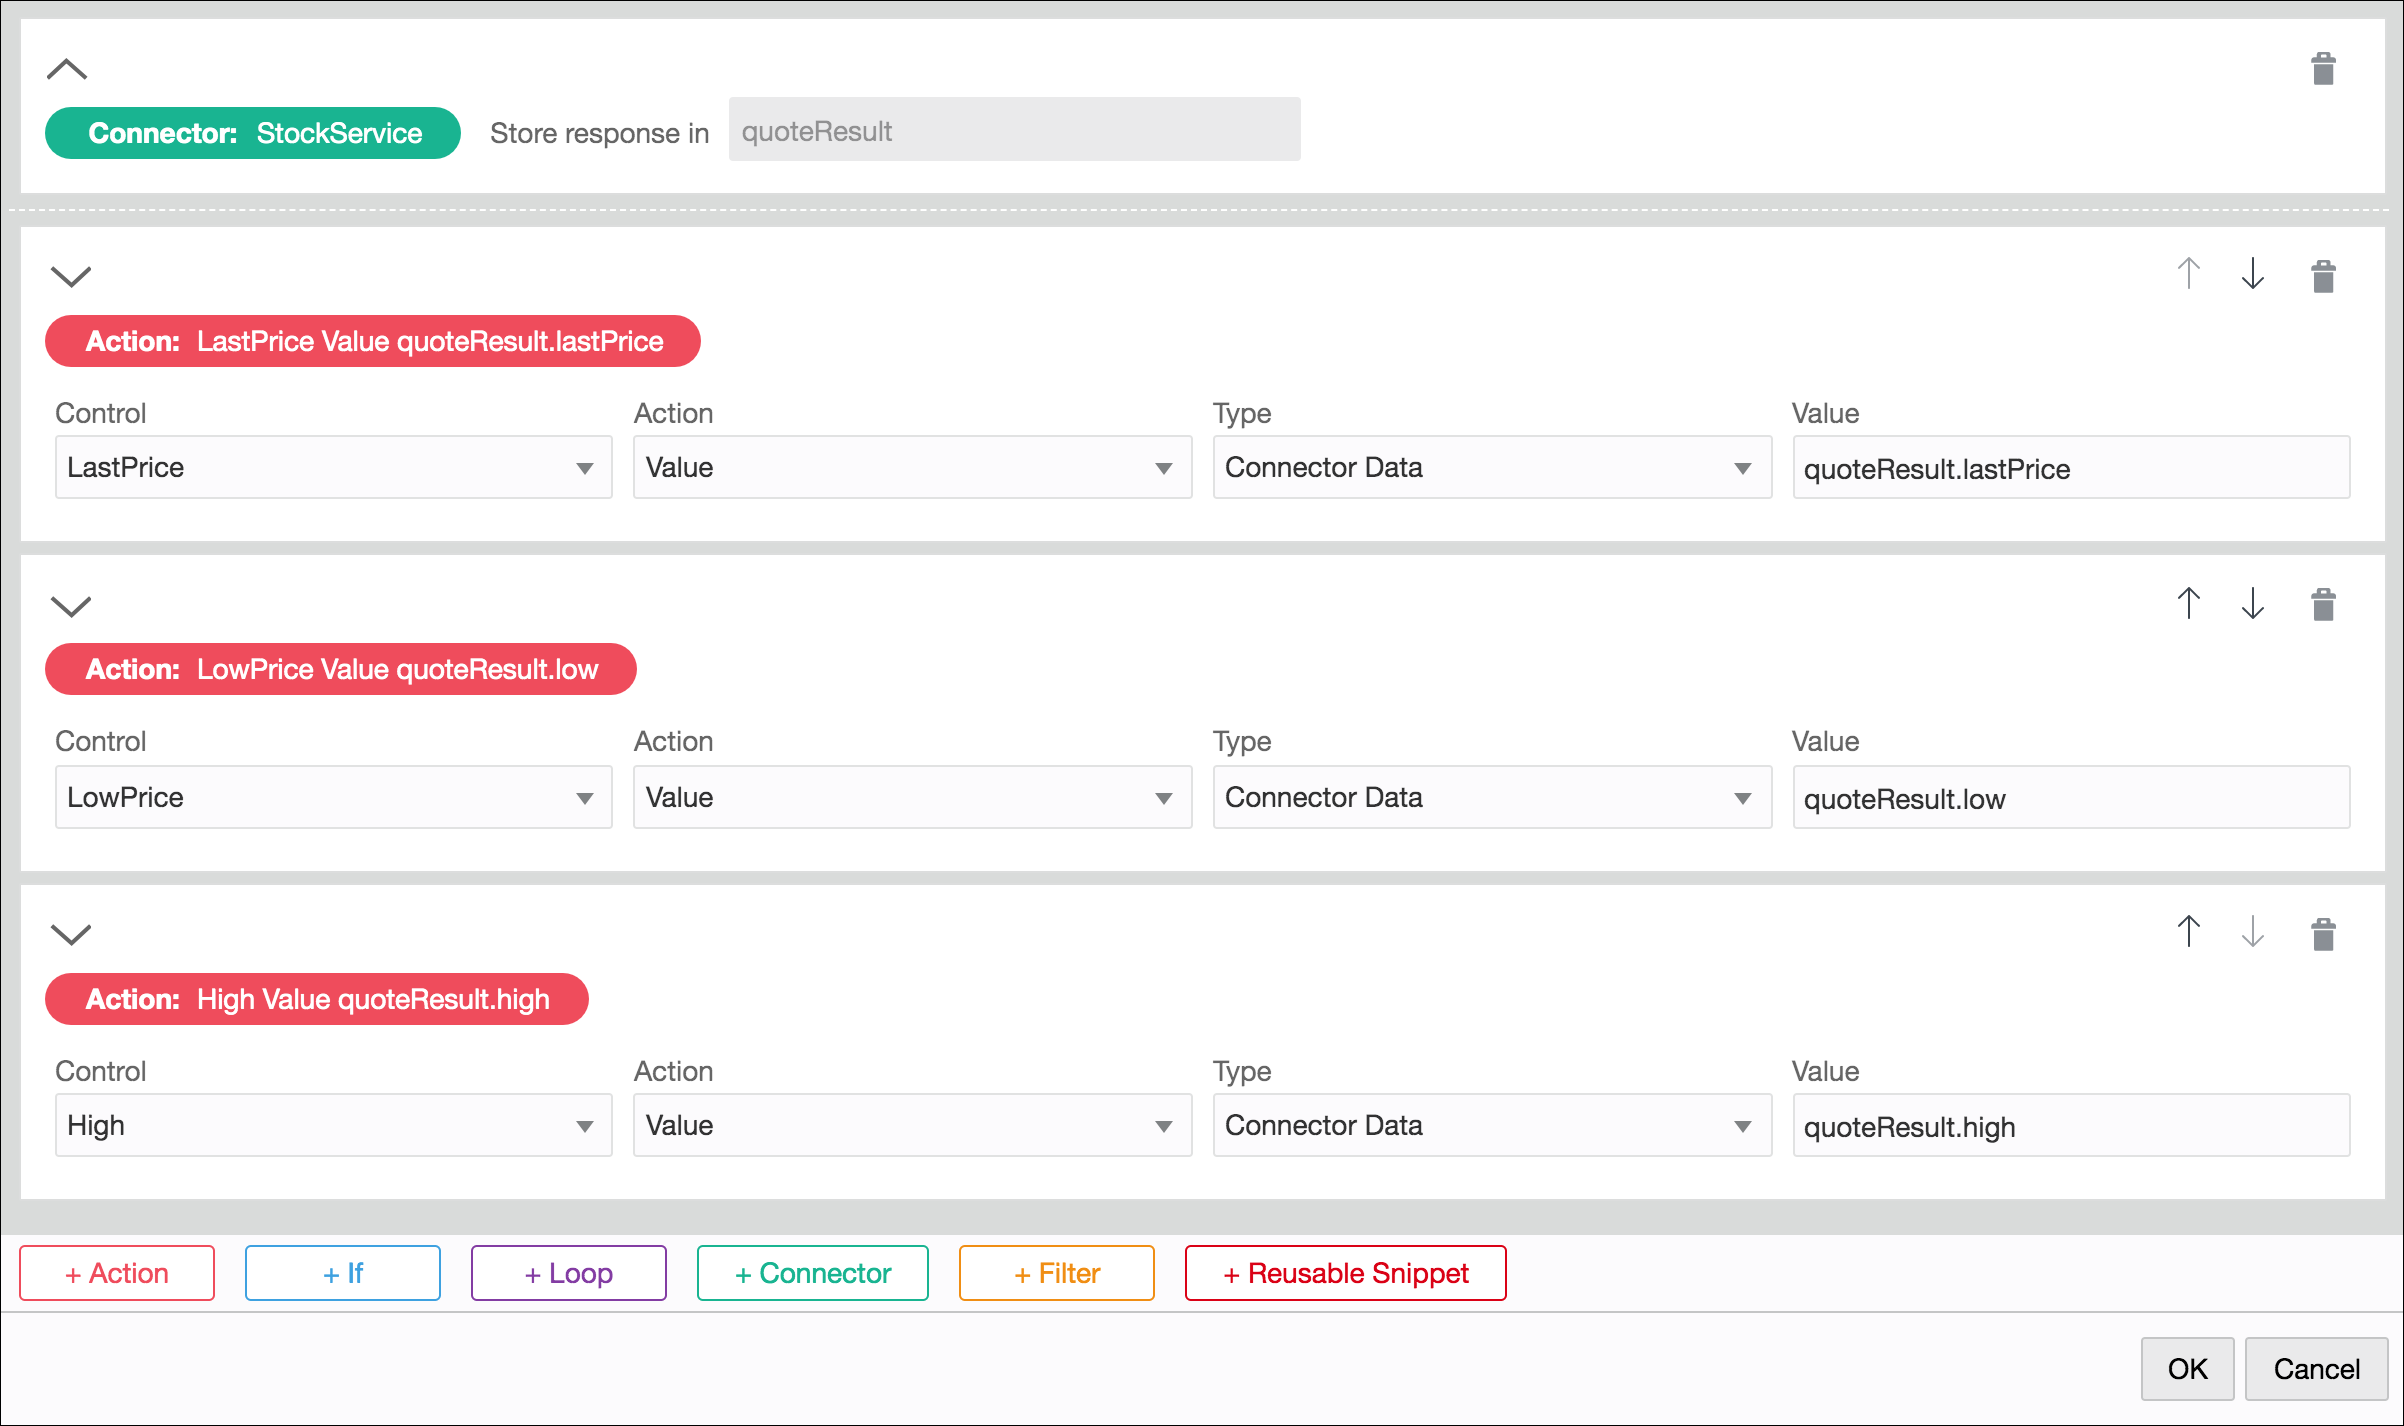
Configure a web form that prompts users to enter a company name and click a Get Quote button. Add an event to the button that calls a stock service site to query stock values for the specified company. Store the response data, then add event actions that display read only stock value fields.
Populate Controls Using REST Calls
Dynamically populate controls such as drop-down select, check list, radio button, table, and repeatable section controls with data using REST connectors.
Link and Refresh List of Value Fields
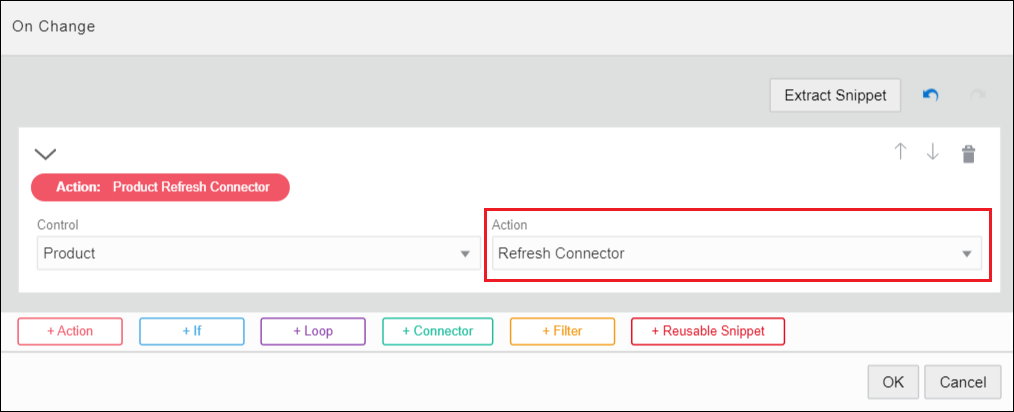
Use the Refresh Connector control action in an event so that each time an end user makes a selection in a LOV field, REST call data is refreshed and reflected in another LOV field. For example, in an order application form, after a user selects from a Category drop-down field, the list of products for that category only displays in a Product drop-down field.
