Define Data
To use data in your application, you must first define how it’s structured and stored.
Typical Workflow for Defining the Data Used Within a Business Process
Defining how data is stored and manipulated is part of the overall design and development of an application.
Use the following typical workflow to define the data used within your process application. The first three tasks are required; complete the remaining tasks as needed.
| Task | Description |
|---|---|
| Define the business types | Business types, such as business objects, business exceptions, and Enum objects, define the data structures used within your application. |
| Create data objects | Data objects store the information used within your business process. Associate each activity with your business process with the data objects it requires. |
| Configure data associations and transformations | Data associations define how information is passed between the flow elements in your business process. |
| Define expressions | Expressions manipulate the data used in your business process. |
| Create business indicators | Business indicators store the key performance information used in your business process. |
| Define input and output arguments | The flow events that you use to define your business process operations allow you to define input and output arguments. These input and output arguments define the process input and output. |
What You Can Do on the Business Types Page
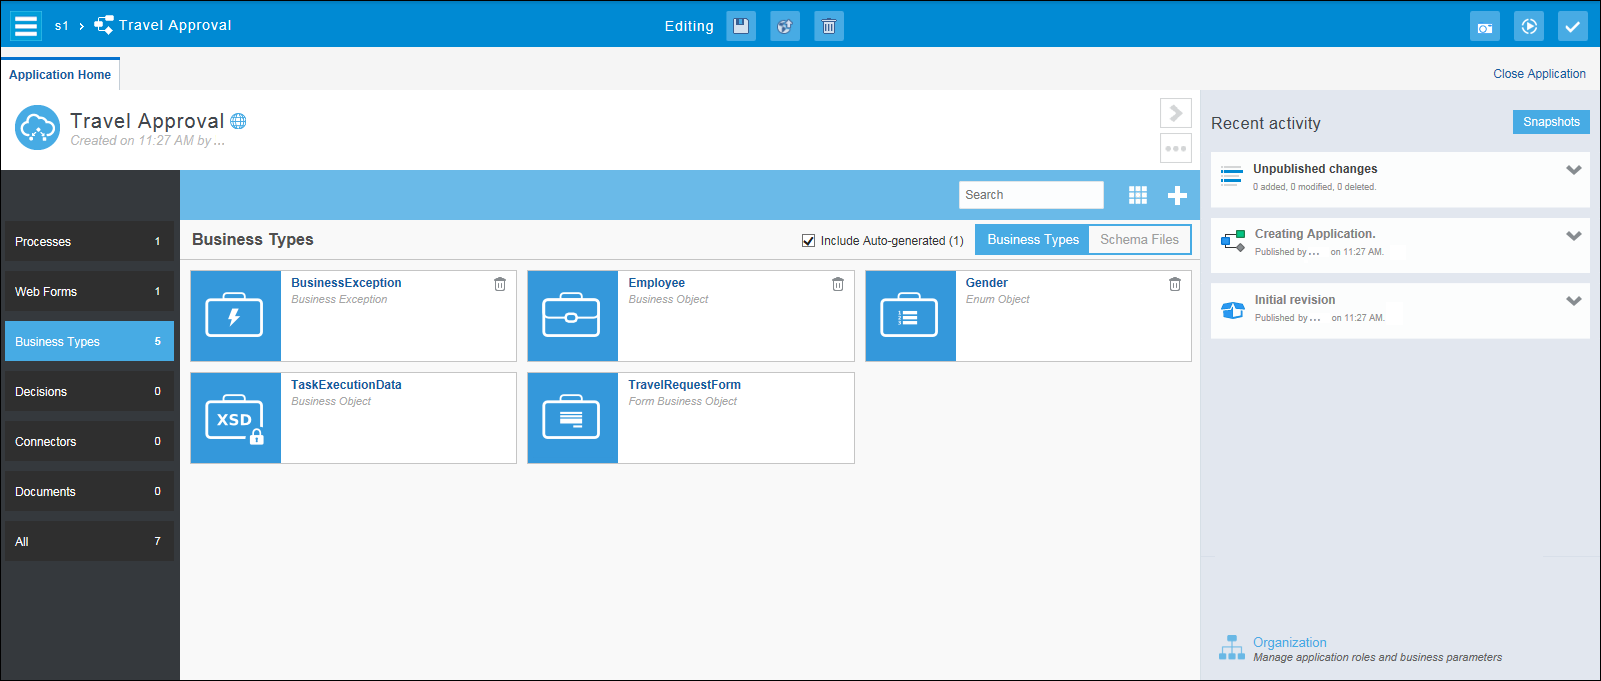
The Business Types page provides the tools required to create and manage business types (business objects, enumeration (enum) objects, business exceptions), and also separately manage the life cycle of XML Schema Definition (XSD) files. You can use the business types in any process created for the selected application.
The Business Types page is divided into two sub views:
-
Business Types
-
Schema Files
Use the view option to alternate between views.
Description of the illustration bus-type-view.png
Business Types View
Use the Business Types view to perform the following tasks:
-
Click Views
 to view the business types in Grid or List format. Grid view is the default.
Each business type displays: its name, type (Business Object, Enum Object, Business Exception), schema, and file name.

Description of the illustration bus-object-grid-view.pngThe business type is also identified by an image:-
 Manually created business objects
-
 Form business objects
-
 Imported business objects
-
 Auto-generated business objects
-
 Enum objects
-
 Business exceptions
-
-
Click the business type name to edit it in the Business Types Editor. Click the file name to view the file details.
-
Select Include Auto-Generated to view the auto-generated business types.
The number of auto-generated business objects that exists in the application display in parentheses.

-
Delete manually created business types.
Note:
The Delete icon only appears for manually created business types. You can’t delete business types that are being referenced by other artifacts.
Schema Files View
Use Schema Files view to perform the following tasks:
-
Click Views
 to view the schema files in Grid or List format. Grid view is the default.
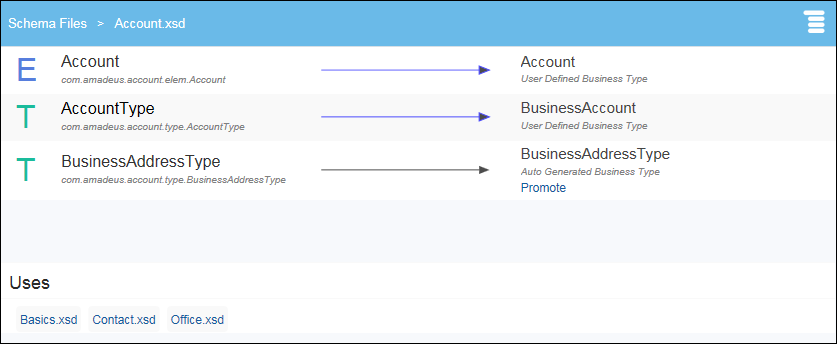
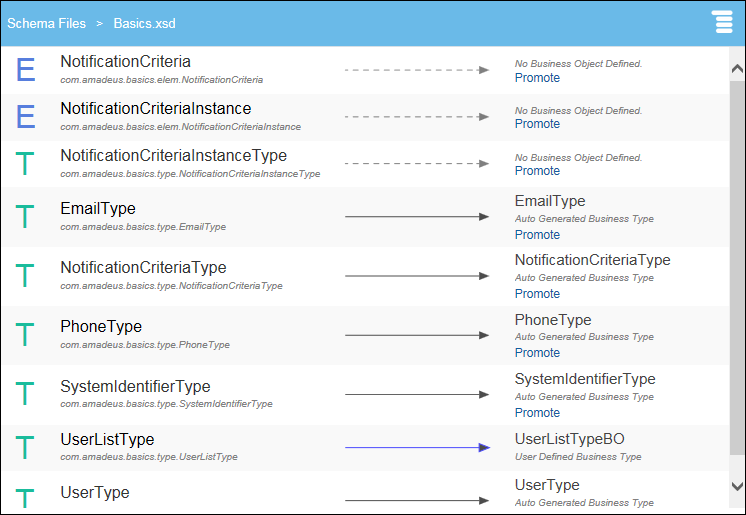
Each schema file displays its name, the number of elements and types it contains, and an XSD image.

Description of the illustration schema-file-grid.png -
Click the schema file name to view its details, and perform the following tasks:
-
Promote auto-generated business types to business objects.
This is allowed as auto-generated business types aren't explicitly created by the user.
-
View the details of other schema files that are imported from the current one. (You can navigate from one to the other)
-
-
Delete schema files.
Note:
You can’t delete schema files that are being used by other business objects.
Work with Business Objects
Business objects let you group related types of data together to define the data structure required for your process applications. Create business objects manually or base them on a XML Schema Definition (XSD). After defining business objects, you can use them to define data objects to store the data within your application.
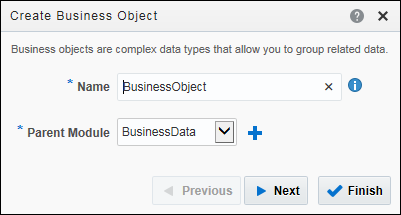
When manually creating business objects, you can define the hierarchical relationship between modules and objects, and the attributes used in the business object.
Note that you can’t modify XSD-based business object properties. However, if you manually create a business object with an attribute pointing to another XSD-based business object, then you can modify the property values of that attribute.
Note:
If you create a business object based on a XSD, any changes made to the XSD (modify, add, delete elements) aren’t reflected in the business object. After importing the modified XSD, you must delete the existing business object and then create a new business object on the modified XSD.You can’t create business objects based on in-line types defined in a WSDL file. However, read-only business objects are automatically created from the WSDL file when you create a web service connection. You can create data objects based on these read-only business objects.
Want to learn more about WSDL files and web service connections? See Creating a Web Service Connection.
-
Modules
Modules are containers that enable you to create a hierarchical structure. Each business object must be contained in a module. When you create a new business object, it’s automatically created within the
BusinessDatamodule. You can create additional business objects within a module or create additional modules. -
Business objects
Within a module you can define one or more business objects. A business object can contain other business objects.
-
Attributes
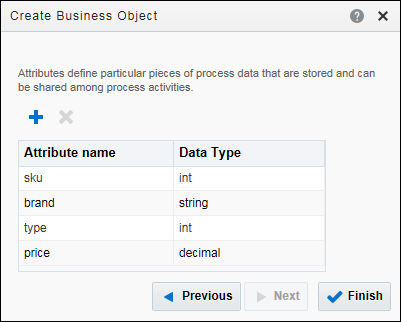
Attributes define particular pieces of process data that are stored and can be shared among process activities. Attributes represent a characteristic of a real-world concept. For example, a business object that represents a person typically has
firstnameandlastnameattributes.
You can also add documentation to your business objects and attributes. Adding documentation makes your data structures more understandable to other users who are collaborating on your application.
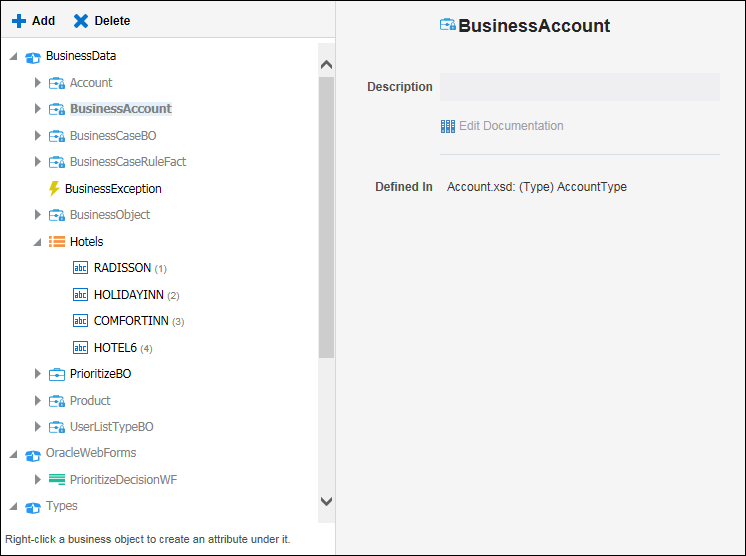
The following image shows an example of the hierarchical structure for the modules, business objects, and the business object attributes defined for an application.
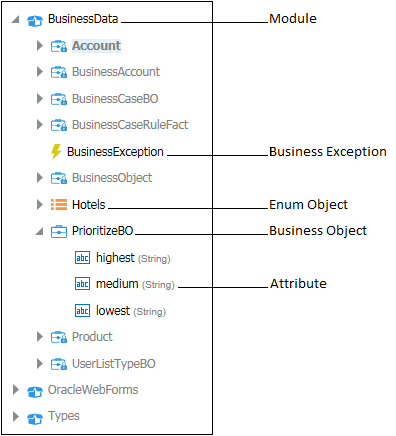
Description of the illustration bus-obj-structure.png
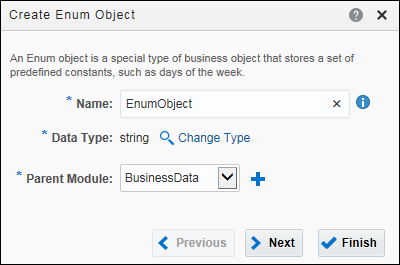
An Enum object (enumeration) is a special type of business object that enables a data object to contain a set of predefined constants, such as one that includes the names of the days of the week (Sunday, Monday, Tuesday, and so on). See Creating an Enum Object.
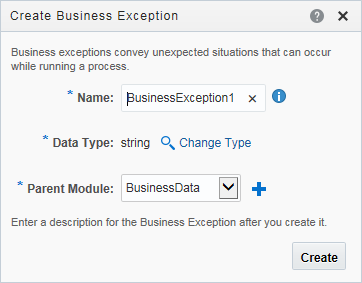
Business exceptions convey unexpected situations that can occur while running a business process. You can use Process to define business exceptions for your application. See Creating a Business Exception.
Create a Business Object
Create new business objects (complex data types) manually. When creating your business objects you define the hierarchical relationship between modules and business objects, and the attributes used in the business object.
Note:
You can also import business objects based on XML schema (XSD) files. See Import a Business Object from XML.Import a Business Object from XML
You can import business objects (complex data types) that are based on an XML Schema (XSD) file. During the process you define the hierarchical relationship between modules and business objects.
Import a Business Object from JSON
You can import business objects (complex data types) that are based on a JSON instance or schema. During the process you define the hierarchical relationship between modules and business objects.
The following is an example of a JSON schema:
{
    "id": "http://some.site.somewhere/entry-schema#",
    "$schema": "http://json-schema.org/draft-04/schema#",
    "description": "schema for an fstab entry",
    "type": "object",
    "required": [ "storage" ],
    "properties": {
        "storage": {
            "type": "object",
            "oneOf": [
                { "$ref": "#/definitions/diskDevice" },
                { "$ref": "#/definitions/diskUUID" },
                { "$ref": "#/definitions/nfs" },
                { "$ref": "#/definitions/tmpfs" }
            ]
        },
        "fstype": {
            "enum": [ "ext3", "ext4", "btrfs" ]
        },
        "options": {
            "type": "array",
            "minItems": 1,
            "items": { "type": "string" },
            "uniqueItems": true
        },
        "readonly": { "type": "boolean" }
    },
    "definitions": {
        "diskDevice": {
            "properties": {
                "type": { "enum": [ "disk" ] },
                "device": {
                    "type": "string",
                    "pattern": "^/dev/[^/]+(/[^/]+)*$"
                }
            },
            "required": [ "type", "device" ],
            "additionalProperties": false
        },
        "diskUUID": {
            "properties": {
                "type": { "enum": [ "disk" ] },
                "label": {
                    "type": "string",
                    "pattern": "^[a-fA-F0-9]{8}-[a-fA-F0-9]{4}-[a-fA-F0-9]{4}-[a-fA-F0-9]{4}-[a-fA-F0-9]{12}$"
                }
            },
            "required": [ "type", "label" ],
            "additionalProperties": false
        },
        "nfs": {
            "properties": {
                "type": { "enum": [ "nfs" ] },
                "remotePath": {
                    "type": "string",
                    "pattern": "^(/[^/]+)+$"
                },
                "server": {
                    "type": "string",
                    "oneOf": [
                        { "format": "host-name" },
                        { "format": "ipv4" },
                        { "format": "ipv6" }
                    ]
                }
            },
            "required": [ "type", "server", "remotePath" ],
            "additionalProperties": false
        },
        "tmpfs": {
            "properties": {
                "type": { "enum": [ "tmpfs" ] },
                "sizeInMB": {
                    "type": "integer",
                    "minimum": 16,
                    "maximum": 512
                }
            },
            "required": [ "type", "sizeInMB" ],
            "additionalProperties": false
        }
    }
}
The resulting business object in Process appears as follows:
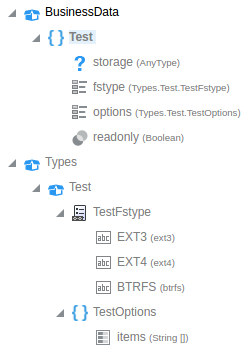
Description of the illustration bo.png
In certain business cases, you may need to update a JSON (either by updating it directly or importing a newer version) with changes that are incompatible with the current JSON. An incompatible JSON can include changes like:
- some elements or types have been removed
- some attributes in complex type have been updated to new type
- some attributes in complex type have been removed
While updating a JSON with incompatible changes, warning messages are displayed indicating the impact of the changes. For example, you may be notified that some business objects have to be modified or removed from the application to support the changes.
Import XML Schema Files
Import and store XML Schema (XSD) files, and then use its complex types or elements to create business objects. You can also update the root XSD and all its dependencies.
Note:
Updating your schema files using this import feature is different from the update feature in the XSD details view where you can only update the current schema file. Want to learn more about how to update the current schema file? See Upload a New Version of an XML Schema File.Upload a New Version of an XML Schema File
Process lets you upload and validate new versions of existing XML schema (XSD) files.
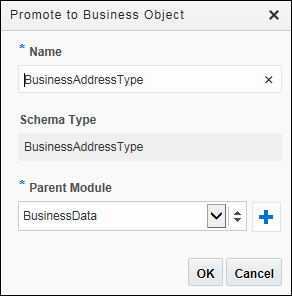
Promote Schema Types and Elements to Business Objects
You can quickly create business objects (complex data types) that are based on specific XML Schema (XSD) types or elements by using the Promote feature available in the Schema Files — Details view.
Manage Business Types
After you create a business object, click its name to go to the Business Types — Data Structure page. From this page, you can add or change the type of a business object’s attributes or add documentation. You can also add modules, business objects, business exceptions, Enum objects and Enum items, and import business objects to the data structure.
The business types and related items you can add are based on what you have highlighted in the hierarchy.
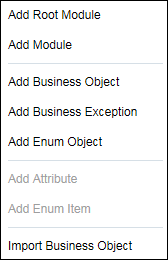
Description of the illustration add-bus-type.png
When you highlight a business type or related item in the hierarchy, its details appear in the pane on the right. You can edit the details or add documentation. For imported business objects, the type behind the business object and the file where that type is defined is also displayed.
Right-click a business type or related item in the hierarchy to delete it, move it, or collapse a section of the hierarchy.
Think before you delete. You can’t recover a business object, module, or attribute that has been deleted. When you delete a business object or module that contains other related items, they’re also deleted. However, if the deleted business object or module contains an attribute based on a business object, that business object isn’t deleted.
Work with Data Objects
Data objects are, in general, the variables used to store the information used by your business processes. They’re defined during the design and implementation stage of a process. To complete a process application, you must ensure that you have associated each activity with the data objects it requires.
At runtime, data objects contain information that might be altered as users interact with your business process. Running processes can store, access, and manipulate data. The values stored within a data object can also be used to determine the branch that a process takes.
Process supports data objects that are based on either simple or complex data types. Which type of data type you base your data object on depends on the type of data it must handle.
-
Based on Simple Data Types
Data objects can be based on simple data types. These are the core data types common in most programming languages. The following table lists the basic data types supported by Process.
Type Description Bool Represents the logical values True or False. Int Represents an integer. For example: 23, –10, 0. Decimal Represents a number that can be expressed in decimal notation. For example: 3.14, 62, 0.023. Real Represents a floating-point numeric value. For example: 2e-1, 2.3E8. String Represents a sequence of characters. For example: This text is a string. Time Represents a specific time expressed as: year-month-day hour:minute:second. For example: 2014–12–14 13:20:28. Interval Represents a duration of time expressed as a number in years, months, days, hours, minutes, and seconds. For example: 1d3h30m. Binary Used to store binary data, including images or videos. -
Based on Complex Data Types (Business Objects)
Data objects based on complex data types (business objects) lets you create data structures that group different types of data. Business objects allow you to create data structures from data objects based on simple data types.
For example, you can create a business object called employee that contains different types of data for employee such as id, name, and age. The relationship between data objects based on simple data types and data objects based business objects is similar to the relationship between classes and instances in the Java programming language. The following tables show this relationship.
Data Object Simple Data Type id Int name String age Int sku Int price Decimal brand String type Int Data Object Structure Employee -
id (Int)
-
name (String)
-
age (Int)
Product -
sku (Int)
-
brand (String)
-
type (Int)
-
price (Decimal)
Before creating a complex data object, you must first define the business object that defines the data structure.
-
Create a Data Object
You can create a data object based on a simple data object type or on a business object (complex data type). If you’re creating a data object on a business object, you must create the business object first.
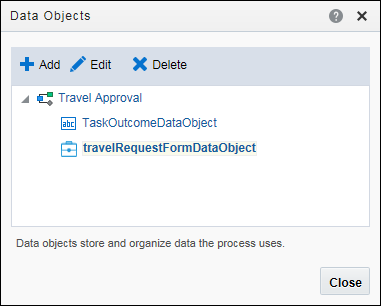
- On the Application Home tab, select a process, and then click Data Objects.
- In the Data Objects dialog box, click Add.
- Enter a name for your data object or use the default name, select a simple data object type or a data object based on a business object, click Create, then click Close.
Note:
A default process data object with the nameTaskOutcomeDataObject is automatically created for the human task outcome when a human task is created. The Edit and Delete links are disabled for this data object.
Edit or Delete a Data Object
You can edit or delete data objects.
After editing a data object, you must ensure that all references to it are still valid. For example, if you change a data object type from an integer to a string, you must verify that all of the expressions that use the data object still function correctly. If they don’t function correctly, the application doesn’t validate.
After deleting a data object, you must ensure that all references to it are removed. This includes any data associations and expressions that use the data object. If you don’t remove references to the deleted data object, the application doesn’t validate.
Create a Business Exception
Business exceptions are used to convey unexpected situations that can occur while running a business process. Define business exceptions for your application and use them in an error end event that is triggered under a certain condition, such as an invalid Id or poor credit rating.
Create an Enum Object
You can manually create Enum objects for your application. An Enum object (enumeration) is a special type of business object that enables a data object to contain a set of predefined constants, such as one that includes the names of the days of the week (Sunday, Monday, Tuesday, and so on).
