5 Segments
Segments are the basic building blocks of analytics reports, and are the first step in creating targeted campaigns that connect with users. Segments are key to identifying customers who are the best match for your products and services.
How Do I Target the Right Users?
You can use Analytics to target the right users by dividing your customer base into different groups, or segments. Prospects are placed into groups depending on certain characteristics that are likely to affect their behavior. Such insight is invaluable when considering how to best reach customers. Take this as an example: Anyone at a sports event knows not everyone roots for the same team, or has the same kind of fun at a game. Given these facts, how could you segment your fans? Well, besides grouping users by which team they’re cheering for, you could also segment users by who buys fan gear at the stadium, or who visits the concession stand. Users who complete a process, like logging on to a team’s site to view game stats, could also be a segment.
Once a segment is defined, you can apply it as a filter in other reports to analyze behaviors that lead to conversion or abandonment. Well-defined segments are important in building buyer personas and creating relevant, personalized experiences that connect with users.
Use segments with reports to help you answer questions like:
-
What age group and gender are my app’s biggest spenders?
-
What version of the app results in more checkouts?
-
Do coupons or does free shipping lead to more sales lift?
-
What incentive do inactive users respond to most frequently?
What Kinds of Things Can I Do with Segments?
-
Define a segment of users who are frequent buyers. Then, apply this segment to the users report and drill down to see what behaviors are common among your loyal customers.
-
Save a segment from the results of a funnel report that shows users who put an item in the cart, but didn't check out. Then, create a campaign with a discount coupon to get these users through the funnel.
-
Create segments for users of iOS and Android devices. Apply these segments to user reports to find out which platform has the biggest spenders.
-
Save a segment of Lost Users from the results of a retention report. Send targeted messages with a promo to get these users back in your app.
Dynamic Segments: Try This First
Segments are a way to group users so you can reach them better. Let’s see how to create a segment of All Users of our app based on where users are located. Give it a go:
-
From the side menu, click Segments.
-
Click New Segment.
-
In the Name field, give the segment a name.
-
In the Dates field, choose Last 90 days from the drop down menu.
-
Click Add Filter and click Location> GPS City.
-
From the drop down menu, chose Is one of, then choose
San Francisco. -
Click Apply.
Your segment is now added to the segments landing page in Segments and accessible from the global filter selector. Typically, once a segment is created you use it in a campaign or apply it in other reports to gain insight into how defined user groups are using your app.
Let’s look at some important concepts regarding segments, then walk through another example.
Dynamic vs. Static Segments
It’s useful to understand the difference between segment types in Analytics. Segments created from Segments in the side menu or via the global filter selector are considered dynamic, that is, you can edit them as your needs change.
You can also create segments from the results of user, funnel, and retention reports, the Report menu, charts, or chart elements, as described in the chapters. These types of segments are static and can’t be edited. They are a snapshot of the report results at a moment in time.
When the Sequence of Steps is Important
Note that when you create a segment from a retention or funnel report, the sequence of steps is very important. Only users who went through the funnel steps in order, or who completed the selected first and then second event in a retention analysis, are included in the segment. That’s because these types of reports analyze behavior as a sequence of choices users make, for example opening the app and signing up to receive new product messages. When you create a segment from Segments in the side menu or the global filter selector, the step sequence is irrelevant. The filter criteria you specified are simply applied as an AND/ OR relationship, and the users meeting that criteria are included in the segment. Let’s take a look at creating a dynamic segment, using it in a campaign, and then applying the segment to a report.
Example: Creating a Dynamic Segment from the Segment Category
Suppose you want to create a segment to use in a campaign. In this scenario, say you want to target users in San Francisco who use iOS devices, and users in Los Angles who use Android devices. Your Easy Shopping app offers phone and tablet accessories that feature beachy designs you think these Californians will love. We’ll use filters for technology and location to create this segment.
To create the segment:
-
ClickSegments on the side menu.
-
Click New Segment.
-
Name the segment Beach Designs.
-
Click the down arrow and choose Last 90 days for the date.
-
Add a description of the segment, if you’d like.
-
Click Add Filter and choose Technology > OS Name > is one of > iOS.
-
Click Add Filter and choose Location > GPS City > is one of > San Francisco.
-
Click Add Filter and choose Technology > OS Name > is one of > Android.
-
Click Add Filter and choose Location > GPS City > is one of > Los Angeles.
-
Click Create.
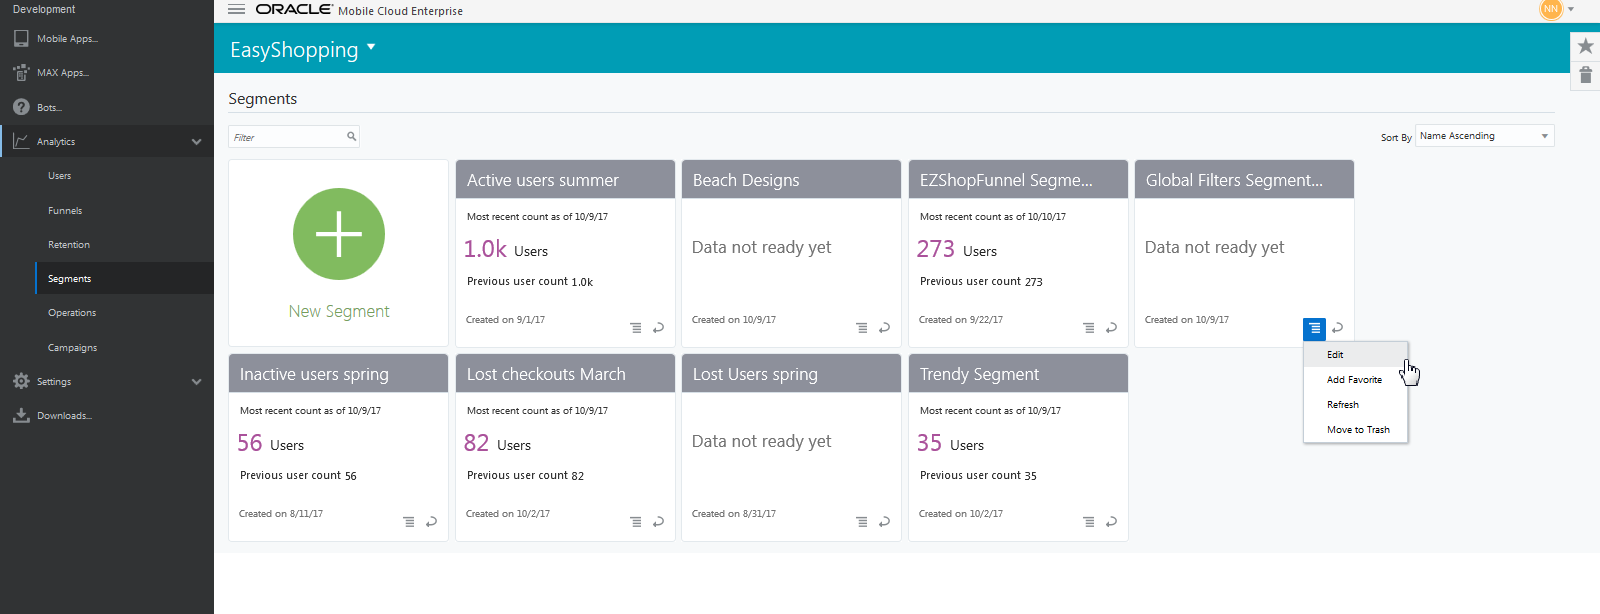
Your segment is now included on the Segments landing page. The segments landing page should look something like this:
-
Each segment is shown as a tile, with a summary of data results and when the segment was created.
-
Use the Actions menu on the tile to edit the segment, make it a favorite, or move it to the trash. You can also use the Actions menu to refresh the data for the segment (if the segment is dynamic; that is, created from Segments and not from the results of a report).
-
Click the arrow to flip the tile to see the filter criteria you set for the segment, and what the segment source is, for example whether it was created from a report or from a chart. The tile also shows the segment history.
-
When many segments exist, use the filter search box to quickly find the filter you’re looking for.
Creating a Segment from the Global Filter Selector
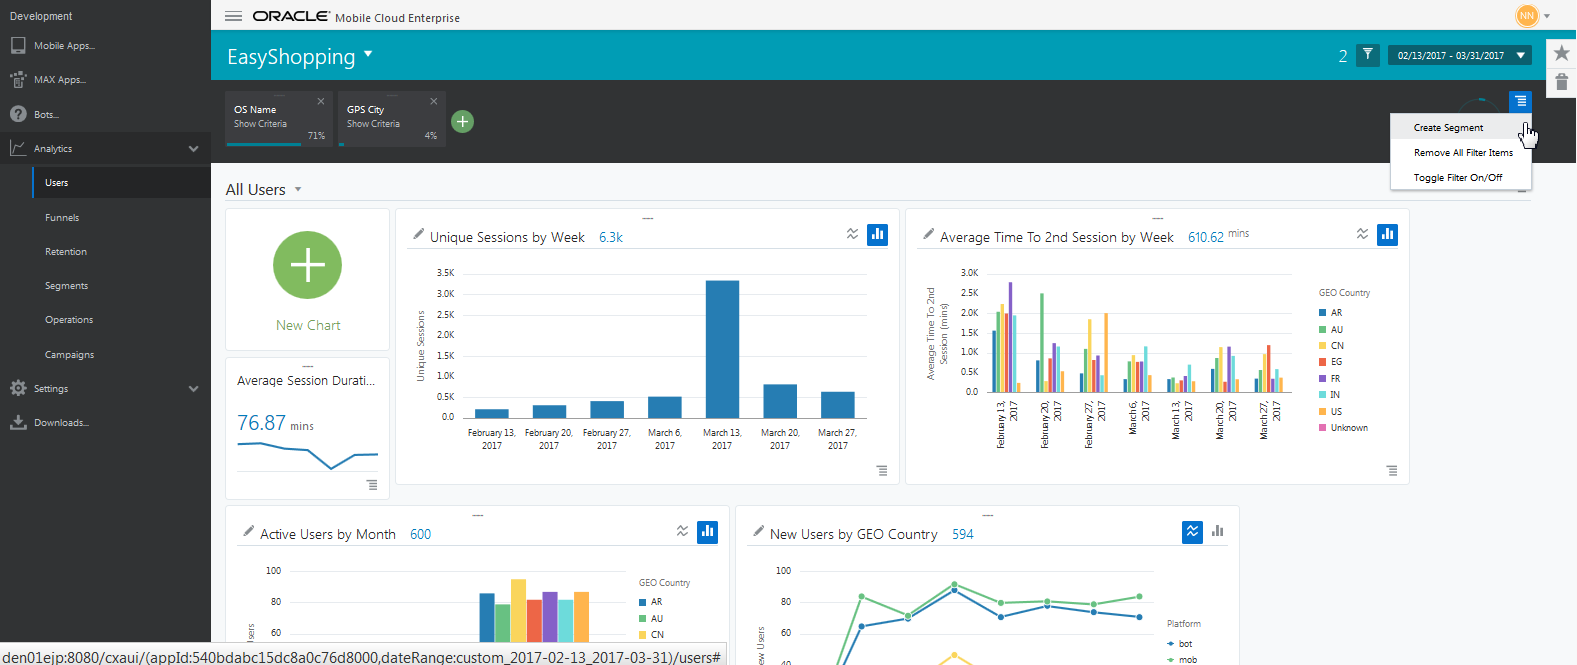
In addition to creating a segment from the side menu, in Users and Retention reports you can also create a segment by clicking the global filter icon ![]() then the
then the ![]() in the global filter summary area. Then choose filters to create the segment.
in the global filter summary area. Then choose filters to create the segment.
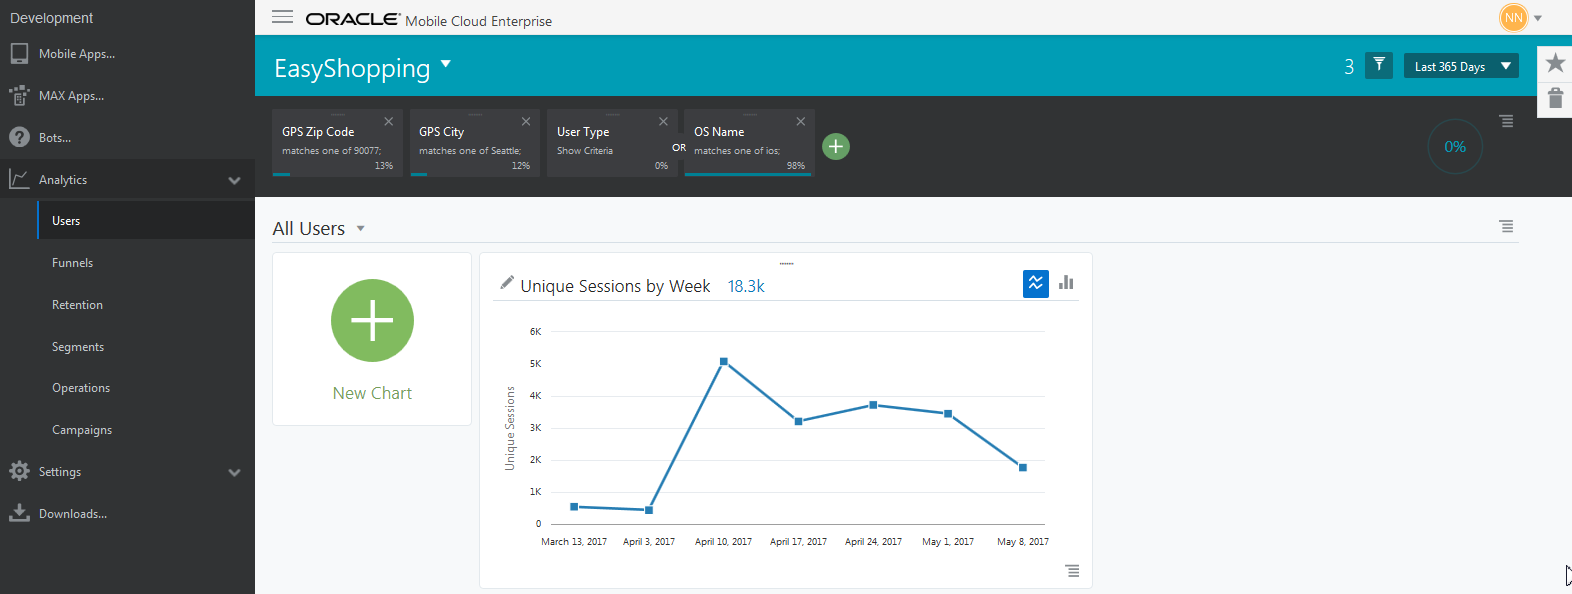
When you click on the global filter icon, you will open the filter summary area. Once you’ve selected filters, you should see something like this:
Note:
While tiles can be dropped to create OR relationships between most filters, there is an exception for segments. Segment filters can only be dropped onto other segment filters.Use the Global filters menu and to create a segment using the filters you’ve chosen.
Once a segment is created, you’ll see it listed in Segments on the side menu, and in the segments list in the global filter selector. You may also see additional segments that your team members have created for the app. Like Favorites, saved segments are available to everyone. If you prefer, click the box Show My Segments Only located in the first panel to filter the list to show only those you’ve created. Leverage any of these segments and apply them as filters in reports. See Applying a Segment to a Report.
Editing Segments
If you need to, you can go back and change the criteria of any segment you’ve created from Segments in the side menu.
Do this:
-
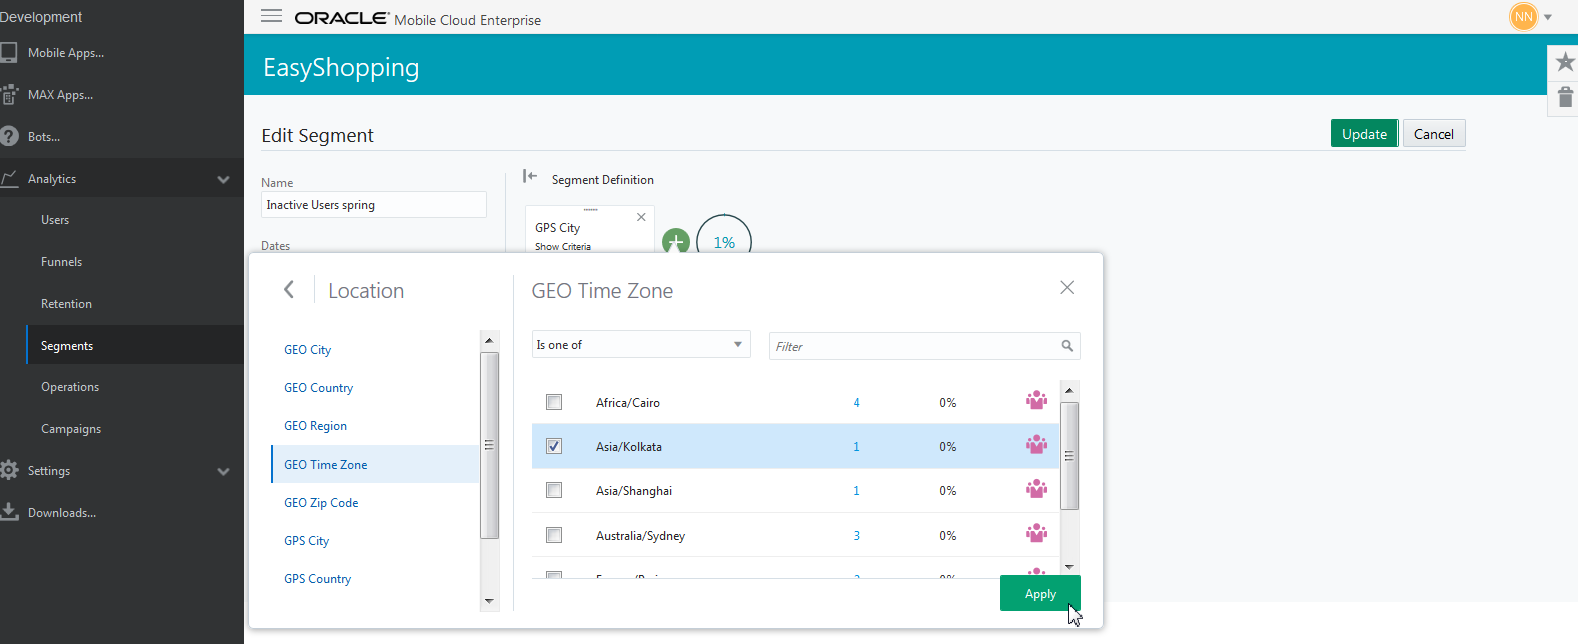
Click the Actions menu on the tile you want to edit, then choose Edit.
-
In the Edit Segment screen, change your criteria, then click Update.
-
You can also add additional filters to the segment, then click Apply.
-
Once back in the Edit segment screen, click Update. Your edited segment is again listed on the segments landing page.
Applying a Segment to a Report
Once you’ve created your segments, they can be applied as filters in reports, or even combined to build other segments.
To use a segment in a report, first open the report from the side menu. In Users and Retention, click the global filter selector, then click Add Filter from the filter summary area. Click Segments and choose the segment from the list, then click Apply. Repeat the process for additional segments.
Note:
Segments cannot be applied to other reports from the Segments category in the side menu. This menu is used only to create, edit, or delete segments.To use a segment in other reports, open the report from the side menu, and click New (Report Type). From there, follow the prompts to add filters and segments.


