Specify Filters in Events
Filters let you selectively use a subset of data from a larger set. For a form control, you can define a filter within an event and use the filter data in other controls through event actions and conditions.
To specify filters within an event:
-
Select a control on the form canvas and specify an event for it. See Configure Events.
-
Click the event editing icon adjacent to the Event field.
The event window displays with the selected event option (for example, On Change) at the top and color coded buttons for adding actions, conditions, connectors, or filters to the event.
-
Click +Filter to add a filter, and specify the data source from which you want to filter specific information. You can choose data attributes, another control, or a REST connector.
-
If the data source selected is valid (of the type: array), additional +Criteria and +If buttons appear as shown in the following figure:
-
Click +Criteria to specify how data is filtered from the data source. You can also use an If condition to do the same.
Note:
You can specify more than one way to filter data from the source. If you specify an Or condition, the results are combined or unioned. If you specify an And condition, the result is the intersection of that filter condition with the other filter conditions.
You can also specify another Filter (specified before) as the source type for your filter. This gives you the ability to filter data from another filter.
-
Provide a suitable name for the filter; the information extracted from the data source is stored within this filter.
-
In the same event window, you can use the data in the filter to populate other controls dynamically through actions or conditions.
-
After completing the event, click OK, then Save.
Filtering Using Events – An Example
This section demonstrates filtering through events using a web form with a drop-down select control and a table.
Based on the option you choose in the select control, you will be able to filter data from a data source and selectively use the extracted data to populate the table.
In this example, we use a previously created REST connector to fetch data from a web server, which contains a list of items. Each item, in this case, is a complex data object that contains personal details of individuals, such as first name, last name, unique ID, company name, email, phone number, city, and so on. To create a REST connector from scratch, see Add a REST Connector.
We use this REST connector to define a global connector call, globalResponse, under Presentation properties of the form. Want to know more about global connectors? See Work with Presentations. In addition, this connector also serves as the input to the select control.
-
Add and configure a drop-down select field on the form’s canvas.
-
From the Basic Palette, drag and drop a Select control onto the canvas.
-
Select the control, and on the General tab, change the Label field to First Name.
-
Under Options Source, select the Connector option and populate the Resource and Operation fields with respect to the REST connector defined within the application. See Populate Controls Using REST Calls.
-
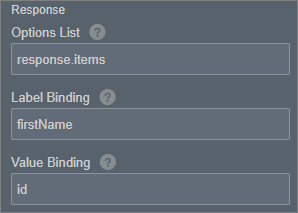
Under Response, specify the items list to display as options of the control.
-
For this particular example, we map the first name attribute to the Label Binding field, so that only first names of all individuals appear as options in the select control. Also, the unique ID attribute is mapped to the Value Binding field as follows:

Description of the illustration filter-response.png
-
-
-
Add and configure a table control on the form’s canvas.
-
From the Advanced Palette, drag and drop a Table control onto the canvas.
-
Add two additional columns, and edit column labels as Last Name, Organization, and Email.
-
Drag and drop an input text control into each column.
-
-
Click on the select control, and define an On Change event for it in the General tab.
-
Click the event editing icon to open the event window. In this window, click +Filter to add a filter.
-
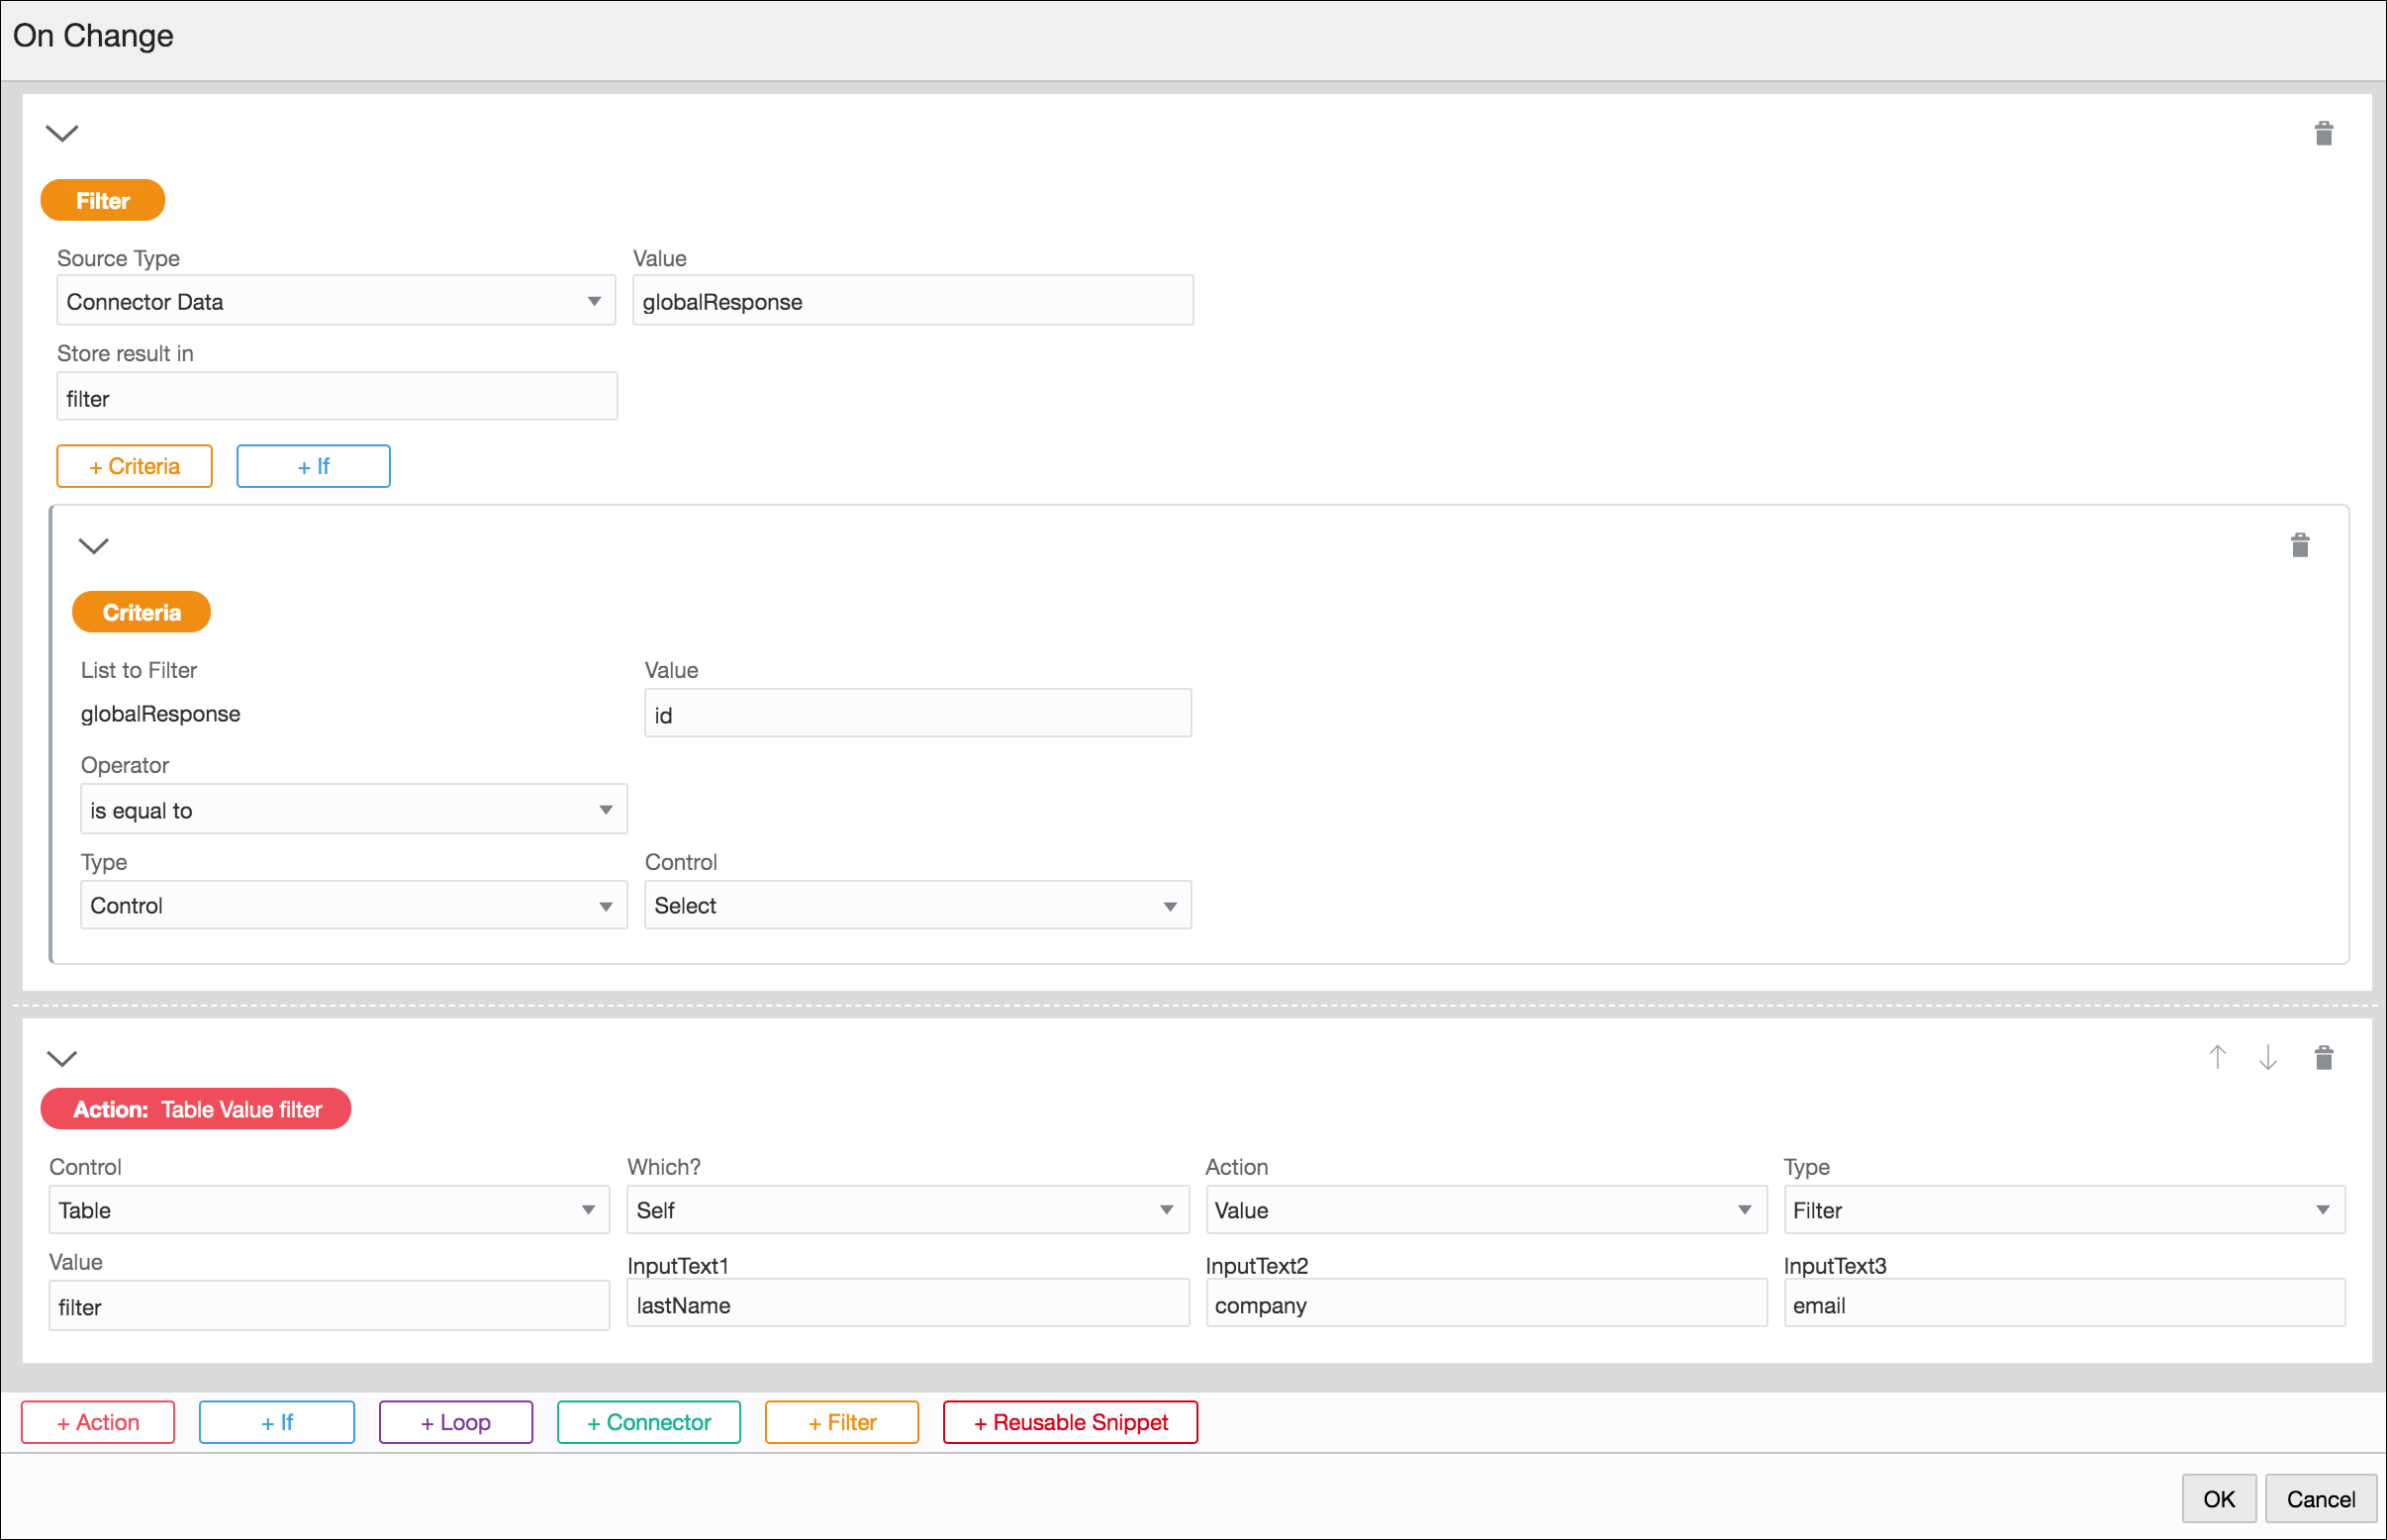
The following figure shows the event configuration for this example:
-
Connector data is set as the data source and its value comes from the global connector call, globalResponse, defined previously.
-
The subsequent Filter section shows how the data is filtered from the source, that is, when the ID of an item in the source list matches with the ID of the option selected by the user, all data associated with that item is stored in the filter, filter.
-
An event action selectively uses the data contained in this filter to populate the table. Although each item may have several attributes associated with it, here we use only last name, company, and email attributes. We map each of these attributes a corresponding input text control or table column.

Description of the illustration filter-actions.pngNote:
While defining event actions, if you choose to map the filter data to a control of simple data type (for example, input text), you have to specify an index value in addition to the attribute that you would like to map to the control.
-
-
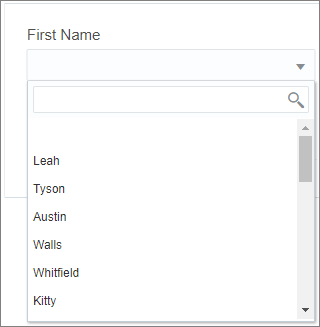
When the form loads, the select control displays first names of all individuals as follows:

Description of the illustration filter-names.png -
After you make a selection, all data associated with the selected option is stored within the filter, and this data is selectively used to populate the table as shown in the following figure:

Description of the illustration filter-output.png
