Configure a NetSuite Catalog for Parent-Child Business Objects
Before you can create a layout or layouts from a NetSuite service that references parent and child business objects, you'll first need to import the catalog and manually add the required child business objects. The NetSuite service metadata document does not provide child paths.
You'll need to complete this task if you want to create a Form-over-Table layout or a Table layout with one or more dependent layouts at the child level.
Suppose you want to create a Form-over-Table layout with a "Sales Order" business object in the form and the child business object, "Items", in the table. Because the NetSuite service metadata document doesn't provide the child path, you won't see the Items child object in the New Layout Setup wizard when you try to create your Form-over-Table layout.
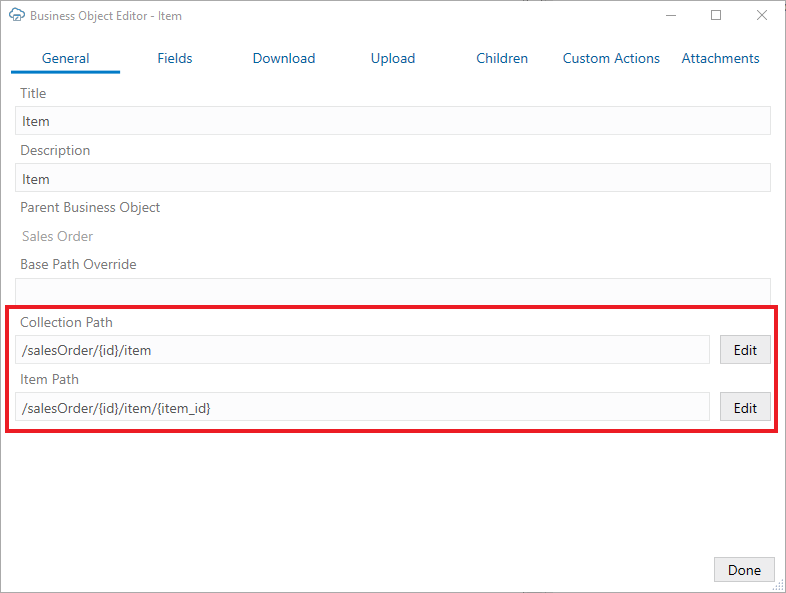
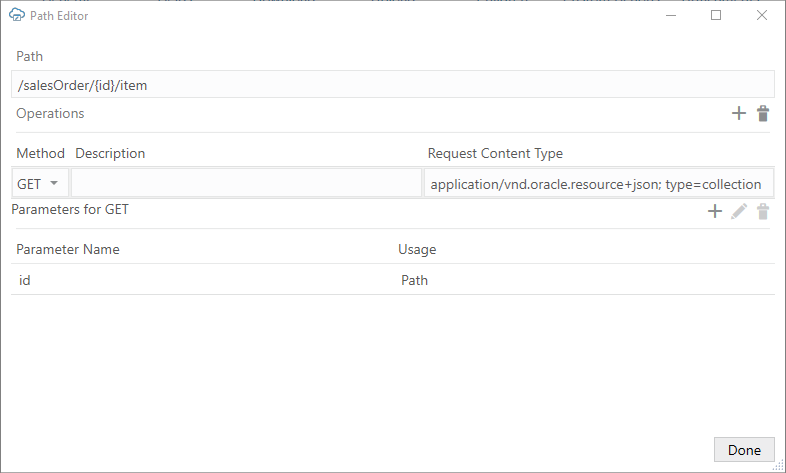
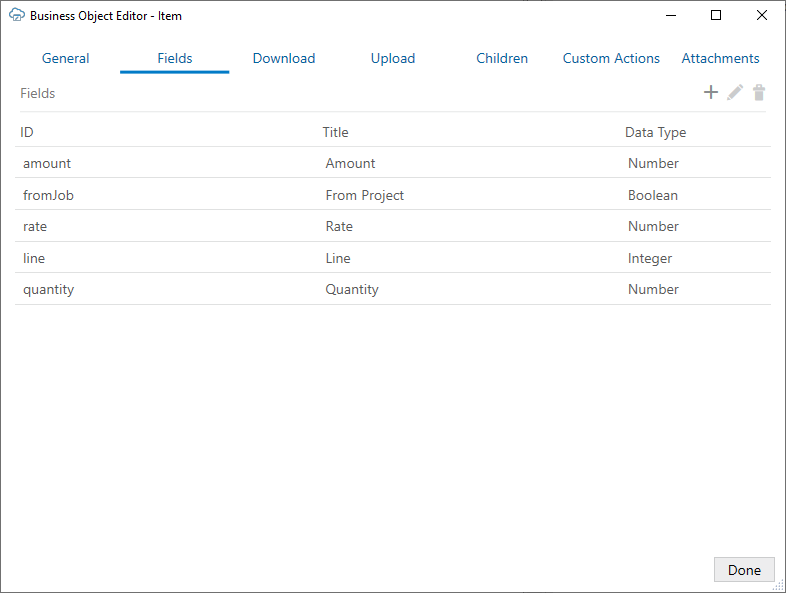
Instead, you need to start by importing the catalog, then adding the child object. When you do this, you'll provide the collection and item paths as well as configure path parameters. You'll also need to add all required fields for the child object.
For more information about parent and child path requirements, see Requirements for Dependent Layouts.
Note:
This task covers adding a child business object, configuring it, and then adding fields. Before you begin, import your catalog as described in Import a Business Object Catalog.To configure a child business object for a NetSuite catalog:
When you are finished, create your layouts in the usual way. You'll see the nearly-added child business object in the New Layout Setup wizard when prompted to choose a child business object for the table part of a Form-over-Table layout or for a dependent layout. See Create a Table Layout in an Excel Workbook or Create a Form-over-Table Layout in an Excel Workbook.
Note:
When the business user edits the form, the downloaded data may be marked as invalid. If these two conditions are met, then clear the value and upload changes:
- The cell value is not changed after download but is still marked as invalid.
- The field's Omit from payload if value is empty check box is selected.


