Create a Table Layout in an Excel Workbook
Create a Table layout in the Excel worksheet when you want to view and edit data from a REST service in a tabular format.
When you create a Table layout, you'll be prompted to point to the service metadata. The service metadata document can be stored on your local drive or accessed remotely using a URL.
These sample URLs return the service metadata the add-in needs to create a business object catalog and then a table layout.
| REST Framework | Sample URL |
|---|---|
| ADF REST (including many REST APIs for Oracle Cloud Applications) | https://<host>/fscmRestApi/resources/11.13.18.05/purchaseRequisitions/describe |
| VBBO | https://<host>/ic/builder/design/<app>/1.0/resources/data/ExpenseReports/describe |
| ORDS | https://<host>/ords/<app>/open-api-catalog/employees/ |
| NetSuite | https://<account>.suitetalk.api.netsuite.com/services/rest/record/v1/metadata-catalog?select=contact |
Note:
You cannot use a data endpoint to create a business object catalog. The metadata endpoint is required at this stage.You'll also have the option to provide authentication details for accessing your REST service. Consult with your REST service owner for access requirements.
To create a Table layout:
- Create a blank Excel workbook using the standard
.XLSXfile format or the macro-enabled.XLSMformat. Other Excel formats (.XLSand so on) are not supported. - Click the cell where you want to locate the data table.
- Open the Oracle Visual Builder tab from the Excel ribbon.
- Click Designer to launch the New Layout Setup wizard.
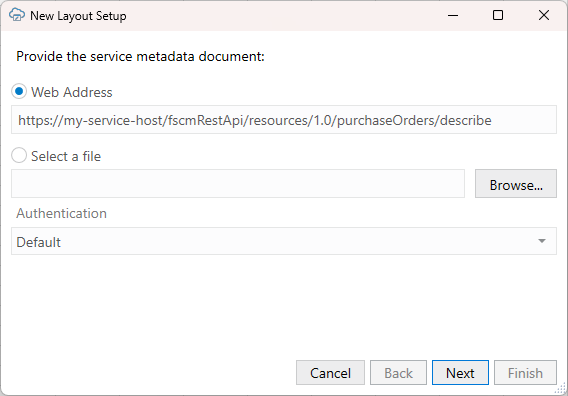
Description of the illustration excel-apiinput.png - From the first screen, provide the service metadata document using one of these options:
- Web Address option (the default) if you access the service metadata from a URL. Note that you can't provide a data URL (a URL that returns data) as the starting point to creating a layout.
- Select a file option if the service metadata document is a local file on your computer.
- Select the authentication method for your service from the Authentication list and click Next.
See Authentication Options for more information.
- If you selected OAuth 2.0 Authorization Code, enter the required properties and click Next.
Required fields are outlined in red. Refer to OAuth 2.0 Authorization Code Flow with PKCE for descriptions of the fields.
- If the service includes five or more business objects, select the business objects you want to include in the catalog, then click Next.
The wizard displays details of the newly-created catalog, such as the catalog name, service host and base path, and number of business objects.
- Review the new catalog details.
Note:
If there are any errors in the service metadata document, click Save Report to save the report to your local drive. Share this report with the service owner. - Click Next to proceed.
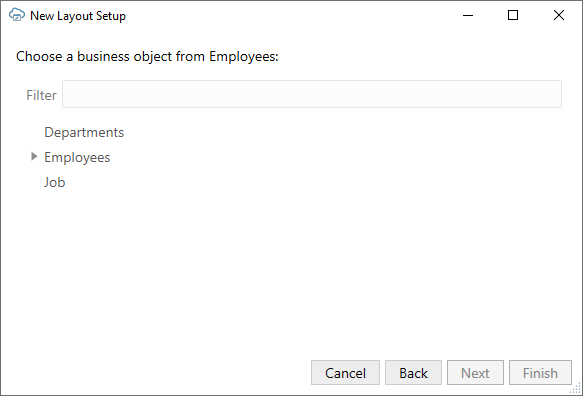
- Select a business object and click Next.
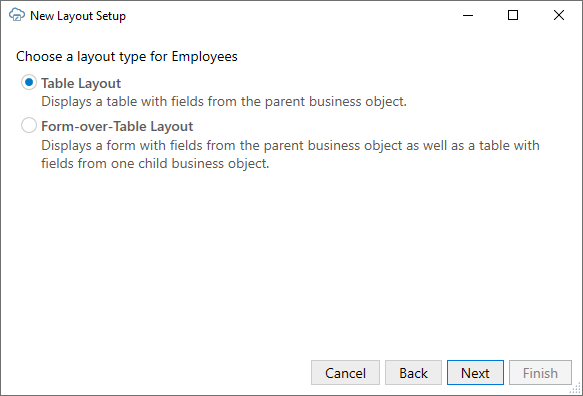
- Select Table Layout and click Next.
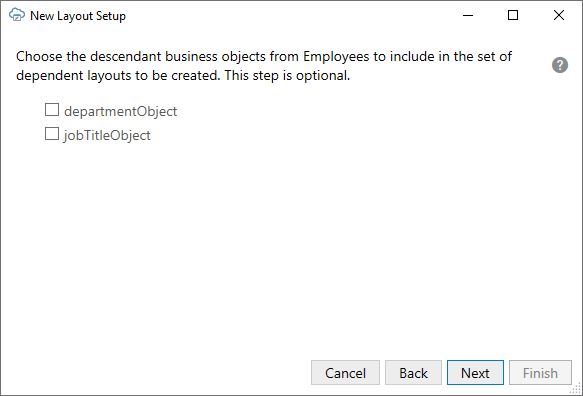
The next screen prompts you to select child business objects if you are creating a set of dependent layouts. See Create a Set of Dependent Layouts.
If there are any available descriptive flexfields, these are displayed in the list and are indicated by the Information icon (
 ).
).
If you select this business object, the descriptive flexfields are added as fields to the respective parent layout. See Create a Layout Using Descriptive Flexfields.
- For a standalone Table layout, click Next without selecting any child business objects.
- Review the Table layout details and then click Finish.
The add-in creates a Table layout in the Excel workbook that includes column headers and a placeholder data row. The Layout Designer opens in the Excel Task Pane.
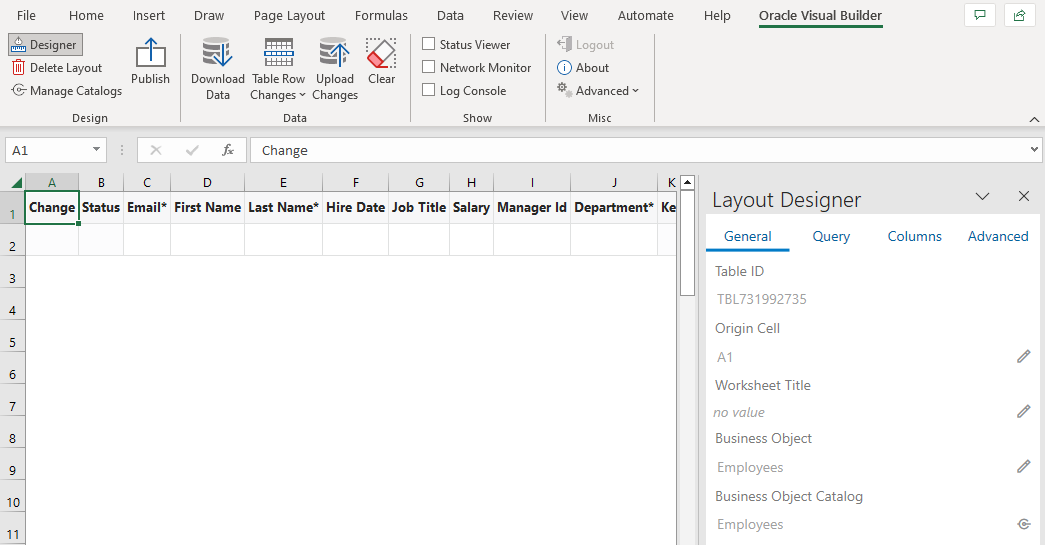
Description of the illustration layout-designer-table.pngNote:
If the origin cell of the layout is in the first 10 rows, the header row is frozen so that you always see the column headers when you scroll up and down in the worksheet. If desired, you can unfreeze the header row from Excel's View tab.
Before you proceed to publishing your workbook, you may want to configure the workbook in various ways to make it easier for your business users to use. For example, you might consider:
- Configuring the workbook to limit the data that the add-in downloads. See Configure Search Options for Download.
- Adding, removing, or reordering columns in your layout. See Manage Fields in a Form or Table.
- Modifying a field associated with a column to, for example, show help text or display a list of input values for your business users. See Configure Business Object Fields and Configure a List of Values with a Business Object.
Before you publish, it's a good idea to perform various data operations, such as download, update, and upload, to test the workbook before you distribute it to users. For information on managing data, see View and Edit Data Using an Excel Workbook in Managing Data Using Oracle Visual Builder Add-in for Excel.

