1 Prepare to Migrate VB Studio to Oracle Cloud Infrastructure

Before you migrate your service instance from Oracle Cloud Infrastructure Classic (OCI Classic) to Oracle Cloud Infrastructure (OCI), you should create and configure required resources, and learn about the required identity domain roles for the migration.

In this documentation, VB Studio on OCI Classic is referred as the source instance and VB Studio on OCI is referred as the target instance. A project in the source or the target instance is referred as the source project or the target project.

To prepare for migration, you'll do the following:

  1. Assign the required identity domain roles to yourself in the source and the target Oracle Cloud account.
  2. Create the target VB Studio instance in the OCI region.
  3. Set up the required OCI connections in the target Oracle Cloud account.
  4. Set up an OCI Object Storage bucket or an OCI Object Storage Classic container in the target Oracle Cloud account.

    You'll use the bucket or the container to export the data of the source VB Studio projects.

Required Identity Domain Roles

Make sure you're assigned the identity domain roles required for the migration. If you're the OCI account subscriber, you already have the required roles to set up the VB Studio instance. If you're not the subscriber, make sure that you've been assigned the correct roles in Oracle Identity Cloud Service (IDCS).

You must be assigned this role: To ...
Cloud Account Administrator or Tenancy Administrator Set up Oracle Cloud Infrastructure (OCI) compartments, policies, dynamic groups, and permission to create and manage the VB Studio instance.

If you're not an account or tenancy administrator, contact the administrator to add you to the OCI_Administrators IDCS group.

Identity Domain Administrator or User Administrator Add users and assign IDCS roles.

If you're not an IDCS domain or user administrator, make sure that your OCI group is assigned a policy like this:

Allow group MyGroup to inspect identity-providers in tenancy

Storage_ReadWriteGroup (Storage_ReadWriteGroup) or Storage_ReadOnlyGroup (Storage_ReadOnlyGroup) Export and import project data to an OCI Object Storage Classic container.

You need this role in the target Oracle Cloud account. If you don't plan to export data to an OCI Object Storage Classic container, you don't need these roles.

To find out how to grant an identity domain role, see Add Users, Assign Policies and Roles in Getting Started with Oracle Cloud.

Create the Target VB Studio Instance

You can create only one VB Studio instance in an Oracle Cloud account. You must create it in your tenancy's root compartment.

  1. In a web browser, go to https://cloud.oracle.com.

    To view the list of supported browsers for the OCI Console, see Supported Browsers.

  2. In Cloud Account Name, enter your Oracle Cloud account or tenancy name and click Next.
  3. On the Single Sign-On (SSO) panel, if required, select your identity provider and click Continue.
  4. Enter your Oracle Cloud account credentials and click Sign In.
    The Oracle Cloud Console, also called the OCI console, opens. If you've recently created your Oracle Cloud account, wait for some time to see your services in the Oracle Cloud Console.
  5. In the upper-left corner, click Navigation Menu the Menu icon.
  6. Select Developer Services and then select Visual Builder Studio.
  7. On the Visual Builder Studio Instances page, from the Compartment drop-down list, select the root compartment.
  8. Click Create VB Studio Instance.
  9. In Instance Name, enter the VB Studio's instance name and click Next.
  10. On the CI/CD Setup page, click the Yes, I authorize this check box. This authorizes VB Studio to create and use Compute and Storage instances.

    In addition, this option automatically creates an additional policy that authorizes VB Studio to perform the necessary operations in the selected compartment for the CI/CD resources. For this automatic policy creation to succeed, the user who creates the instance must also have permissions to manage policies in the root compartment. See Required Identity Domain Roles.

    Typically, tenancy administrators have these permissions, so the easiest way to create a VB Studio instance is to have a tenancy administrator do it. However, if that isn't feasible, it's also possible to create the VB Studio instance without the CI/CD authorization and then set it up later by performing an edit operation.

  11. If you've selected the Yes, I authorize this check box, in Compartment, select the compartment you created to host VB Studio's Compute and Storage instances.
    When you select the check box, the required policies are applied to the selected compartment.
  12. Click Submit.
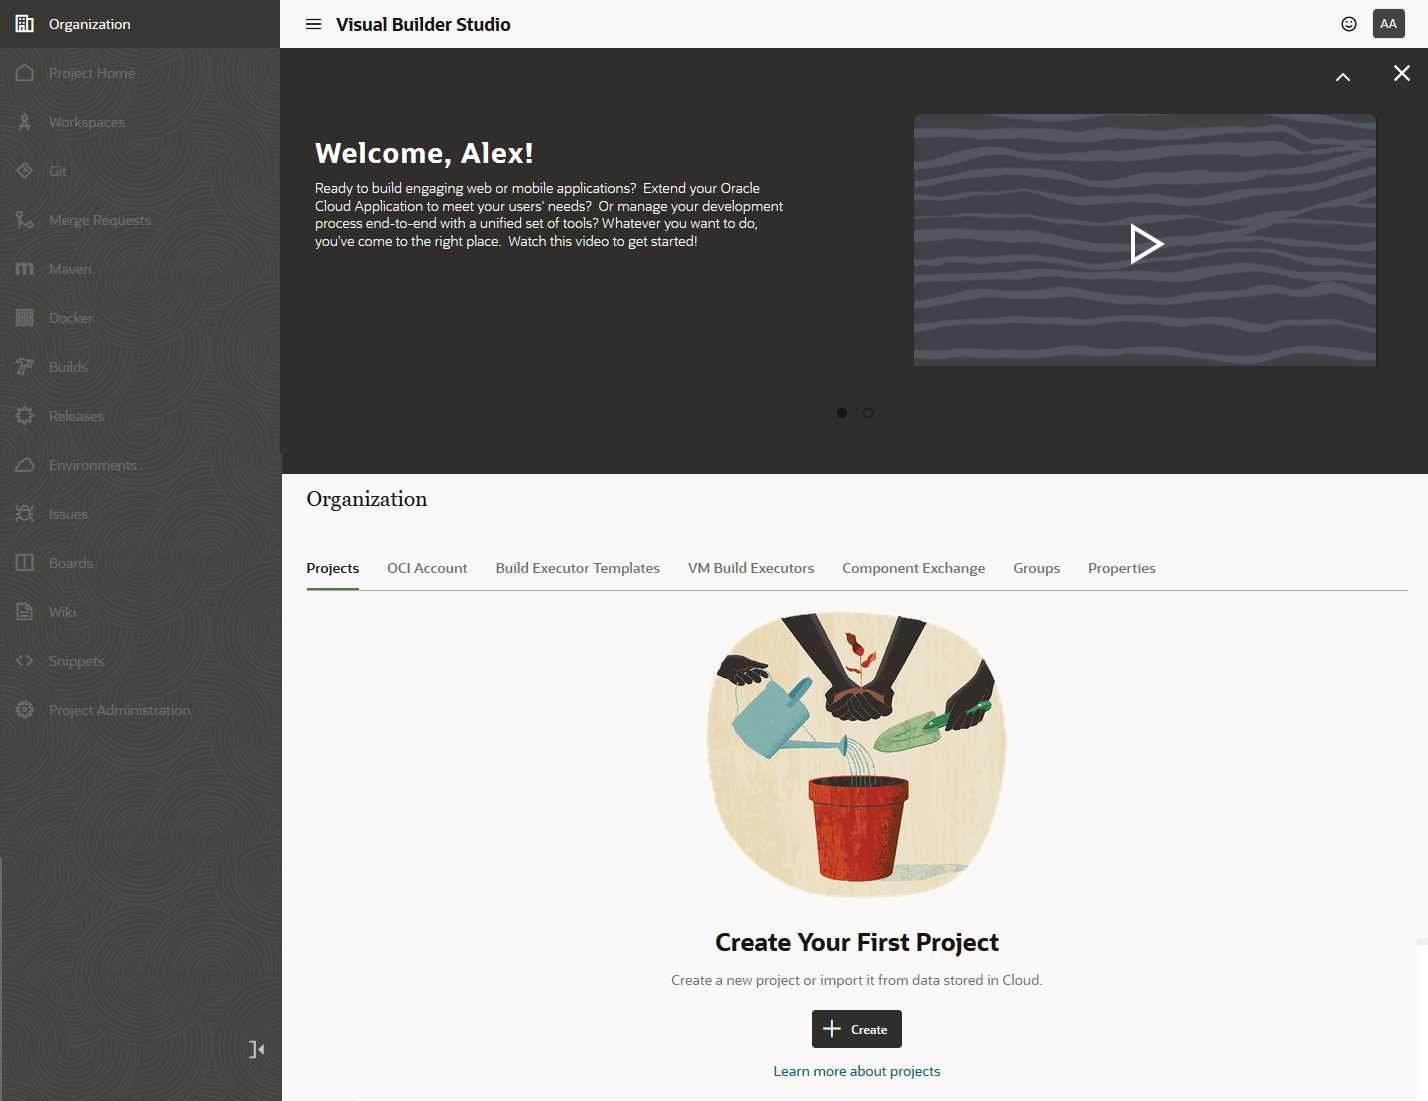
Once the service instance is created, click Service Console to open VB Studio's Organization page.

Here's an example:

What Are the Next Steps?

After you create the instance:
  1. You're assigned the DEVELOPER_ADMINISTRATOR IDCS role, which enables you to set up VB Studio, manage the VM build executors, and update the organization details. After you're assigned the role, you become a VB Studio Organization Administrator.
  2. You'll receive an email with the subject Verify your Oracle Visual Builder Studio email. Open the email and click the URL link in the email body to verify your email. If you don't do this, you won't receive important email notifications.
  3. After verifying the email address, you’ll receive another email with the subject Welcome to Oracle Visual Builder Studio. This email contains the VB Studio URL that you can bookmark.
  4. Default tags are created that help you identify the instance. On the VB Studio's Instance Details page, click the Tags tab to see the created tags. If you don't know how to use tags, see How Tagging Works.
  5. You now need to provide access for additional VB Studio users. See Set Up IDCS Users and Groups to add individual users or unresolvable-reference.html#GUID-114EE819-0EE6-4A46-BABF-77A52F76648C to add groups of users.

Set Up an OCI Object Storage Bucket or an OCI Object Storage Classic Container

To export a project's data, you need an OCI Object Storage bucket or an OCI Object Storage Classic container to host the data. There aren't any functional differences between a bucket and container, so the choice is yours. Do note that OCI offers better security and speed than OCI Classic.

You can use a common bucket or a container for all the projects in your source VB Studio instance, or use a separate bucket or container for each project. There's a bit of a tradeoff in using a separate bucket or container: doing so allows you to organize archive files better, as they aren't mixed up with the archive files of other projects, but it does consume more storage resources to do it this way.

Set Up the OCI Object Storage Bucket

To set up the OCI Object Storage bucket, sign in as the OCI administrator and follow these steps:
  1. In the compartment that hosts VB Studio resources, create a bucket for the project.
    1. In the left navigation bar, under Core Infrastructure, go to Object Storage and click Object Storage.
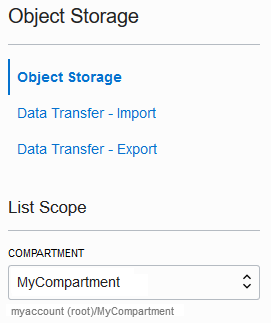
    2. On the left side of the Object Storage page, from the Compartment list, select the VB Studio compartment.

      Example:

      Compartment list
    3. Click Create Bucket.
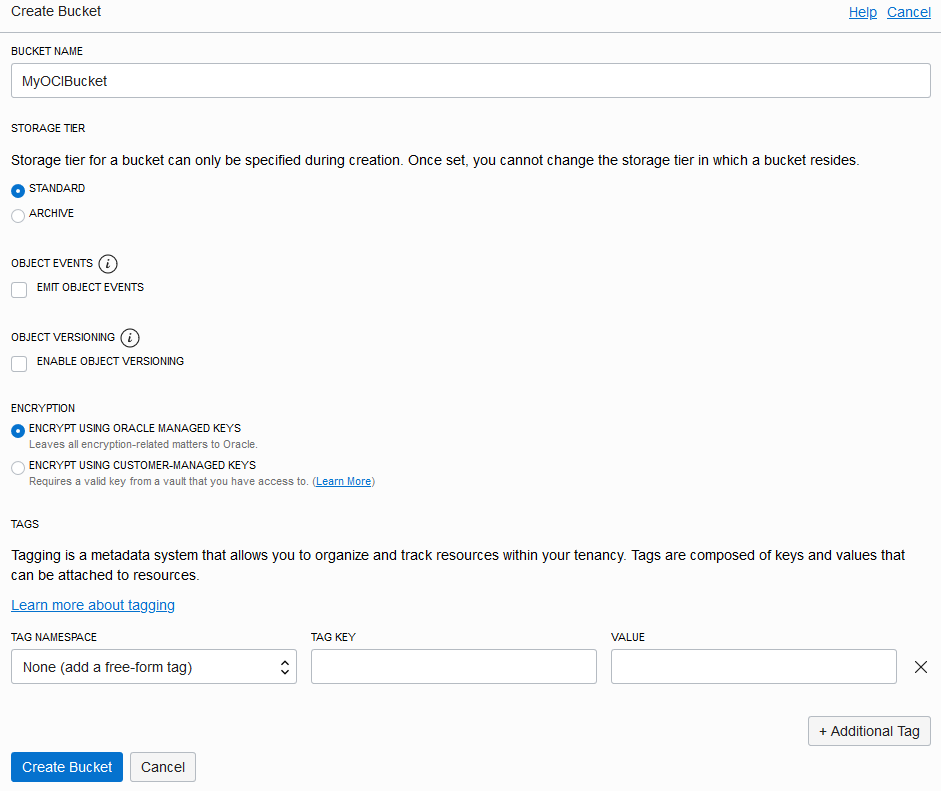
    4. In the Create Bucket dialog box, fill in the details, and click Create Bucket.

      Example:

      Create Bucket dialog box
  2. Create a user to access the bucket.
    1. In the left navigation bar, under Governance and Administration, go to Identity and click Users.
    2. Click Create User.
    3. Select the user type: Oracle Identity Cloud Services or IAM.
    4. Click Next.
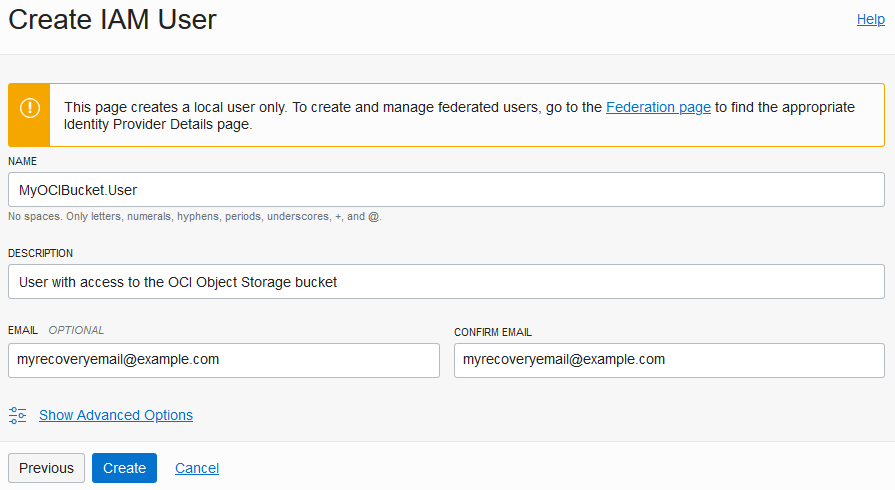
    5. In the Create User dialog box, fill in the fields, and click Create.

      Example:

      Add User dialog box
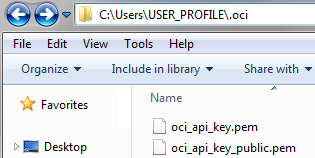
  3. On your computer, generate a private-public key pair in the PEM format.
    To learn more, see How to Generate an API Signing Key.

    Example of private-public key files on a Windows computer:

    Private and Public key files
  4. Upload the public key to the user's details page.
    1. Open the public key file in a text editor and copy its contents.
    2. In the left navigation bar of the OCI dashboard, under Governance and Administration, go to Identity and click Users.
    3. Click the user's name created in Step 2.
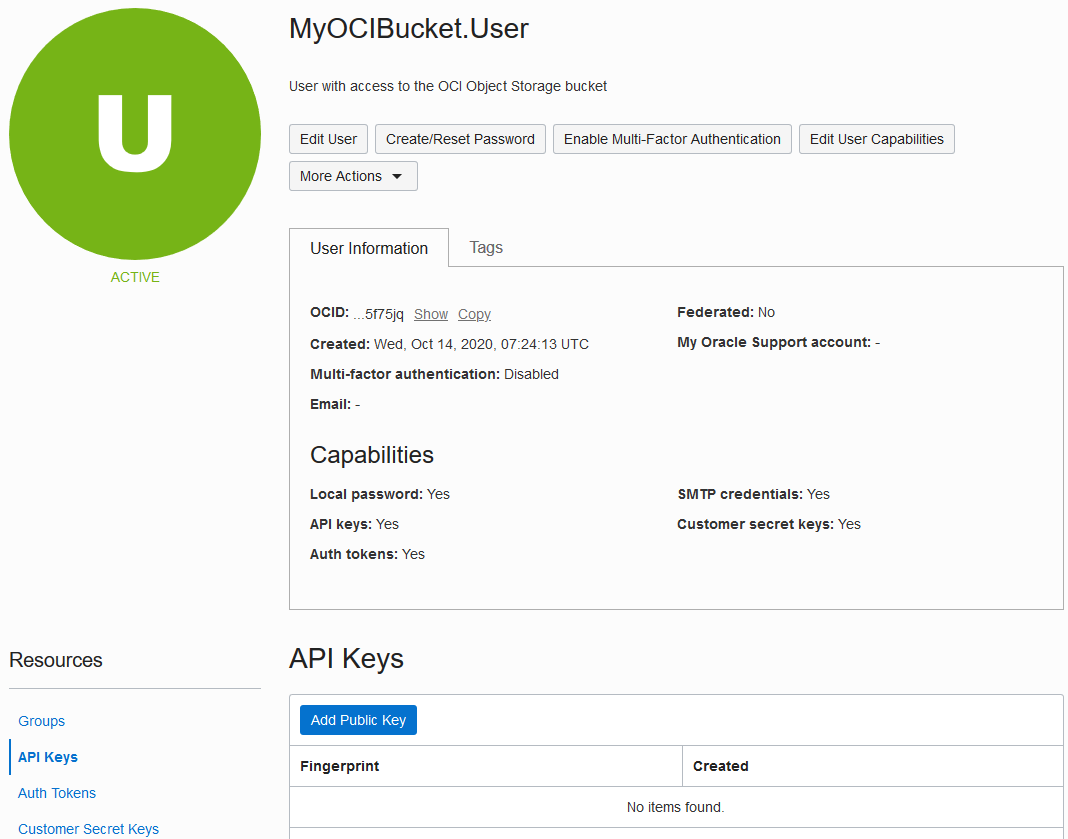
    4. In the User Details page, click Add Public Key.

      Example:

      User Details page
    5. In the Add Public Key dialog box, paste the contents of the public key file, and click Add.
    To learn more, see How to Upload the Public Key.
  5. On the Groups page, create a group for the user who can access the bucket and add the user to the group.
    1. In the left navigation bar, under Governance and Administration, go to Identity and click Groups.
    2. Click Create Group.
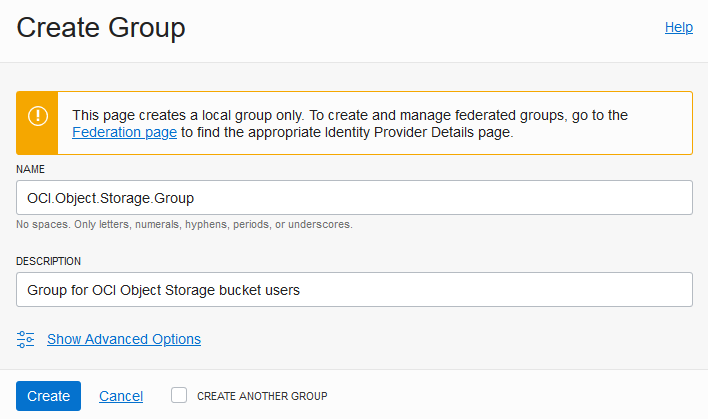
    3. In the Create Group dialog, fill in the fields and click Submit.

      Example:

      Create Group dialog box
    4. On the Groups page, click the group's name.
    5. On the Group Details page, click Add User to Group.
    6. In the Add User to Group dialog box, select the user created in Step 2, and click Add.

      Example:

      Add user to group
    To learn more, see Managing Groups.
  6. In the VB Studio compartment, create a policy with read and write access to the bucket.
    You can give read and write access to the same user, or create different users.
    1. In the left navigation bar, under Governance and Administration, go to Identity and click Policies.
    2. On the left side of the Policies page, from the Compartment list, select the VB Studio compartment.
    3. Click Create Policy.
    4. In Name and Description, enter a unique name and a description.
    5. In Policy Builder, click Customize (Advanced).
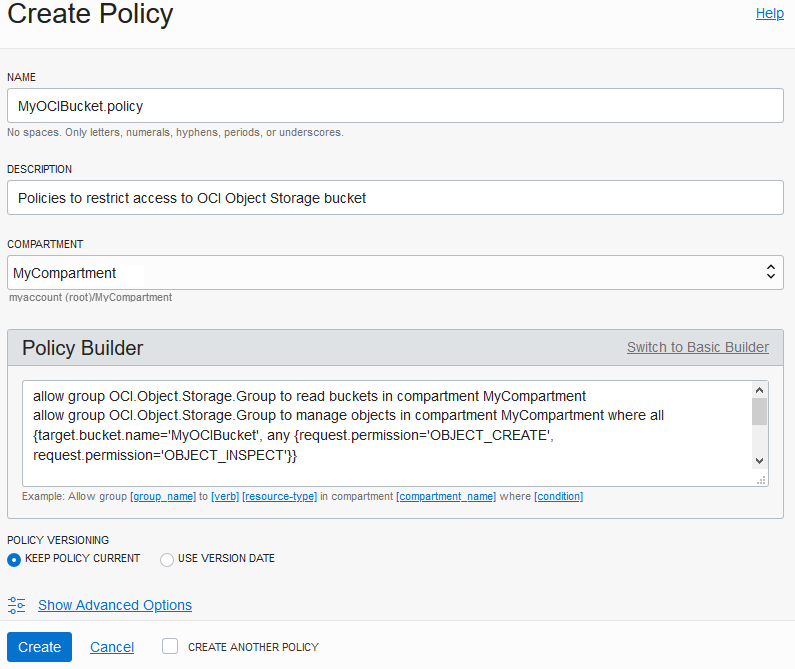
    6. Add statements to restrict read and write access to the bucket.

      To allow different user groups to read objects from and write objects to the bucket, create separate policies. Here are some examples:

      To: Add these statements:
      Allow a group to read from and write objects to a bucket (required to import and export a project's data)

      allow group <group-name> to read buckets in compartment <compartment-name>

      allow group <group-name> to manage objects in compartment <compartment-name> where all {target.bucket.name='<bucket-name>', any {request.permission='OBJECT_CREATE', request.permission='OBJECT_INSPECT'}}

      Allow a group to download objects from a bucket (required to import a project's data)

      allow group <group-name> to read buckets in compartment <compartment-name>

      allow group <group-name> to read objects in compartment <compartment-name> where target.bucket.name='<bucket-name>'

      Example:

      Bucket policy
    7. Click Create.
    To learn more, see Managing Policies.

Set Up the OCI Object Storage Classic Container

An identity domain administrator or the OCI Object Storage Classic administrator can create an OCI Object Storage Classic container. After creating the container, assign a user the Storage_ReadWriteGroup (Storage_ReadWriteGroup). If you want the user to read files from the container, but don't want them to write or delete files, assign the Storage_ReadOnlyGroup (Storage_ReadOnlyGroup) role to the user. Then, share the container and user details with the project owner. Project owner will need the details to connect to the container to export or import data.

You must be an identity domain administrator to create a container and set up the user.

  1. On the OCI Object Storage Classic console, create a container for the project.
    1. Open the Oracle Cloud My Services dashboard.
    2. On the Oracle Cloud Dashboard, in the Storage Classic tile, click Action the Action menu icon and select Open Service Console.
    3. On the Storage Classic page, click Create Container.
    4. In the Create Storage Container dialog box, enter the container name, and click Create.

      Example:

      Create Storage Container dialog box
  2. Set up a user to access the container.
    1. On the Oracle Cloud My Services dashboard, click Users.
    2. Click the user's name tile to whom you want to assign the access.
      To create a user, click Add and fill in the details.
    3. Click the Roles tab.
    4. In All Services, search for Storage Classic.
    5. To assign read and write access to the user, add the Storage_ReadWriteGroup (Storage_ReadWriteGroup) role.
      To assign the read access, add the Storage_ReadOnlyGroup (Storage_ReadOnlyGroup) role.

      Example:

      Storage Classic role
    6. Return to the dashboard.

Set Up IDCS Users and Groups

This step is required.

To add IDCS users to VB Studio and its projects, make sure they are added to the identity system and assigned the appropriate VB Studio roles. Optionally, if you want to add IDCS groups instead of adding IDCS users individually, see Manage Your Organization's Groups.

To add IDCS users manually to the identity system, follow these steps:

  1. Open the Oracle Cloud Console page.
  2. In the upper-left corner, click Navigation Menu the Menu icon.
  3. Under Governance and Administration, select Identity, and then select Federation.
  4. On the Federation page, click the identity service provider's link.
  5. On the Identity Provider Details page, click Create IDCS User.
  6. In the Create IDCS User dialog box, enter the new user's details and click Create.
  7. To send the password reset instructions and URL to the new user, click Email Password Instructions.
  8. Click close.
  9. On the Identity Provider Details page, click the user's IDCS Username link.
  10. On the User Details page, click Manage Service Roles.
  11. On the Manage Service Roles page, search for the service with Developer Cloud Service description, click the Actions icon (three dots) and select Manage Instance Access.
  12. On the Manage Access page, in the Instance Role column, select the role you want to grant to the user. A user must be assigned one of these two roles to access VB Studio.
    This VB Studio role... Enables a user to:
    DEVELOPER_ADMINISTRATOR Set up VB Studio, manage all projects, manage VM build executors and build executor templates, and update the organization's details. The user with this role is also called the Organization Administrator.

    Assign this role role to users who can administer VB Studio.

    DEVELOPER_USER Create and access VB Studio projects. All non-admin users of VB Studio must be assigned this role.

    Note that this role doesn't allow the user to update the organization details.

  13. Click Save Instance Settings.
  14. On the Manage Service Roles page, click Apply Role Settings.

For more details about adding users to IDCS and assigning them roles, see Managing Oracle Identity Cloud Service Users in the Console and Managing Instance Roles in the Console.

Manage Your Organization's Groups

Working with IDCS groups is optional. If a customer hasn't created IDCS groups on their OCI Classic instance, they wouldn't want to recreate or replicate those groups to their OCI Gen 2 instance.

In VB Studio, you can create groups of your VB Studio organization's users or import existing Oracle Identity Cloud Service (IDCS) groups, and then add these groups to VB Studio projects. When you add a group to a project, you assign a common membership type to all group's users.

After creating a group, you can add more members to it and add the group to projects. You can also import IDCS groups to VB Studio, but can't add or remove users from the imported IDCS group. To do that, sign in to the IDCS Console. Note that the imported IDCS group is synced with IDCS every five minutes.

This table describes the actions you can perform to create and manage groups.

Action How To

Create a VB Studio group

  1. In the navigation menu, click Organization Organization.
  2. Click the Groups tab.
  3. Click + Create Group.
  4. In Type, if not already selected, select the VB Studio tile.
  5. In Name and Description (optional), enter the group's name and description.
  6. To see all members you can add, click the members list. Users who are assigned the DEVELOPER_ADMINISTRATOR or the DEVELOPER_USER IDCS role are displayed.
  7. From the users drop-down list, select users to add to the group.

    If you can't find a particular user, enter the user's name or username in the search box. As you type, the drop-down list displays users matching the search term.

  8. Click Create.
Import an IDCS group
  1. In the navigation menu, click Organization Organization.
  2. Click the Groups tab.
  3. Click + Create Group.
  4. In Type, select the IDCS tile.
  5. Under the filter box, select the group to import.

    The drop-down list displays IDCS groups that are assigned either the DEVELOPER_ADMINISTRATOR or the DEVELOPER_USER IDCS role.

    To select multiple groups, press the Ctrl key or the Shift key, and then select groups. If you can't find a particular group, enter the group's name in the search box. As you type, the drop-down list displays groups matching the search term.

  6. Click Create.

From VB Studio, you can't add or remove users of an IDCS group. You can do that from the IDCS Console. See Manage Oracle Identity Cloud Service Groups.

See a group's members
  1. In the navigation menu, click Organization Organization.
  2. Click the Groups tab.
  3. Locate the VB Studio group and click the user gravatars in the Members column.
Add members to an existing VB Studio group
  1. In the navigation menu, click Organization Organization.
  2. Click the Groups tab.
  3. Locate the VB Studio group and click Add Member to the Group Add user.
  4. Click the members drop-down list. All users who are assigned the DEVELOPER_ADMINISTRATOR or the DEVELOPER_USER IDCS role are displayed.
  5. Select the user from the drop-down list.

    If you can't find the user, enter the user's name or username in the search box. As you type, users matching the search term are displayed.

  6. Click Add.
  7. In the Members tab, verify the added members.
  8. Click Close.
Remove members from a VB Studio group
  1. In the navigation menu, click Organization Organization.
  2. Click the Groups tab.
  3. Locate and double-click the VB Studio group.
  4. In the Members tab, select the members to remove.
  5. Click Remove Members.
  6. Click Remove Members to confirm.
Add a group to a project

To add a group to a project, you must be assigned the project's Project Owner membership.

  1. In the navigation menu, click Organization Organization.
  2. Click the Groups tab.
  3. Locate the VB Studio group and click Add Group to a Project Add group to a project
  4. From the project drop-down list, select the project.
  5. From the roles list, select the role you want to assign to the group's members.
  6. Click Add.
  7. Click Close.
Remove a group from a project

To remove a group from a project, you must be assigned the project's Project Owner membership.

  1. In the navigation menu, click Organization Organization.
  2. Click the Groups tab.
  3. Locate and double-click the VB Studio group.
  4. In the Projects tab, select the projects to remove.
  5. Click Remove Group from Projects.
  6. Click Remove Group from Projects to confirm.
See the projects a group is added to
  1. In the navigation menu, click Organization Organization.
  2. Click the Groups tab.
  3. Locate the VB Studio group and click the user gravatars in the Projects column.
  4. Click Close.
Edit a group's name or description
  1. In the navigation menu, click Organization Organization.
  2. Click the Groups tab.
  3. Locate and double-click the VB Studio group.
  4. Click Actions Actions menu and select Edit.
  5. Update the group's name and description
  6. Click Save.
  7. Click Close.
Delete a group
  1. In the navigation menu, click Organization Organization.
  2. Click the Groups tab.
  3. Locate the VB Studio group.
  4. Click Delete.
  5. Click Delete to confirm.