Chat Sessions Workspace
It is important to familiarize yourself with the chat sessions workspace before chatting with customers.
Your main role is to chat with customers and access tools to answer their questions. This is accomplished through the chat sessions workspace.
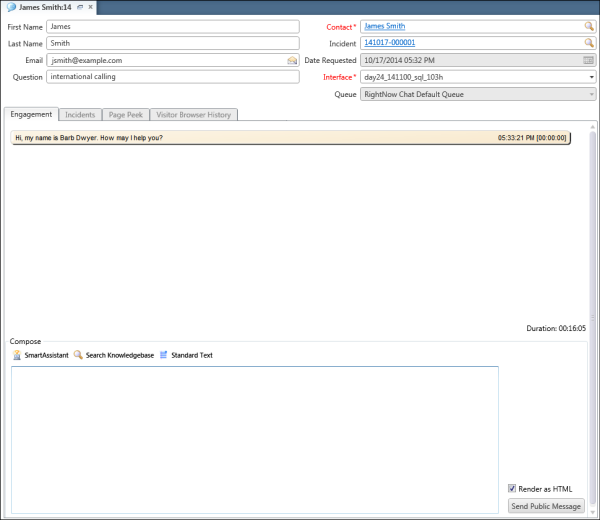
This image shows the standard chat sessions workspace for an agent after accepting a chat request from a customer. Keep in mind that what you see may be different if your administrator has created a custom chat sessions workspace and assigned it to your profile.

Notice the customer’s name on the content pane tab in the image. Additional tabs will display when you are engaged in multiple chat sessions.
After you accept a chat request, read-only customer fields display at the top of the content pane. See View Incidents Submitted by a Customer. Much of the information listed on the content pane is also provided in the toast invitation you see before accepting the chat request.