Setting up Oracle Eloqua multi-step campaigns
To set up an Oracle Eloqua multi-step campaign with an Oracle Eloqua segment, you will need to do the following:
Install the Oracle Unity app
Installing the Oracle Unity - Eloqua Connector app makes the CX Unity Feeder service available for use within Oracle Eloqua multi-step campaigns.
When you install the app, field mapping is automatically set up between Oracle Unity and Eloqua. This will link Oracle Unity attributes to Eloqua contact fields.
Learn more about Installing the Oracle Unity - Eloqua connector app.
Note: If you are experiencing issues with an app developed by Oracle Marketing Apps, click Support in the app-level or instance-level configuration window. Detailed information about the app is displayed, such as Service URL, App Name, App Status, Client, and Error Messages. Copy and paste this information into a service request at My Oracle Support.
Create Oracle Eloqua multi-step campaigns
To create an Eloqua multi-step campaign with an Oracle Unity segment, you will need to use the CX Unity Feeder element on the Eloqua campaign and then activate the Eloqua campaign.
Using the feeder
When you add the CX Unity Feeder to the campaign canvas, the feeder will import the linked data from Oracle Unity so that it can be used for the Eloqua campaign.
To use the CX Unity Feeder:
- Log in to Eloqua.
- Navigate to Orchestration
 , then click Campaigns.
 - Click Create a Multi-Step Campaign.
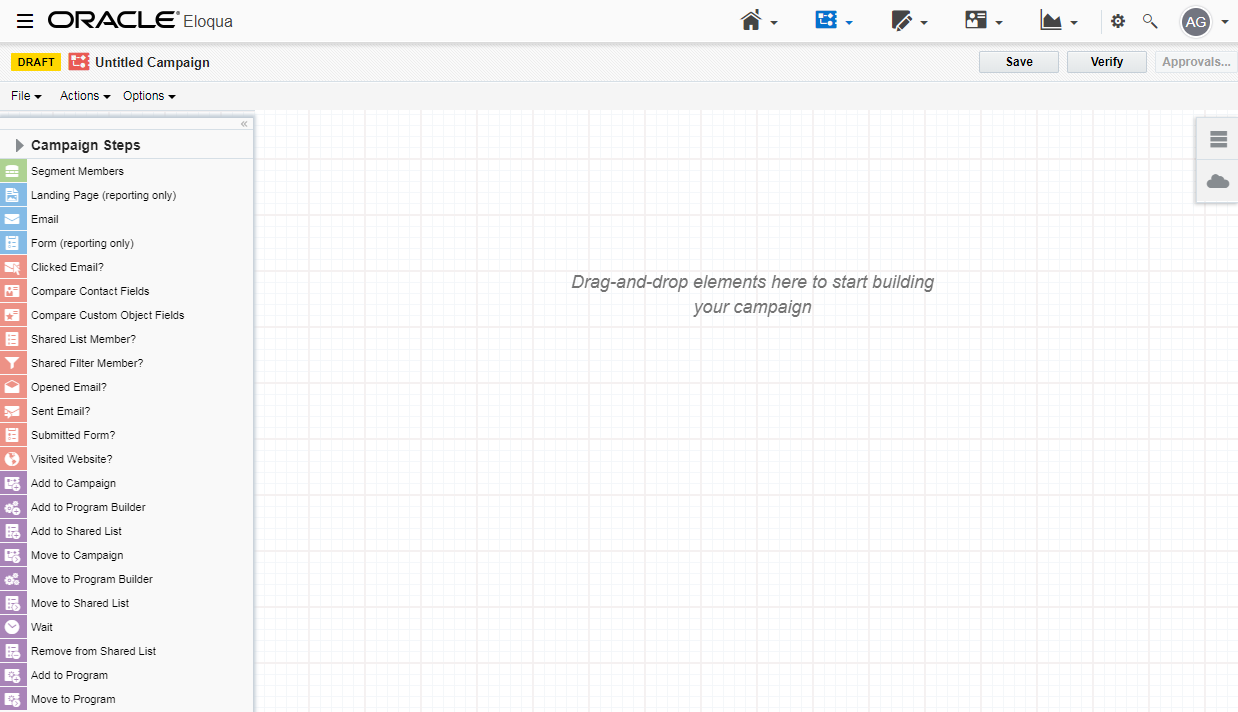
- Select a template or use the blank campaign. The campaign canvas opens.
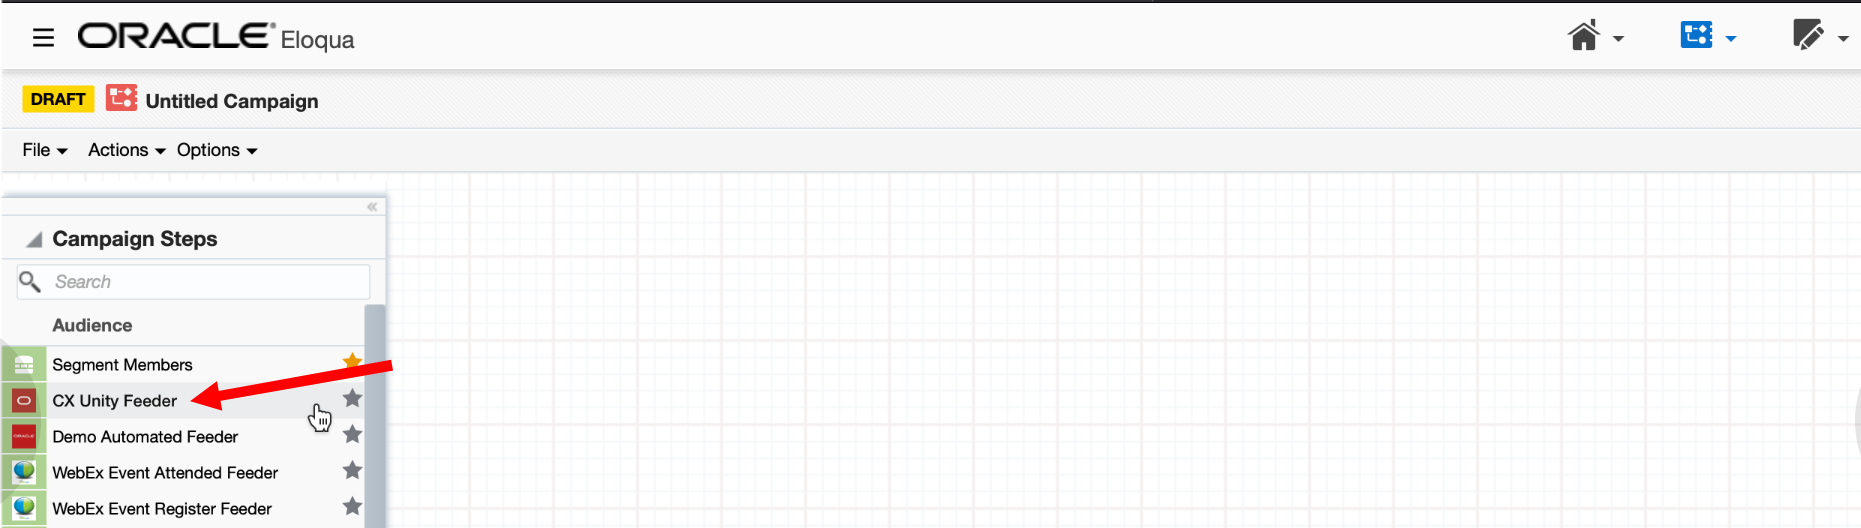
- Click the Campaign Steps heading. All available elements for the campaign will display.
- Drag and drop the CX Unity Feeder element to the campaign canvas.
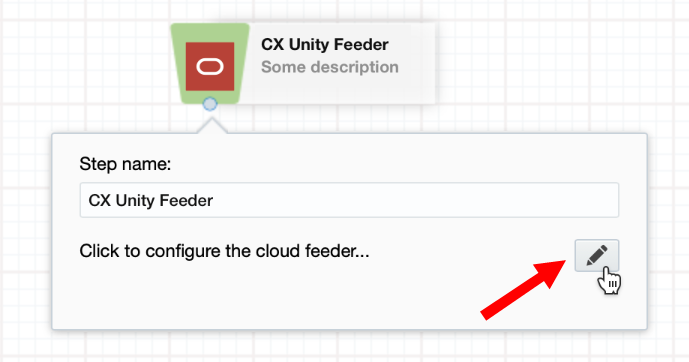
- Click
 next to Click to configure the cloud feeder. The Cloud Feeder Configuration dialog will display.
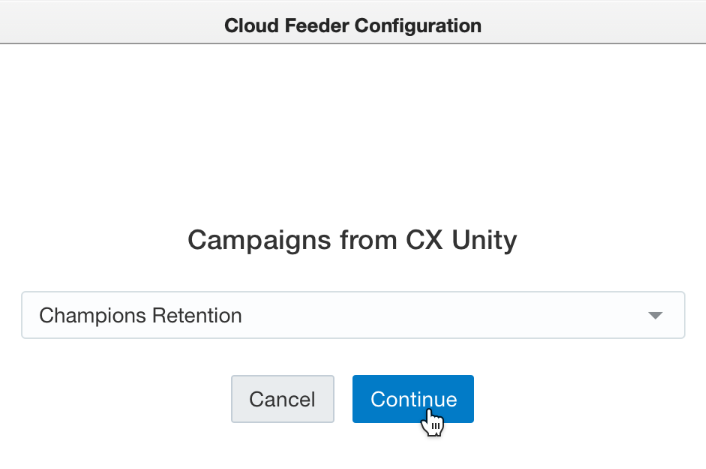
 - You will need to select the segment delivery created in Oracle Unity that you want to use for the Eloqua campaign. Search for the segment delivery name from Oracle Unity you want to link to this campaign, then click Continue. A confirmation message will display if the campaign was saved successfully.
- You can only select one Oracle Unity segment delivery.
- You can only select Oracle Unity segment deliveries that are not currently being used for Eloqua campaigns.
- You can only view published Oracle Unity segment deliveries. If you want to select a segment delivery that is not yet published, follow the steps for Publishing changes.
- Continue creating the campaign. Learn more about Creating multi-step campaigns from the Eloqua Help Center.
Activating the campaign
After you create the campaign, you will need to activate it. Follow the steps for Activating multi-step campaigns from the Eloqua Help Center.
Note: You must have permissions to activate a campaign. If you see an Approvals button on the campaign canvas, the campaign must go through an approvals process before activation. See campaign activation security for more information about activation permissions. Learn more about the approvals process and campaign activation security from the Eloqua Help Center.
When you activate the campaign, that will trigger the respective campaign from the Oracle Unity Jobs dashboard.
Installing the Oracle Unity - Eloqua connector app
Eloqua Help Center - Installing and managing apps
Eloqua Help Center - Creating multi-step campaigns
Eloqua Help Center - Activating multi-step campaigns