Introduction
This 35-minute hands-on tutorial shows you how to use a Groovy business rule in Planning to export dimension metadata from Enterprise Data Management Cloud, and then import the metadata into Planning. The sections build on each other and should be completed sequentially.
Background
Enterprise Data Management Cloud provides multiple solutions for managing changes in your business by ensuring consistency across enterprise data, even across disparate applications.
You can export dimension metadata from Enterprise Data Management Cloud to a Planning instance manually or by using the EPM Automate utility. You can also create a Groovy business rule in Planning that calls the Enterprise Data Management REST API to export the dimension metadata, then imports the metadata to Planning using a saved import job.
In this tutorial, you update the Product dimension in Enterprise Data Management Cloud and then synchronize the changes to Planning by using a Groovy business rule in Planning.
Note:
See the Next Steps section for links to tutorials on manually exporting and importing and using EPM Automate.Groovy rules
Groovy rules can be used anywhere a normal business rule can be used. The way you implement this type of integration rule in a production environment depends on how often the integration needs to be run and whether you want to allow planners to run it independently or reserve it for a regular application maintenance process that includes importing metadata, then refreshing and recalculating the database. You can implement one or both of the methods covered in this tutorial:
- Add a context menu item for the rule in forms where users can run the integration and immediately see new metadata imported
- Schedule the rule to run at a specific time
This tutorial has three parts:
Part 1: Setup steps- Set up connections between Enterprise Data Management Cloud and Planning to reference in the Groovy rule.
- Create an Import Metadata job in Planning to reference in the Groovy rule.
- Set up user variables to use Planning forms.
- Create a Groovy rule in Planning that uses Enterprise Data Management REST API calls to export dimension metadata from Enterprise Data Management to the Planning inbox, then issues internal REST API calls to run the saved Import Metadata job.
- Create an action menu item for the rule and assign it to a Planning form, so users can run the integration from the form.
- Update the Product dimension in Enterprise Data Management Cloud.
- Run the Groovy rule using the Planning form a context menu to see immediate results.
- Schedule the Groovy rule to run at a specific time.
Prerequisites
An EPM Cloud Service instance allows you to deploy and use one of the supported business processes. To deploy another business process, you must request another EPM Enterprise Cloud Service instance or remove the current business process.
- Have Service Administrator access to two instances of EPM Enterprise Cloud Service. The instances should not have business processes created.
Tip:
If you have already set up these instances for one of the tutorials listed in the Next Steps section, you can continue to use the same environments and skip these prerequisites tasks. Your results may vary from those shown in the screenshots for this tutorial, depending on whether and in which order you have completed the related tutorials. - Configure one of your instances for Enterprise Data Management Cloud and configure the other instance for Planning.
- In your Enterprise Data Management Cloud instance, create a sample application. For more information, see the documentation.
- Upload and import this snapshot into your Planning instance. For more information on uploading and importing migration snapshots, refer to the Administering Migration for Oracle Enterprise Performance Management Cloud documentation.
Part 1: Setup tasks
Setting up the Planning application connection in Enterprise Data Managment Cloud
In this section, in Enterprise Data Management Cloud, you set up and test a connection to your Planning instance so you can export dimension metadata directly to the Planning instance inbox.
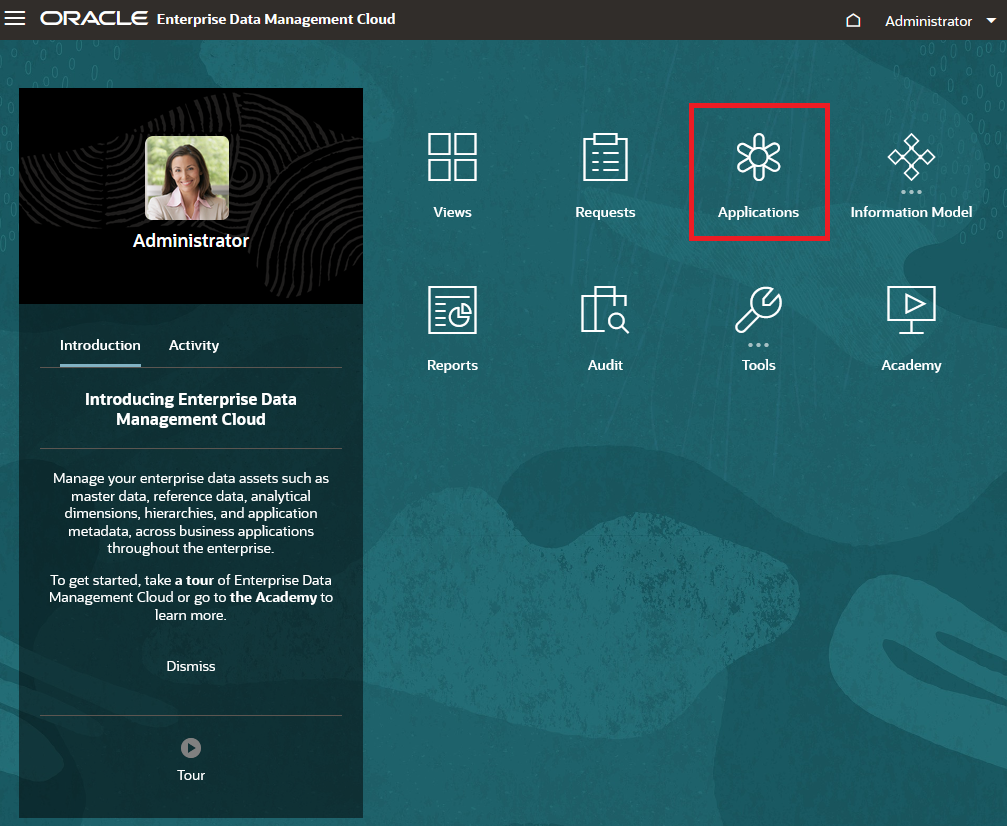
- On the Enterprise Data Management Cloud home page, click Applications.
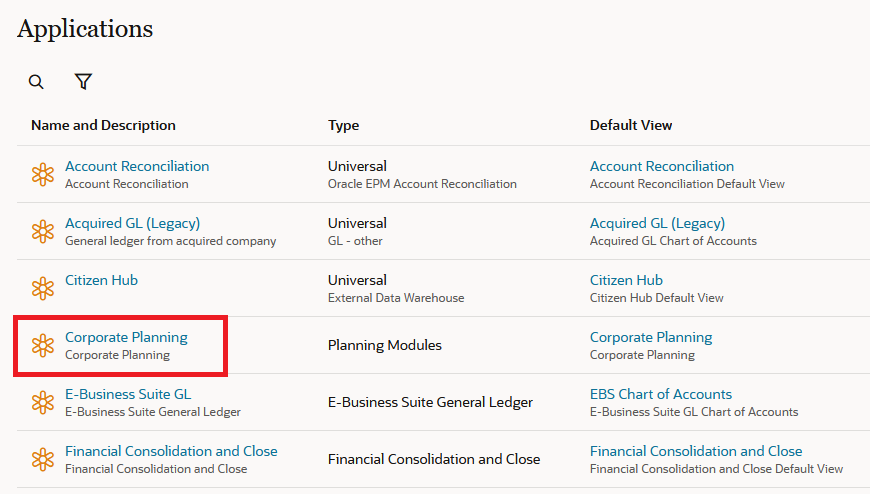
- Click Corporate Planning to open the inspector.
- Select the Connection tab.
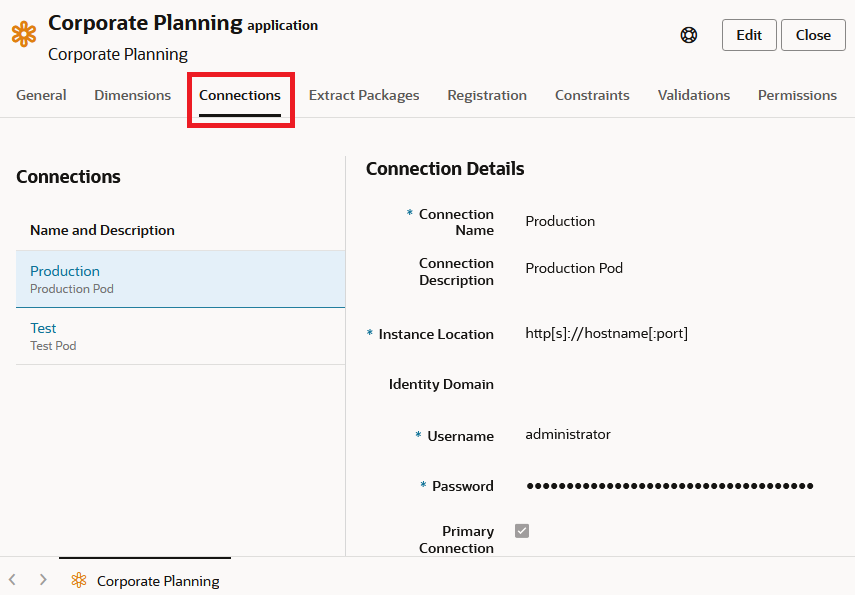
- Select the Production connection, then click Edit.
- Modify the connection details for your Planning instance:
Field Valid Values Example Instance Location Enter a connection URL to your Planning instance in the format: https://ServiceName-IdentityDomain-ServiceType.DataCenter.oraclecloud.comhttps://planbudget-uscompany-entplan.US11.oraclecloud.com
where
ServiceNameisplanbudgetIdentityDomainisuscompanyServiceTypeisentplanDataCenterisUS11
Identity Domain Enter the identity domain of your Planning instance. Note:
This is the same Identity Domain used in the Instance Location.uscompanyUsername Enter an authorized user name. Note:
The user must be a Service Administrator of the Planning instance.tom.smithNote:
You must enter the identity domain in either the Identity Domain or Username fields. For example, enteruscompanyin Identity Domain oruscompany.tom.smithin Username.Password Enter the user's password. xxxxxxxx - Select Primary Connection to make this connection the default for importing and exporting.
- Click Test Connection.
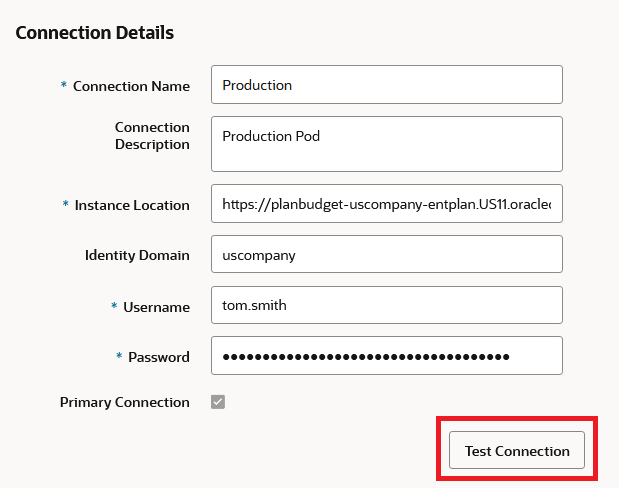
The message "Connection Successful" is displayed.
Tip:
If your connection test is not successful, check your connection information and try again. - Click OK, then click Save.
- Click Close to close the inspector.
Setting up the Enterprise Data Management Cloud application connection in Planning
In this section, in Planning, you set up and test a connection to your Enterprise Data Management Cloud instance so you can use Groovy to call Enterprise Data Management Cloud REST API functions from Planning.
- Open a new browser tab and log in to your Planning instance. From the home page, click Tools, and then click Connections.
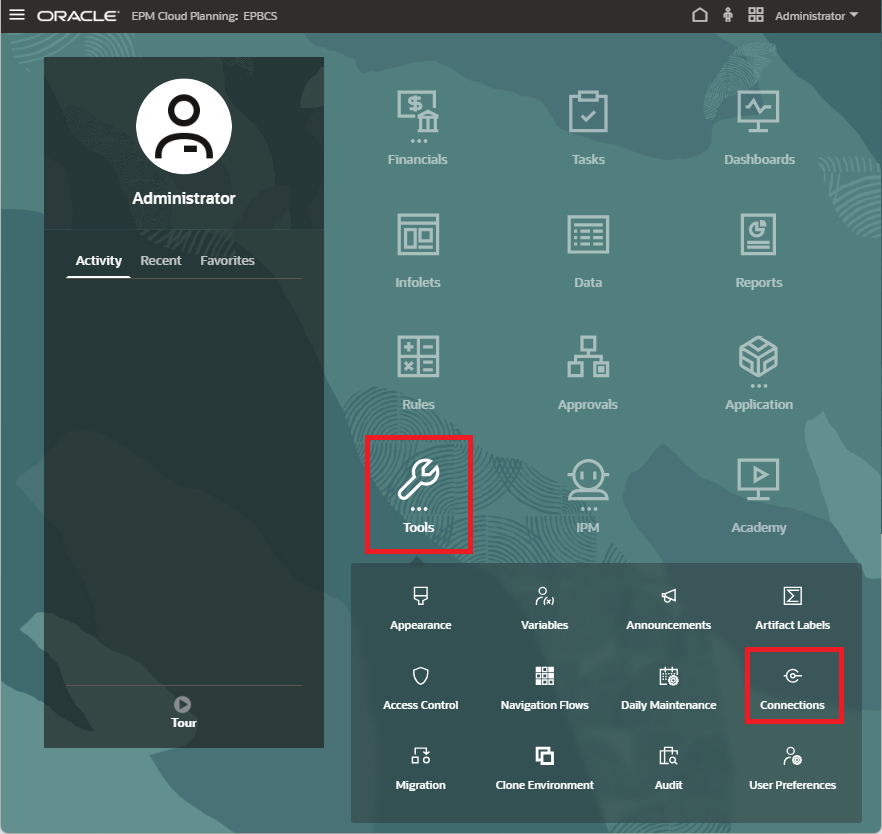
- Click Create.
- For the provider, click Other Web Service Provider.
- Enter the connection details:
- Connection Name: EDM
- Description: EDM connection for Groovy rules
- URL: Enter the login URL for your Enterprise Data Management Cloud instance in the format
ServiceName-IdentityDomain.ServiceType.DataCenter.oraclecloud.com.
For example:
https://edmcs-uscompany.epm.US1.oraclecloud.com
- User: Enter
IdentityDomain.UserName, whereIdentityDomainis your Enterprise Data Management Cloud identity domain andUserNameis your Enterprise Data Management Cloud service administrator user (for example,tom.smith). - Password: Enter the password for your Enterprise Data Management Cloud service administrator user.
- Click Save and Close to save the connection.

Setting up a Planning connection for internal REST API calls
In this section, you set up a connection to the current Planning instance that you can use to issue internal REST API calls for import jobs in Groovy.
- Click Create.
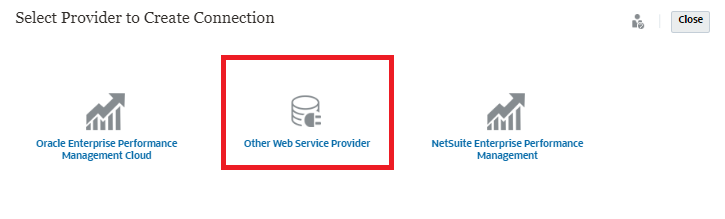
- For the provider, click Other Web Service Provider.
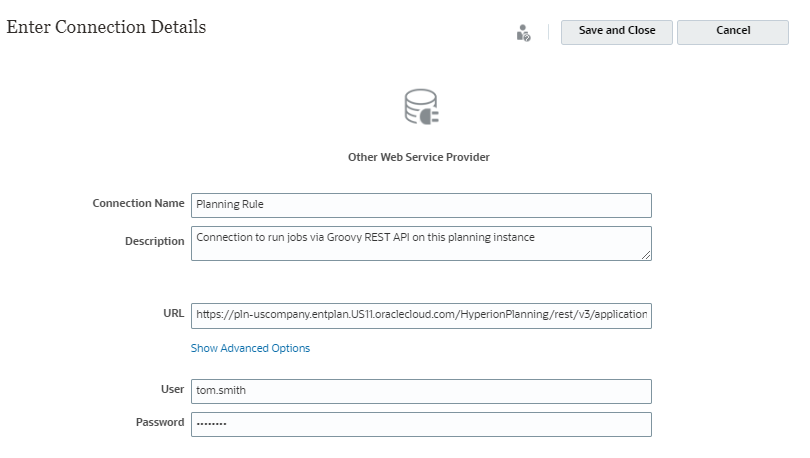
- Enter the connection details:
- Connection Name: Planning Rule
- Description: Connection to run jobs via Groovy REST API on this planning instance
- URL: Enter the REST API URL for your Planning instance, in the format
https://ServiceName-IdentityDomain.ServiceType.DataCenter.oraclecloud.com/HyperionPlanning/rest/API_Version/ResourcePath.
For example:
https://pln-uscompany.entplan.US11.oraclecloud.com/HyperionPlanning/rest/v3/applications/EPBCS/jobs
- User: Enter
IdentityDomain.UserName, whereIdentityDomainis your Planning identity domain andUserNameis your Planning service administrator user (for example,tom.smith). - Password: Enter the password for your Planning service administrator user.
- Click Show Advanced Options.
- Enter the header options:
- For Type, select Header.
- For Name, enter Content-Type.
- For Value, enter application/json.
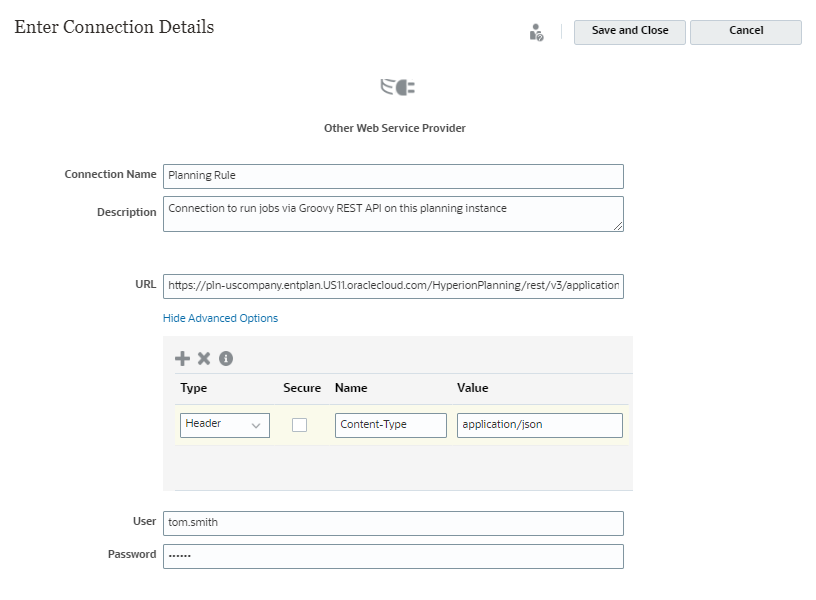
- Click Save and Close to save the connection.
- Return to the Planning home page.
Creating an import job in Planning
Using Groovy rules, you can import files stored in the Planning Inbox by referencing a saved import job. In this section, you create an import job for a file called edmc-groovy-product.csv, which you will export from Enterprise Data Management Cloud in your Groovy rule by using the REST API.
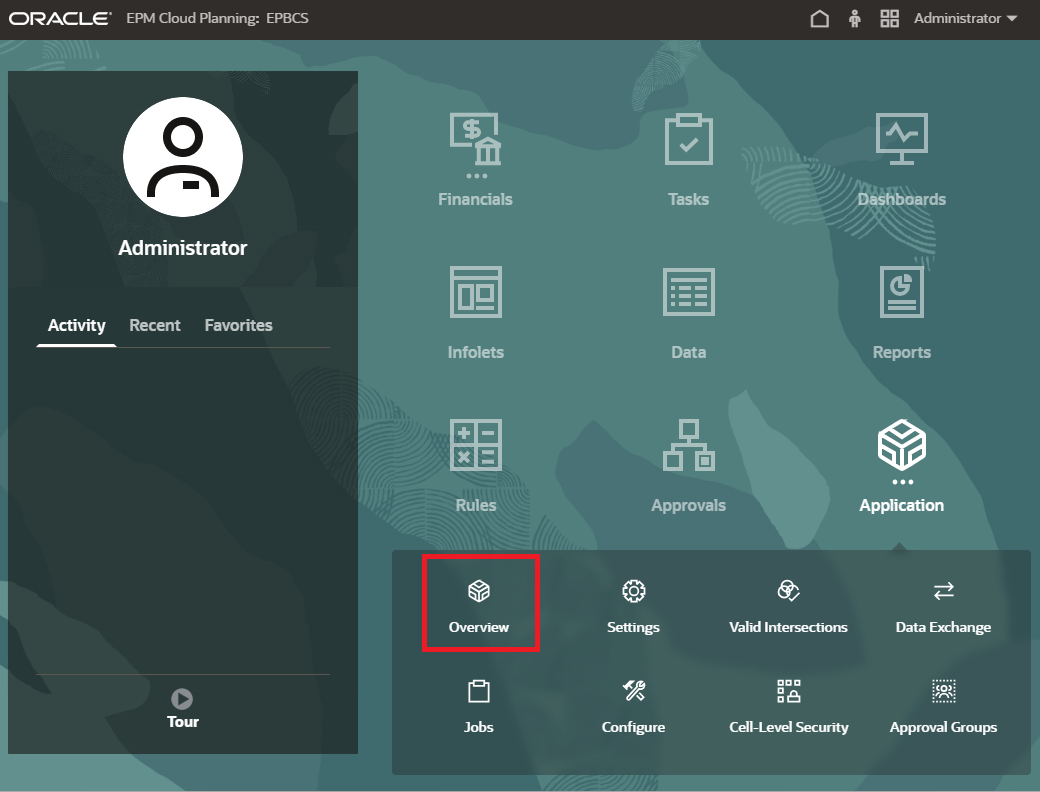
- From the Planning home page, click Application, and then click Overview.
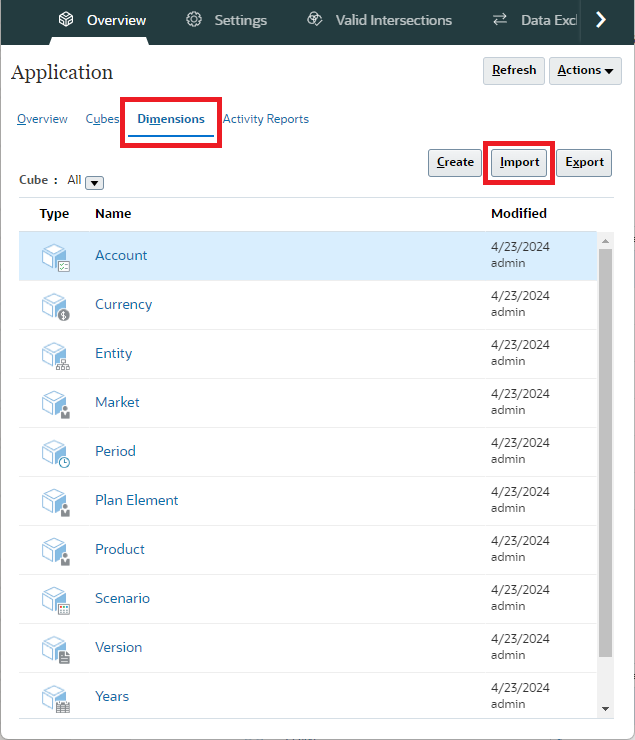
- Select the Dimensions tab, and then click Import.
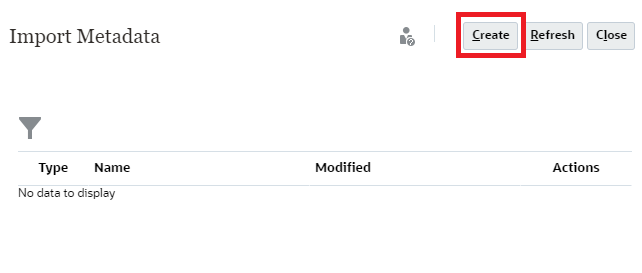
- Click Create.
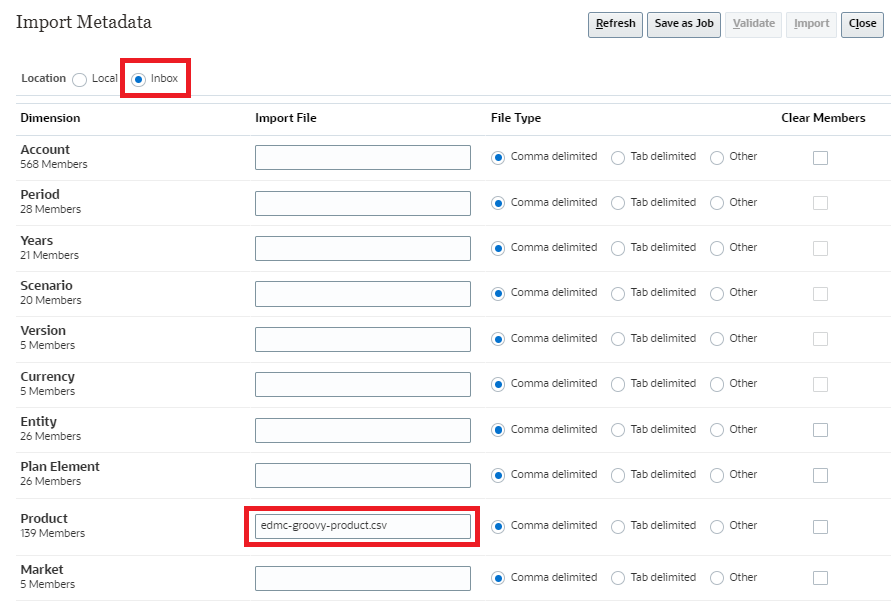
- For Location, select Inbox.
In the Product dimension row, enter edmc-groovy-product.csv, and accept the default (Comma delimited) for the File Type.
- Click Save as Job.
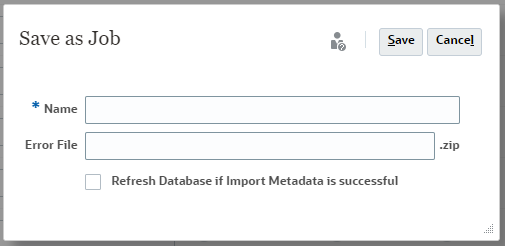
- Configure the job:
- Name: Import_EDMC_Groovy_Product
- Error File: import_edmc_groovy_product_error
- Refresh Database if Import Metadata is successful: accept the default setting (unselected).
Note:
This file provides information about the metadata records that were not imported for each dimension. If you specify an error zip file, a separate error file is created for each dimension, then the error files are zipped together, and the zip file is stored in the Outbox where you can download the file using Inbox/Outbox Explorer.Tip:
For new members to be included in calculations, you must refresh the database after modifying dimensions and members. In a production environment, Oracle recommends that you notify all users, asking them to save their work and close the application, before you refresh the database. In this example, while planners can import new metadata, refreshing the database should be reserved as a separate administrative function. For more information on database refreshes, please see Before Refreshing the Database in Administering Planning.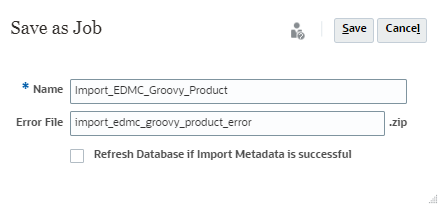
- Click Save, then click OK to close the information message.
- Click Close to close the Metadata dialog box that lists dimensions.
- In the Import Metadata dialog box that lists saved import metadata jobs, click Refresh to view the created job.
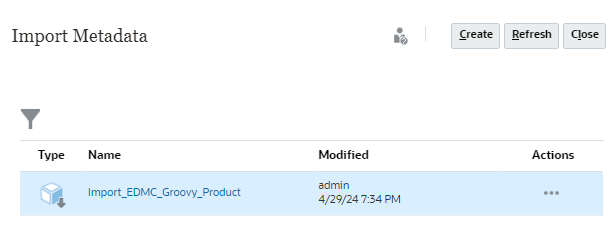
- Click Close, then return to the Planning home page.
Setting up user variables in Planning
User variables are added when the business process is created. User variables act as filters in forms, enabling planners to focus only on certain members. You must select values for your user variables before opening Planning forms and dashboards.
- On the Planning home page, click Tools, then User Preferences.
- On the left, click User Variables.
- Enter the following members for the user variables:
- Currency: USD
- Entity: Sales US
- Reporting Currency: USD
- Scenario: OEP_Forecast
- Version: OEP_Working
- Years: FY20
- Expense Account: OFS_Total Expenses
- Expense Drivers: OFS_Expense Drivers for Forms
Tip:
You can use Member Selector to select members.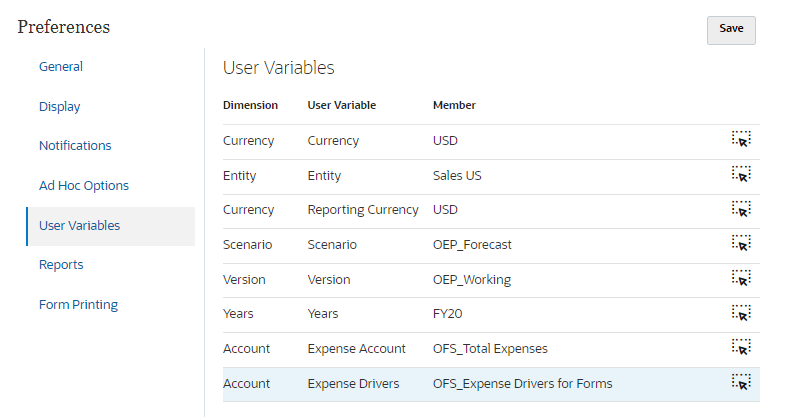
- Click Save. When prompted, click OK.
- Return to the Planning home page.
Part 2: Creating the Groovy rule and context menus
Creating the Groovy rule
In this section, you implement a Groovy rule to export Product metadata from Enterprise Data Management Cloud and then import the exported metadata to Planning.
-
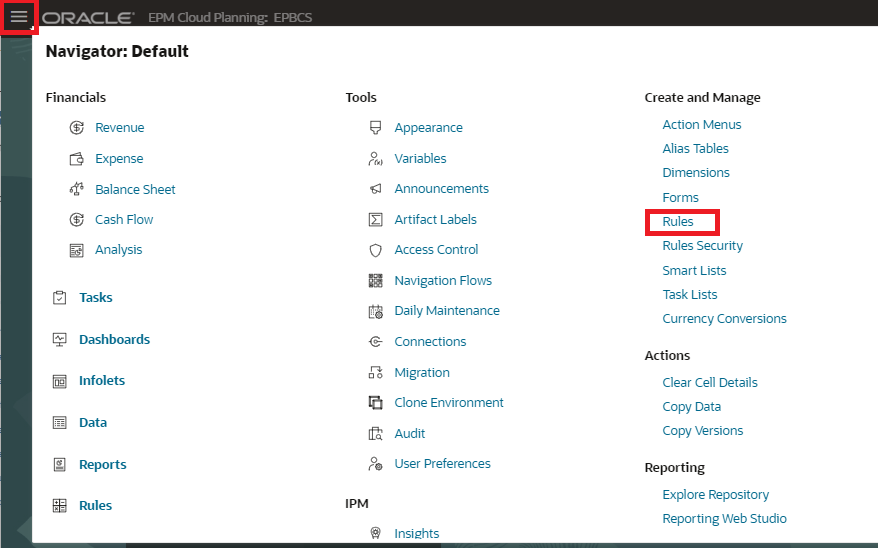
From the Planning home page, click
 (Navigator), then click Rules (located under Create and Manage).
Note:
This action opens Calculation Manager in a popup window. - Click Actions, then click New Object.
- Define the rule:
- Application Type: EPM Cloud
- Application: EPBCS
- Cube: OEP_FS
- Object Type: Rule
- Name: groovy-import-edmc-products
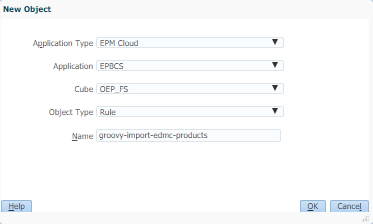
- Click OK to create the rule, then click OK to close the information message.
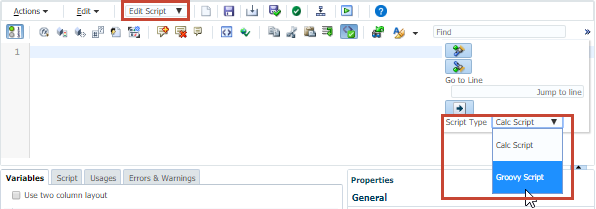
- In the Rule Editor, change the Designer option to Edit Script and set the Script Type to Groovy Script.
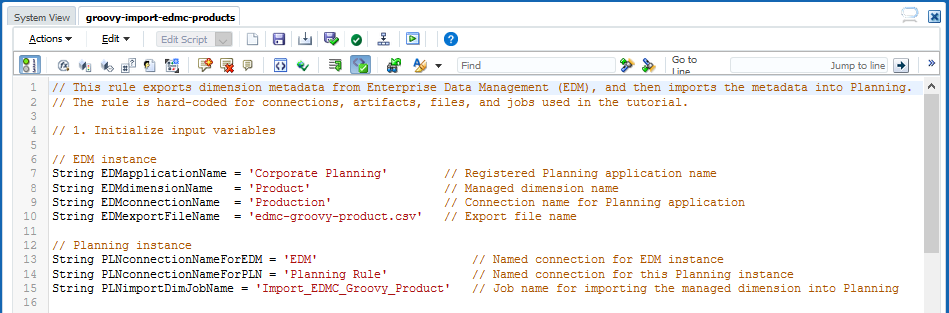
- Copy this script and paste it into the editor:
- On the toolbar, click
 (Save) to save the script, then click
  (Validate and Deploy) to validate and deploy the script.
 - In the Deploy dialog box, click OK, then close Calculation Manager.
Explaining the script logic
In this section, the script logic is described one section at a time.
Note:
This rule is hard-coded to use two named connections (EDM and Planning Rule) in Planning of the type Other Web Service Provider. It is also hard-coded for artifacts specific to the Corporate Planning application in the provided Enterprise Data Management Cloud sample environment. It exports the Product dimension using the connection Production. The rule is hard-coded to export a file named edmc-groovy-product.csv to the Planning server. Finally, it is hard-coded to use the saved import job Import_EDMC_Groovy_Product, which you created earlier in the tutorial.- Initialize input variables for the script.

- Lines 7-10: Initialize input variables related to the Enterprise Data Management Cloud instance, including the registered Planning application name, the dimension to export, the connection name for the Planning application, and the export file name.
- Lines 13-15: Initialize input variables related to the Planning instance, including the name of the Enterprise Data Management cloud connection, the name of the internal Planning connection, and the name of the Import Metadata job.
- Retrieve the application and dimension IDs for the Planning application and managed dimension in Enterprise Data Management Cloud instance.

- Line 19: Get the list of applications and their information in Enterprise Data Management Cloud (this API).
- Line 21: In the response, extract the application metadata for the Corporate Planning application.
- Line 22: In the application metadata, find the application ID.
- Line 23: In the application metadata, find the dimension ID for the Product dimension.
- Retrieve the connection ID for the Planning application registered in Enterprise Data Management Cloud.

- Line 27: Get the list of connections for the Corporate Planning application in Enterprise Data Management Cloud (this API).
- Line 29: In the response, find the connection ID for the Production connection.
- Export the Product dimension from Enterprise Data Management Cloud to the Planning inbox.

- Lines 33-34: Export the Product dimension to the configured connection Production, using the hard-coded export file name
edmc-groovy-products.csv(this API). - Line 36: In the response, find the job URL.
- Line 37: Extract the job ID from the job URL.
- Lines 33-34: Export the Product dimension to the configured connection Production, using the hard-coded export file name
- Check the dimension export job status.

- Lines 41-43: Pause until the job status is
COMPLETED. - Lines 45-50: Return the results of the job run by submitting a
GETrequest (this API).
- Lines 41-43: Pause until the job status is
- Run a job in Planning to import the dimension metadata from the inbox.
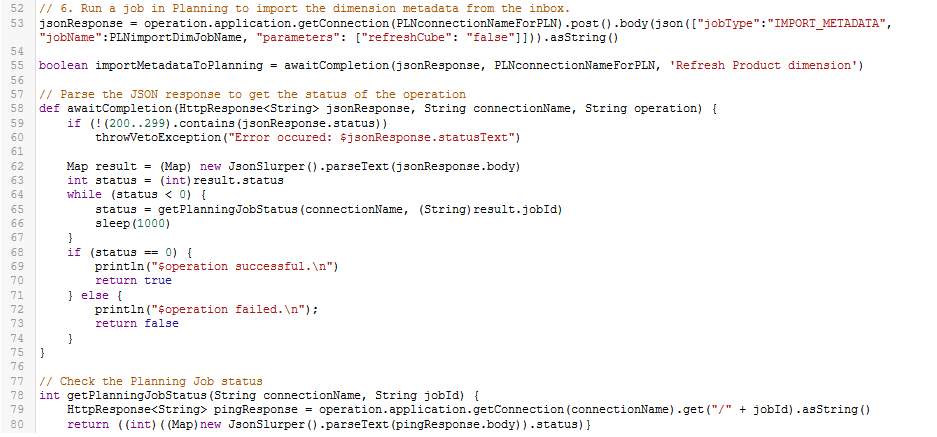
- Line 53: Execute an import metadata job, Import_EDMC_Groovy_Product, in Planning using the Planning Rules connection by submitting a
POSTrequest (this API). - Line 55: Execute the
awaitCompletionfunction. - Lines 58-75: Parse the response from the
POSTrequest in line 53. If the response status is between 200 and 299, proceed with checking the job status. Otherwise throw an exception. Wait until the job status returned by thegetPlanningJobStatusfunction is 0 or > 0. If the status equals 0, then the import was successful, otherwise, the operation has failed. - Lines 78-80: Get the status of the Planning job (this API).
- Line 53: Execute an import metadata job, Import_EDMC_Groovy_Product, in Planning using the Planning Rules connection by submitting a
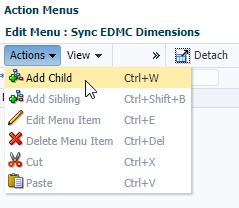
Creating an action menu and adding action items
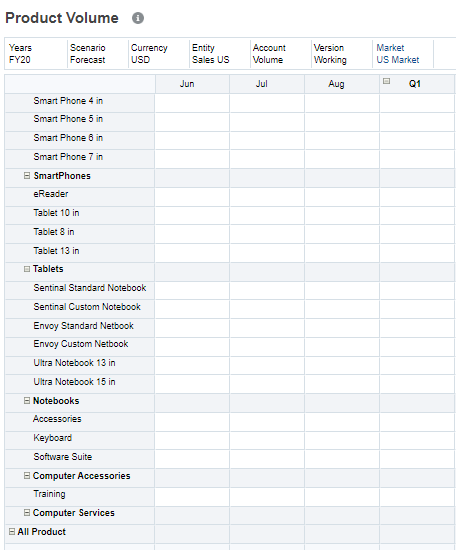
In this section, you add an action menu with an item that runs the Groovy rule to synchronize Product metadata from Enterprise Data Management Cloud. You then add the custom action menu to the predefined Product Volume form, which has been set up for planners to enter volume data for all products. Adding a custom menu to the form lets planners execute the rule using a simple right-click in the form.
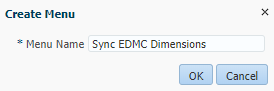
- From the Planning home page, click (Navigator), then click Action Menus (located under Create and Manage).
- Click
 (Create Menu).
 - For the menu name, enter Sync EDMC Dimensions, then click OK.
- Select Sync EDMC Dimensions, and click
 (Edit Menu).
 - Click Actions, then select Add Child.
- Enter or select the following options to define the menu item:
Option Field Value to Enter or Select Menu Item Sync Product Label Sync Product Type Business Rule Required Parameters None Cube OEP_FS Business Rule groovy-import-edmc-products 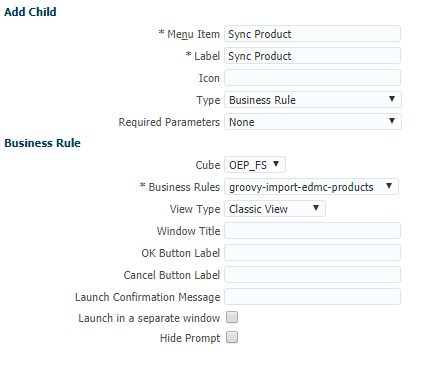
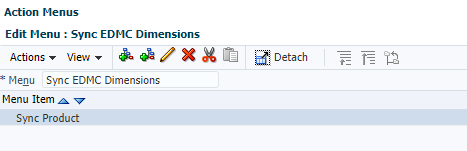
- Click Save, then click OK to save the menu item. Finally, click Save again to save the action menu.
- Return to the Planning home page.
Adding the action menu to a Planning form
- From the Planning home page, click (Navigator), then click Forms (located under Create and Manage).
- Select the Product Volume form, and then click (Edit).
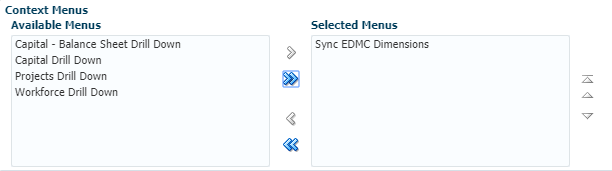
- Select the Other Options tab.
- In the Context Menus section, under Available Menus, select Sync EDMC Dimensions, then click
 (Move selected items to: Selected Menus).
- Click Finish to save and close the form editor.
- Return to the Planning home page.
Verify the context menu
In this section, you open the Product Volume form and verify that the context menu was added to the form.
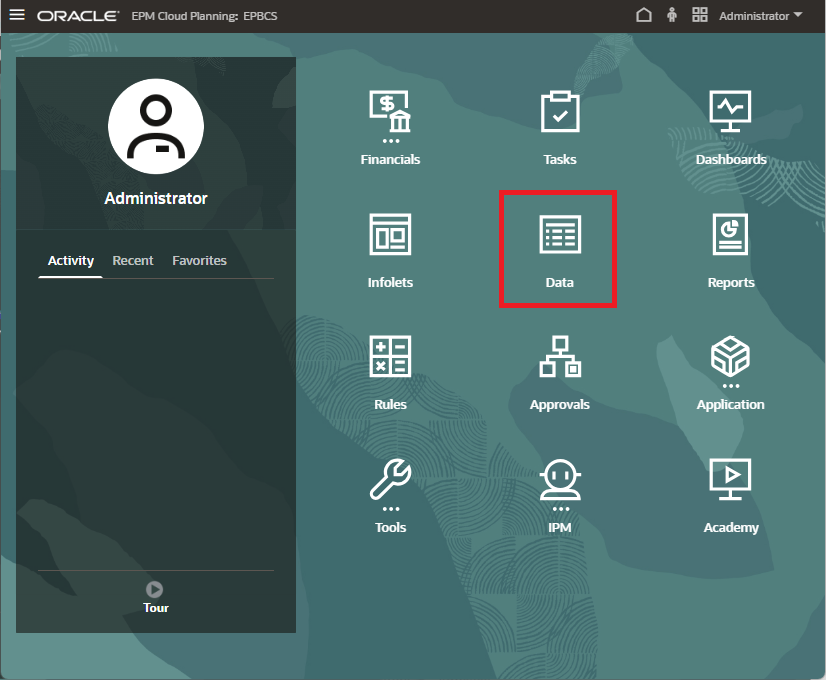
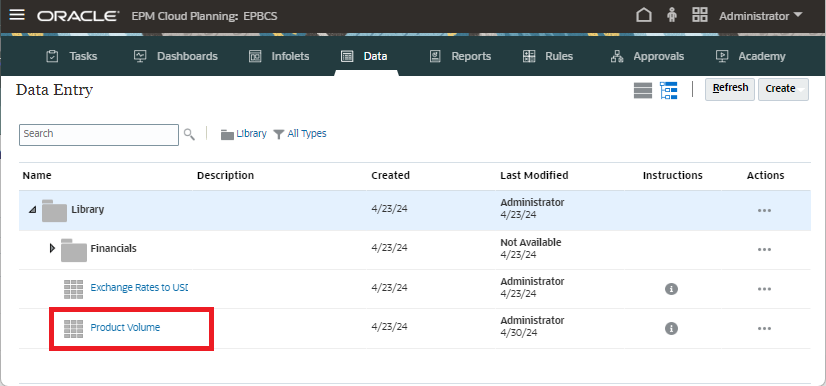
- From the Planning home page, click Data.
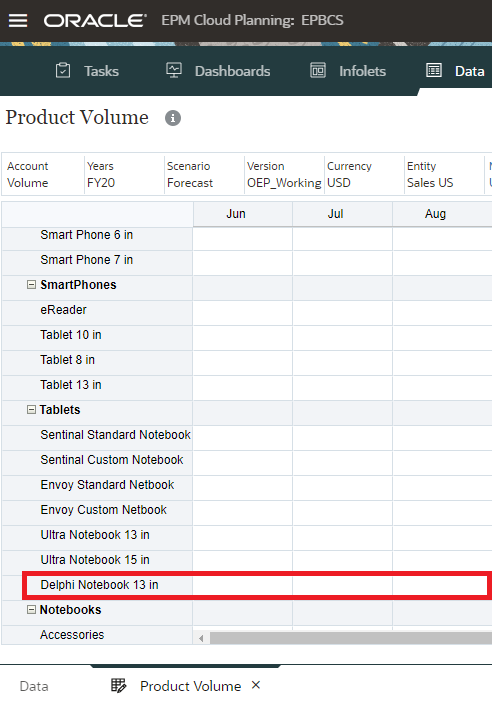
- Click Product Volume to open the form.
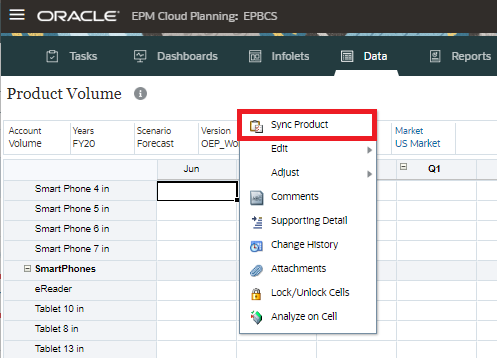
- Right-click in the form and verify that the Sync Product menu item is displayed in the context menu.
- Click outside the context menu to close it. Leave the form open.
Part 3: Testing the Grrovy rule two ways
In this section, you add a new product in Enterprise Data Management Cloud, and then you test your Groovy script by running it two ways: from the Planning form context menu, and by scheduling it to run at a specific time. When run, the script exports Product metadata from Enterprise Data Management Cloud to the Planning inbox, then runs an Import Metadata job in Planning.
Adding a product in Enterprise Data Management Cloud
Currently, the Product dimensions in Enterprise Data Management Cloud and Planning are in sync. In this section, you add a new product to the Corporate Planning application in Enterprise Data Management Cloud.
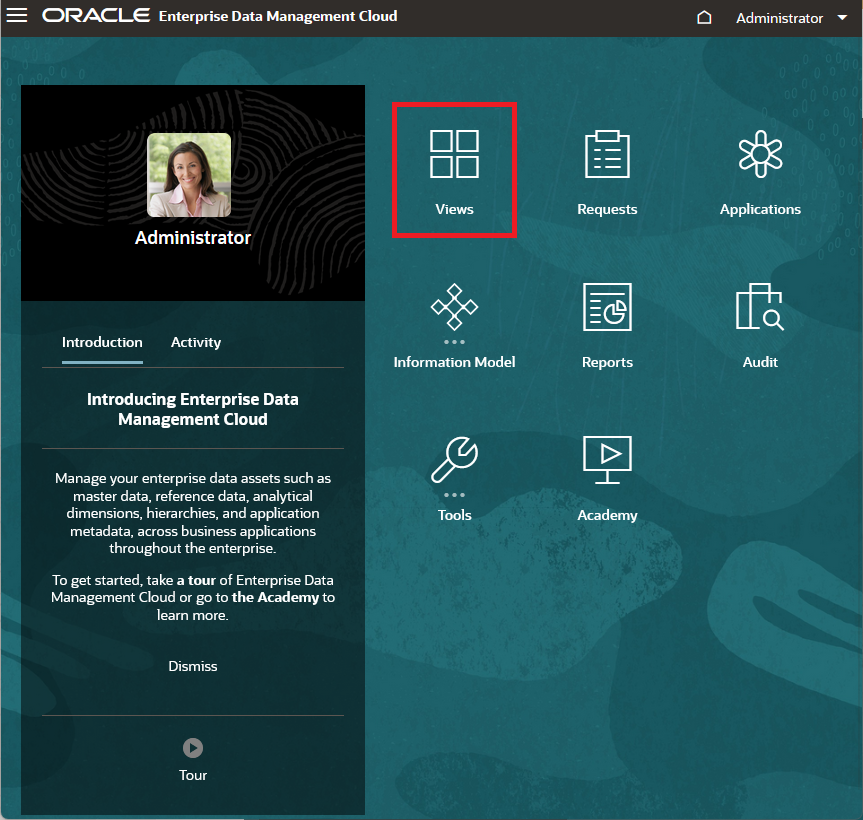
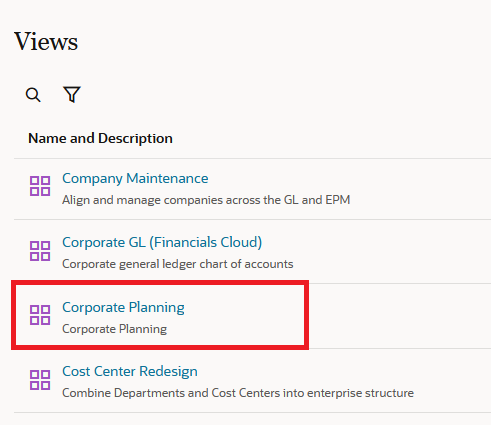
- On the Enterprise Data Management Cloud home page, click Views.
- Click Corporate Planning to open the view.
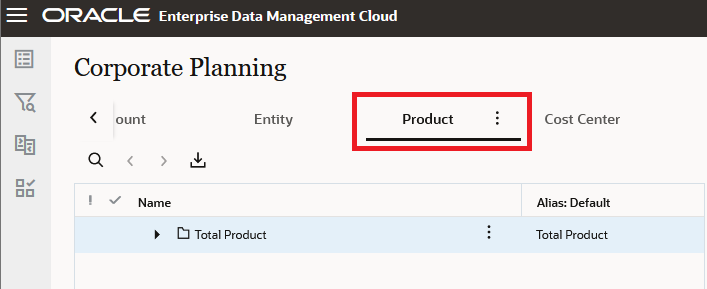
- Select the Product viewpoint.
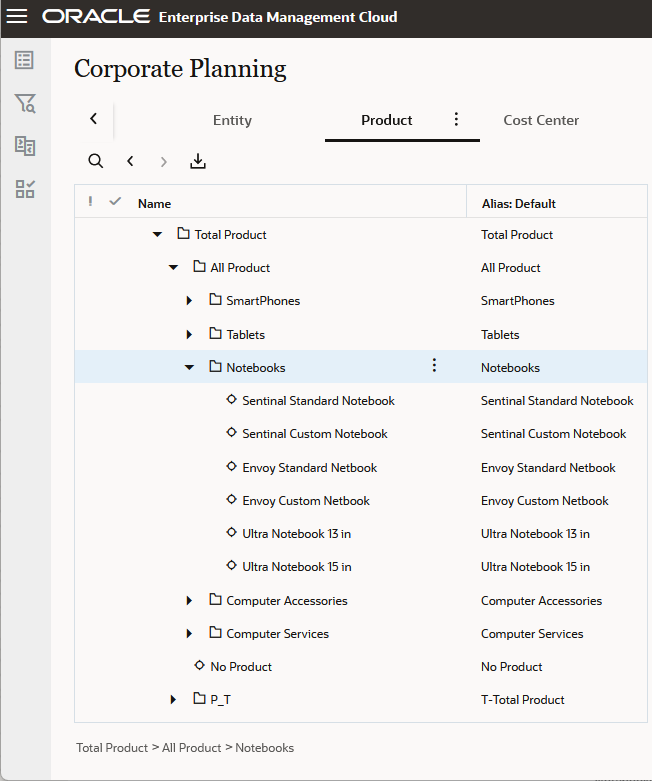
- In the Product hierarchy, expand Total Product, then All Product, and then Notebooks.
- Click New Request to add a product.
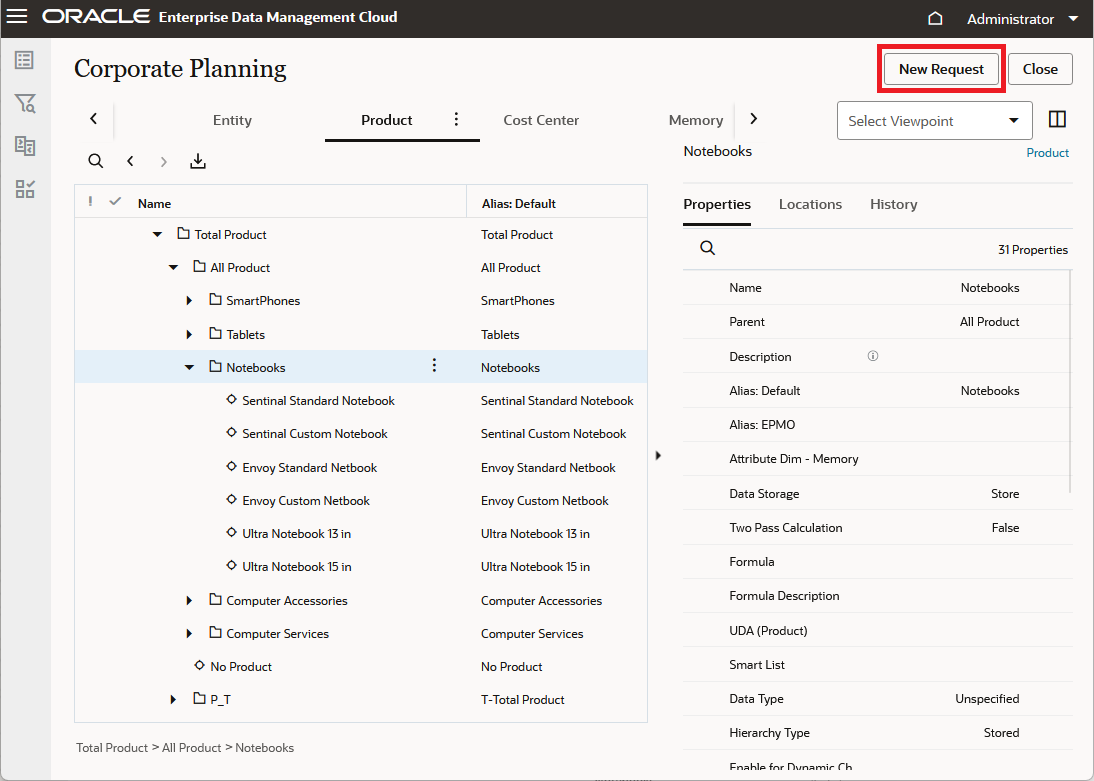
- In the Notebooks row, click the Actions icon and select Add Child.
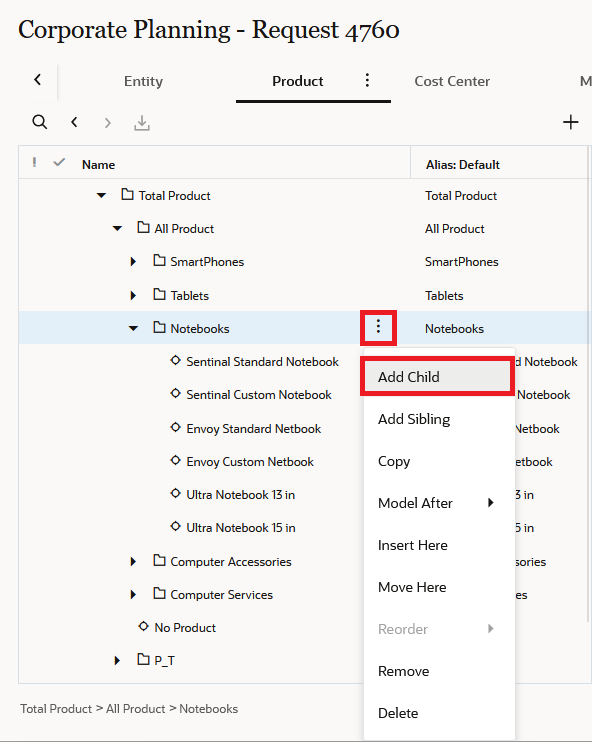
- Enter property values for the new product (for any properties not listed in the table, use the default value):
Property Value Name Delphi Notebook 13 in Description Delphi Notebook 13 in Plan Type (Plan 1) False 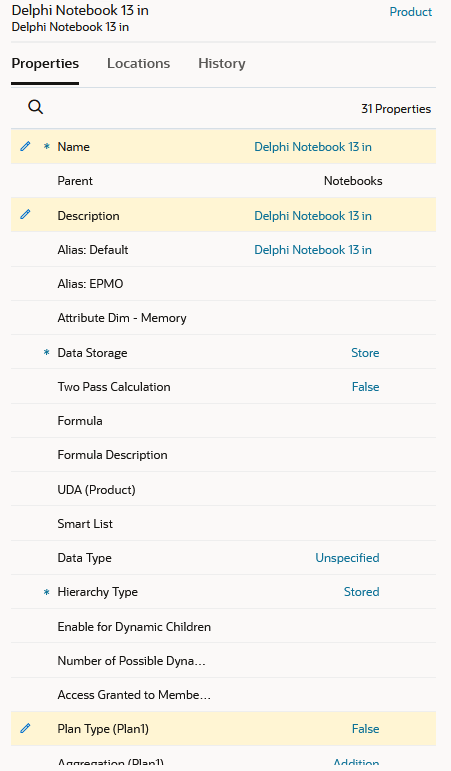
- Click Submit to commit the changes.
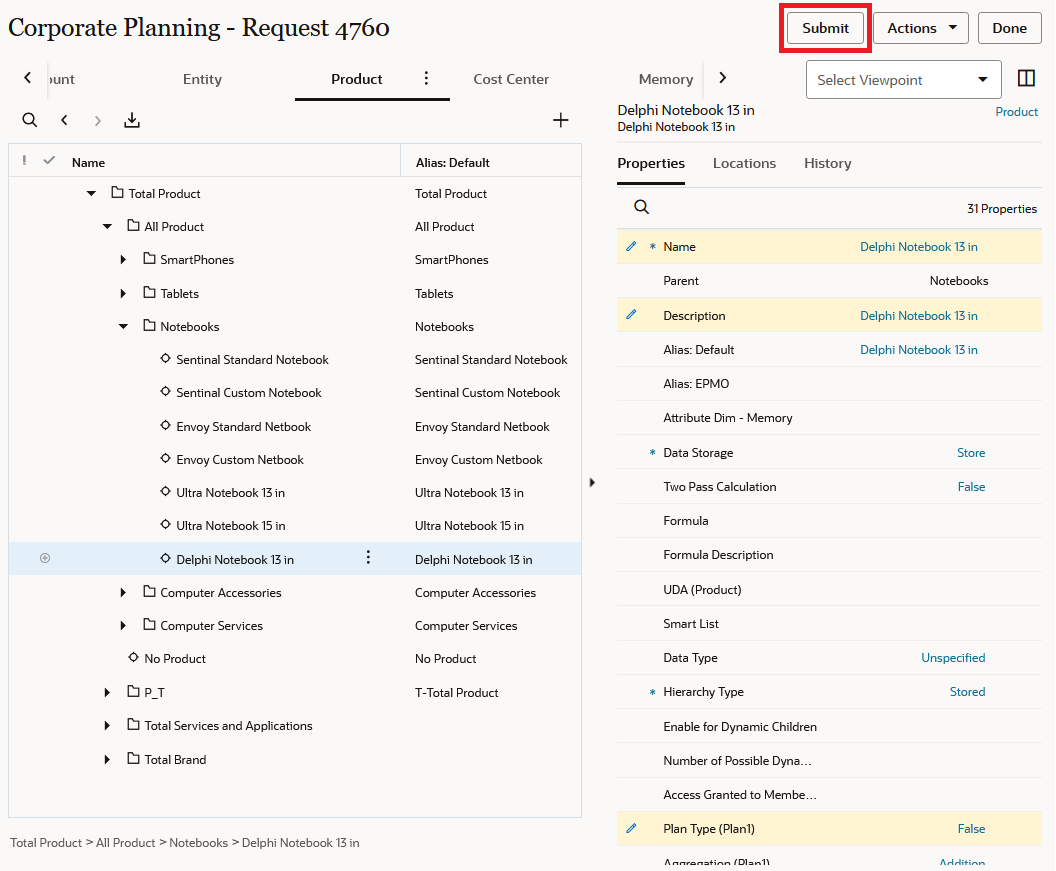
You receive a message that the request was successfully submitted.
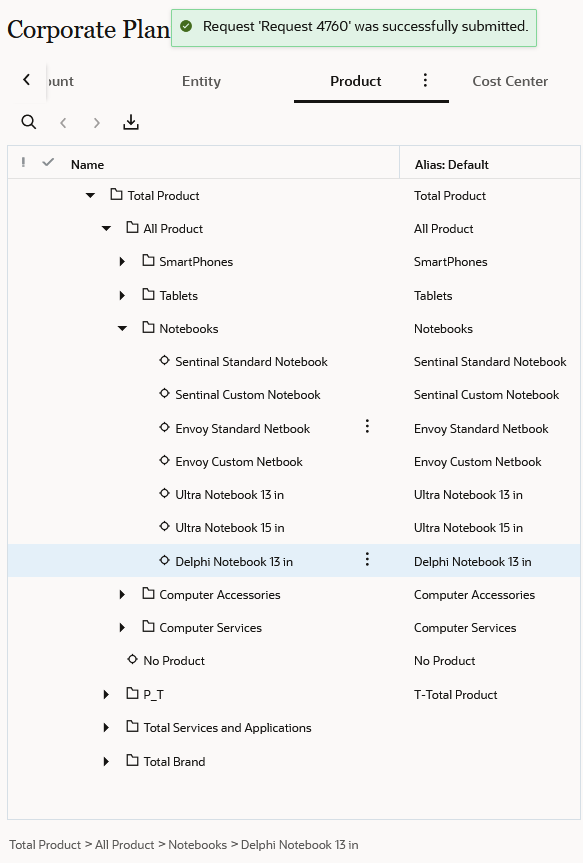
Submitting the request validates your changes. If there are no validation issues and there is no approval workflow defined, the changes are immediately commited to the dimension.
- Click Close to close the view, then return to the home page.
Running the Groovy rule from a Planning form
- Return to the Planning browser tab, where the Product Volume form is still open.
- Right-click in the form to display the context menu, and select Sync Product.
The groovy script is launched. It might take a few seconds to run.
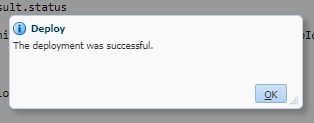
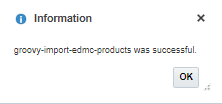
- You receive an information message when the rule finishes running. Click OK.
- Notice that the product you added in Enterprise Data Management Cloud is now displayed in the form.
- Return to the Planning home page.
Scheduling the Groovy rule to run at a specific time
In addition to, or instead of, letting users running the Groovy import rule manually from a Planning form, you can incorporate loading metadata from Enterprise Data Management Cloud into a scheduled maintenance routine. In this section, you schedule the Groovy rule to run at a specific time.
Tip:
After importing any dimension metadata as part of a regular maintenance routine, it is best practice to schedule a second job to refresh the database so that new metadata can be included in calculations. This database refresh step is not included in this tutorial.Note:
This section of the tutorial is optional; you have already integrated the new products from Enterprise Data Management Cloud by running the rule in the preceding section.- On the Planning home page, click Application, then click Jobs.
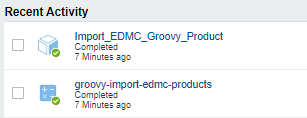
- Notice that the two most recent entries are the groovy-import-edmc-products rule and the Import_EDMC_Groovy_Product import job, which was initiated by the rule.
- Click Schedule Jobs to open the job scheduler.
- Under "What type of job is this?" select Rules.
Note:
Although this job does import metadata, the import instructions are incorporated in the Groovy rule. - Under "When do you want to run this job?" select Run Now. Notice that if you choose to run the job immediately, recurring options are not available.
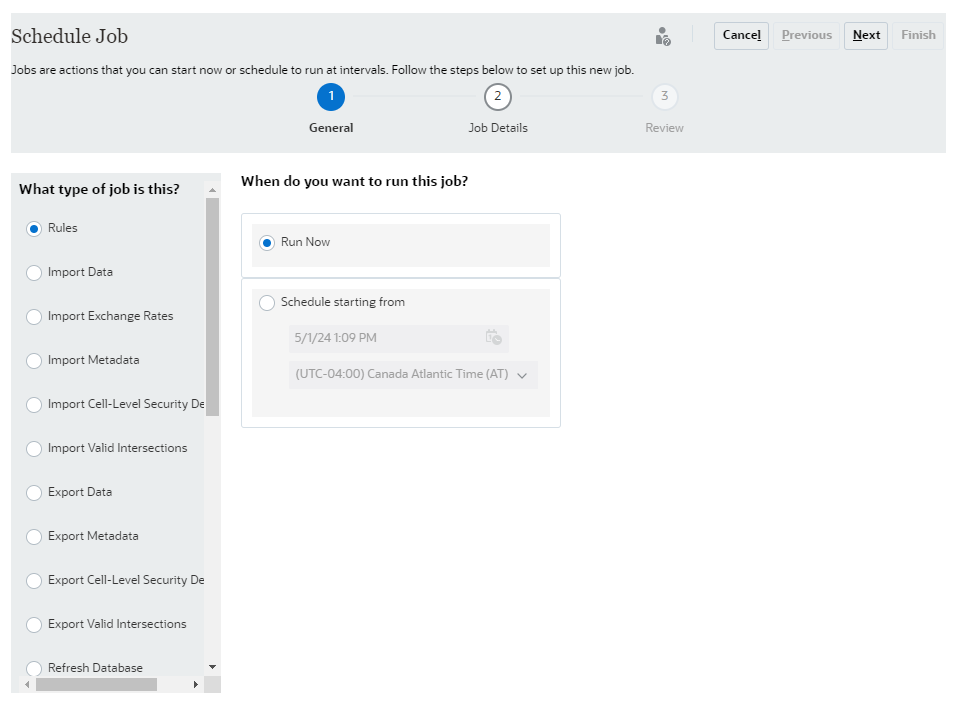
- Under "When do you want to run this job?", select the following options:
- For the schedule option, select Schedule starting from.
- For date and time, select today's date and a time five minutes from now.
- For the time zone, select your current time zone.
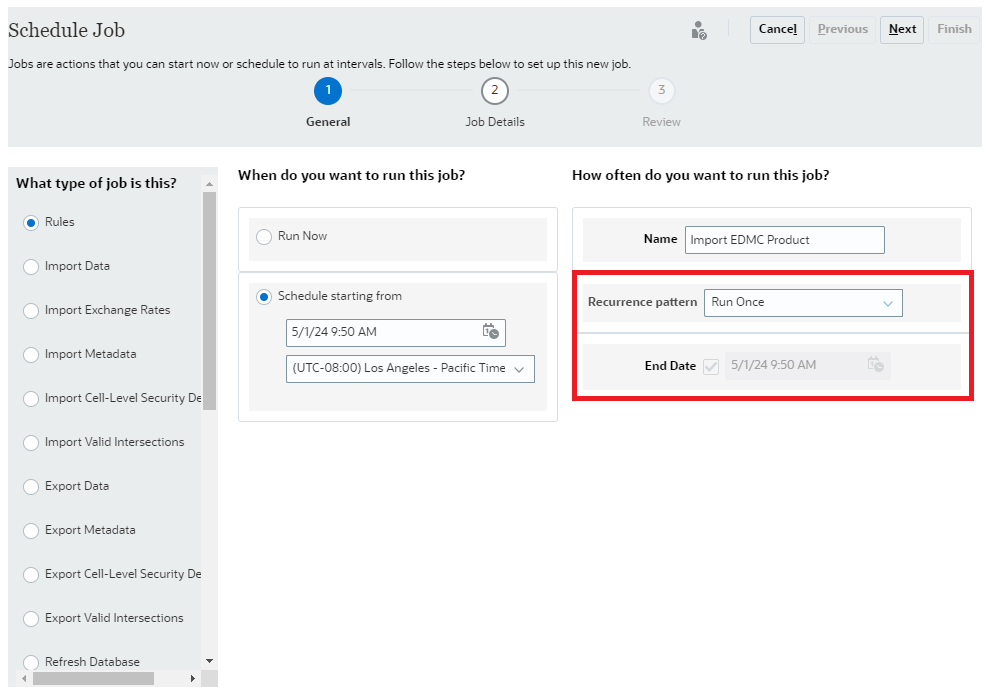
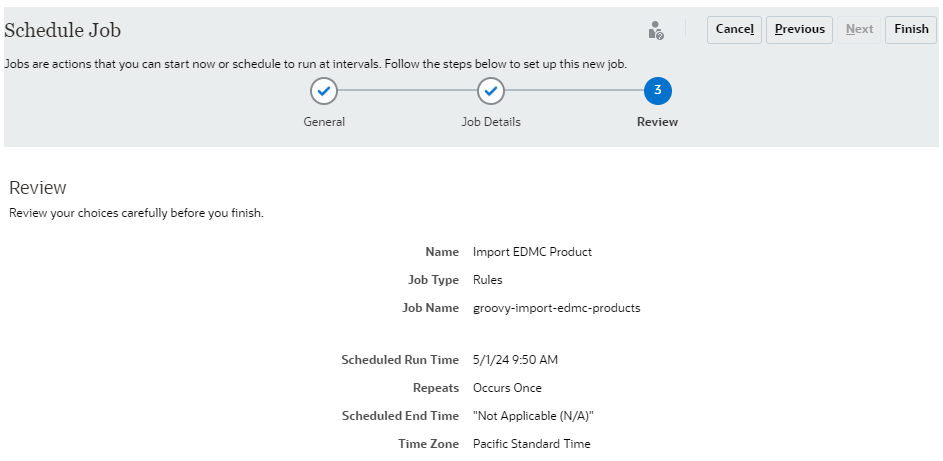
- For Name, enter Import EDMC Product.
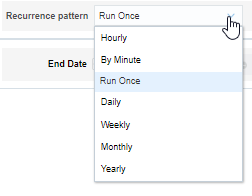
- Expand the drop-down list for Recurrence pattern to view the options. You can schedule jobs to run hourly, by minute, once, daily, weekly, monthly, or yearly.
- Select Run Once. Note that when the Run Once option is selected, the optional End Date parameter is disabled. You can specify an end date for any other recurrence pattern.
- Click Next.
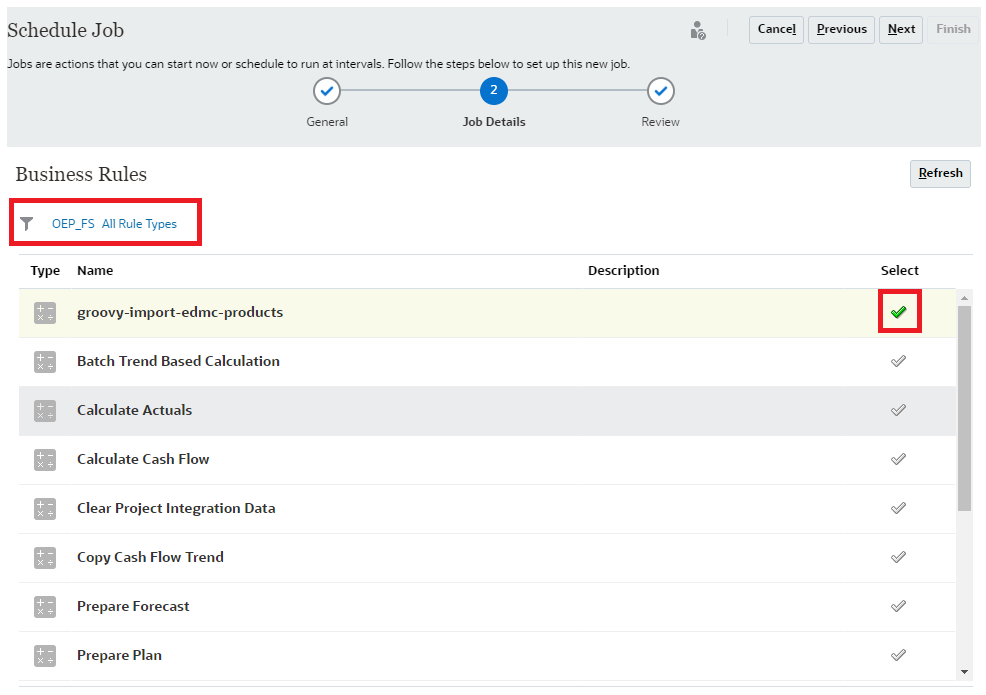
- In the Job Details page, select the Groovy rule to run:
- Next to the filter icon, click All Cubes.
- For Cube, select OEP_FS, then click Apply.
- In the row for groovy-import-edmc-products, click
 (Select).
- Click Next.
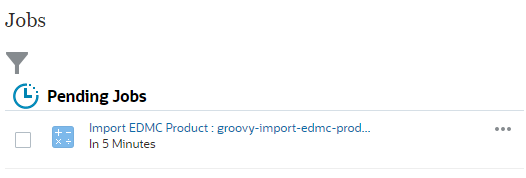
- In the Review page, review your selections, then click Finish. Notice that the job is now listed under Pending Jobs.
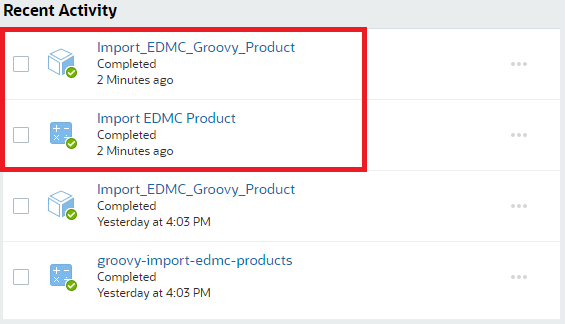
- Wait until a few minutes after the scheduled run time, then click Refresh.
- Notice that now the two most recent entries are the Import EDMC Product rule job and the Import_EDMC_Groovy_Product import job, which was initiated by the rule.
Next Steps
Related Links
Integrating dimension metadata from Enterprise Data Management Cloud with Planning using Groovy rules
F41544-02
May 2024