Steps to Complete in the Target Identity Domain in IAM Interface
Create and activate a confidential application in the target identity domain. Confidential applications run on a protected server and keep the OAuth client ID and client secret. The Oracle Identity Domain application in the source identity domain uses these protected client credentials and connects with your target domain. See Create and Activate a Confidential Application.
If needed, create a new group in the target domain so that you can assign users in the source domain to this group once the source and target domains are integrated. See Creating IDCS Groups.
Create and Activate a Confidential Application
- Sign into IAM Interface as an Identity Domain Administrator in the target domain. See Accessing the IAM Interface.
- Navigate to the Integrated applications tab.

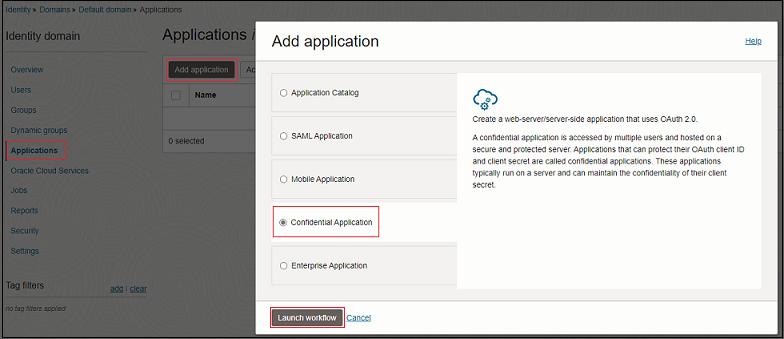
- Click Add application.
- On the Add application page, click
Confidential Application, and then click
Launch workflow.
- Click Submit to create a new application.
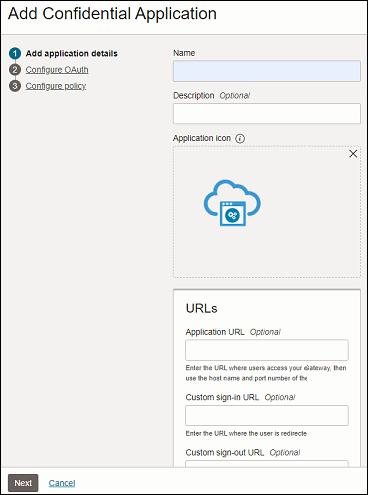
- Click Submit to create a new application.

- On the application's page, click Oauth configuration
tab.

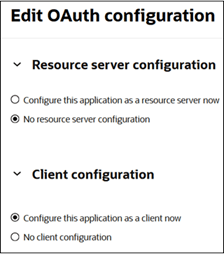
- Click Edit OAuth configuration.
- Select Configure this application as a client now for
Client configuration.
- Select Client Credentials for
Authorization.
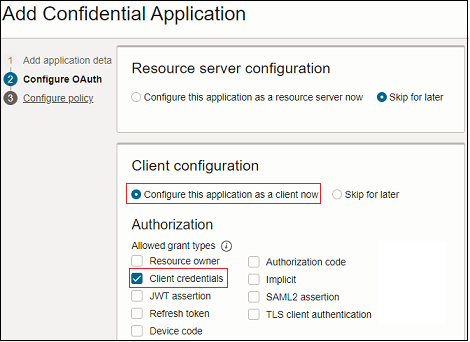
- Scroll-down to the Token Issuance Policy section.
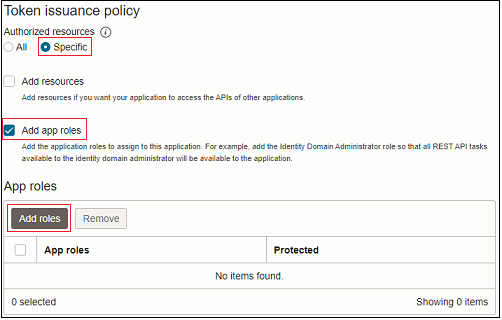
- Click Specific for Authorized resources.
- Click Add app roles and then click Add app
roles again to proceed.
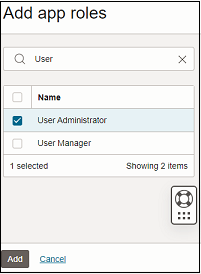
- Select User Administrator, and click
Add.
- Click Submit.
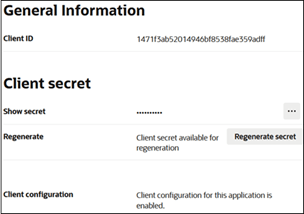
- In the General Information section, note the Client ID and Client Secret.
- Click Actions, and select
Activate.
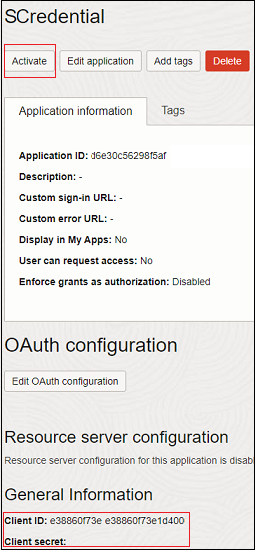
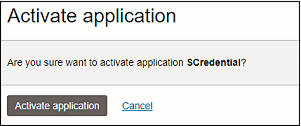
- On the confirmation page, click Activate application to
finalize the activation.
