Configuring SSO Between Services Across Different Cloud Accounts
You might have services deployed across two different cloud accounts. To provide a seamless user experience, you can configure Single Sign-On (SSO) between them.
Example Scenario
You have a user who needs to access both Oracle Fusion Cloud Enterprise Performance Management and Fusion ERP services, but these services are spread across two different Oracle Cloud accounts. Although the user exists in both accounts, to provide a seamless sign-on experience, you plan to set up SSO between these environments.
- Fusion ERP serves as the Identity Provider
- Cloud EPM functions as the Service Provider
In this topic, we’ll walk through how to configure SSO for this scenario:
- Step 1 - Open Separate Sessions for Each Cloud Account
- Step 2 - Fusion ERP Cloud Account - Download Fusion ERP Metadata
- Step 3 - Cloud EPM Account - Configure Fusion ERP as an Identity Provider
- Step 4 - Fusion ERP Cloud Account - Add Cloud EPM as an Integrated Application
- Step 5 - Cloud EPM Account - Verify SAML SSO
- Step 6 - Test SSO
Step 1 - Open Separate Sessions for Each Cloud Account
Sign-in to the Oracle Cloud Console for each of your subscribed cloud accounts.
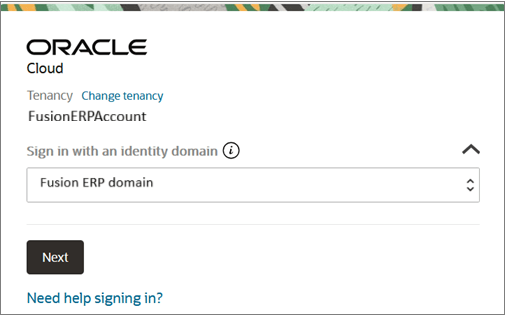
The following example is to sign in to Fusion ERP cloud account. Follow the same steps to open the Cloud EPM account as well.- On the sign-in page, select Sign in with an Identity Domain. Ensure your
tenancy and domain name are correct. Click Next.
- Sign in using your credentials. Multi-factor authentication (MFA) may be
required to access the console. See Enabling Multifactor Authentication.
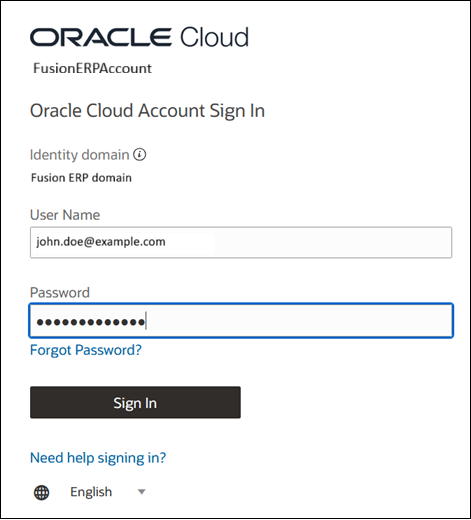
After successful authentication, the Oracle Cloud Console opens.
Step 2 - Fusion ERP Cloud Account - Download Fusion ERP Metadata
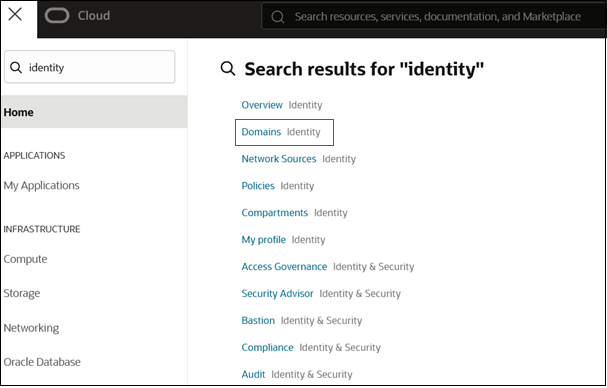
- In the Fusion ERP cloud account, go to the Navigation
menu, search for Identity, and select
Domains.
- Select the Fusion ERP domain to view the domain's details.
- Navigate to the Federation tab.
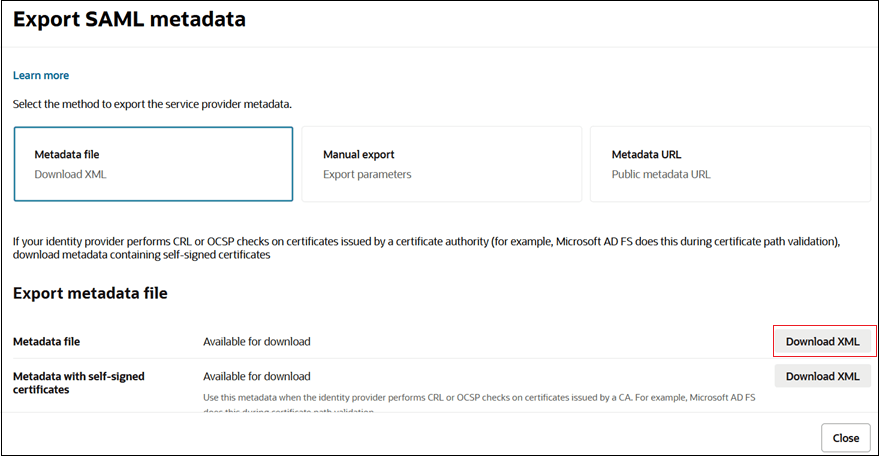
- Select Export SAML metadata.

- Download metadata file. You will use this file to configure Fusion ERP as an IdP
in EPM cloud account.
Step 3 - Cloud EPM Account - Configure Fusion ERP as an Identity Provider
Configure the Fusion ERP service as a trusted identity provider in the Cloud EPM account.
- In the Cloud EPM account, go to the Navigation menu, search for Identity, and select Domains.
- Select the Cloud EPM domain to view the domain's details page.
- Navigate to the Federation tab.
- Click Actions, select Add SAML IdP and submit the
tasks in the workflow.
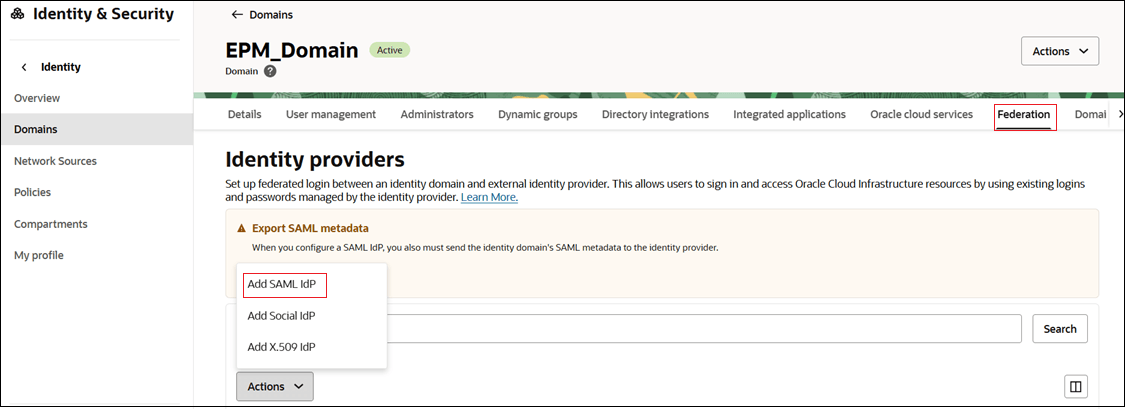
- Task 1 - Add details:
- Name: Enter the name of the SAML IdP.
- (Optional) Description: Enter a description of the IdP.
- (Optional) Identity provider icon: Drag and drop a supported image, or click select one to browse for the image.
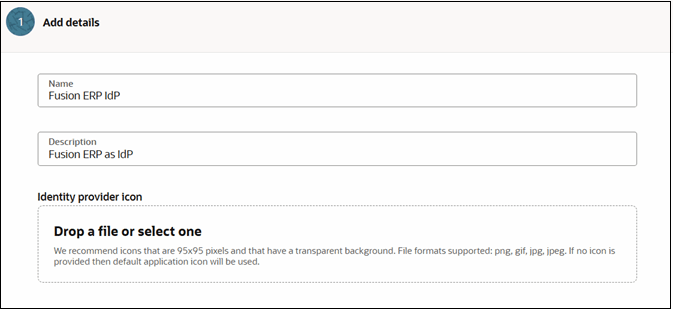
- Click Next.
- Task 2 - Exchange metadata:
- Select Import IdP metadata.
- Click Drop a file or select one to upload the
metadata file you downloaded from Fusion ERP. See Step 2 - Fusion ERP Cloud Account - Download Fusion ERP Metadata
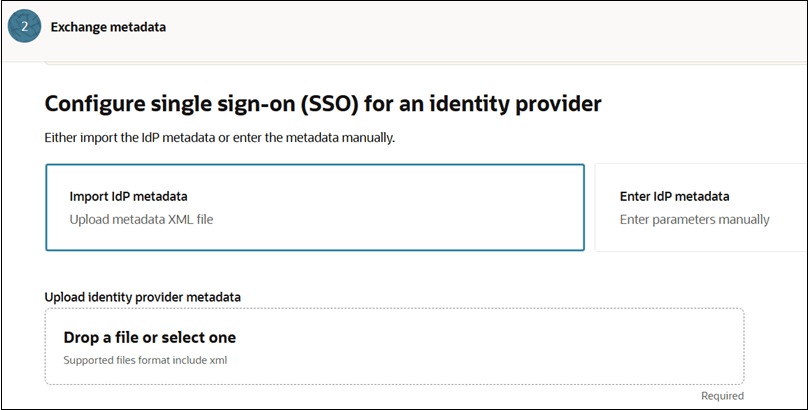
- Click Next.
- Task 3- Map user identity. Configure the fields as shown in referenced
image:
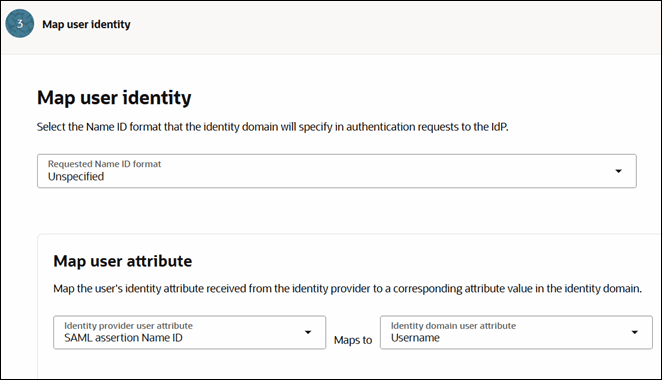
- Click Next.
- On the Review and Create page, verify the entered
details. Click Create IdP.
The Fusion ERP service gets listed under Identity Providers in the Federation tab.
- Select Fusion ERP service identity provider you just created to open the
Details page.
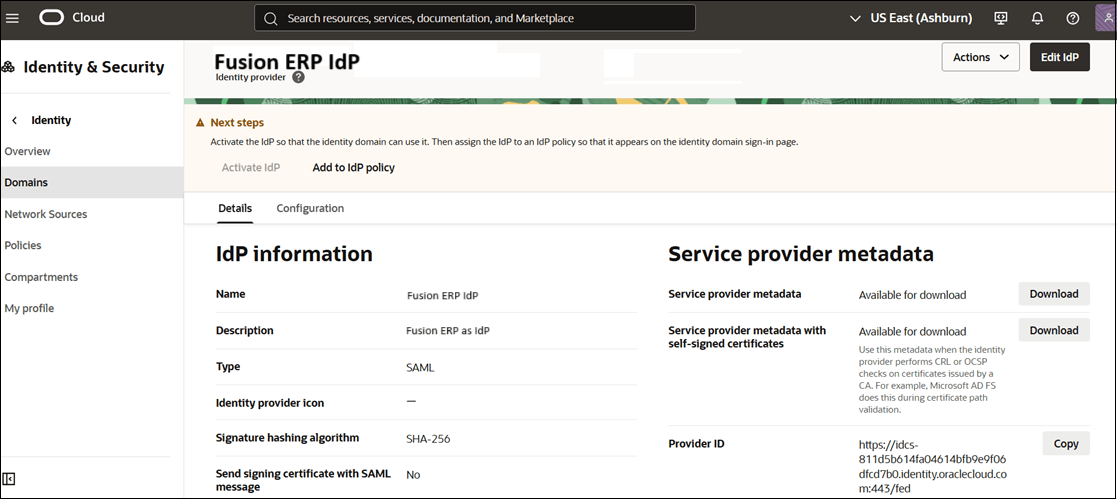
- Click Download next to Service provider metadata.
- Scroll down and click Download next to Service provider signing certificate.
Step 4 - Fusion ERP Cloud Account - Add Cloud EPM as an Integrated Application
- Go to the Integrated applications tab.
- Click Add application.

- On the Add application page, select SAML Application.
- Click Launch workflow.
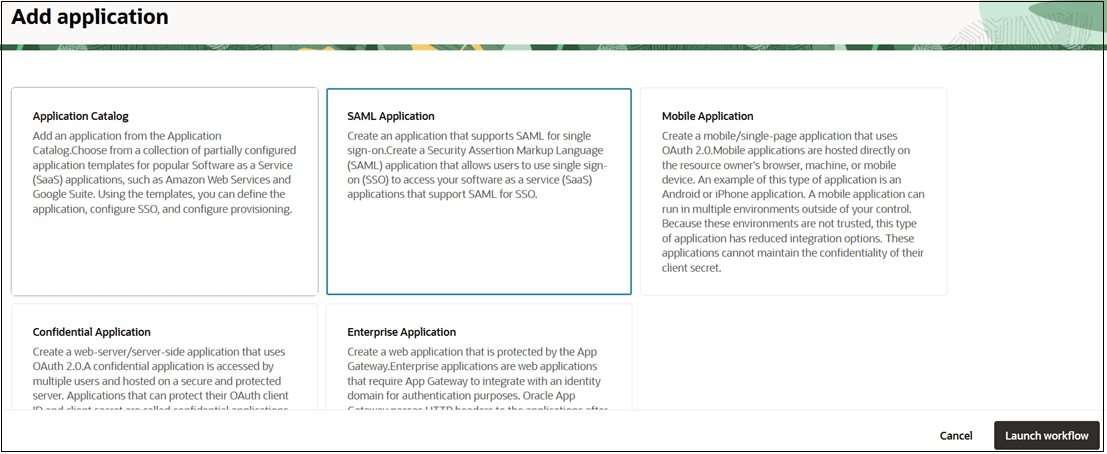
- Provide name and other details, and click Submit.
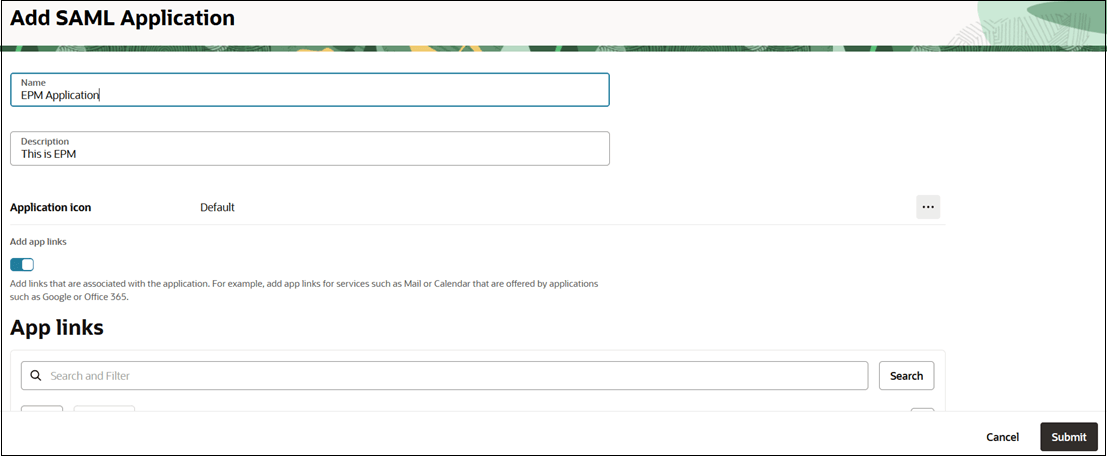
- Configure SSO.
- Navigate to SAML SSO configuration tab.
- Click Edit SSO configuration.
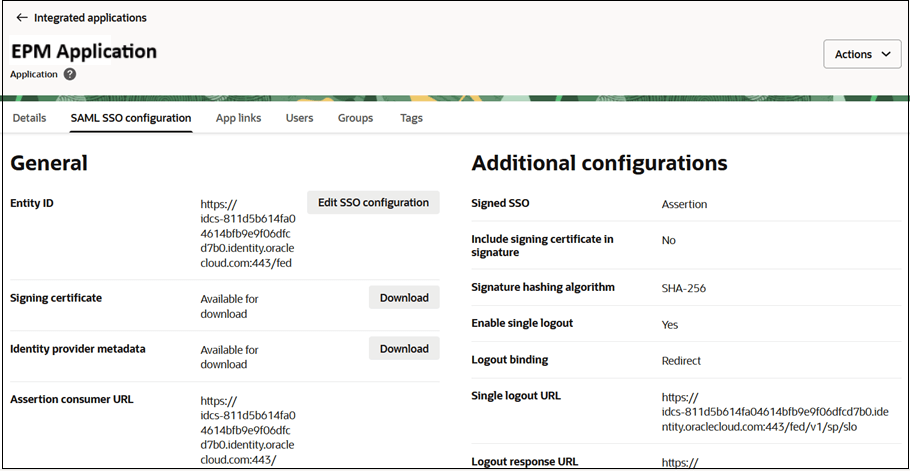
- Under General, enter the Service Provider metadata values that
you downloaded in last section. See Step 3 - Cloud EPM Account - Configure Fusion ERP as an Identity Provider . Map the fields as
follows:
- Entity ID - Provider ID
- Assertion consumer URL - Assertion Consumer Service URL
- Single logout URL - Logout Service Endpoint URL
- Logout respone URL - Logout response URL
- Configure additional SSO settings:
- Name ID Format: Select Unspecified
- Name ID Value: Select Username
- Signing Certificate: Upload the Service Provider signing certificate downloaded from the Service Provider Metadata screen. See Step 3 - Cloud EPM Account - Configure Fusion ERP as an Identity Provider.
- Click Save changes.
- Assign users to the application.
- Navigate to the Users tab.
- Click Action on top, and then select Activate from the menu.
- Next, click Assign users.
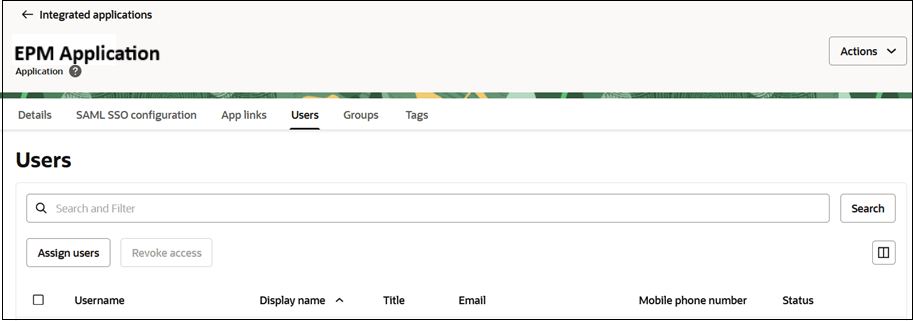
- Search for and select users to assign this application to, and click Assign.
Step 5 - Cloud EPM Account - Verify SAML SSO
- Verify SAML SSO with your identity provider.
- Click Actions on top, and then select
Test login from the menu.
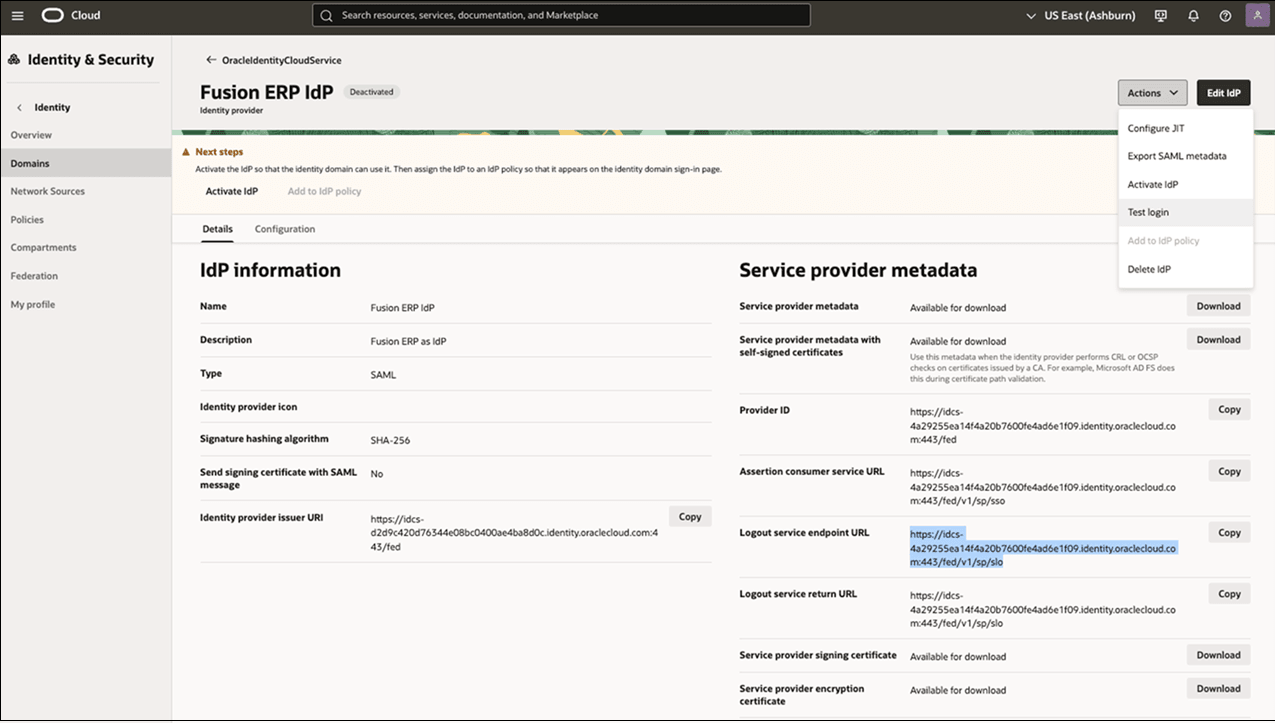
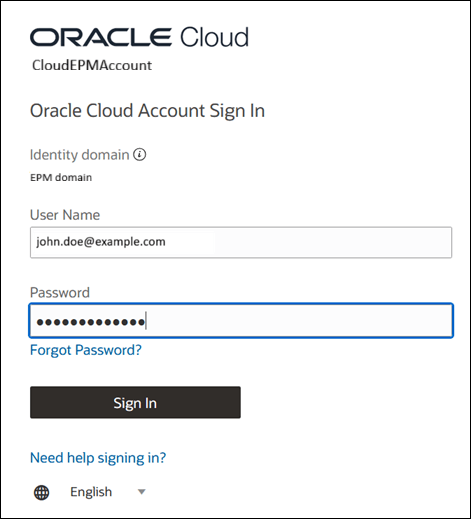
- Authenticate with your credentials to test the connection.
If successful, a message will appear: "Your connection is successful."

- Click Actions on top, and then select
Test login from the menu.
- Activate the Identity provider so that the identity domain can use it. Click
Actions, then select Activate
IdP from the menu.
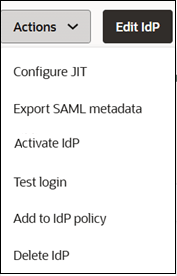
- Next, assign the identity provider to an IdP policy so that it appears on the
identity domain sign-in page.
- Click Actions, and then select Add to IdP Policy from the menu.
- Scroll-down, under Identity Provider Policies, select the policy
to assign.
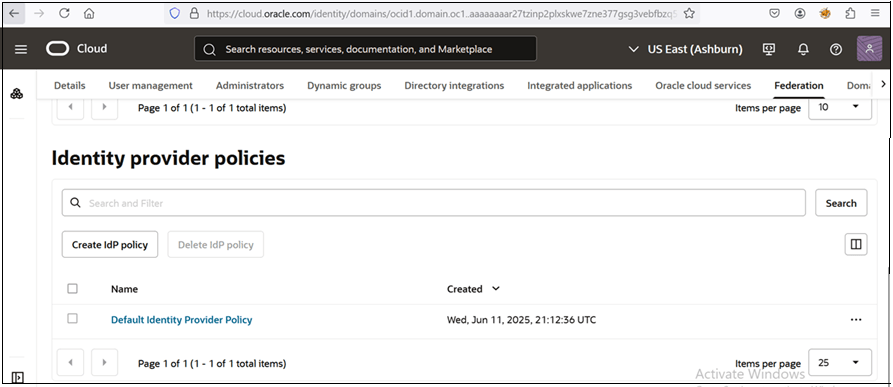
- Click on Default Identity Provider Policy.
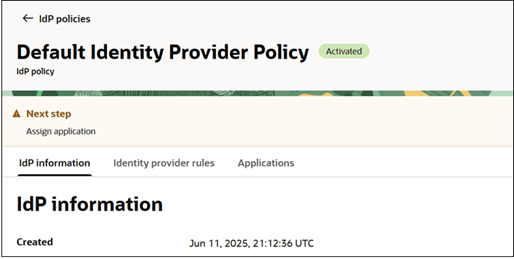
- Navigate to Identity provider rules tab.
- Click the ellipses next to the IdP rule, then
click select Edit IdP rule.

- On the Edit identity provider rule page, in the Assign
identity providers dropdown, select Fusion ERP
IdP and Username-Password.
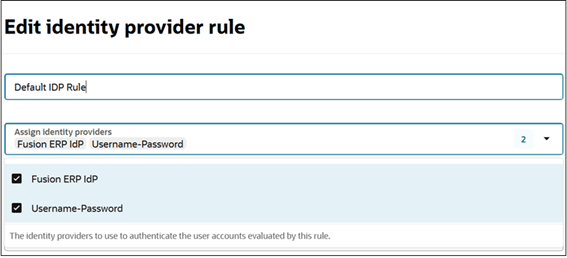
- Click Save changes.
- Click Profile icon on top and select Sign out.
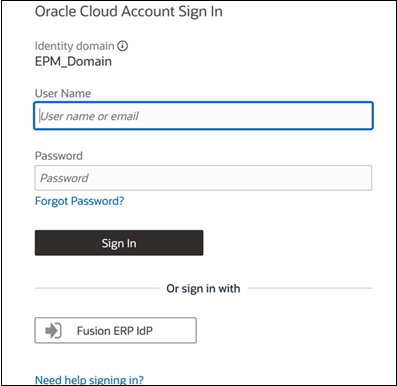
- Sign in again to the Cloud EPM
account. The Fusion ERP IdP button is displayed at the bottom.
Step 6 - Test SSO
- Sign out of both your Fusion ERP and Cloud EPM accounts, then close your browsers.
- First, sign to your Fusion ERP cloud account.
- Next, open your Cloud EPM URL in
a separate tab.

- On the Cloud EPM sign-in page,
click Fusion ERP IdP.
You will be automatically authenticated and redirected to the Cloud EPM environment without re-entering your credentials.
Successful sign-in through the Fusion ERP IdP confirms that SSO is configured between your Fusion ERP and Cloud EPM accounts.