Extracting Data from On-premises Data Sources
You can extract data from your on-premises data sources and then load the data directly to the Oracle Fusion Cloud Enterprise Performance Management using the EPM Integration Agent. The EPM Integration Agent executes a query against an on-premises relational database and then loads the data to the Cloud EPM.
The EPM Integration agent is defined as a data source for an integration, and when executed provides data that is subsequently mapped and loaded to the selected target application.
The EPM Integration Agent may also be extended by way of scripting to access other data sources including third-party cloud applications, non-relational sources, or any system that provides access by way of scripting, a report, or an API.
In order to use this feature and register the application created for the extraction, you must create a file that contains only sample data with one header record. The file does not contain the application name or SQL query, etc. The name of the file must be the name of the application. This type of data source is an application of the type "On Premise Database" and uses an adapter-based framework.
To create an on-premises database adapter:
-
In Data Integration, create the query definition and save the SQL query.
To do this, see Creating an SQL Query.
If you already have a SQL query registered in Data Integration, skip this step.
-
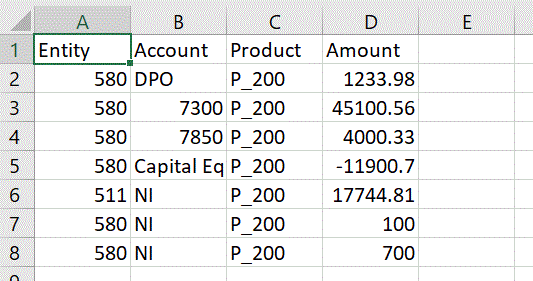
Create a file that contains one header row from the on-premises database.
The header row must exactly match the dimension name in the target dimension. You can use an alias for a column name in the SQL query to the dimension name.

-
Save the file as a CSV format file with a header row.
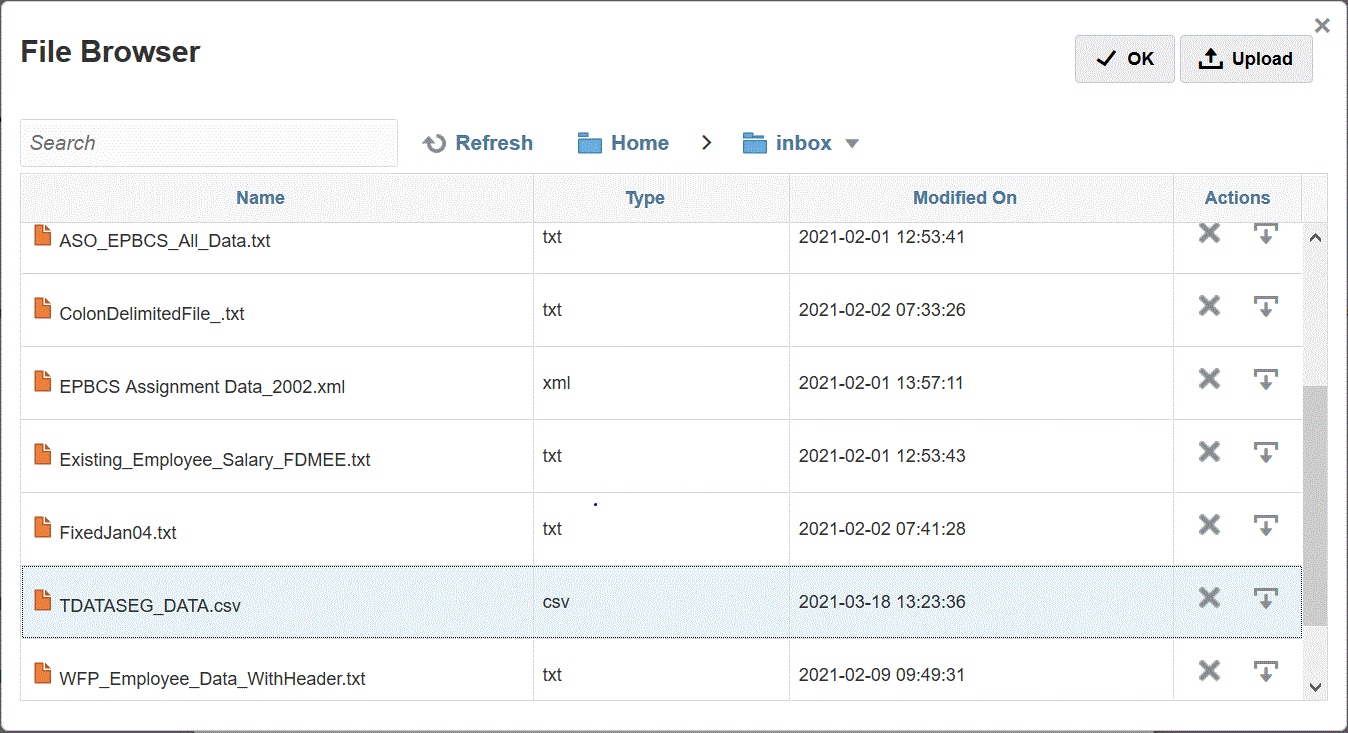
Upload the file using the file browser when registering the target application.
-
Create the on-premises database data source:
-
From the Data Integration home page, and then Actions, select Applications.
-
On the Applications page, click
 .
.
-
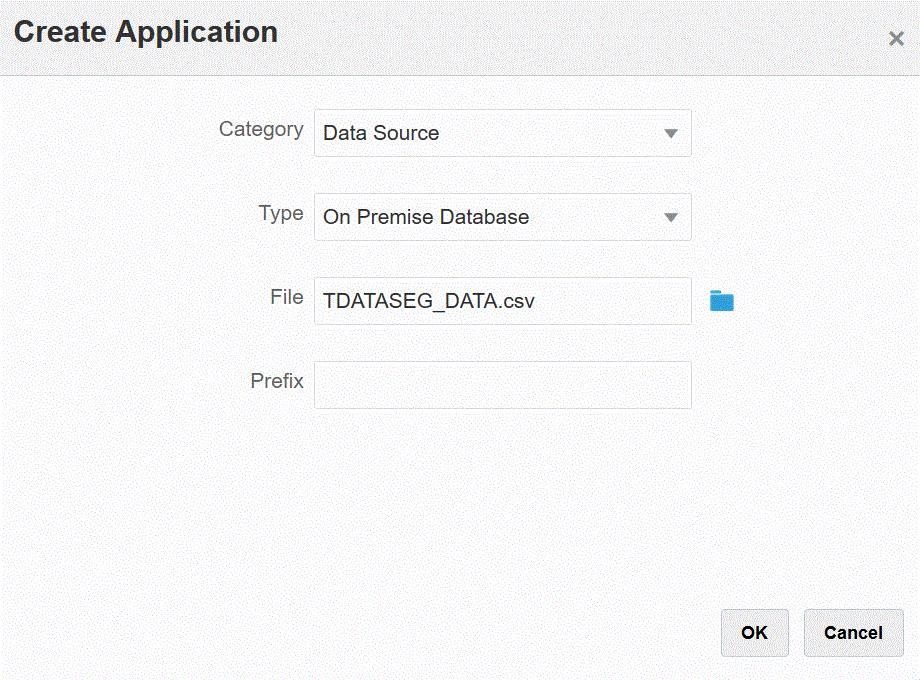
From Create Application, then Category, select Data Source.
-
From Type, select On Premise Database.
-
From File, select the file that you created in step 1.
Click
 to browse for the file on the File Browser page.
-
-
When prompted, select the file that you created in step 1.

-
In Prefix, specify a prefix to make the application name unique.
The prefix is concatenated with the application name to form a unique application name. For example, if you want to name an application with the same name as an existing one, you can assign your initials as the prefix.
-
Click OK and then click Save.
-
On the Application, click
 next to on-premises data source application created in steps 3-7 and
then select Application Details.
-
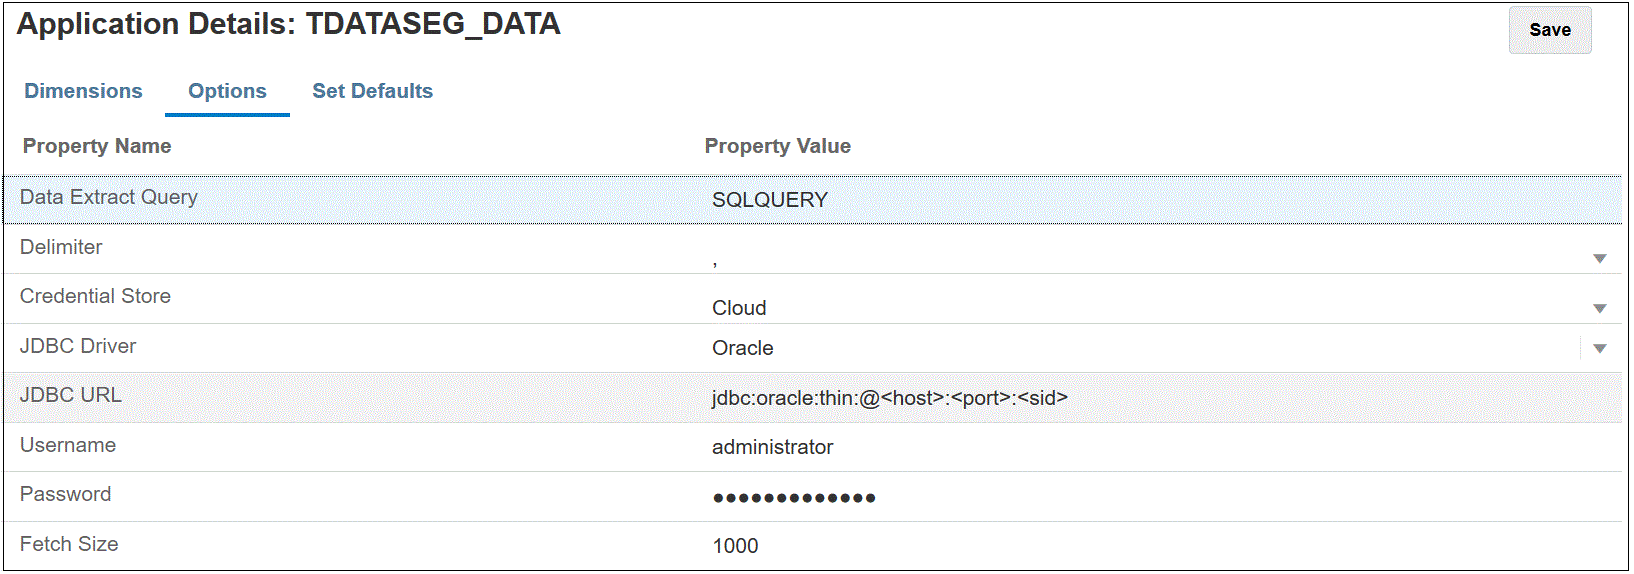
On the Application Details page, click the Options tab.
-
In Data Extract Query, specify the name of the SQL query to run against the file.
-
In Delimiter, select the type of delimiter used in the file.
Available delimiter symbols include the following:
-
Comma (,)
-
Exclamation (!)
-
Semicolon (;)
-
Colon (:)
-
Vertical bar (|)
-
-
In Credential Store, specify the type of credential store used by the EPM Integration Agent.
Available types of credential stores include the following:
- Cloud
- File
For the Cloud credential store type, store the username/password/connect string in the application.
For the File credential store type, create a file in the on-premises environment to store the JDBC URL, user name, and password. The file name must be named
appname.credand stored in theconfigdirectory.The file must contain the following lines:
driver=oracle.jdbc.driver.OracleDriver
jdbcurl=jdbc:oracle:thin:@host:port/service
username=apps
password=w+Sz+WjKpL8[
Note:
The password used for both credential store types must be encrypted.
When the type is a "Cloud" store, type the password in the user interface in the usual way. The system encrypts and stores the password.
When the type is a "File" store, you must encrypt the password using the
encryptpasswordutility and store the password in the file. For more information about encrypting your password, see Encrypting the Cloud EPM User Password. -
In JDBC Driver, select the type of JDBC driver to use when connecting to the Database Management System (DBMS).
Available types of JDBC drivers include the following:
- Microsoft SQL Server
- Oracle
-
In JDBC URL, specify the JDBC driver URL connection string.
The JDBC Driver URL connection string enables you to connect to a relational database using Java.
For an Oracle Thin JDBC driver, the JDBC driver URL includes the following:
jdbc:oracle:thin:@host:port:sidjdbc:oracle:thin:@host:port/serviceFor a MS SQL Server, the JDBC driver URL includes:
jdbc:sqlserver://server:port;DatabaseName=dbname -
In Username, specify the on-premises database user name.
-
In Password, specify the on-premises database password.
-
In Fetch Size, specify the number of rows fetched (that the driver processes) with each database round trip for a query.
-
Click Save.
The following image shows application filters:
